
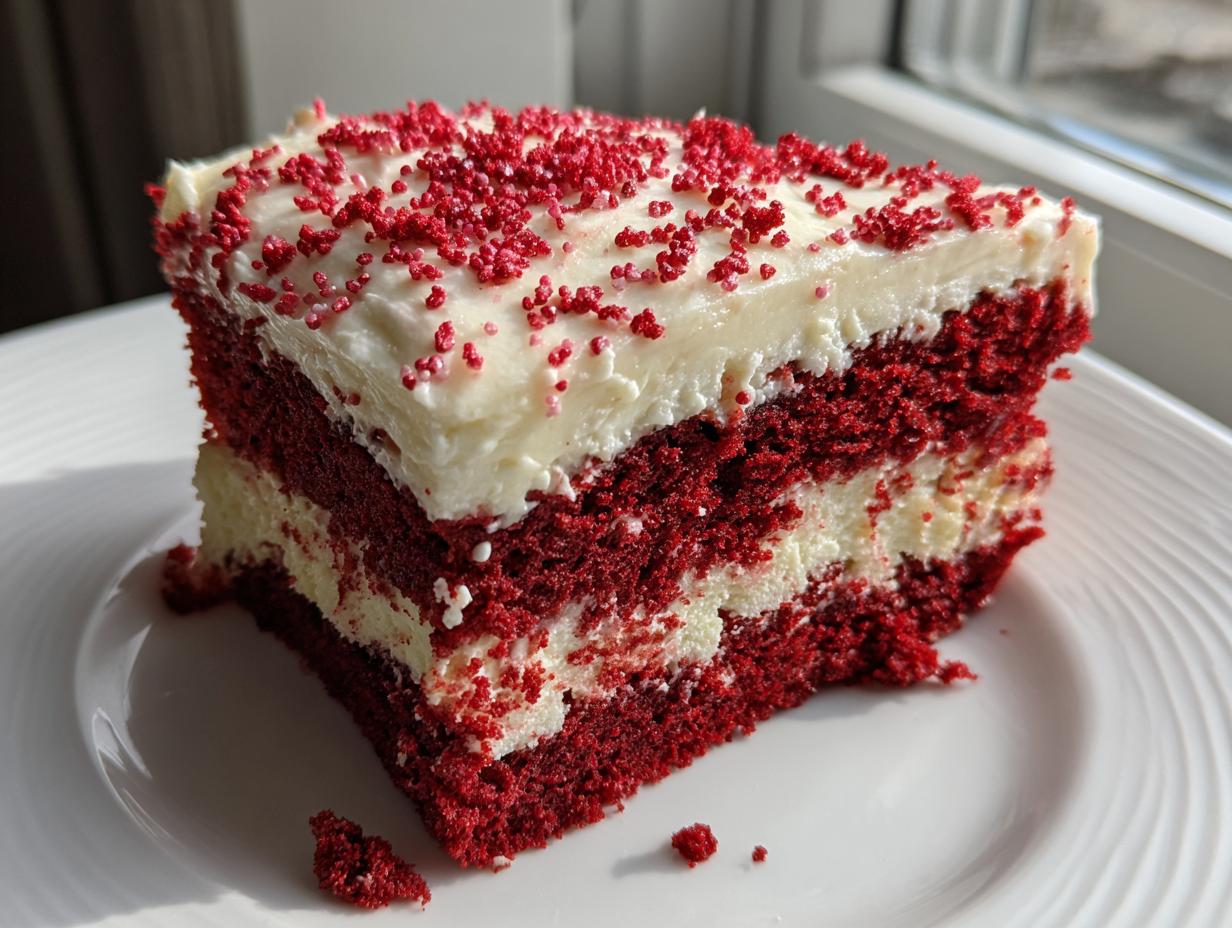
You know those desserts that immediately make you think of a celebration? The ones that have that incredible, rich color and practically melt in your mouth? That’s exactly what we’re chasing here. In the rhythm of modern life, carving out time for deep baking can feel impossible, but that joy you get from serving something truly delicious shouldn’t be just for special occasions. That’s why I’m thrilled to share my recipe for the Ultimate Moist red velvet poke cake with Cream Cheese Pudding Filling. It’s simple, it’s festive, and it delivers that creamy goodness we all crave, proving you don’t have to stop the rush of life to bring a little comfort back to your table. Seriously, this cake is a showstopper with hardly any effort!
You can check out some of my other favorite sweet treats over here: delicious dessert recipes.
- Why This red velvet poke cake Recipe is Your New Favorite Easy Dessert
- Gathering Your Ingredients for the red velvet poke cake
- Step-by-Step Instructions for the Ultimate red velvet poke cake
- Tips for Success with Your red velvet poke cake
- Make-Ahead and Storage for This Festive Sheet Cake
- Ingredient Notes and Substitutions for Your Creamy Filling Cake
- Serving Suggestions for This Fun Party Desserts
- Frequently Asked Questions About red velvet poke cake
- Estimated Nutritional Profile for a Slice of red velvet poke cake
Why This red velvet poke cake Recipe is Your New Favorite Easy Dessert
When you need a dessert that looks fancy but actually comes together fast? This is it. Nobody needs complicated steps when they’re aiming for weeknight joy or planning a big gathering, and this easy dessert truly delivers. It’s amazing how much flavor we pack in here!
- It’s the perfect Holiday Cake—that vibrant red just screams celebration.
- It travels brilliantly, making it a must-have Potluck Dessert.
- It uses the magic of a box mix, cutting down your prep time drastically.
Achieving Ultra-Moist Texture
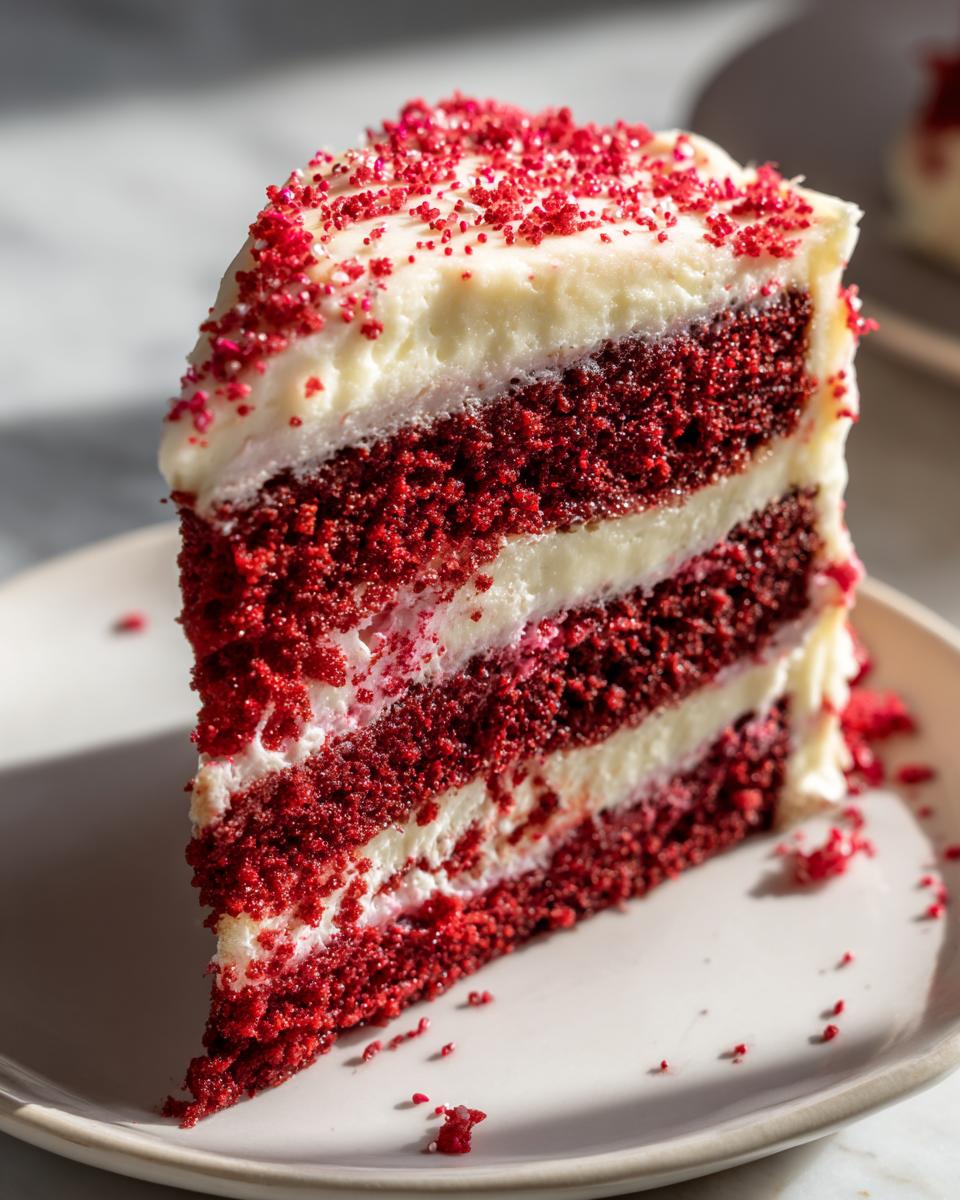
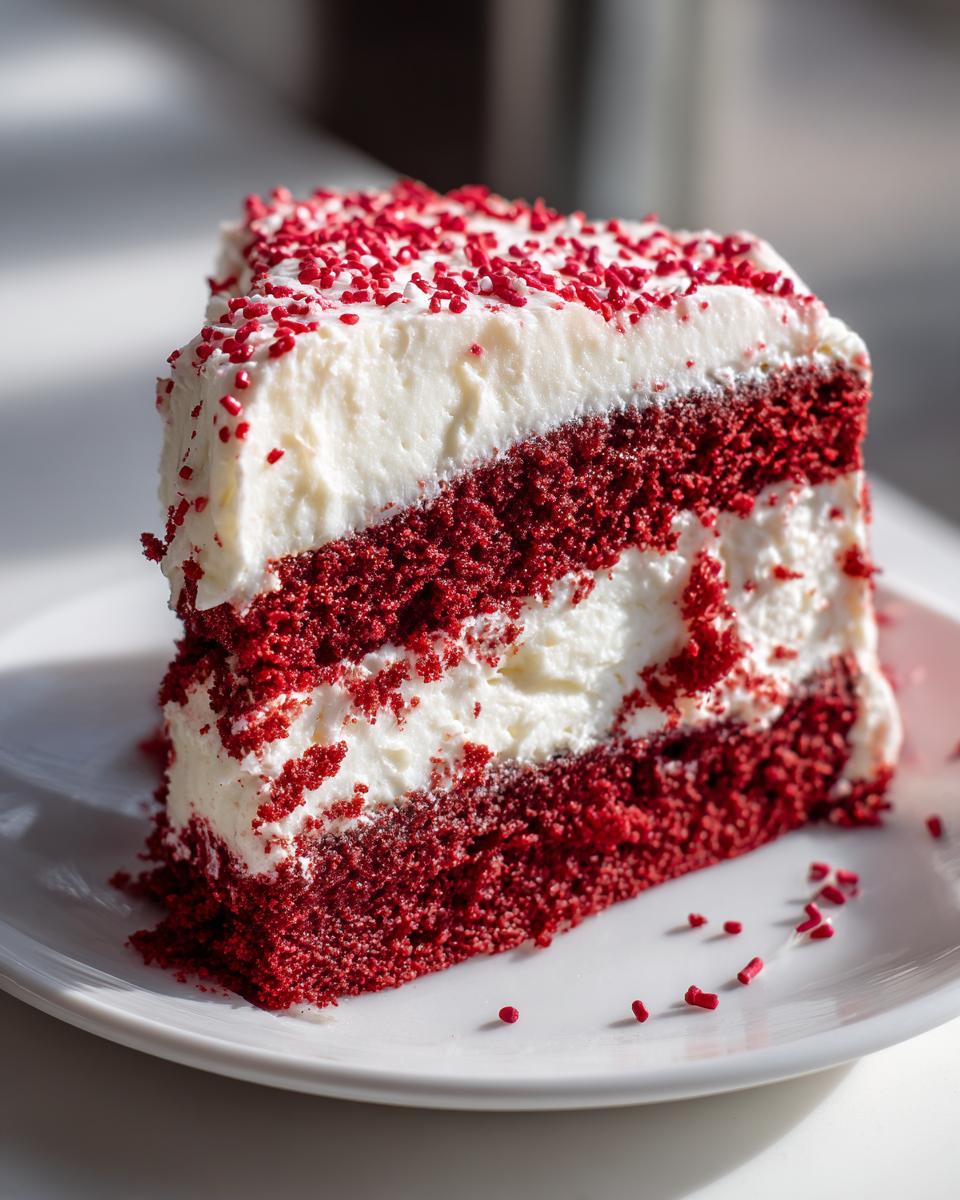
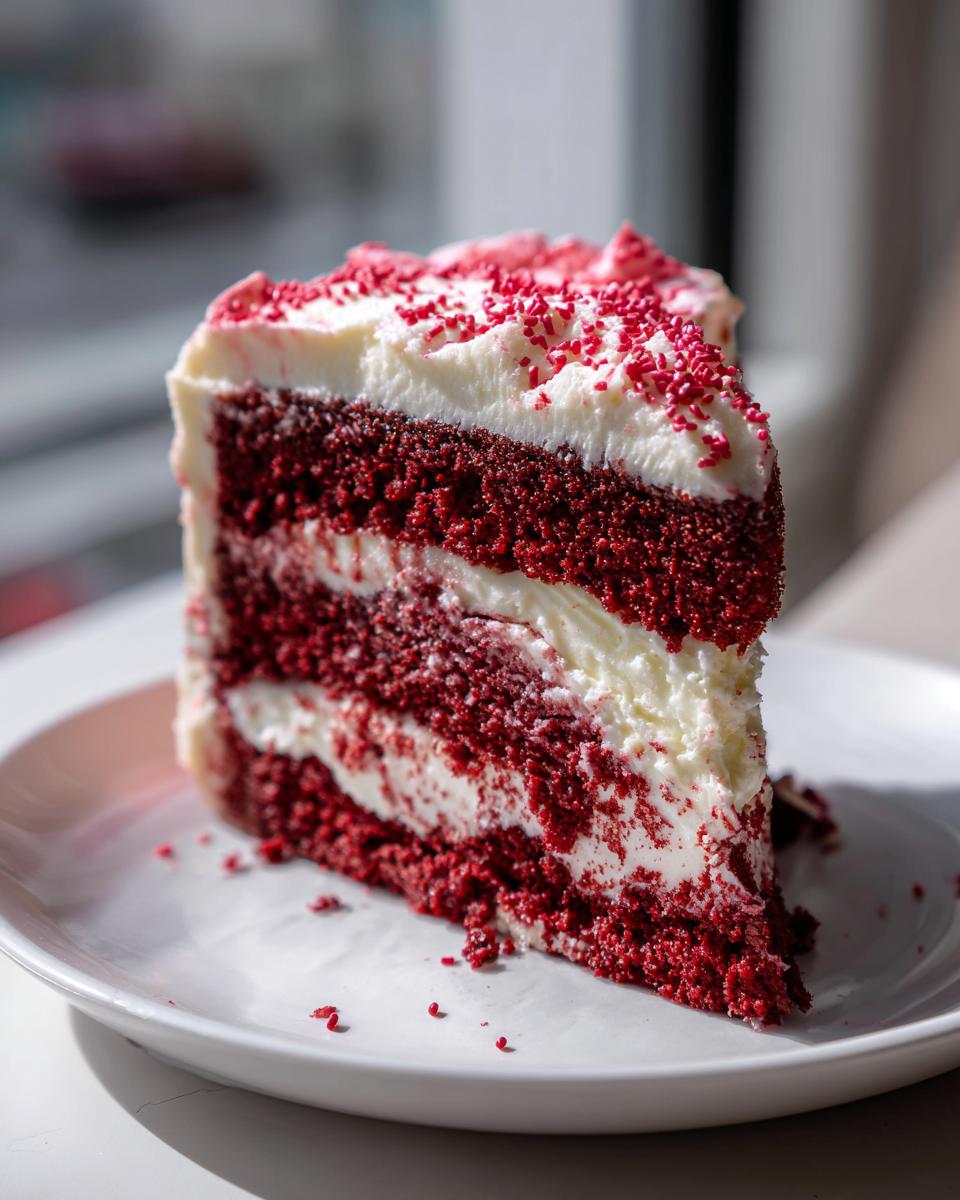
The secret to avoiding dry cake 101 is what happens *after* the bake. We’re poking holes everywhere so that creamy vanilla pudding soak seeps right down into the crumb. Trust me, this technique locks in moisture better than anything else, guaranteeing a truly Moist Cake bite every single time.
Simple Preparation for Baking for Beginners
Honestly, most of the work happens while the cake is cooling! Since we rely on a quality box mix, we skip the measuring all the usual dry stuff. This recipe is proof you don’t need years of experience to make something wonderful. It’s a Simple Cake Recipe that feels instantly impressive.
Gathering Your Ingredients for the red velvet poke cake
Okay, now for the fun part: rounding up our players! Even though this is an easy dessert, precision matters, especially when we are trying to lock in that incredible moisture. We’re keeping things grouped together so you can pull everything out at once right before you need it. You might be using a box mix, but treating these few core components right is what turns this into the red velvet poke cake people ask about later!
I’ve listed everything you need for the base, the creamy filling, and that tangy topping. If you’re looking for other straightforward recipes that maximize flavor without complex steps, you can check out my Alfredo sauce recipe for inspiration!
For the Red Velvet Cake Base
Since we’re relying on the box for speed, we just need the basics listed right on the back. Don’t skip the wet ingredients the recipe calls for—they help keep things tender before we even start poking!
- 1 box red velvet cake mix (plus the eggs, oil, and water listed on the box!)
For the Creamy Filling Cake Soak
This is where the magic happens! We need the puddings to set up nicely inside those holes, so make sure your milk is nice and cold when you mix this section.
- 1 (14 ounce) can sweetened condensed milk
- 1 package (3.4 ounce) instant vanilla pudding mix (Don’t use the cook-and-serve kind!)
- 2 cups cold milk
- 1 tub (8 ounce) frozen whipped topping, thawed
For the Cream Cheese Frosting
This topping is non-negotiable for me—it has to be that classic tangy, rich Cream Cheese Frosting. And here’s a big tip: make sure that cream cheese is actually soft, not just room temperature, or you’ll end up with tiny lumps in your beautiful topping. That would ruin the smooth texture!
- 4 ounces cream cheese, softened properly!
- 1/2 cup powdered sugar (sift this if you can!)
- 1 teaspoon vanilla extract
- Red sprinkles for garnish (Because everything festive needs sprinkles!)
Step-by-Step Instructions for the Ultimate red velvet poke cake
This is where we turn simple ingredients into that show-stopping moist chocolate cake texture, just in velvety red! Pay close attention to the timing here, especially when we poke—that window is everything for getting the layers saturated just right for our red velvet poke cake.
Baking and Poking the Cake
First things first, bake your Red Velvet Cake mix according to the package directions. Don’t try to mess with the temperature; stick to what it says for a perfect bake in your 9×13 pan. Once it comes out of the oven, resist the urge to touch it for a full 10 minutes. Too hot, and the liquid soak will just run right through and pool at the bottom. Too cool, and it won’t absorb anything!
After that 10 minutes—and I mean 10, set a timer!—grab the handle of a wooden spoon or a thick fork. Start poking straight down all over the surface. I like to aim for about an inch apart both ways to make sure we get coverage everywhere. Don’t be shy; you want good, deep holes so that glorious Sweetened Condensed Milk Cake soak can really sink in.
Preparing the Creamy Filling Cake
While the cake is cooling and you’re poking it, get your pudding mixture ready. In a medium bowl, whisk together that instant vanilla pudding mix and the 2 cups of absolutely cold milk. Whisk it like you mean it until it starts getting thick—it should thicken up fast because we’re using instant pudding!
Once that pudding is smooth, start pouring it slowly over the warm cake. Tilt the pan a little bit if you need to ensure it runs into all those little holes you made. After you’ve drizzled it all over, pop the whole thing into the fridge for just 30 minutes. This quick chill allows the pudding to start setting up inside the cake, before we add the final toppings.
Making and Spreading the Cream Cheese Frosting
Now for the frosting—this is where we ensure that rich, tangy flavor. Remember how I stressed that the cream cheese needs to be soft? That’s because you want to whip it first on its own until it’s looking perfectly smooth and lump-free. This is one of those little steps that separates a good baker from a great one; don’t rush the cream cheese!
Once the cream cheese is happy, beat in the powdered sugar gradually, followed by your vanilla. If you’re using a stand mixer, use the paddle attachment. When it’s fluffy and smooth, take that chilled cake from the fridge and spread this amazing frost right over the top. Make sure you get nice, even coverage across the entire surface.
Final Chill and Garnishing
We are almost there! Before you even think about slicing this beautiful structure (which is perfect for making ahead for your next morning treat, by the way!), it needs a final rest. Cover the pan loosely with plastic wrap and stick it back in the refrigerator for at least one full hour. This helps everything meld together and firms up the filling so you get clean slices.
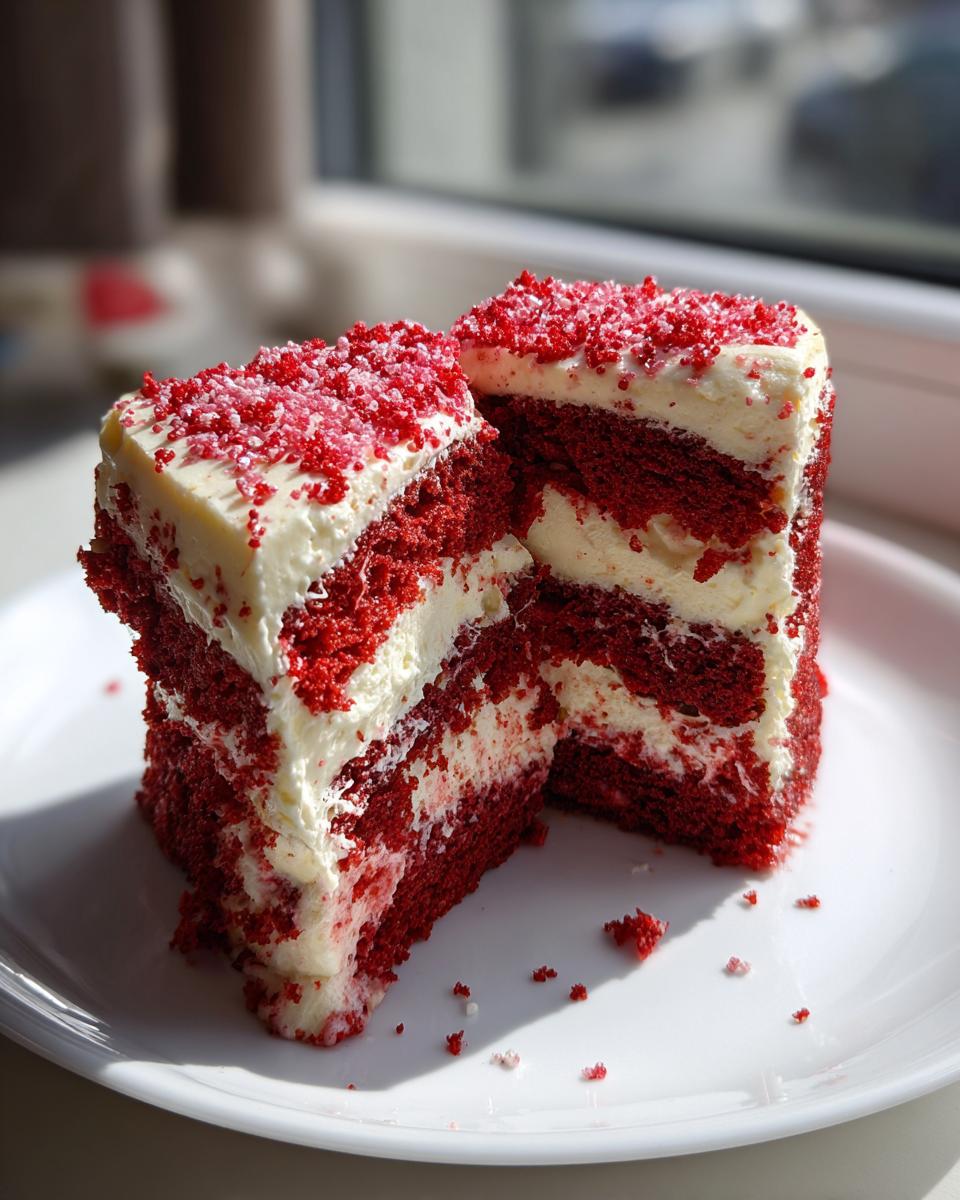
When it’s ready to serve, sprinkle those festive red sprinkles right across the top. That bright color contrast against the white frosting is just gorgeous. Slice it cold—it tastes so much better when it’s chilled!
Tips for Success with Your red velvet poke cake
Even though this red velvet poke cake is famously easy, there are just a couple of things I’ve learned over the years to make sure you never end up with a puddle instead of a pudding soak! When you’re aiming for that rich, decadent, truly Velvet Dessert experience, these little tricks make all the difference.
First, let’s talk about poking. You must poke when the cake is warm, not scalding hot, and definitely not cold. If the cake is too hot, that creamy filling—especially the pudding—will just melt away completely and evaporate. If you let it cool too much, the liquid won’t penetrate. Aim for that perfect ‘barely warm to the touch’ temperature.
Another common mistake I see people make is rushing the pudding setup. That 30-minute chill after pouring is mandatory! That time allows the instant pudding to grab onto the warmth of the cake and set up securely inside those holes. If you skip it or rush it, you end up with runny pockets instead of that perfectly satisfying, thick center.
And for the frosting? Always work with cold cake underneath that cream cheese layer. If the cake is cold, the frosting glides on beautifully and stays put. If the cake is even slightly warm, you’ll end up dragging crumbs everywhere and melting your beautiful topping into just a sweet, smooth mess!
If you want to see how I manage moisture in another one of my favorite baked goods, check out my tips for moist chocolate cake recipe perfection—the principle of locking in the wet ingredients is similar!
Make-Ahead and Storage for This Festive Sheet Cake
This is such a dream to know you can make it ahead of time! Because of that thick pudding soak, this red velvet poke cake actually improves overnight. It’s definitely a recipe built for celebrations, whether you’re planning Christmas Desserts or need the perfect Valentine’s Day Cake.
You can totally bake the cake layer a day in advance. Just let it cool completely, poke the holes while it’s still slightly warm, and pour on the pudding soak. Cover it well and chill it overnight. That extra time really lets the flavor deepen!
The next day, right before you serve it, take it out of the fridge—you don’t want it ice-cold for frosting—let it sit on the counter for maybe 20 minutes. Then, frost it with that lovely Cream Cheese Frosting and add your red sprinkles. If you frost it the day before, the frosting can sometimes get a little sweaty in the fridge, which we don’t want.
When it comes to storage, keep any leftovers tightly covered in the refrigerator. Since we’ve got dairy in the pudding and the frosting, it needs to stay chilled. It’s actually even better on Day Two because the cake has had more time to absorb all that creamy goodness. I always love making big batches of things like this that taste better later, just like my favorite make-ahead salad for a party!
It keeps nicely for about three to four days in the fridge, but honestly, a cake this good never lasts that long at my house!
Ingredient Notes and Substitutions for Your Creamy Filling Cake
One thing I’ve learned applying my nutrition background to home baking is that flexibility is your friend! While I absolutely adore the texture of the classic vanilla pudding in this recipe—it really complements the red velvet flavor profile—I know sometimes you want to mix it up. Sticking to the core steps of this red velvet poke cake is important, but changing the pudding flavor is a great way to give it a twist for your family. It builds our authority here at MayaPlate when we show you how to adapt things!
If you’re planning a menu and want to see another wonderful creamy dish that’s great for gatherings, you should take a peek at my cream cheese corn casserole recipe. It’s a total crowd-pleaser!
Pudding Mix Variations
If you’re looking for a slightly tangier or richer soak, you have options! The instant pudding really just needs to be a reliable thickener here. If you swap out the vanilla for cheesecake instant pudding mix, you get an extra layer of savory tang that pairs beautifully with the cream cheese frosting. I’ve also had success using white chocolate pudding mix; it adds a gorgeous, mild sweetness that makes the whole Creamy Filling Cake feel even more decadent.
Remember, we’re using a boxed mix here because we want speed, but these little flavor swaps make it feel completely custom, which is what great baking is all about!
Box Mix Hacks
Since we are using a cake mix base, we already have a huge head start on those Box Mix Hacks! If you want to make the cake itself taste less “boxed,” try replacing the oil called for on the package instructions with melted butter instead. You’ll get a richer crumb, though it might be ever so slightly less tender. Also, if you have a bottle of buttermilk on hand, use that instead of the water the box requires. That little bit of acid reacts great with the red food coloring and gives the cake a genuine tang reminiscent of a from-scratch Red Velvet Cake.
Serving Suggestions for This Fun Party Desserts
When you bring out a cake this stunning—that deep red, that towering white frosting—you want the rest of the spread to live up to the occasion! This red velvet poke cake is so rich and beautifully sweet that it doesn’t need a lot of fussy sides, but a few smart pairings can make the whole dessert table sing, especially if you’re hosting for the holidays or a big party.
Since the cake itself is super heavy on flavor and texture from the creamy pudding soak, I tend to lean toward simpler, slightly acidic, or refreshing accompaniments. You want something on the side that cuts through that richness just a tiny bit so nobody feels weighed down after the second slice!
If you’re looking for a fabulous celebratory drink to serve alongside, I highly recommend my recipe for a bright, citrusy accompaniment. Check out the lemon drop martini recipe—that tartness against the sweet velvet cake is just divine!
Here are a few ways I like to serve this Fun Party Desserts:
- A Side of Fresh Berries: Seriously, it’s the easiest thing. A big bowl of fresh, slightly tart raspberries or sliced strawberries cuts right through the sweetness of the cream cheese frosting perfectly. It gives people something light to snack on between bites of that dense cake.
- Simple Coffee Pairing: A good, strong, freshly brewed dark roast coffee is always required dessert station companion in my kitchen. The slight bitterness of the coffee is the ultimate balance for super moist cake recipes like this one.
- A Light Fruit Salad: If you need something a little healthier on the table, make a simple fruit salad that skips the heavy whipped cream. Think melons, kiwi, and maybe a splash of lime juice. It acts as a palate cleanser!
- Vanilla Bean Ice Cream: Okay, this one isn’t exactly “light,” but who can resist serving a warm slice? If you happen to bake this and serve it slightly warm, a scoop of high-quality vanilla bean ice cream that melts all over the frosting is just heaven.
The goal is just to keep the plate balanced. Let the red velvet poke cake be the star; the sides are just the brilliant supporting cast!
Frequently Asked Questions About red velvet poke cake
I always get so many great emails after people try this recipe, and I wanted to pull together some of the most common questions I hear about making the red velvet poke cake. Almost everyone wants to know how to tweak it, or if they missed a step! If you have another question, feel free to reach out anytime through my contact page.
Can I make this red velvet poke cake without instant pudding?
That’s a good question! The instant pudding is really our secret weapon here because it sets up so quickly once it hits the warm cake, keeping that filling nice and sturdy. If you absolutely have to skip it, you could try using a cooked vanilla custard instead, but you need to let that custard cool *completely* before pouring it on the cake, or it will melt. Just know that using a cooked custard will change the texture slightly—it won’t be quite as firm as the instant pudding version, but it will still be delicious!
What is the best tool for poking holes in the cake?
My absolute favorite tool, and the one I mention in the instructions, is the handle end of a wooden spoon. It’s thick enough that it creates a nice, wide hole—you don’t want teeny-tiny holes, because the filling can’t get past them! If you don’t have an old wooden spoon handle lying around, a thick metal skewer or even the blunt end of a clean chopstick works wonderfully for getting those deep wells needed for the filling to soak into. We need those gaps for maximum moisture!
Is this recipe considered a Southern Desserts classic?
Oh yes, absolutely! While the poke cake style itself is a bit more modern, Red Velvet is pure Southern tradition through and through. That rich, slightly tangy flavor profile? That comes straight from the South. This red velvet poke cake takes that beloved classic and makes it super easy for any baker to manage, no matter where you live. It’s tradition made practical for an Easy Dessert!
Estimated Nutritional Profile for a Slice of red velvet poke cake
I always try to keep things practical here at MayaPlate, even when we’re talking about a decadent treat like this red velvet poke cake! As much as I love giving you amazing flavor, I also know that understanding what’s in your food matters, even when it’s a lovely Holiday Cake. So, here is the estimated nutritional breakdown for one reasonable slice of this cake, based on the ingredients list we used.
Please remember, these numbers are just estimates, truly! How much milk gets absorbed, how thick you spread that cream cheese frosting, and even the exact brand of cake mix you use can shift these around a little bit. Think of this as a helpful guideline rather than a strict laboratory result.
- Serving Size: 1 slice
- Calories: 380
- Sugar: 45g (It is a dessert, after all!)
- Sodium: 350mg
- Fat: 18g
- Saturated Fat: 10g
- Unsaturated Fat: 8g
- Trans Fat: 0.5g
- Carbohydrates: 52g
- Fiber: 1g
- Protein: 4g
- Cholesterol: 45mg
It’s a rich combination, loaded with the sweetness from the condensed milk and the richness of the cream cheese. This is definitely a dessert you want to enjoy knowing it’s made with care, not something you eat every day! If you’re interested in how I approach balanced eating and building meals that support a healthy lifestyle even when you’re busy, make sure you check out my About page. Baking delicious things like this red velvet poke cake has to fit into a balanced life, and knowing the facts helps!
PrintUltimate Moist Red Velvet Poke Cake with Cream Cheese Pudding Filling

Make this ultra-moist red velvet poke cake, filled with a creamy pudding soak and topped with rich cream cheese frosting. It is a simple, festive dessert perfect for holidays or any celebration.
- Prep Time: 20 min
- Cook Time: 35 min
- Total Time: 2 hours 35 min
- Yield: 12 servings 1x
- Category: Dessert
- Method: Baking
- Cuisine: American
- Diet: Vegetarian
Ingredients
- 1 box red velvet cake mix (plus ingredients listed on the box)
- 1 (14 ounce) can sweetened condensed milk
- 1 package (3.4 ounce) instant vanilla pudding mix
- 2 cups cold milk
- 1 tub (8 ounce) frozen whipped topping, thawed
- 4 ounces cream cheese, softened
- 1/2 cup powdered sugar
- 1 teaspoon vanilla extract
- Red sprinkles for garnish
Instructions
- Prepare and bake the red velvet cake mix in a 9×13 inch baking pan according to the package directions.
- Let the cake cool for 10 minutes after removing it from the oven.
- Use the handle of a wooden spoon or a fork to poke holes evenly across the entire surface of the warm cake.
- In a medium bowl, whisk together the instant vanilla pudding mix and the cold milk until the mixture is smooth and slightly thickened.
- Slowly pour the pudding mixture over the cake, ensuring the liquid seeps into the poked holes.
- Refrigerate the cake for 30 minutes to allow the pudding filling to set inside the cake.
- While the cake chills, prepare the cream cheese frosting: Beat the softened cream cheese, powdered sugar, and vanilla extract together until the mixture is smooth and creamy.
- Spread the cream cheese frosting evenly over the chilled cake.
- Top the frosting with red sprinkles for a festive look.
- Chill the finished red velvet poke cake for at least 1 hour before slicing and serving to achieve the best texture.
Notes
- For an extra rich flavor, substitute the vanilla pudding with a white chocolate or cheesecake instant pudding mix.
- If you prefer a lighter topping, use Cool Whip instead of the homemade cream cheese frosting.
- This cake tastes best when served cold, so plan to make it ahead of time.
Nutrition
- Serving Size: 1 slice
- Calories: 380
- Sugar: 45g
- Sodium: 350mg
- Fat: 18g
- Saturated Fat: 10g
- Unsaturated Fat: 8g
- Trans Fat: 0.5g
- Carbohydrates: 52g
- Fiber: 1g
- Protein: 4g
- Cholesterol: 45mg