
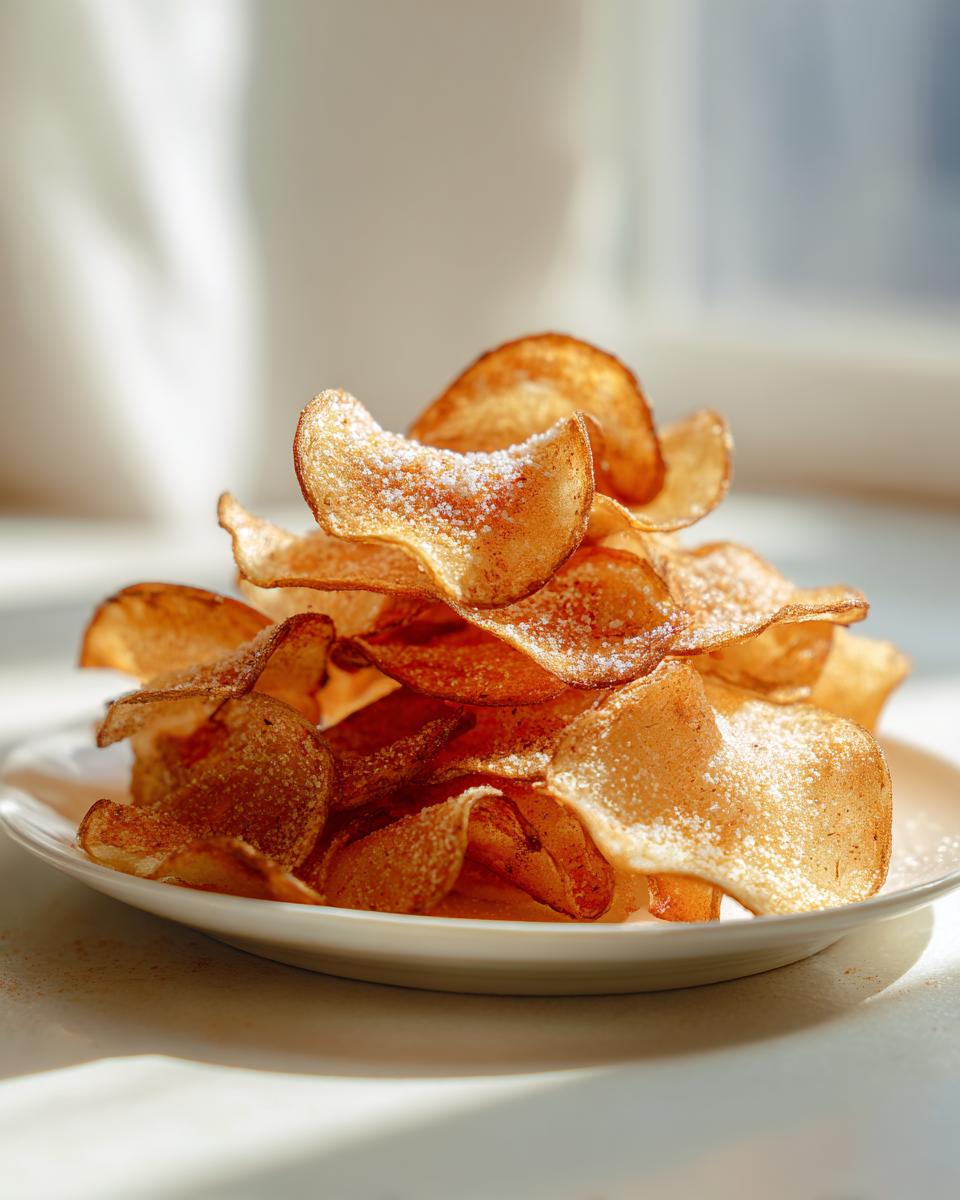
Oh, that sound! You know the one—that sharp, immediate CRUNCH that signals pure snacking joy? If you are anything like me, sometimes only a bag of perfect potato chips will cut it. But honestly, the store-bought ones? They just leave me wanting that fresh, wholesome flavor.
That’s why I developed this recipe. As a nutritionist, I’m always looking for ways to turn comfort foods into genuinely practical and nourishing treats. I’ve spent ages tweaking this so you can get that unparalleled crispiness right in your own kitchen, no matter your setup. Trust me, making your own chips is surprisingly easy!
This guide walks you through the ultimate trifecta: how to make crispy chips using the oven, the air fryer, or—for those moments you need pure, indulgent flavor—the classic fried method. We are talking about eliminating those mystery ingredients and delivering satisfying, guilt-free snacks whenever that crunch craving hits!
- Why You Will Love This Crispy Potato Chips Recipe
- Ingredients for the Best Potato Chips From Scratch
- Essential Equipment for Homemade Potato Chips
- How to Make Potato Chips: The Crispy Preparation Steps
- Cooking Methods for Perfect Potato Chips: Oven Baked, Air Fryer, and Fried
- Flavor Variations and Potato Chip Seasonings
- Tips for Success with Your Crunchy Snack Ideas
- Storage and Reheating Instructions for Homemade Potato Chips
- Frequently Asked Questions About Making Potato Chips
- Sharing Your Perfect Potato Chips Creation
Why You Will Love This Crispy Potato Chips Recipe
I know you are after that perfect crunch, and that’s exactly what we deliver here. Forget soggy failures! This crispy potato chips recipe is designed for success, no matter how you cook.
- We cut down on oil without sacrificing flavor, making these fantastic guilt free snacks when you choose the oven or air fryer method.
- You get to control the salt and seasonings completely—pure flavor control in every batch!
Triple Method Approach for Perfect Potato Chips
I truly believe that everyone deserves a great homemade chip. That’s why I included three ways to make them! Whether you have an air fryer ready to go, or you prefer the reliability of the oven, or maybe you just want that classic deep-fried taste, this recipe has you covered. It’s truly the best of all worlds for potato lovers.
Guilt Free Snacks Potential
When I developed this, I really wanted to offer a real homemade snack alternative. The baked and air-fried versions use such minimal oil compared to what’s soaked into those bags on the shelf. It lets you enjoy a satisfying, crunchy snack without feeling guilty about it later. You control every bit of what goes into these!
Ingredients for the Best Potato Chips From Scratch
You only need a few simple things to transform humble potatoes into amazing, crispy homemade potato chips. The quality really matters here, especially with so few components!
I always reach for Russet potatoes. They are high in starch, which is the secret sauce for that spectacular crunch we are chasing. Here is what you need to gather:
- 3 large Russet potatoes
- 2 tablespoons olive oil (for tossing/frying)
- 1 tablespoon olive oil (for brushing, if baking)
- 1 teaspoon fine sea salt, or to taste
- 1/2 teaspoon garlic powder
- 1/2 teaspoon paprika (optional, for that little color kick!)
Ingredient Notes and Substitution Tips
A few quick notes here, because details make the difference. Always use fine sea salt, not coarse kosher salt. Fine salt sticks better to these thin little slices! Use a neutral oil like avocado or vegetable oil if you are deep-frying them, but for the baking and air frying, olive oil works beautifully for flavor and texture.
If you are making a huge batch and need more oil for tossing, you can certainly substitute vegetable oil for the olive oil, but stick to the recipes timing and technique to keep them from getting greasy.
Essential Equipment for Homemade Potato Chips
I’m going to be really honest with you: you need one specific tool to make these snack slices come out right, and that’s why I want to mention it upfront. If your slicing isn’t uniform, your cooking won’t be uniform either, and we want every bite to deliver that satisfying crunch!
You might think a sharp knife will do the trick, but unless you have the steady hand of a sushi chef, you need to invest in a good slicer. This is non-negotiable for achieving that light, airy texture.
- Mandoline Slicer: This is your MVP. You must use a mandoline to get slices consistently thin—we are aiming for about 1/16th of an inch. It ensures everything cooks at the exact same rate. Safety guard, please! We don’t want any accidents while chasing that perfect chip.
- Several Layers of Paper Towels or Clean Kitchen Towels: You need these for the drying process. Seriously, the drier the potato, the crispier the final product!
- Large Mixing Bowls: Essential for soaking out the starch and then tossing everything lightly with oil and seasonings.
- Baking Sheets or Air Fryer Basket: Depending on the method you select, you’ll need well-sized baking sheets lined with parchment, or just use your air fryer basket.
If you’re looking for some other easy ways to amp up your vegetable game, check out my garlic parmesan roasted green beans—it uses similar simple seasoning vibes!
How to Make Potato Chips: The Crispy Preparation Steps
Okay, we have our equipment ready. Now we get to the part that separates mediocre homemade potato chips from the *best* ones you’ve ever had. It all comes down to structure and moisture control. You really need to commit to the next few steps if you want that perfect crunch!
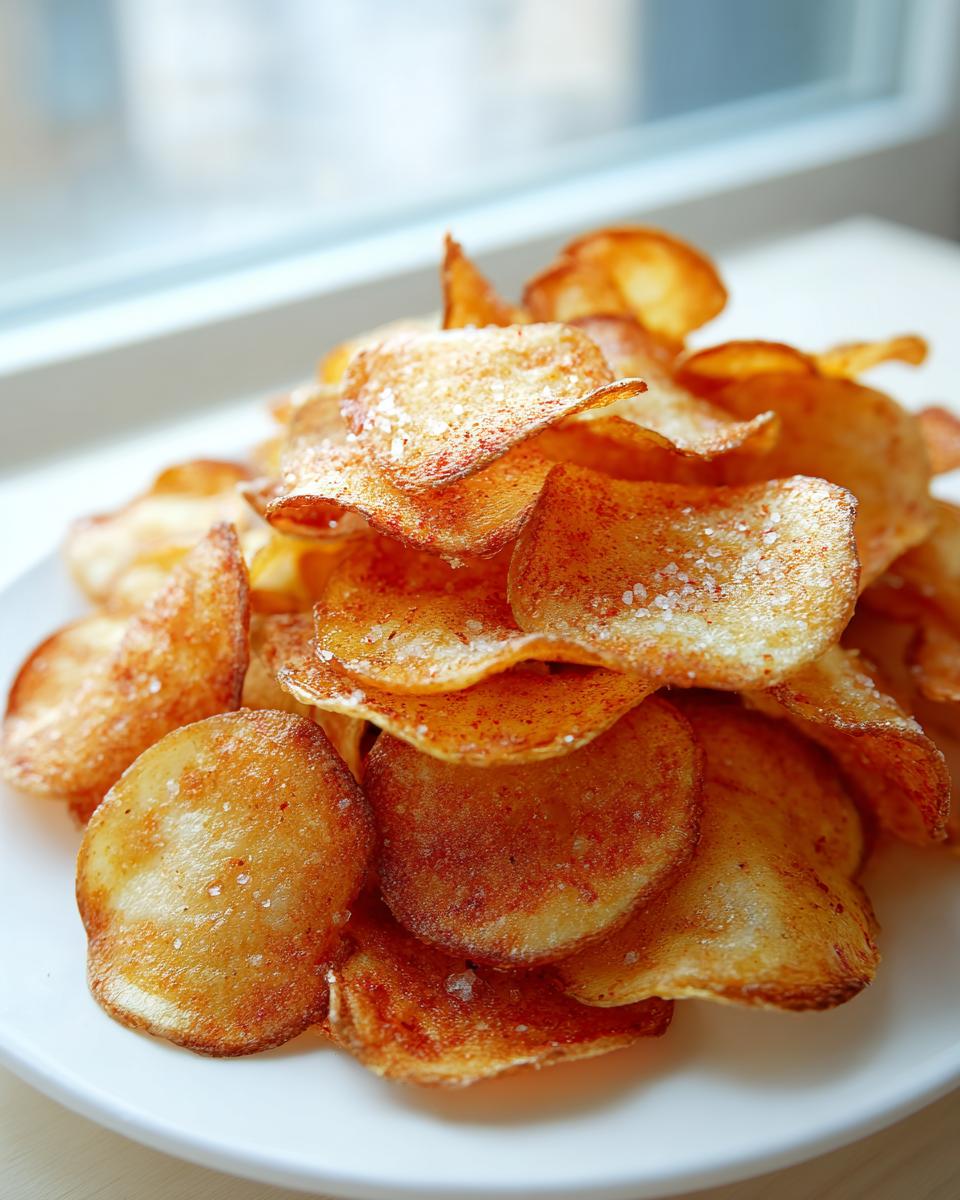
First, wash those Russets really well, but don’t bother peeling! I love the rustic look of the skin left on for these snacks. Once they are clean, grab that mandoline slicer. This is where you earn your crunch credit.
The Secret to Thinly Sliced Potatoes Snack Uniformity
This is non-negotiable for making your potato chips crispy all the way through. Set your mandoline guard to slice them about 1/16th of an inch thick—that’s paper thin! If some slices are thick and some are whisper-thin, the thick ones will stay chewy while the thin ones burn to dust. Uniformity means even cooking, which means a perfect, crunchy snack!
Starch Removal for Maximum Crunch
As soon as you finish slicing, get those chips into a big bowl of very cold water right away. You’ll see the water turn cloudy almost instantly—that’s the starch releasing! This soaking step is essential for a truly crispy potato chips recipe. Let them hang out in that cold bath for at least 30 minutes, maybe even two hours if you have time. Then, here’s the real kicker: drain them well and spread them out on towels. Pat them until they honestly feel dry to the touch. Seriously, dry potatoes are the secret weapon here!
Cooking Methods for Perfect Potato Chips: Oven Baked, Air Fryer, and Fried
This is where the magic finally happens! Because I want everyone to enjoy amazing potato chips, I’ve perfected three distinct routes to crunch town. The key, remember, is that you need to have done the soaking and drying steps perfectly before you even think about heat!
For the baked and air-fried versions, toss those dry slices lightly with your oil and seasonings first. For the deep-fried option, you toss them with just a tiny bit of oil before they hit the hot oil, but the main fat absorption comes from the fryer itself.
Oven Baked Chips Recipe Technique
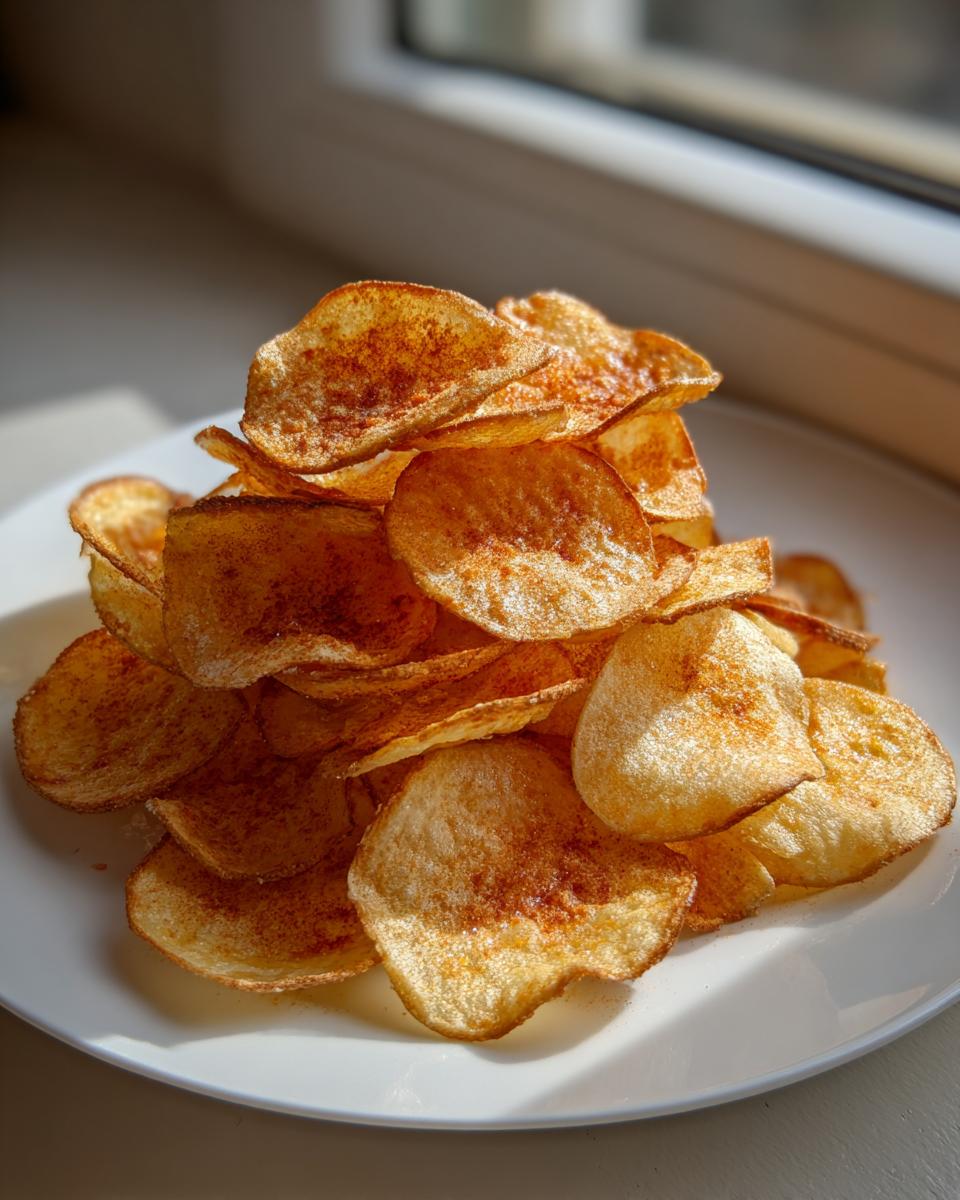
If you prefer an oven baked chips recipe, preheat your oven to 400°F (200°C). This high heat is important. Line your baking sheets with parchment paper—don’t skip this; the sugars in the potato can stick! Arrange your seasoned potato slices in a perfect single layer. They absolutely cannot overlap, or you’ll steam them instead of crisping them. Pop them in for about 15 to 20 minutes, giving them a flip halfway through. Keep a close eye on them during the last five minutes; they go from golden to burnt fast!
Air Fryer Potato Chips Tutorial
For quicker results, the air fryer is fantastic for making air fryer snack ideas. Preheat your basket to 350°F (175°C). You must work in batches here, or the air won’t circulate properly. Place only one layer of seasoned slices in the basket. Air fry for 10 to 15 minutes total, but you need to shake that basket vigorously every five minutes. This ensures they all get that lovely, uniform golden color. They make such satisfying homemade potato chips!
Classic Frying for Traditional Potato Chips
Now, if you are feeling ambitious and want that pure, traditional potato chip flavor, you can fry them. Heat about two inches of a neutral oil, like canola, to 350°F (175°C). Fry these dried slices in small batches for about 3 to 5 minutes until they are bubbly and golden brown. Once they come out, immediately drain them on paper towels and toss them with your salt while they are still hot. For more traditional inspiration, you can check out some popular methods over at Homemade Vibes.
Flavor Variations and Potato Chip Seasonings
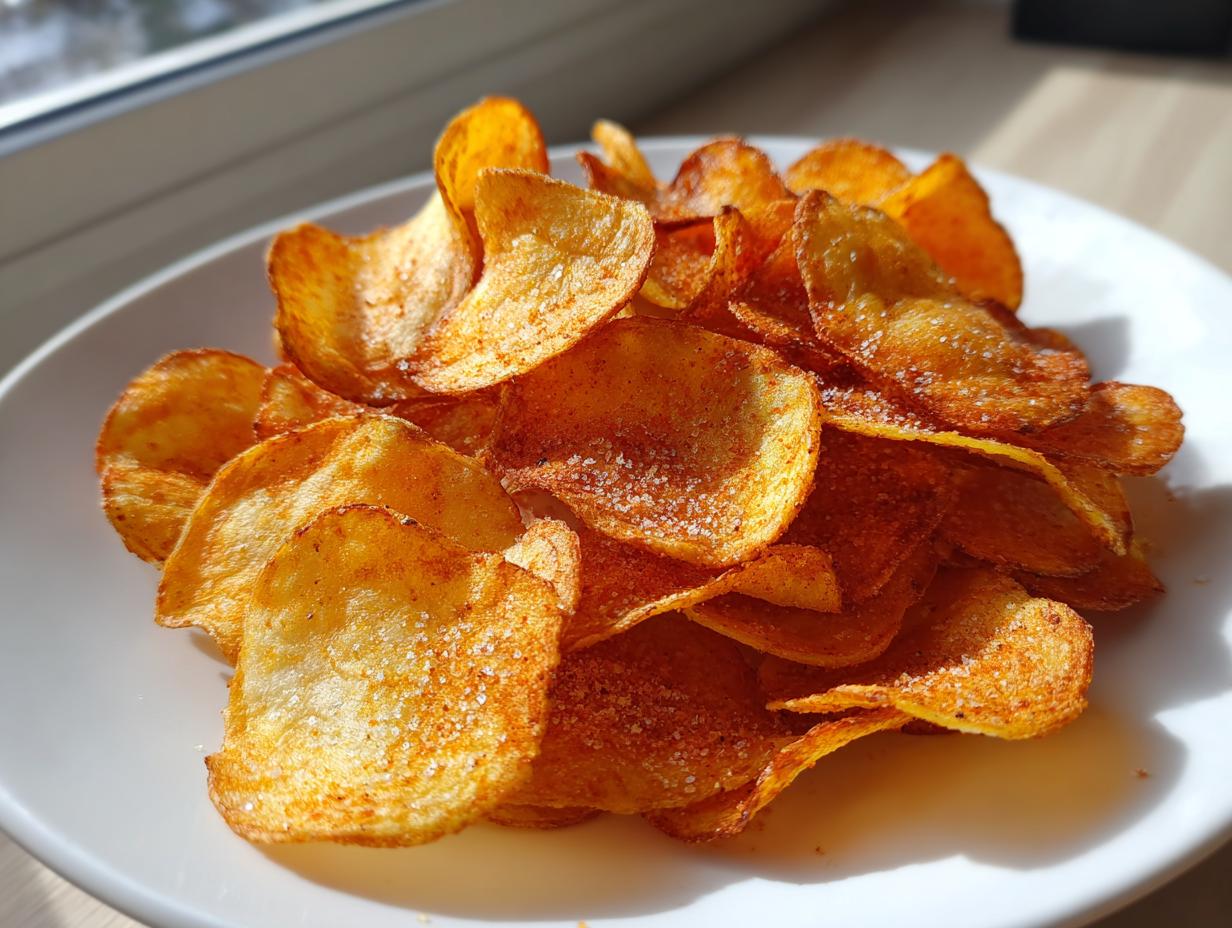
Just salt is fantastic, I won’t lie—it’s the classic for a reason. But once you’ve mastered the prep work for these homemade potato chips, the real fun begins: the seasoning!
We already added garlic powder and paprika to our baseline recipe, right? That gives you a wonderful, savory kick. But don’t stop there! Once they are seasoned *before* cooking, feel free to experiment with different combinations. Think about a little onion powder mixed in, or maybe a tiny sprinkle of cayenne if you like heat.
For the ultimate party snack potatoes, try tossing them with nutritional yeast right after they come out of the air fryer for a cheesy flavor without the dairy! Or, if you’re feeling sweet and savory, look up flavoring ideas like the low-calorie honey BBQ ones I saw online—it’s fun to see how creative people get with these crunchy snack ideas.
Tips for Success with Your Crunchy Snack Ideas
I want every batch of these salty snacks to turn out perfectly for you. Remember, making great homemade potato chips isn’t just about the heat source; it’s all in the prep work and the patience you show *after* they come off the heat. If you follow these tips, you’ll master the recipe for crispy fresh chips every time.
First, I can’t stress this enough: Drying is paramount. Seriously, if those potato slices feel damp even slightly, they will steam in the oven or air fryer instead of crisping up beautifully. You want them bone dry before they meet any oil or heat. Pat, pat, pat them dry on the towels.
Second, spacing is your friend when cooking. Whether you’re baking on a sheet pan or loading up your air fryer basket, make sure those little slices aren’t touching. Overcrowding traps moisture and prevents that glorious browning we are looking for. You might have to work in smaller batches, but trust me, it’s worth the extra time to ensure true crunch!
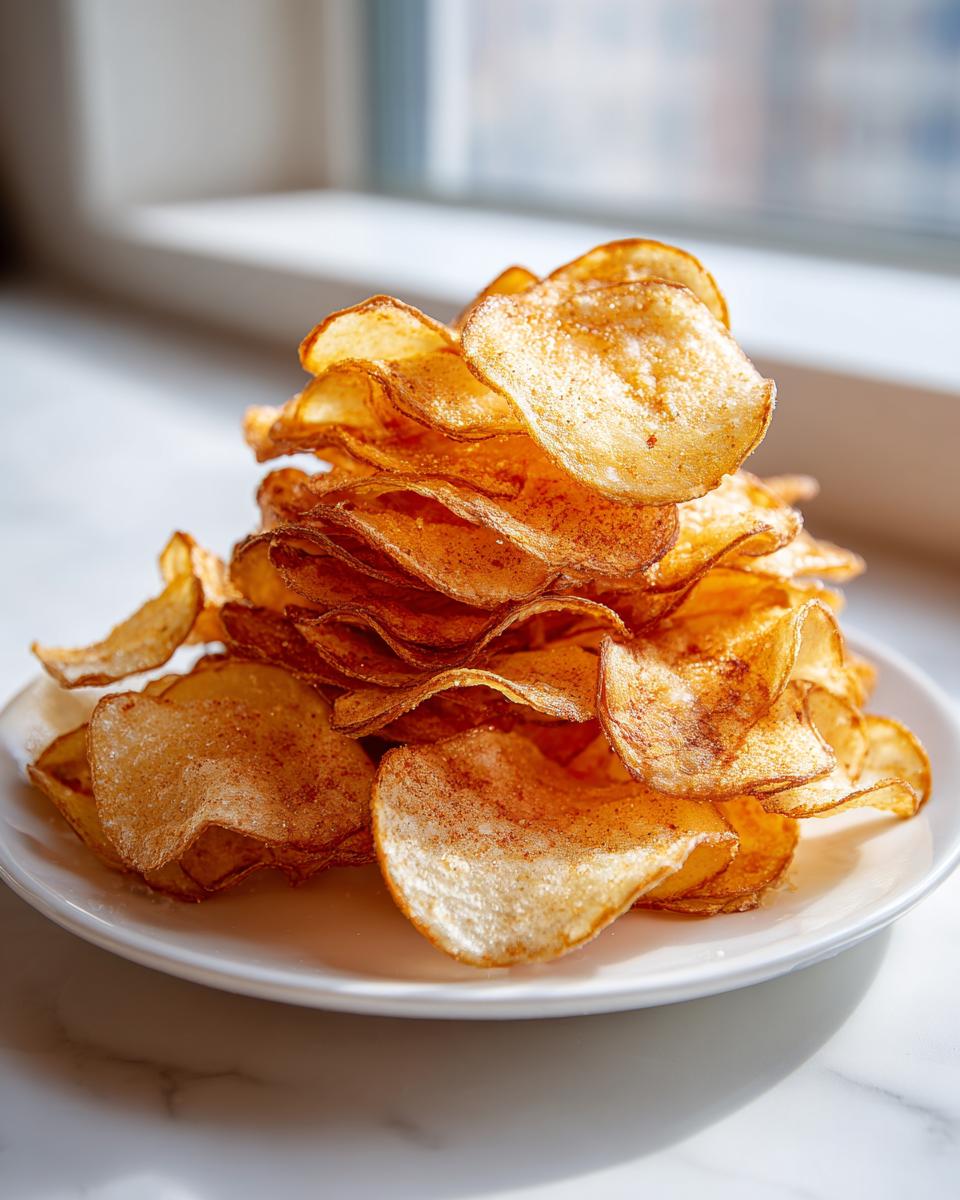
Finally, the cooldown phase! This is a step everyone rushes, but it’s crucial for those final satisfying snaps. As soon as your baked or air-fried chips come out, transfer them immediately to a wire cooling rack—not a plate lined with paper towels. A rack allows air to circulate completely around every single chip, letting that residual heat fully dry them out and set that crispy texture. They firm up significantly as they cool down, so wait patiently before you taste-test!
Storage and Reheating Instructions for Homemade Potato Chips
So you made a giant batch because, well, that’s what happens when snacks are this good! Now, how do you keep these beauties crispy for tomorrow? The key here is managing moisture, which means rethinking how you store things.
The absolute best way to keep your homemade snacks crunchy is to store them in an airtight container right on the counter at room temperature. Think glass containers with good rubber seals, or a really high-quality zip-top bag with all the air squeezed out. They are surprisingly stable if kept dry!
I need you to promise me one thing: do not put them in the refrigerator! Cold air circulating around chips creates condensation, and that condensation is the enemy of crispiness. I learned that the hard way when I tried to store leftover roasted potatoes in the fridge—they came out soft and sad the next day. For a recipe like this wonderful date nut bread, the fridge is fine, but not for these thinly sliced treats.
If, by some miracle, a day passes and your chips have lost a tiny bit of snap—maybe they sat next to a simmering pot of soup—don’t panic! You can often revive them. Just spread them back out on a baking sheet and pop them into a warm oven, say 300°F (150°C), for about 5 to 8 minutes. It gently dries out any absorbed moisture. Then, let them cool completely before you dive back in. Happy snacking!
Frequently Asked Questions About Making Potato Chips
I know you might have a few lingering questions before you commit to making a full batch of these amazing homemade potato chips. It’s smart to ask! Getting the prep right means you secure that satisfying crunch, whether you bake them or use the air fryer.
Here are some common things people ask me when they try this recipe for the first time. I hope this helps you feel confident!
What is the best potato for crispy potato chips recipe?
For the ultimate crunch, you really should stick to Russet potatoes, just like I used in the recipe. Russets have that fantastic high starch content, and starch is what turns golden and snaps when it cooks! If you try waxy potatoes, they tend to turn out a bit wavy or chewier, which isn’t what we want when chasing a crispy potato chips recipe. Russets are your best bet for that perfect shatter!
Do I really need to soak the slices?
Yes, please, please soak them! I know it adds about 30 minutes to the timeline, but it’s utterly essential. Soaking gets rid of the surface starch. If that starch stays on the potato, it essentially clumps up when heated and prevents the chips from getting that light, airy, crispy texture. Soaking is a major step in making sure these turn out like excellent homemade snack alternatives.
Can I make these healthy potato chips ahead of time for a party?
That’s a big “no” from me, I’m afraid. For the absolute best texture, these chips must be made fresh, ideally the same day you plan to serve them. They are best enjoyed within about 4 to 6 hours of cooling completely. If you make them the night before, they inevitably absorb ambient moisture and lose that perfect snap. For party perfection, check out the storage advice in the section above about keeping them in an airtight container, but honestly, just bake a fresh batch right before your guests arrive—it’s worth the minimal effort!
Can I use sweet potatoes or purple potatoes?
You absolutely can use different varieties if you want to mix things up! Sweet potatoes will work, but they have more sugar, so they might cook faster and brown quicker than Russets, so watch them *very* closely in the oven or air fryer. Purple potatoes give you the prettiest color—they are wonderful for vibrant party snacks potatoes. Just remember, the starch content might be slightly lower, so they might not get quite as aggressively crisp as the Russets do.
Is using the air fryer really faster than the oven?
It’s faster in terms of active oven time, yes, and cleanup is usually a breeze! For the oven, you have to heat up a much larger space, and if you’re using two baking sheets, you might have to wait for them to bake sequentially. With the air fryer, you’re cooking smaller batches faster because the smaller space heats up rapidly, and the convection is very direct. I find the air fryer is my go-to for quick batches of air fryer potato chips when I just need a single snack serving!
Sharing Your Perfect Potato Chips Creation
Well, that’s it! We have conquered the crispiness conundrum, whether you chose the hands-off oven bake, the speedy air fryer route, or the super-satisfying classic frying method. I’m genuinely thrilled for you to try these homemade potato chips!
Now, I truly love hearing how things turn out in your kitchen! Did you manage to get them perfectly thin? Which cooking method became your favorite way to make these crunchy snacks? I’m always curious which technique our readers lean towards.
Please, leave a rating down in the comments below so others can see how much you loved this recipe. And if you snapped a picture of your beautifully golden, perfectly salted chips, tag me on social media! I love seeing my MayaPlate creations out in the world. Happy snacking, everyone!
PrintThe Ultimate Homemade Potato Chips: Crispy Oven Baked and Air Fryer Methods

Make the crispiest, perfectly salted potato chips at home using simple ingredients. This guide provides instructions for both oven baking and air frying for a satisfying, guilt-free snack alternative to store-bought bags.
- Prep Time: 20 min
- Cook Time: 20 min
- Total Time: 40 min
- Yield: 4 servings 1x
- Category: Snack
- Method: Baking/Air Frying
- Cuisine: American
- Diet: Vegetarian
Ingredients
- 3 large Russet potatoes
- 2 tablespoons olive oil (for frying/tossing)
- 1 tablespoon olive oil (for brushing, if baking)
- 1 teaspoon fine sea salt, or to taste
- 1/2 teaspoon garlic powder
- 1/2 teaspoon paprika (optional, for flavor)
Instructions
- Prepare the potatoes: Wash and dry the potatoes completely. You do not need to peel them for a rustic chip.
- Slice thinly: Use a mandoline slicer to cut the potatoes into very thin, uniform slices, about 1/16 inch thick. Uniformity is key for even cooking.
- Rinse and soak: Place the potato slices in a large bowl of cold water. Swish them around to remove excess starch. Let them soak for at least 30 minutes, or up to 2 hours, changing the water once if possible. This step helps achieve maximum crispiness.
- Dry thoroughly: Drain the potatoes well. Spread them out on several layers of clean kitchen towels or paper towels. Pat them completely dry. Moisture prevents crisping.
- Seasoning (for baking/air frying): In a medium bowl, toss the dry slices with 2 tablespoons of olive oil, sea salt, garlic powder, and paprika until lightly coated.
- Method 1: Oven Baked Chips: Preheat your oven to 400°F (200°C). Line two large baking sheets with parchment paper. Arrange the seasoned potato slices in a single layer on the sheets, ensuring they do not overlap. Brush lightly with the remaining 1 tablespoon of olive oil if needed. Bake for 15 to 20 minutes, flipping halfway through, until golden brown and crisp. Watch closely during the last few minutes to prevent burning.
- Method 2: Air Fryer Potato Chips: Preheat your air fryer to 350°F (175°C). Work in batches to avoid overcrowding the basket. Place the seasoned slices in a single layer in the air fryer basket. Cook for 10 to 15 minutes, shaking the basket every 5 minutes, until they are golden and crunchy.
- Cool and serve: Remove the chips from the oven or air fryer and let them cool completely on a wire rack. They will crisp up further as they cool. Adjust salt if needed before serving.
Notes
- For the crispiest results, ensure your potato slices are as thin and dry as possible before seasoning and cooking.
- If you prefer a classic fried chip, heat 2 inches of neutral oil (like canola or vegetable) to 350°F (175°C) and fry the dried slices in small batches until golden brown, about 3-5 minutes. Drain on paper towels and immediately toss with salt.
- Try different seasonings like onion powder, black pepper, or a dash of vinegar powder for variety.
Nutrition
- Serving Size: 1 serving (approx. 1 cup)
- Calories: 180
- Sugar: 1
- Sodium: 250
- Fat: 9
- Saturated Fat: 1
- Unsaturated Fat: 8
- Trans Fat: 0
- Carbohydrates: 23
- Fiber: 2
- Protein: 3
- Cholesterol: 0