
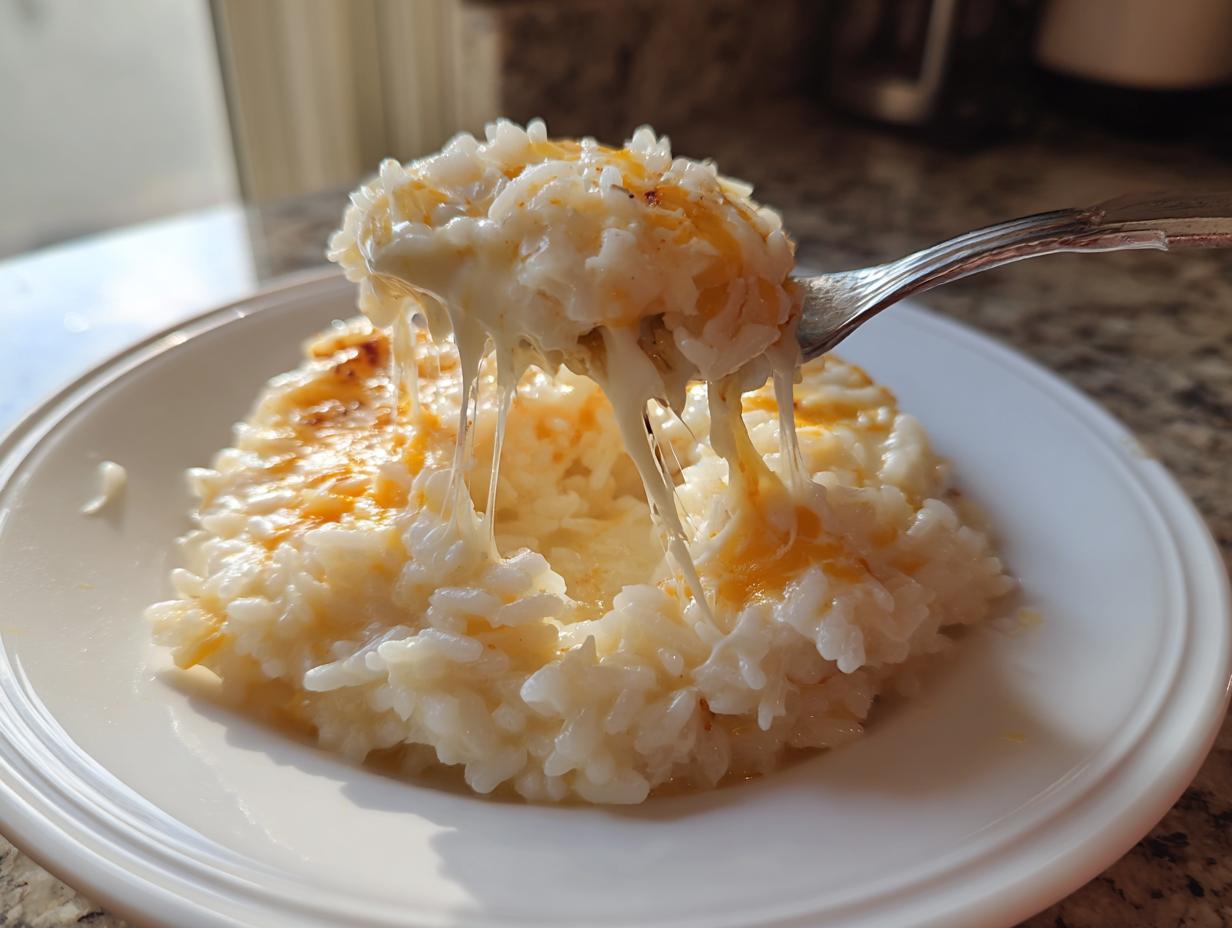
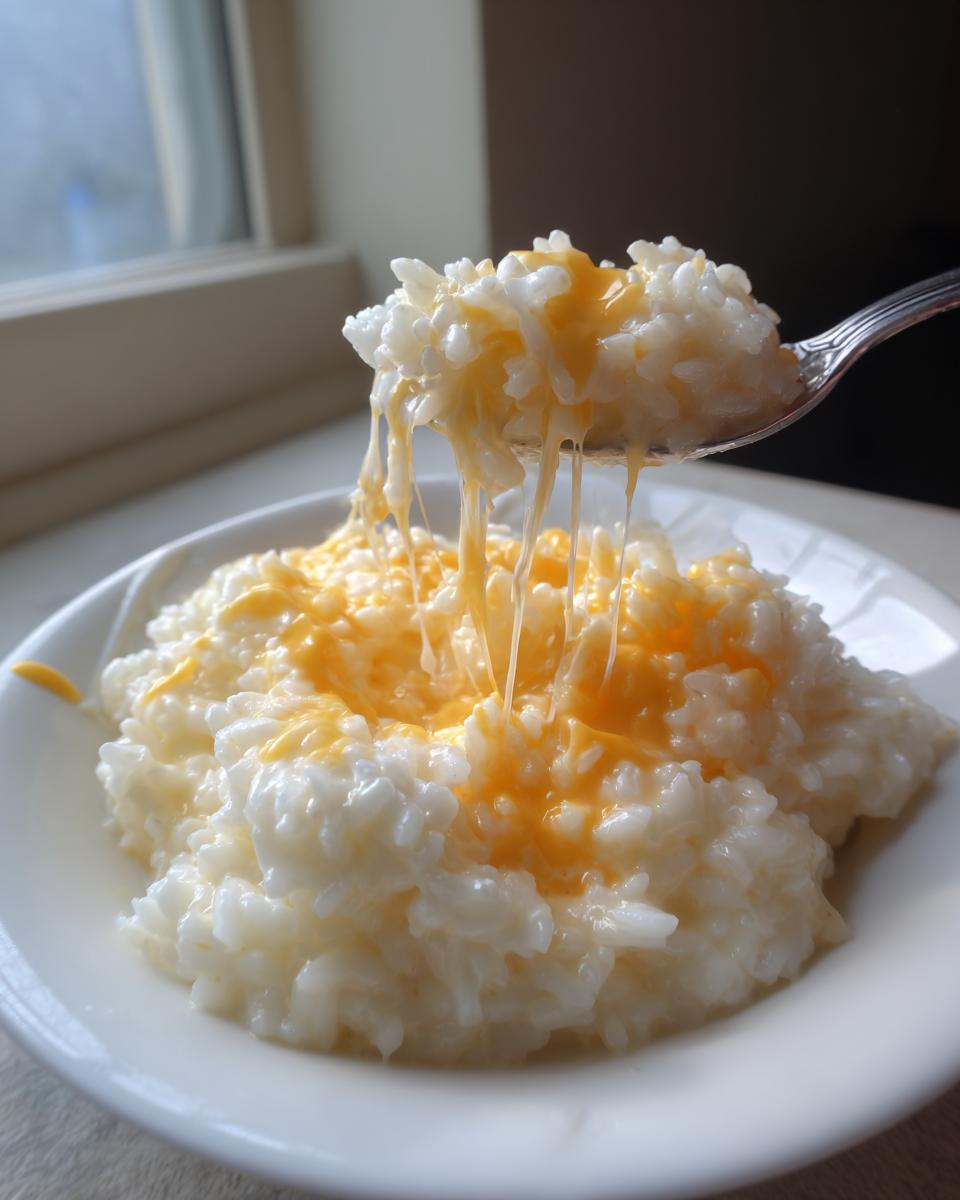
I know the feeling! Some nights you just desperately need that warm, familiar hug from your plate, but you’re out of time before you can even think about firing up the oven for a casserole. That’s exactly why I cracked the code on this stovetop cheesy rice. Forget dry, grainy rice; we are making ultra-creamy, gloriously gooey cheesy rice right on the burner in under 35 minutes. This is the Ultimate Comfort Food Side Dish you’ve been searching for. When I started MayaPlate, my goal was blending my nutrition knowledge with real-life speed, and this recipe proves you can have incredible flavor and texture without sacrificing your entire evening to the kitchen. Trust me, this is going to become your go-to!
If you’re looking for more quick meals that deliver on flavor, be sure to check out my guide on simple weeknight dinners!
- Why This Stovetop Cheesy Rice is the Ultimate Comfort Food Rice (E-E-A-T)
- Gather Ingredients for Your Creamy Cheesy Rice Recipe
- How to Make Cheesy Rice: Step-by-Step Stovetop Cheesy Rice Instructions
- Ingredient Notes and Substitutions for Cheesy Rice
- Serving Suggestions for Your Easy Cheesy Side Dish
- Storage and Reheating Instructions for Leftover Cheesy Rice
- Frequently Asked Questions About Making Cheesy Rice
- Nutritional Snapshot of This Cheesy Rice Side Dish
- Share Your Ultimate Cheesy Rice Side Dish Experience
Why This Stovetop Cheesy Rice is the Ultimate Comfort Food Rice (E-E-A-T)
When I talk about Comfort Food Rice, this is what I mean! It’s rich, it’s deeply satisfying, and the texture is everything. You get that gorgeous, gooey melt because we are finishing this on the stovetop, not in the oven. Honestly, that’s the secret to making the Ultimate Cheesy Rice Side quickly. Baking takes forever, and sometimes the rice dries out before the cheese even fully melts.
As I developed this recipe through the MayaPlate philosophy, speed was crucial. Why wait an hour when you can have this creamy side ready before your main course? This stovetop method is so much more practical for busy nights, giving you creamy perfection without the long bake time.
Quick Cheesy Rice for Weeknights in Under 35 Minutes
Let’s talk numbers because I know your time is precious. From the moment you walk into the kitchen to the moment it hits your plate, you are looking at just 35 minutes total. Seriously! The Prep Time is only 10 minutes—mostly just chopping that little bit of onion and grating the cheese. That means you can whip up this Quick Cheesy Rice for Weeknights while your chicken is finishing on the grill or your veggies are roasting. It’s efficiency without sacrificing that gooey, decadent texture we love.
You can check out my recipe for cheesy beef stuffed shells if you’re looking for another super fast, comforting win!
Gather Ingredients for Your Creamy Cheesy Rice Recipe
Okay, getting that perfect creamy, gooey cheese rice starts right here with the ingredients. I kept this list short and sweet because, remember, we want this cheesy rice recipe to be fast! You’ll need standard pantry items plus the key players that make it so rich.
Make sure you weigh or measure your cheese accurately; that’s where the magic happens for that ultimate melt factor. Don’t skimp on the sharp cheddar—it brings the necessary punch!
- 1 tablespoon butter
- 1/2 cup chopped onion
- 2 cloves garlic, minced
- 1 cup long-grain white rice, uncooked
- 2 cups chicken broth
- 1/2 teaspoon salt
- 1/4 teaspoon black pepper
- 1 cup shredded sharp cheddar cheese
- 1/2 cup shredded Monterey Jack cheese
- 1/4 cup cream cheese, cut into cubes
How to Make Cheesy Rice: Step-by-Step Stovetop Cheesy Rice Instructions
Now for the fun part! We are using the Stovetop Cheesy Rice method here, which is so much faster than baking, and it guarantees that luscious, creamy texture we are chasing. I’ve jotted down the timings exactly as I run them so you know when to step away from the pot—it’s important!
- First, grab your medium saucepan and melt that butter over medium heat. Toss in your chopped onion and let it cook down until it gets nice and soft, which usually takes about 4 minutes. Don’t rush this; softened onions build flavor!
- Next, add the minced garlic. Be careful here—garlic burns fast! We just want one minute until it smells amazing and fragrant.
- Time to toast the rice! Stir in the uncooked rice and keep stirring constantly for 2 full minutes. You want those edges to look a tiny bit translucent, that means you’re sealing in the starch so it doesn’t get mushy later.
- Pour in your chicken broth, salt, and pepper. Bring the whole thing up to a rolling boil.
- Once it’s boiling, immediately reduce that heat way down to low, cover it tight, and let it simmer for exactly 18 minutes. And here is rule number one: Do not lift that lid! I mean it!
- When the 18 minutes are up, take the pot OFF the heat. You still don’t lift the lid! Let it stand, completely covered, for 5 minutes. This resting period lets the steam finish cooking the grains perfectly.
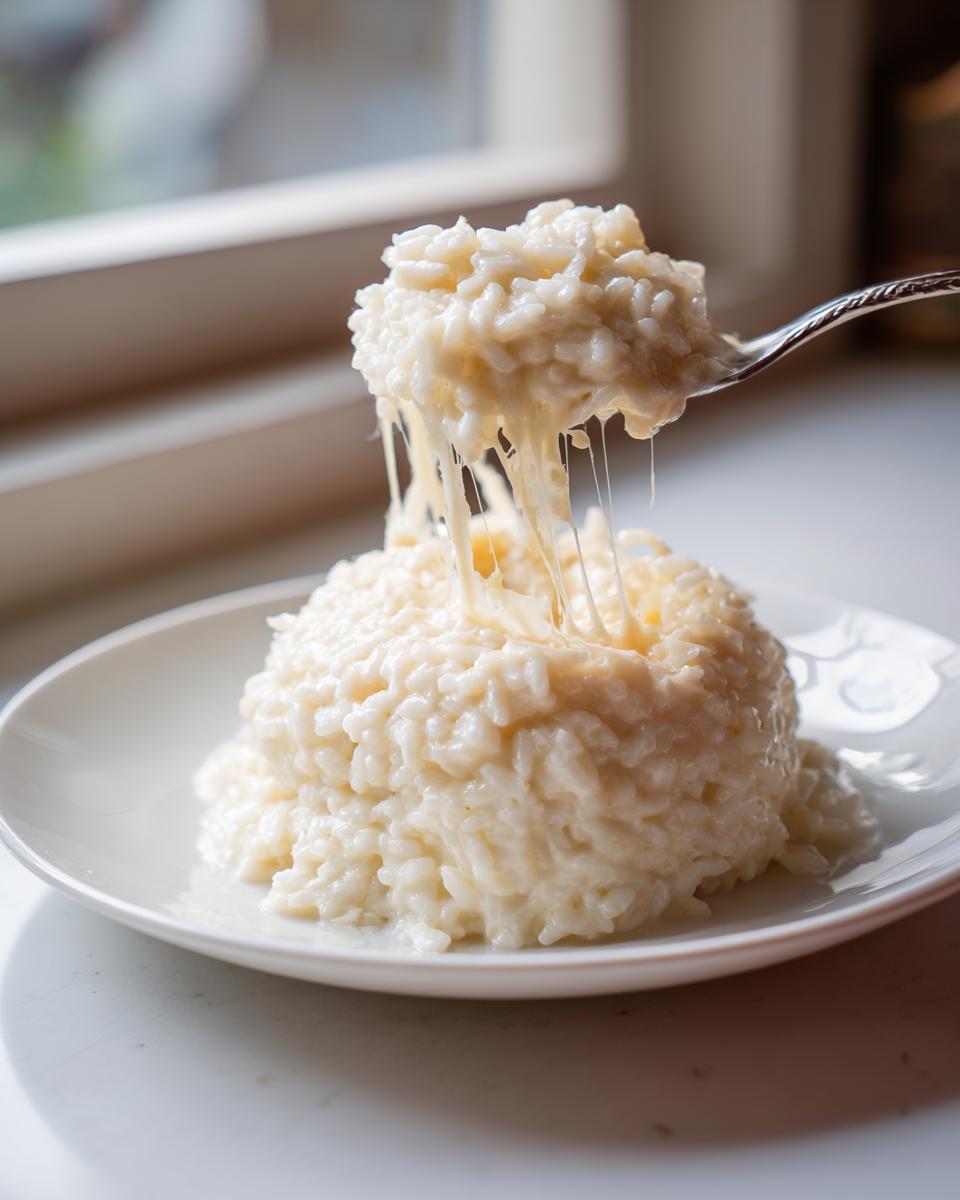
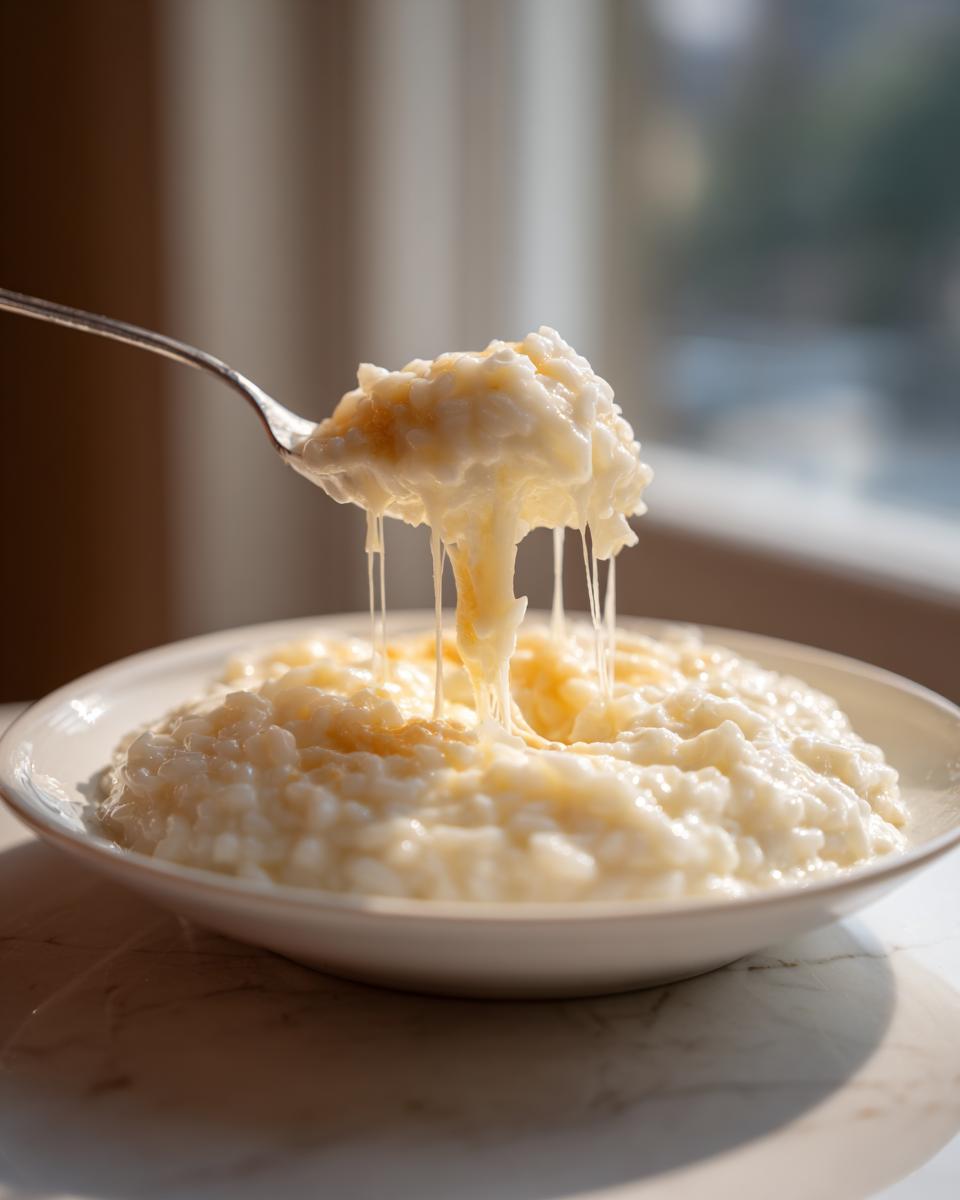
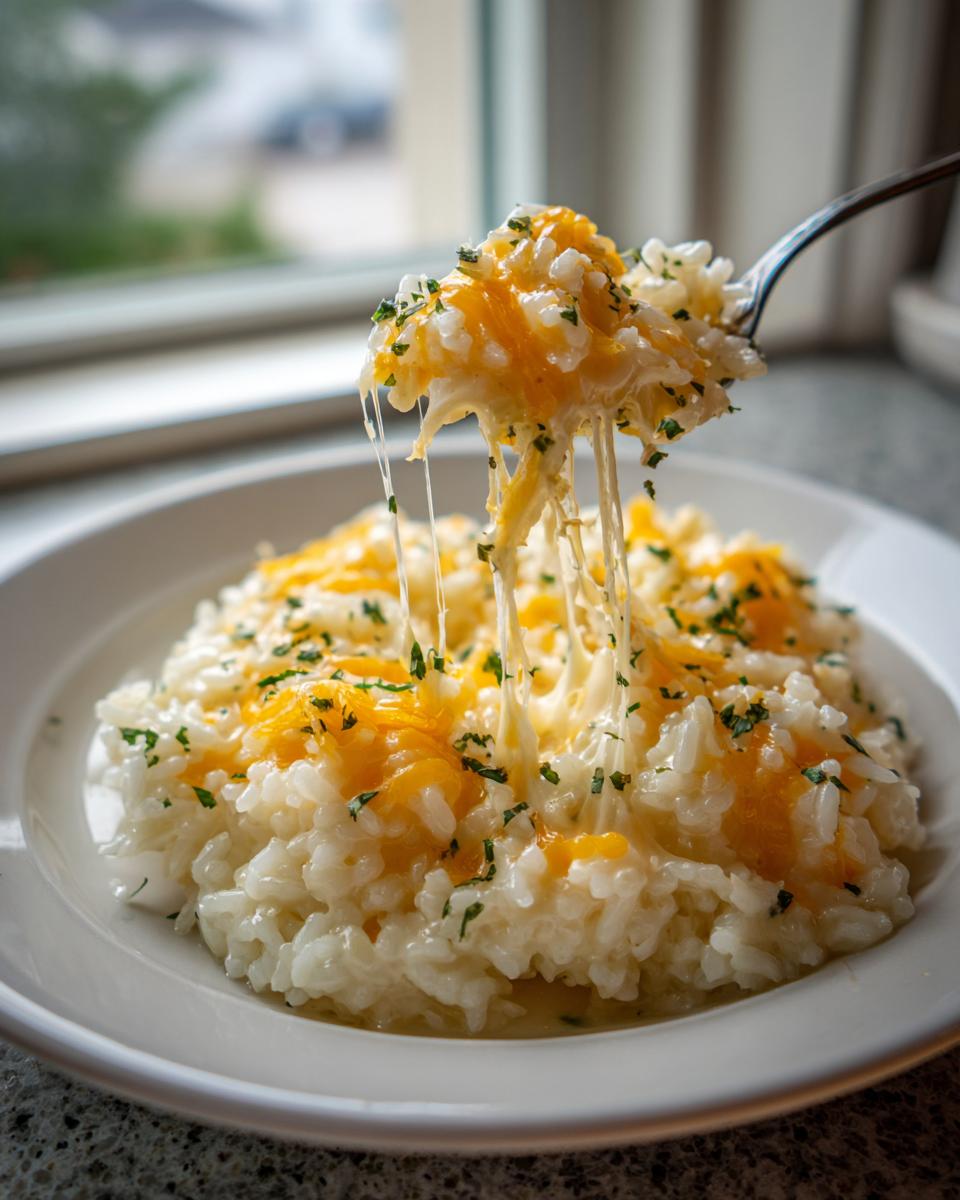
- Finally! Remove the lid. Dump in all those cheeses—the cheddar, the Jack, and those little cubes of cream cheese. Gently stir everything together until every grain of rice is coated in that gorgeous, melted shine. That’s how you get the best cheesy rice!
If you want to see a fantastic one-pot pasta that uses a similar technique to lock in creaminess, take a peek at my recipe for creamy pesto pasta.
For more creamy rice inspiration, check out this great recipe from a fellow food lover: Easy Creamy Cheesy Rice.
Expert Tips for Perfecting Your Cheesy Rice
Getting that incredible texture that makes people ask for the recipe comes down to a couple of small details. First, that cream cheese isn’t just for flavor; it’s pure stabilizer! It melts down and integrates with the broth to create a sauce that clings perfectly to every grain, preventing that watery look some rice dishes get. It really elevates the creaminess factor.
Second, please, please, please respect that resting time after simmering. If you stir right away, you mash the grains and lose that fluffy quality. Letting it sit covered off the heat lets the starches settle and absorb that last bit of steam. It’s patience, but it pays off big time for that perfect texture.
Ingredient Notes and Substitutions for Cheesy Rice
Understanding what each ingredient brings to the table really helps when you want to customize this cheesy rice! That sharp cheddar? It’s non-negotiable for me because it has that amazing flavor punch that cuts through the richness. If you just use mild cheese, you end up with bland goo, and we definitely don’t want that bland situation!
The real game-changer here, and why we get that incredibly smooth consistency, is the cream cheese. It acts as an emulsifier, keeping the sauce from breaking apart as it cools. It melts down into the broth and makes the final dish so delightfully decadent. If you love the idea of using cream cheese as a base but want to try something different next time, you might enjoy my cream cheese corn casserole!
Now, about swapping things out. If you don’t have enough chicken broth on hand—oops!—substituting half of it with whole milk works wonders for making the dish even richer. Just make sure you are still respecting the simmer time, even with the lower liquid heat.
Also, remember the note about Parmesan? If you want a little extra sharpness, swap out about 1/4 cup of that cheddar for some grated Parmesan. It adds a salty, nutty depth that pairs beautifully with the cheddar and Jack. This lets you tweak the flavor profile while keeping the texture perfect for a creamy cheesy rice recipe.
Serving Suggestions for Your Easy Cheesy Side Dish
This Easy Cheesy Side Dish is incredibly versatile, which I love because it means less planning for me! While it’s utterly perfect as a comforting side, you can easily turn it into a quick, satisfying meal. I often pair a generous scoop of this creamy rice with simple grilled chicken breasts. It’s honestly a five-minute dinner solution!
If you’re having a vegetarian night, it loves roasted vegetables. Broccoli—naturally!—but roasted carrots or crispy Brussels sprouts are amazing tossed right into the warm rice at the end. It’s hearty enough to stand on its own, but it really shines next to something savory. Check out my tips for quick, healthy lunch ideas if you want to use leftovers for lunch the next day!
Storage and Reheating Instructions for Leftover Cheesy Rice
The best thing about this cheesy rice recipe? The leftovers are almost as good as the first batch—if you handle them right! We really need to protect that creamy texture, or you end up with a sad, dense brick the next day. So, here’s my tried-and-true method.
Once it cools down a bit, transfer any leftover rice immediately into an airtight container. I try to get it into the fridge within two hours. It’ll keep nicely for about three days if you seal it up snug. Don’t just leave it uncovered on the counter, please!
When it’s time to reheat, this is where many people go wrong! If you microwave it plain, it turns into concrete. You have to introduce moisture back in. I always put the portion I’m eating into a microwave-safe bowl and stir in a little splash—maybe a tablespoon or two—of milk or chicken broth before heating it up.
Microwave in short bursts, stirring every 30 seconds. That added liquid turns the starch back into a creamy sauce as it warms, making it just as luscious as when it first came off the stove. It works like magic to restore that fresh, creamy cheesy rice feel!
Frequently Asked Questions About Making Cheesy Rice
I know you probably have a few questions rattling around, because when you find a great cheesy rice recipe, you want to make sure you can customize it for your family! Dealing with different rice types or adding veggies is super common. I’ve answered the usual suspects below so you can confidently make this dish your own. If you’re looking for more quick ideas while dinner simmers, check out some ideas for easy breakfast ideas!
Can I use different cheese types in this cheesy rice?
Absolutely! While I swear by the sharp cheddar for flavor balance, this is a fantastic place to experiment with melting cheeses. If you want a funkier flavor, you could certainly try Gruyère! Colby Jack is another winner if you prefer a milder, extremely gooey result—it melts beautifully. Remember what I mentioned earlier about Parmesan? Swapping about 1/4 cup of the Cheddar for Parmesan gives you that salty kick without changing the overall creaminess too much. Go for it!
Is this recipe kid friendly cheesy rice?
Oh, yes, this is the definition of kid friendly cheesy rice! It is soft, mild, and super comforting—exactly what picky little eaters usually flock to. The only thing parents sometimes change is omitting the black pepper entirely for the very young ones, as they can be sensitive to spice. But honestly, the flavor of the cheese and the creamy texture usually wins them over instantly. It’s a great way to sneak in some extra broth/dairy!
What happens if I need to use brown rice instead of white rice?
That’s a common query! If you want to make this a healthier side, you definitely can use brown rice, but you must adjust your expectations and your timing. Brown rice takes much longer to cook and needs more liquid, so you won’t get that 35-minute timeframe. You’ll need to simmer it for closer to 40-45 minutes, and you’ll probably need an extra splash of broth. You might also want to add an extra cube of cream cheese at the end to ensure that texture stays extra creamy.
Can this cheesy rice be made ahead of time for a potluck?
Yes, this is a fantastic cheesy rice potluck idea, but you need to plan for the reheat! It’s best prepared fresh, but if you need to make it ahead, cook the rice and broth steps completely, but stop *before* adding the cheeses. Cool the rice mixture completely and store it airtight. When you are ready to serve at the potluck, gently reheat it on the stove with a splash of milk or broth, and then stir in all your cheeses until fully melted and gooey. It’s the best method for serving this as an easy cheesy side dish later on!
Nutritional Snapshot of This Cheesy Rice Side Dish
Look, I’m Maya, and I have a background in nutrition, which means I totally believe in tracking what you eat! However, when we are making ultimate comfort food like this glorious cheesy rice, we need to keep things simple in the breakdown.
Since every brand of broth, every type of cheddar, and even how tightly you pack that cup of rice is going to change the final count, I’ve kept the specific nutritional details to general estimates. What I can tell you is that because we are using whole ingredients and plenty of cheese and broth, this is definitely a richer side dish than plain steamed rice!
Please consider this data only an estimation based on standard ingredient conversions for a single serving. If you are strictly tracking macros or sodium for medical reasons, you’ll want to plug the exact brands you use into your favorite tracking app for the most accurate reading. But for our purposes here, let’s focus on the flavor!
Share Your Ultimate Cheesy Rice Side Dish Experience
I poured my heart into making this the best, quickest, and creamiest cheesy rice out there for you. Now, I need to know how it turned out at your table!
Did this Ultimate Cheesy Rice Side Dish save your weeknight dinner stress? Did it disappear the second you set it down? That’s what I love to hear!
Please leave a star rating right below this section. Seriously, those ratings help other busy cooks find this recipe fast. I read every single one!
And don’t keep your genius pairings to yourself! What incredible main dish did you serve alongside this easy cheesy side dish? Did you stick to grilled chicken, or did you try something totally unexpected?
Tell me all about it in the comments below. If you need to reach out directly about substitutions or have general questions, you can always find my contact form here: Get in Touch with Maya.
Happy cooking, everyone!
PrintEasy Stovetop Creamy Cheesy Rice: The Ultimate Comfort Side Dish

Make this rich, creamy, and gooey cheesy rice on the stovetop in under 35 minutes. This recipe is a simple, satisfying comfort food side dish perfect for busy weeknights or potlucks.
- Prep Time: 10 min
- Cook Time: 25 min
- Total Time: 35 min
- Yield: 4 servings 1x
- Category: Side Dish
- Method: Stovetop
- Cuisine: American
- Diet: Vegetarian
Ingredients
- 1 tablespoon butter
- 1/2 cup chopped onion
- 2 cloves garlic, minced
- 1 cup long-grain white rice, uncooked
- 2 cups chicken broth
- 1/2 teaspoon salt
- 1/4 teaspoon black pepper
- 1 cup shredded sharp cheddar cheese
- 1/2 cup shredded Monterey Jack cheese
- 1/4 cup cream cheese, cut into cubes
Instructions
- Melt the butter in a medium saucepan over medium heat. Add the chopped onion and cook until softened, about 4 minutes.
- Add the minced garlic and cook for 1 minute until fragrant.
- Stir in the uncooked rice and cook for 2 minutes, stirring constantly, until the edges of the grains look slightly translucent.
- Pour in the chicken broth, salt, and pepper. Bring the mixture to a boil.
- Once boiling, reduce the heat to low, cover the saucepan tightly, and simmer for 18 minutes without lifting the lid.
- Remove the saucepan from the heat and let it stand, covered, for 5 minutes. Do not lift the lid during this resting period.
- Remove the lid. Add the shredded cheddar cheese, Monterey Jack cheese, and cubed cream cheese to the rice.
- Stir gently until all the cheese is melted and the rice is creamy and coated. Serve warm immediately.
Notes
- For a richer flavor, substitute half of the chicken broth with whole milk.
- If you want a tangier flavor, substitute 1/4 cup of the cheddar cheese with grated Parmesan cheese.
- This dish pairs well with grilled chicken or roasted vegetables for a complete meal.
Nutrition
- Serving Size: 1 cup cooked
- Calories: 410
- Sugar: 2
- Sodium: 650
- Fat: 20
- Saturated Fat: 12
- Unsaturated Fat: 8
- Trans Fat: 0.5
- Carbohydrates: 45
- Fiber: 1
- Protein: 14
- Cholesterol: 55