
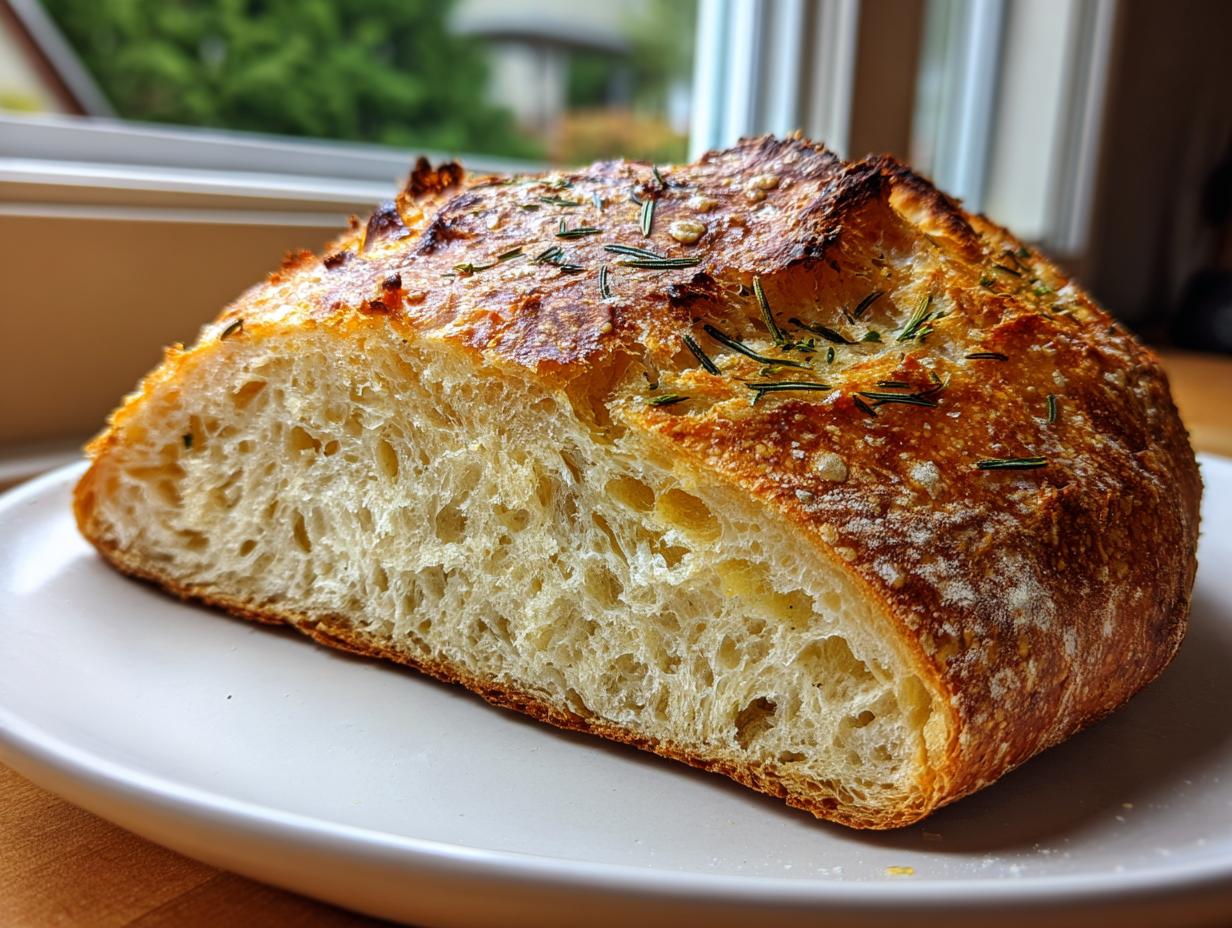
If you’ve ever walked into a bakery, inhaled that incredible aroma, and thought, “I wish I could have that moment every morning,” then I have fantastic news for you. You absolutely, positively can! We all crave that high-quality, soulful food, even when life is moving at a million miles an hour. That’s why I developed this specific **artisan bread** that doesn’t ask you to slave over the counter. This is my go-to, ridiculously easy **no-knead bread** recipe. Seriously, the technique is so simple, it feels like cheating! We’re using time, not muscle, to develop incredible flavor. Forget kneading until your arms ache; this loaf requires almost zero effort but gives you that deeply satisfying, naturally flavored, **crusty homemade bread** texture that makes any meal feel special. It’s about bringing bakery joy right into your weeknight routine! If you love this simple approach, you might want to check out my guide on easy French bread baking too.
- Why This No Knead Artisan Bread Recipe Works for Busy Home Cooks
- Gathering Ingredients for Your Simple Artisan Loaf
- Step-by-Step Guide to No Knead Bread Baking
- Tips for Success in Artisan Bread Baking
- Artisan Bread Variations: Flavor Twists
- Serving Suggestions for Your Rustic Loaf Recipe
- Storage and Reheating Instructions for Homemade Bread with Crispy Crust
- Frequently Asked Questions About Easy Artisan Bread Recipe
- Nutritional Estimates for This Simple Artisan Loaf
Why This No Knead Artisan Bread Recipe Works for Busy Home Cooks
I get it—you want amazing quality bread, but you don’t have an hour to dedicate to manual labor. That’s the beauty of this method! It completely flips the script on traditional baking. We are leaning heavily on time to do all the hard work for us, which means you only spend about ten minutes of active time to get a masterpiece.
- We rely on just four core components to make this **Simple Four Ingredient Bread** base shine.
- The process is foolproof, making it perfect for any **Beginner Bread Baking Guide** collection.
- It delivers that deep, complex flavor you usually only find in professional bakeries.
It’s practical, it’s nourishing, and honestly, watching the dough bloom overnight is just so satisfying! If you’re looking to keep your weeknight meals simple and delicious, be sure to check out my simple weeknight dinner ideas as well.
Achieving that Perfect Crusty Homemade Bread Texture
The secret sauce here is twofold: the long, slow fermentation and the steam. When you let that dough rest for 12 to 18 hours, the yeast works slowly, developing those wonderful complex flavors and creating air pockets. Then, when you bake it inside a preheated Dutch Oven, that trapped heat and steam is pure magic. That steam keeps the exterior soft just long enough for the bread to climb beautifully, and when you take the lid off, BAM! You get that shatteringly crisp, **Homemade Bread with Crispy Crust** every single time.
Gathering Ingredients for Your Simple Artisan Loaf
Okay, I want you to look at this ingredient list and try not to panic. That’s the beauty of this method—it’s so beautifully basic! We are truly sticking to that **Simple Four Ingredient Bread** concept, plus a little bit of fresh flavor to make it sing. You don’t need any fancy starters or specialty flours here; we’re proving that you can achieve a magnificent **artisan bread** using things you probably already have in your pantry. Trust me, the results you get from this short list are miles ahead of what you’d expect!
When you’re going for a **crusty homemade bread**, the quality of even these few items counts. I like to be super specific about what I use, just so you get the same crackly exterior and soft inside I do:
- Three cups of good old All-Purpose Flour. No need to sift, just measure it right!
- One and a half teaspoons of regular Salt—this is for the dough itself.
- Just a tiny whisper of Instant Yeast—only 1/4 teaspoon. Don’t let anyone tell you bread needs a mountain of yeast; this slow ferment takes care of everything.
- One and a half cups of Cool Water. Yep, cool, not warm! This controls the fermentation speed perfectly.
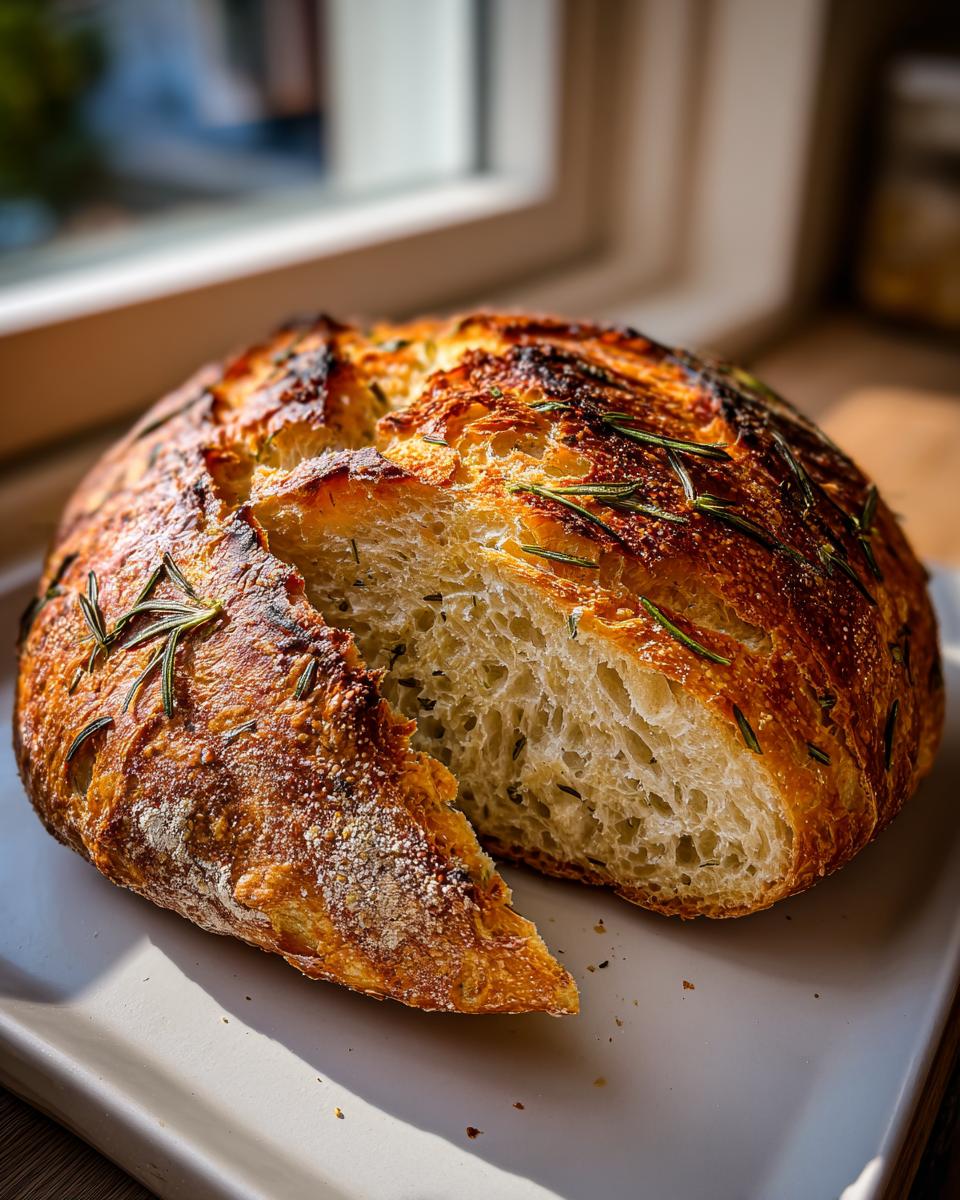
- Now for the flavor pop: a full tablespoon of Fresh Rosemary, chopped fine. That woodsy aroma is what makes this loaf feel so rustic.
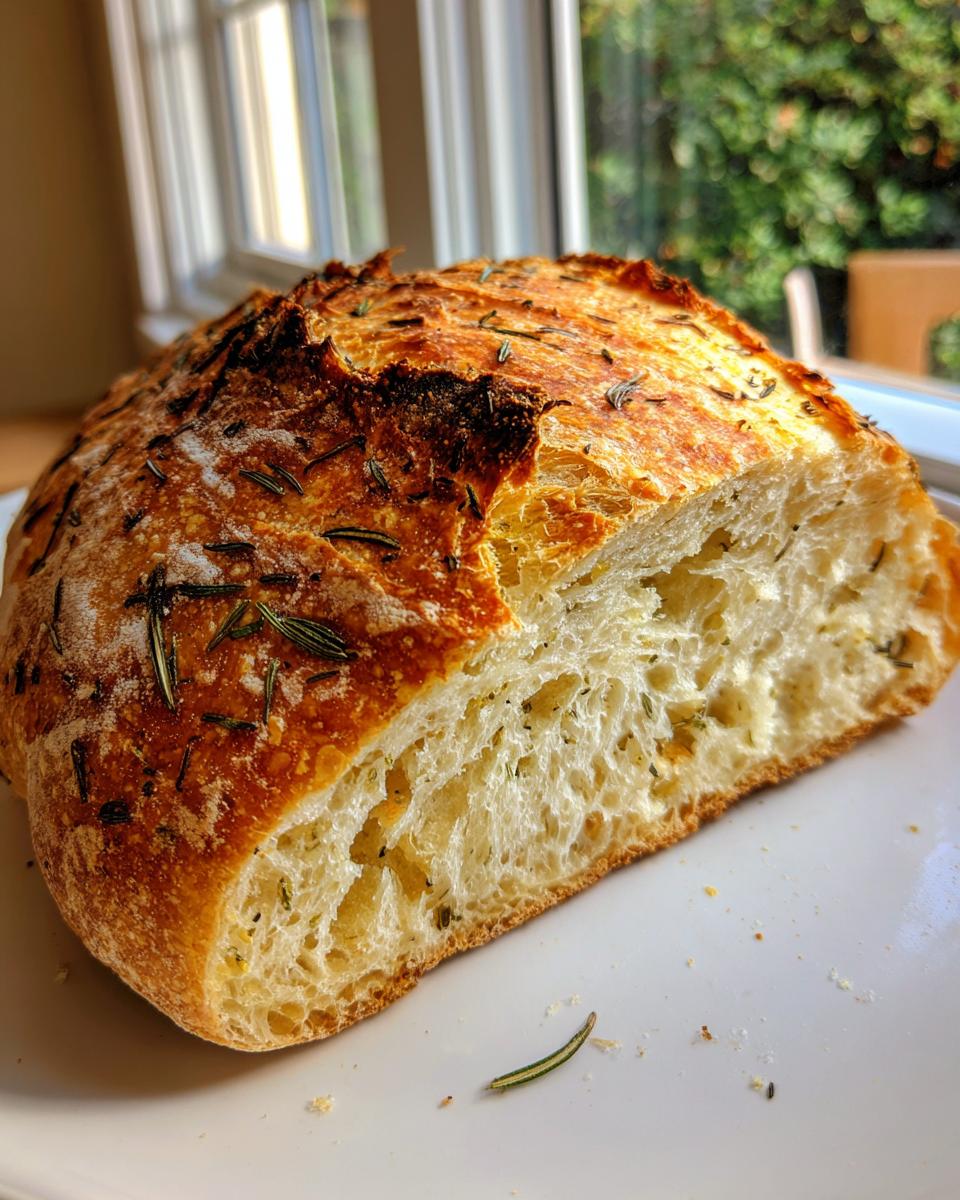
- And finally, for the topping, one teaspoon of Coarse Sea Salt. That texture on top is going to look and taste professionally done!
That’s it! Flour, salt, yeast, water, rosemary, and sea salt. See? So simple! If you’re planning to bake this early in the morning, maybe prep your dough the night before, or try out some of my easy breakfast ideas while you wait for the magic to happen!
Step-by-Step Guide to No Knead Bread Baking
Alright, this is where we prove that you don’t need to be a professional baker to make a phenomenal **artisan bread**. This entire process is about patience and simplicity—you just have to mix it and forget it until tomorrow! Follow these steps closely, especially when it comes to the timing, and you’ll have that perfect **Bakery Style Loaf At Home** without breaking a sweat.
Mixing the Dough and Long Rest Period
First things first: grab a big bowl. Whisk together your flour, salt, and instant yeast until they’re just happy together. Then, toss in the cool water and all that chopped fresh rosemary. Now, listen closely: Mix it with a wooden spoon until everything is just combined. I mean it—it will look shaggy, sticky, and a little messy. That’s the point! Do not knead this dough; we want to avoid developing the gluten too much now. Once it’s mixed, cover it up tight with plastic wrap. Now, this is the most important step for developing that deep **artisan bread** flavor: let it sit on your counter at room temperature for 12 to 18 hours. It’s going to puff up and get bubbly. Seriously, walk away!
Preheating and Transferring Dough for Dutch Oven Bread
About 30 minutes before your long rest time is up, it’s time to get serious about the heat. Place your Dutch oven, lid and all, right into the oven and crank that temperature up to 450°F (232°C). This pot needs to get screaming hot! While that’s happening, gently scrape your bubbly dough out onto a piece of parchment paper. It will be sticky—don’t fight it! Use that parchment paper as a sling to carefully lower the entire sticky mess right into your scorching hot Dutch oven. Don’t touch the pot directly! Sprinkle that coarse sea salt right over the top of the dough, and then quickly pop the lid back on.
Baking Your Bakery Style Loaf At Home
Now for the beautiful browning! Place the covered Dutch oven back in the oven and bake it for 30 minutes. This trapped heat is what creates steam and gives you that gorgeous rise. After 30 minutes, carefully take the lid off. You’ll see the bread is pale but fully inflated. Continue baking uncovered for another 15 to 20 minutes, watching until that crust turns a deep, beautiful golden brown. That golden color equals that **crusty homemade bread** you are dreaming of. The absolute hardest part is next: you must let it cool completely on a wire rack before slicing. Cutting it hot traps the steam inside and makes the crumb gummy. If you need a little something while you wait, maybe whip up my easy creamy pickle dip to snack on!

Tips for Success in Artisan Bread Baking
I know that for some of you, pulling that super-hot Dutch oven out of the oven feels a little dramatic—and honestly, it is! But don’t let that intimidate you if you’re new to **no knead bread baking**. Success in this simple **artisan bread** recipe really comes down to a few tiny details I learned through trial (and a few scorched counter tops!).
First, let’s talk about the water temperature again. I stress cool water for a reason. Because we are using instant yeast and letting the dough hang out for so long (12 to 18 hours!), using very warm water can make your dough overproof before you’re ready. We want a slow, controlled flavor build, not a spontaneous yeast explosion! So, grab water that feels like it’s just sitting on the counter, not water from the tap that’s been sitting in a hot dish. It keeps everything mellow until the long rest period starts.
When you handle the dough the next day, remember this: it’s supposed to be sticky. It’s not French bread dough; it’s a very wet, slack dough. Resist the urge to add more flour just to make it manageable! If you add flour, you’ll weigh it down, and you won’t get that airy, open interior we want in a perfect **Bakery Style Loaf At Home**. Just use a generous sheet of parchment paper underneath it. Think of the paper as your non-stick baking glove.
Now, what if you absolutely do not own a Dutch oven? Don’t let that stop you from making this fantastic **crusty homemade bread**! We need two things for a good crust: high heat and steam. If you don’t have the pot, you can bake this on a preheated pizza stone or even just a sturdy baking sheet. The trick is the steam. Take a shallow, oven-safe pan (like a metal pie plate) and place it on the bottom rack while your oven preheats. When you slide your loaf onto the hot surface, quickly pour about a cup of hot water into that bottom pan and immediately shut the door. That burst of steam mimics the Dutch oven environment and helps you get that gorgeous, crackly shell on your **simple artisan loaf**! Pair it with my easy garlic aioli for dipping when you pull it out!
Artisan Bread Variations: Flavor Twists
One of the absolute best things about mastering this basic **artisan bread** technique using the no-knead method is how incredibly versatile it is! Since the base recipe only uses four ingredients plus the fresh rosemary, we have tons of room to play around and make this loaf fit whatever mood you’re in. Don’t feel locked into just the rosemary—this dough is a wonderful canvas!
Think about what you’re serving it with. If you’re making a big bowl of pasta tonight, why not bump up the savory factor? You can easily swap that fresh rosemary for half a cup of grated Parmesan cheese mixed right in with the flour, and maybe toss in a teaspoon of garlic powder while you’re at it. That gives you an amazing Parmesan Garlic version that’s perfect dipped in my garlic parmesan roasted green beans.
If you want something a little more Mediterranean or robust for making sandwiches, try my favorite Italian blend. Fold in about two tablespoons of a dried Italian herb mix—oregano, basil, thyme, the works—and maybe half a cup of shredded mozzarella. It gets beautiful pockets of cheese scattered throughout the crumb. It’s amazing how much depth you can add to a ridiculously easy **artisan bread recipe**!
If you’re looking for even more inspiration on that cheesy front, I saw a gorgeous recipe for a dedicated Parmesan Garlic loaf over at Crave Recipes that might give you some fun ideas for your next batch of dough. The point is, once you conquer the basic technique, you are in control of dinner!
Serving Suggestions for Your Rustic Loaf Recipe
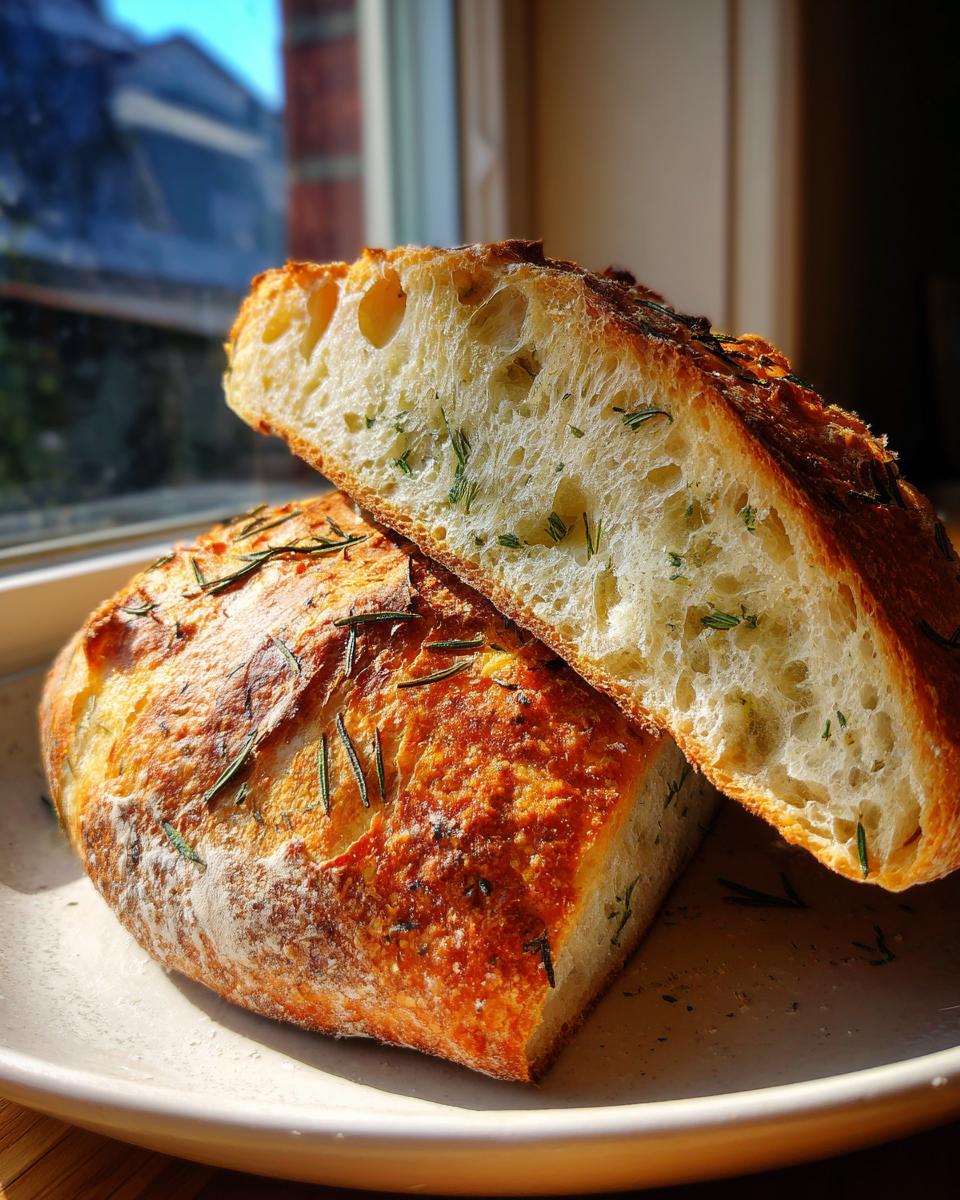
Now that you have this gorgeous, **crusty homemade bread** cooling on the rack—and believe me, the smell alone is probably making you dizzy—the absolute hardest part is waiting until it’s completely cool before slicing! I know, I know, but slicing it warm ruins that beautiful airy structure we worked so hard to achieve with the long fermentation. Once it’s ready, though, this **rustic loaf recipe** is ready for anything!
At MayaPlate, we believe bread should elevate a simple meal into something comforting and wholesome, which is why this Rosemary Sea Salt loaf pairs so perfectly with soups. Forget fancy side dishes; this bread is the meal! My absolute favorite pairing is dipping big hunks of this loaf straight into a big bowl of my creamy roasted basil tomato bisque. The savory rosemary and salt cut right through the richness of the soup so beautifully.
But it doesn’t have to be complicated! Honestly, the best way to enjoy this **easy artisan bread recipe** is the simplest way. I tend to keep some good quality butter softened and ready. A thick slice, toasted just lightly, with real butter melting into all those tiny holes is heaven for breakfast or a quick snack.
If you’re having friends over and want something quick for appetizers, tear chunks off the loaf and serve it alongside a big platter of cold cuts and cheeses, or just set it out with a small bowl of really good olive oil mixed with a tiny splash of balsamic vinegar for dipping. That rosemary just sings when it meets the oil. It’s simple, it’s real food, and it brings that joy back to the table, exactly how Grandma would have done it!
Storage and Reheating Instructions for Homemade Bread with Crispy Crust
You’ve done the hard part—the long rest, the waiting, the glorious bake! Now we have to talk about keeping this absolute gem of **artisan bread** fresh. That incredible, shatteringly crisp crust we worked so hard for tends to soften up once it sits, especially if you store it incorrectly. Nobody wants a soft crust on their **Homemade Bread with Crispy Crust**, right? I have a couple of tricks that help preserve that bakery quality for as long as possible.
First rule for storage: Do NOT put this bread into an airtight plastic bag right away! I know it seems like the sensible thing to do to keep it “fresh,” but plastic traps moisture released by the cooling bread, and that moisture is the sworn enemy of a crispy crust. When the crust gets moist, it gets tough and leathery, and we definitely don’t want that.
For the first day, I highly recommend letting the remaining loaf cool completely, and then storing it cut-side down on a cutting board, covered loosely with a clean kitchen towel. This protects the top from dust but allows air exchange so the crust can breathe. Honestly, the best way to enjoy this **no knead bread** is usually within 12 hours of baking!
Refreshing Your Loaf for Day Two
If you make it to Day Two and the outside isn’t quite as crackly as it was yesterday, don’t panic or toss it! You can absolutely revive that texture. The key is to reintroduce dry heat, which evaporates that excess moisture that softened the crust. I use my oven for this, and it works like a charm.
Preheat your oven (or toaster oven, if you have a smaller piece left) to about 350°F (175°C). Take your cooled loaf, slice off what you need, and place the slices directly onto a baking sheet. Bake them for just 5 to 7 minutes. You’ll hear it start to sizzle a little! When you pull them out, that crispiness should be mostly restored, making it perfect for dipping or spreading butter on. Just make sure you let it cool for a minute or two before spreading anything, or it will melt right away!
If you want some ideas for using up stale bread slices—because sometimes, even with reheating, bread goes a bit past its prime—you might want to look at my recipe for moist date nut bread, as you can turn sturdy slices into delicious bread pudding!
Frequently Asked Questions About Easy Artisan Bread Recipe
I knew you’d have questions! When you’re diving into **artisan bread baking**, especially using a completely hands-off method like this, it’s natural to wonder about the details. I always want you to feel confident walking into the kitchen, so here are the things I get asked most often about making this **Easy Artisan Bread Recipe** shine.
Can I use Active Dry Yeast instead of Instant Yeast for this artisan bread?
That is such a common question, and yes, you totally can, but we need to treat it a little differently since this is a **no knead baking** recipe. Instant yeast is designed to be mixed right in with the dry ingredients because it’s quite resilient. Active dry yeast, though, usually needs to wake up first. If you use Active Dry, you need to proof it! Mix your 1/4 teaspoon of yeast with about 1/4 cup of the *lukewarm* water (not cool!) and a tiny pinch of sugar, let it sit for about 5 to 10 minutes until it gets foamy, and then add that foamy mixture to your flour, along with the rest of the cool water. It’s an extra step, but it makes sure your yeast is alive and kicking before the long rest. For true simplicity, I always recommend keeping instant yeast on hand for this style of **yeast bread recipe easy** application!
What is the secret to the soft interior in this No Knead Crusty Bread?
This is the best part—it’s science making you look like a genius! The secret lies in two places working together to give you that perfect **Bakery Style Loaf At Home**. First, the long, slow fermentation period (the 12–18 hours) allows the yeast to slowly produce carbon dioxide bubbles, creating large, irregular pockets of air within the dough. This creates the soft, open interior structure. Second, the steam created by baking inside the preheated Dutch Oven is crucial. The moist heat keeps the outside surface pliable while the interior cooks through. When you remove the lid later in the bake, the dry heat hits that surface and immediately creates that beautiful, crackly **crusty homemade bread** shell.
If you want to see another highly respected source on this technique, check out the great advice over at RecipeTin Eats on their take on no knead baking. It really confirms why this method is so beloved!
I hope that clears things up! If you ever want to read more about the MayaPlate philosophy and why we focus on simple, wholesome food, you can always check out my About page.
Nutritional Estimates for This Simple Artisan Loaf
I always believe in knowing what’s on your plate, even with bread! Since we are focusing on keeping this **artisan bread** wonderfully simple and wholesome—using just basic flour, water, yeast, and salt, plus a tiny bit of rosemary—the nutrition profile is pretty clean. It’s certainly a better choice than many store-bought loaves crammed with preservatives!
Here are the estimated values per slice. Remember, since bread recipes can vary slightly based on humidity, oven temperature, and the exact flour you use, these are my best approximations, serving as a general guide for this **simple artisan loaf**:
- Serving Size: 1 slice
- Calories: 180
- Sugar: 0.5g
- Sodium: 350mg
- Total Fat: 0.5g
- Saturated Fat: 0.1g
- Carbohydrates: 38g
- Fiber: 1.5g
- Protein: 6g
As you can see, this **no knead bread baking** method results in a loaf that is low in fat and sugar, while offering a decent hit of protein and fiber for a bread. It really fits perfectly into the kind of nourishment I aim for here at MayaPlate—quality ingredients that fuel you up without weighing you down. If you’re looking for other quick, healthy options, check out my ideas for quick healthy lunch ideas!
PrintEasy No-Knead Artisan Bread with Rosemary and Sea Salt
Bake bakery-style artisan bread at home with this simple, no-knead recipe. You achieve a wonderfully crusty exterior and a soft interior using just four basic ingredients. This recipe is perfect for beginner bread baking.
- Prep Time: 10 min
- Cook Time: 50 min
- Total Time: 13 hours 0 min
- Yield: 1 loaf 1x
- Category: Baking
- Method: No Knead Baking
- Cuisine: American
- Diet: Vegetarian
Ingredients
- 3 cups All-Purpose Flour
- 1 1/2 teaspoons Salt
- 1/4 teaspoon Instant Yeast
- 1 1/2 cups Cool Water
- 1 tablespoon Fresh Rosemary, chopped
- 1 teaspoon Coarse Sea Salt, for topping
Instructions
- In a large bowl, whisk together the flour, 1 1/2 teaspoons of salt, and instant yeast.
- Add the cool water and the chopped fresh rosemary to the dry ingredients. Mix with a wooden spoon until just combined into a shaggy dough. Do not overmix or knead.
- Cover the bowl tightly with plastic wrap and let the dough rest at room temperature for 12 to 18 hours. The dough will become bubbly and increase in volume.
- About 30 minutes before baking, place a 5 to 6-quart Dutch oven, with its lid, into your oven. Preheat the oven to 450°F (232°C).
- Carefully remove the hot Dutch oven from the oven. Gently scrape the dough out of the bowl onto a piece of parchment paper. The dough will be sticky.
- Using the parchment paper as a sling, carefully lower the dough into the hot Dutch oven. Sprinkle the top of the dough with the coarse sea salt.
- Cover the Dutch oven with the lid and return it to the oven. Bake for 30 minutes.
- Remove the lid and continue baking for another 15 to 20 minutes, or until the crust is deep golden brown.
- Carefully remove the bread from the Dutch oven and let it cool completely on a wire rack before slicing.
Notes
- Using cool water helps control the long fermentation, which develops the flavor.
- If you do not have a Dutch oven, you can bake this on a baking stone, but place a pan of hot water on the bottom rack to create steam for a crispier crust.
- This recipe uses the four-ingredient method for simple artisan loaf success.
Nutrition
- Serving Size: 1 slice
- Calories: 180
- Sugar: 0.5
- Sodium: 350
- Fat: 0.5
- Saturated Fat: 0.1
- Unsaturated Fat: 0.4
- Trans Fat: 0
- Carbohydrates: 38
- Fiber: 1.5
- Protein: 6
- Cholesterol: 0