
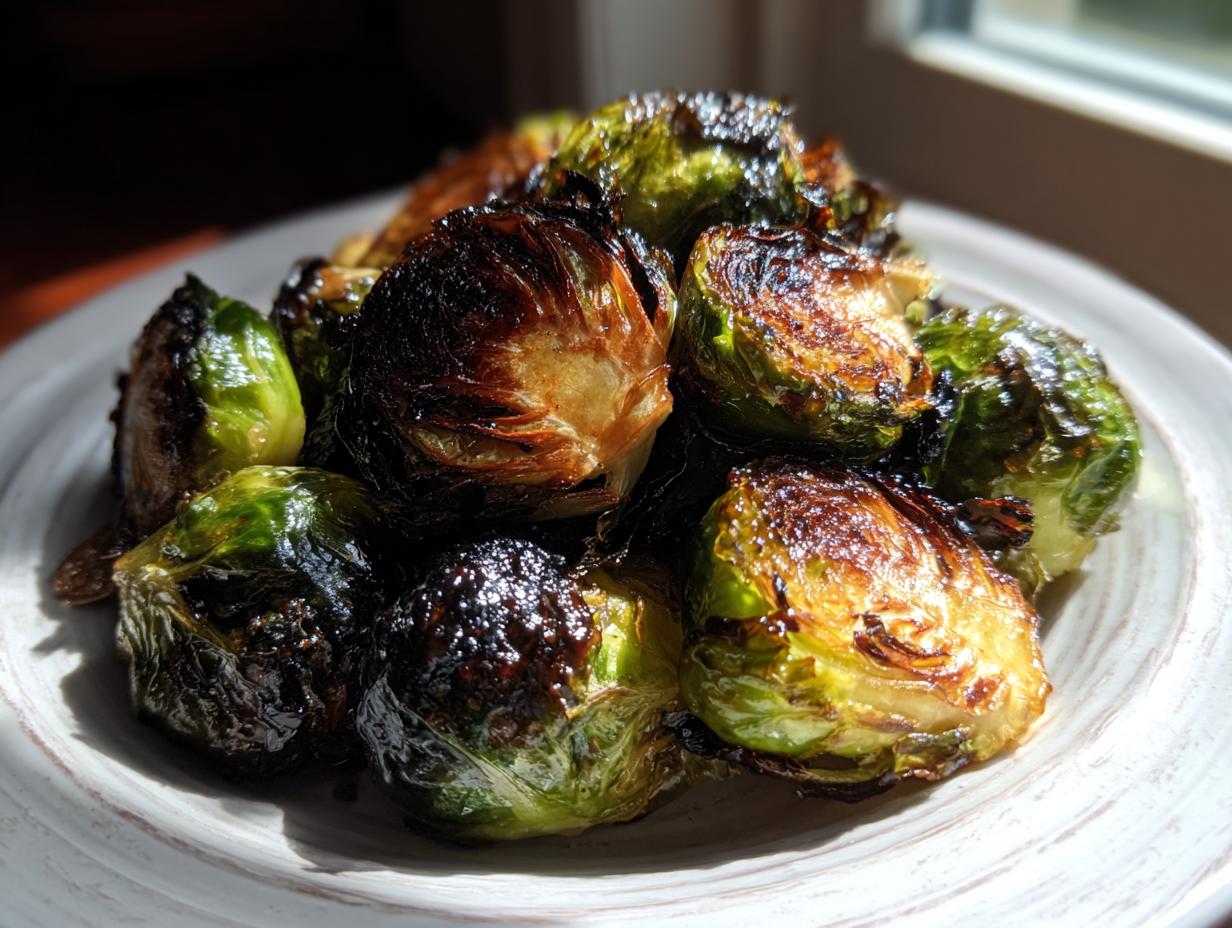
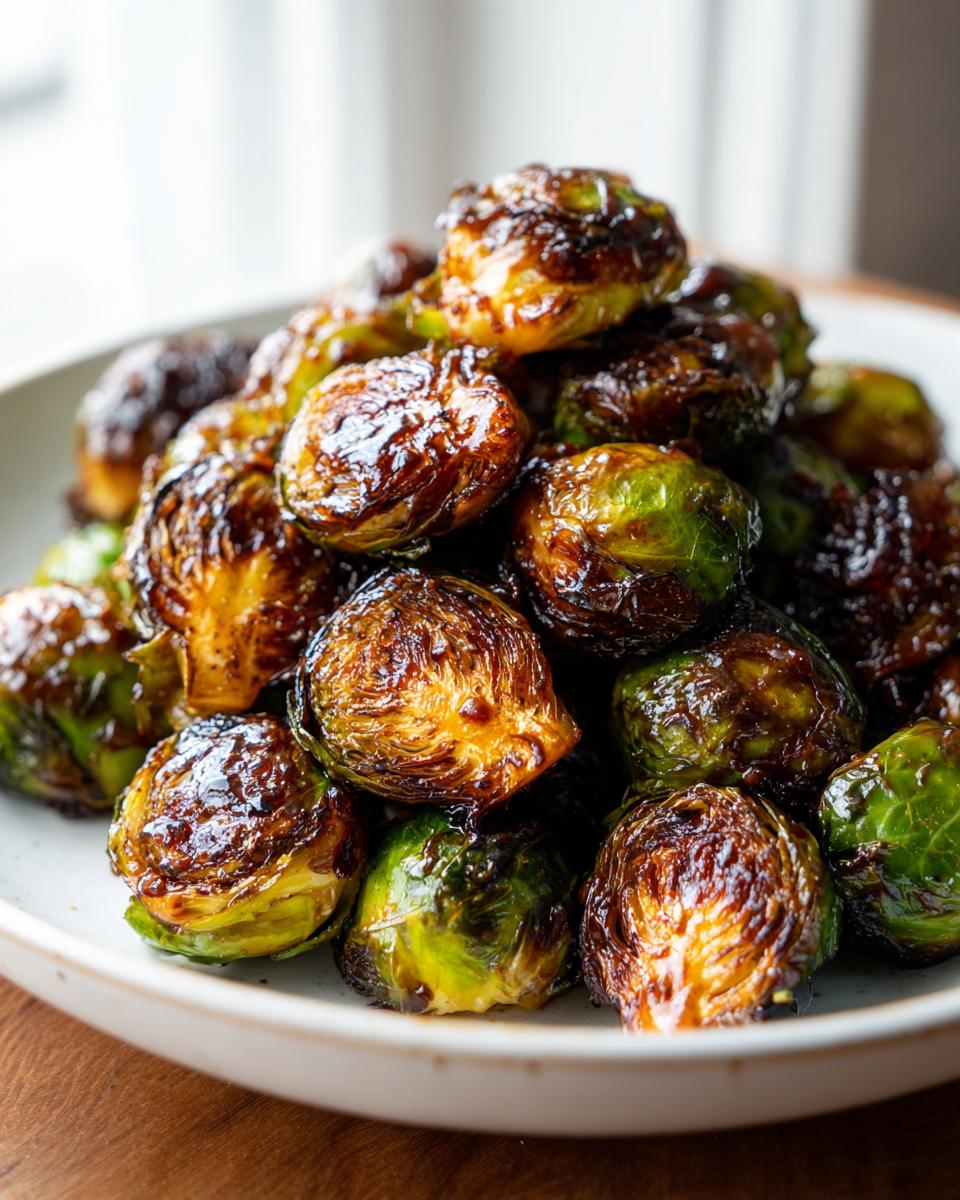
I totally get it. Brussels sprouts often get a bad rap, right? They can be bitter, or worse, just plain mushy if you’re rushing dinner together after a long day. When my schedule ramps up, I usually default to a boring side salad, but my heart really craves something deeply flavorful. That’s why I perfected this Sticky Brussels Sprouts Glaze recipe. It’s my go-to solution for turning humble sprouts into a truly gourmet side dish that everyone actually begs for!
Seriously, these oven-roasted sprouts, coated in that perfect balance of sweet, savory, and tangy goodness, taste like they took hours of gourmet preparation. But trust me, because of my nutrition background, I’ve streamlined the technique so you can whip up this incredible flavor in just minutes. If you’re looking for the best way to elevate simple vegetables on a busy night, this is it.
- Why You Need This Sticky Brussels Sprouts Glaze Recipe
- Ingredients for the Perfect Sticky Brussels Sprouts Glaze
- How to Prepare the Best Sticky Brussels Sprouts Recipe: Step-by-Step
- Tips for Achieving a Thick and Glossy Sprout Topping
- Variations: Customizing Your Sticky Brussels Sprouts Glaze
- Cooking Method Adjustments: Air Fryer Sticky Sprouts
- Serving Suggestions for Your Perfectly Caramelized Brussels Sprouts
- Storage and Reheating Instructions for Leftover Sticky Brussels Sprouts Glaze
- Frequently Asked Questions About This Sticky Brussels Sprouts Glaze
Why You Need This Sticky Brussels Sprouts Glaze Recipe
When I was building MayaPlate, I promised myself every recipe had to pass the busy weeknight test. This glaze absolutely crushes it. It’s the secret weapon that turns a standard vegetable into the star of the plate without adding stress to your evening. Here’s exactly why this is the Best sticky Brussels sprouts recipe you’ll find:
- Flavor Bomb Guaranteed: It hits that perfectly balanced sweet and savory note thanks to the honey and soy sauce combo. It makes them taste almost candied!
- No More Bitter Sprouts: The acidity from the balsamic vinegar beautifully cuts through any bitterness, ensuring you get perfectly caramelized Brussels sprouts every single time.
- Speedy Prep: You’re only whisking together a few pantry staples to assemble the glaze, leaving the oven to do all the heavy lifting. It’s genuinely brilliant for weeknights.
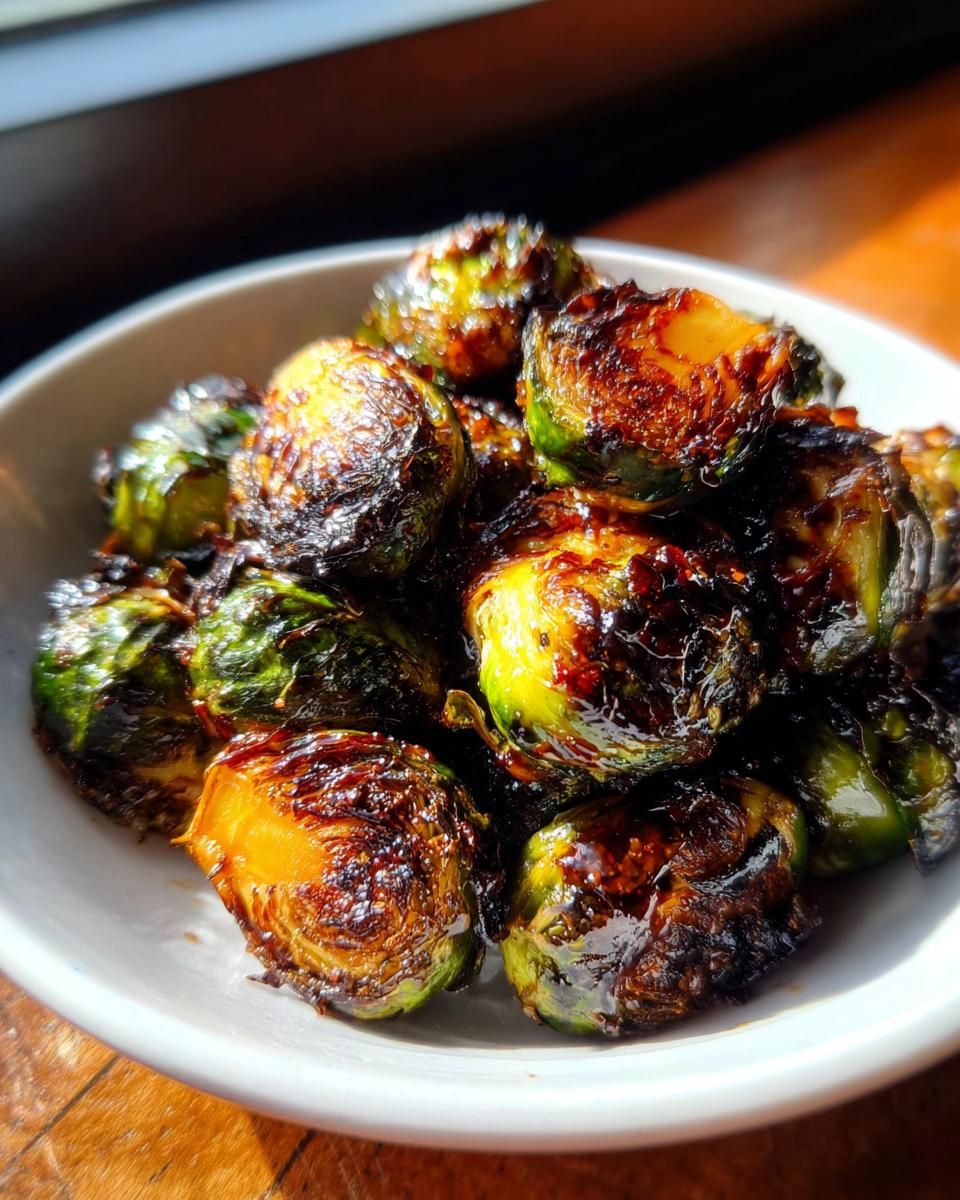
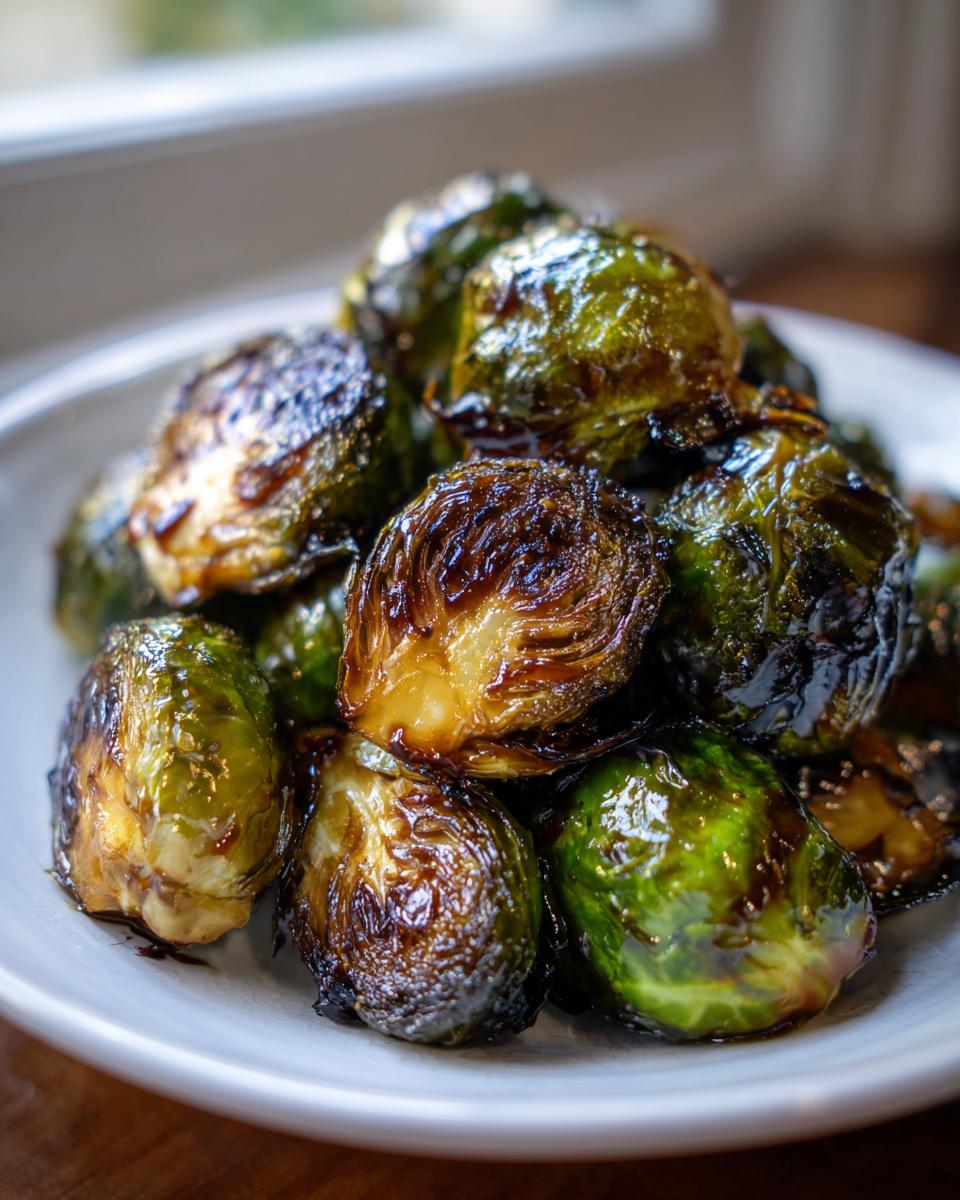
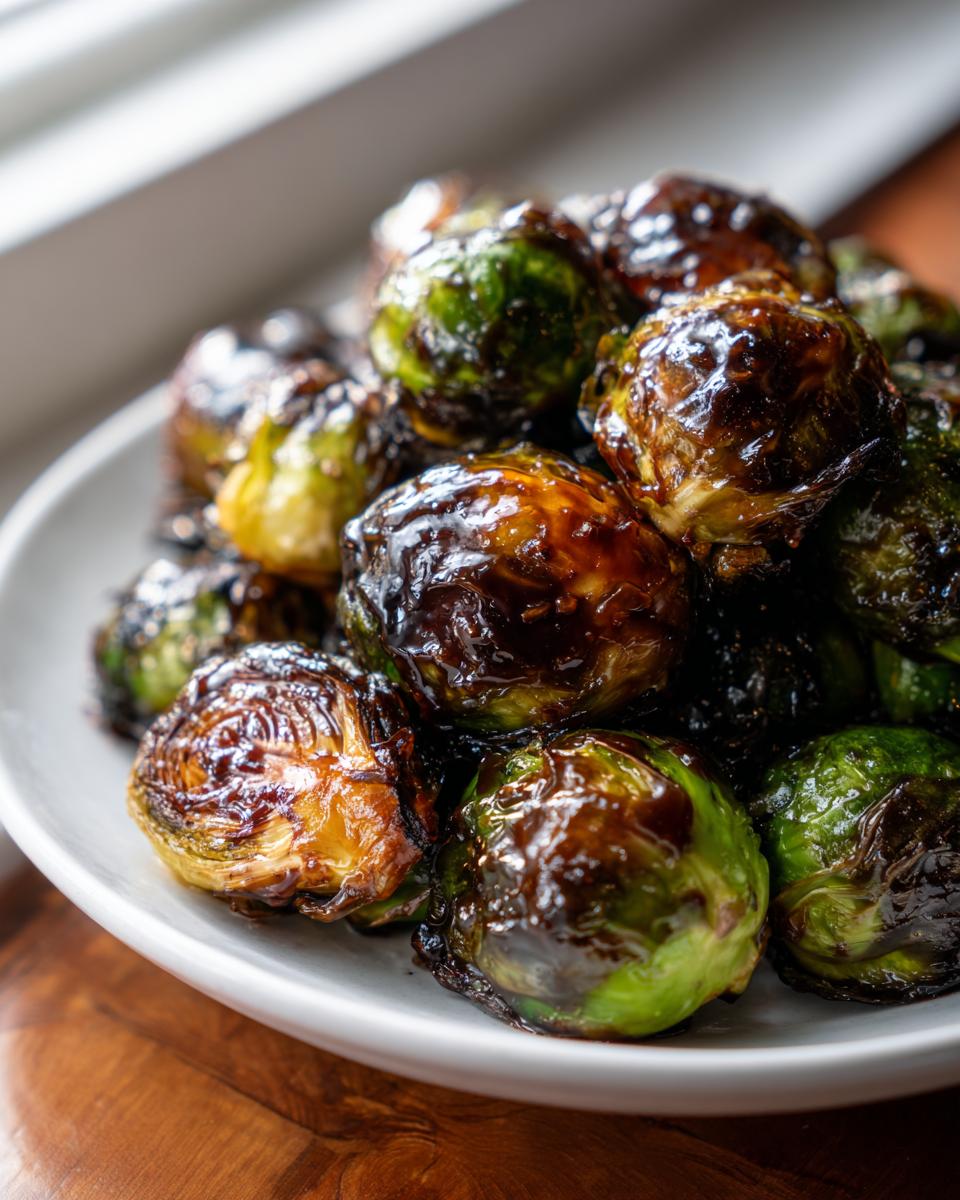
- Textural Perfection: This method ensures the sprouts get crispy edges while the outer layers are coated in a thick and glossy sprout topping that clings beautifully.
- Reliable Results: I’ve tested this glaze dozens of times against different ovens and altitudes. It’s a consistently tested recipe; you won’t end up with runny sauce or scorched sprouts (if you watch closely, of course!).
- Incredibly Versatile: While it’s designed for roasting, this sweet and savory vegetable glaze works like a charm in the air fryer too.
Ingredients for the Perfect Sticky Brussels Sprouts Glaze
Creating intense flavor doesn’t require tracking down obscure ingredients! That’s one of my core beliefs here at MayaPlate. Everything in this glaze is designed to create maximum savory impact using basics you probably already have hiding in your pantry. Seriously, just look at this list—it’s simple!
Here’s what you’ll need to make the magic happen for your oven-roasted glazed vegetables:
- 1 pound fresh Brussels sprouts, trimmed and halved
- 2 tablespoons olive oil (for coating before glazing)
- 1/4 cup honey (Our main source of sticky sweetness!)
- 2 tablespoons soy sauce (or tamari if you need that gluten-free option—I use tamari frequently now!)
- 1 tablespoon balsamic vinegar
- 1 teaspoon garlic powder
- 1/2 teaspoon ground ginger
- Pinch of red pepper flakes (optional—but highly recommended if you like a little background warmth!)
Maya’s Expert Tip on Sauces: When you’re working with sauces that include rich ingredients like soy, quality really matters. If you can find a good quality, low-sodium soy sauce, it helps balance the saltiness so you can control the final sodium level better. Also, if you’re looking for great dipping condiments later, check out my recipe for homemade garlic aioli—it’s amazing on everything!
How to Prepare the Best Sticky Brussels Sprouts Recipe: Step-by-Step
Alright, buckle up! This is where the magic happens for the Sticky Brussels Sprouts Glaze. The key here isn’t fancy technique; it’s timing. We apply the glaze in stages. I remember the very first time I tried this, I dumped all the sauce on upfront, and it just turned into a sticky, burnt mess! Now I know better. By glazing in phases, we build up that gorgeous, thick, and glossy coating layer by layer, giving you those perfectly caramelized Brussels sprouts without any harsh bitterness.
Preparing the Sprouts and Oven Setup
First things first: get that oven hot! Preheat your oven to a roaring 400 degrees Fahrenheit. While it heats up, trim off those tough little ends of your sprouts and slice them right in half. Toss the sprouts in a big bowl with just the olive oil until they’re lightly shining—don’t add any salt yet! Spread them out on a baking sheet lined with parchment paper. They absolutely must be in a single layer, or they’ll steam instead of roast, and we want crispiness!
Mixing the Sweet and Savory Vegetable Glaze
Now for the star! Grab a small bowl and get ready to whisk up your Sticky Brussels Sprouts Glaze. Whisk the honey, soy sauce, balsamic vinegar, garlic powder, ground ginger, and those optional red pepper flakes until everything is smooth. You want it uniform—no chunks of honey stuck at the bottom of the bowl. If your honey is super stiff, just warm this mixture for 15 seconds in the microwave first; that helps everything incorporate beautifully.
The Multi-Stage Roasting Process for the Sticky Brussels Sprouts Glaze
Roast those naked sprouts for 15 minutes first. When you pull them out, drizzle half of your prepared glaze over them and gently toss them right there on the pan. Pop them back in for another 8 to 10 minutes. This sets the first layer. Finally, pull them out, brush on the rest of that heavenly glaze, and return them for just 3 to 5 final minutes. Seriously, watch them like a hawk during these last few minutes! That sugar likes to burn fast, but when they come out looking rich and perfectly caramelized, it’s the best feeling. You can find more tips on oven-roasted glazed vegetables on the blog!
Tips for Achieving a Thick and Glossy Sprout Topping
Okay, let’s talk texture, because that’s really what separates the good glazed sprouts from the truly *unforgettable* ones. We want that beautiful, lacquered look—not liquid dribbling off, and definitely not charred black bits. Achieving that Thick and glossy sprout topping is all about controlling the heat, especially in those final minutes.
The main culprit for a runny glaze is usually adding too much liquid too soon, or trying to cook it all at once. By splitting the application into the multi-stage process we just went through, we let the honey and sugar cook down slowly with the sprouts’ natural moisture. This layering technique is key!
But what if you like an even *thicker* coating, almost like a sticky wing sauce? I have a little trick for that, which mimics what I do when I’m making my quick homemade BBQ sauce, but scaled down.
Here is the technique for maximizing that sticky thickness:
- The Reduction Trick (For True Thickness): Take a small portion of your measured glaze mixture—about two tablespoons—and set it aside before you toss any on the sprouts. Pour only that small amount into a tiny saucepan. Bring it to a gentle simmer over medium heat. It will thicken up incredibly quickly, maybe in just 60 to 90 seconds, because of the honey content.
- Final Toss: Once it has visibly thickened (it should coat the back of a spoon), pull it off the heat immediately. After your sprouts are cooked and have received their final brush of the regular glaze, you can toss them quickly in this intensely reduced, super-sticky portion. This gives you that intense, chewy coating without risking burning the main batch in the oven.
- Watch for Sugar Bloom: Remember, honey and balsamic have high sugar content. If your sprouts are starting to look dark brown, pull the pan out right away! The residual heat in the sprouts will finish cooking the glaze even after it leaves the oven. If the glaze starts looking too dark, pull the pan out early—a slightly under-glazed sprout is better than a burnt one, trust me!
By controlling when that sugar hits the high heat, you ensure you get that gorgeous shine without sacrificing the tender interior of the sprout. It takes practice, but once you nail that final three minutes, you’ll have the most incredible topping!
Variations: Customizing Your Sticky Brussels Sprouts Glaze
One of the reasons I love developing these simple base sauces is that they are so wonderfully adaptable. While the honey, soy, and balsamic combination makes the absolute best sticky Brussels sprouts recipe for that sweet-savory hit, you can easily tweak it based on what you have on hand or what flavor profile you’re craving tonight. It’s all about adjusting those core balancing elements!
Don’t feel chained to the exact measurements, especially if you’re trying to recreate a specific restaurant flavor. You can take this basic Sticky Brussels Sprouts Glaze in totally new directions!
Spicy Kick: Making Wing Sauce Style Brussels Sprouts
If you’re looking to bump the heat up—maybe you love that Sriracha kick you get in some takeout preparations—this is super easy to do. We already added a tiny pinch of red pepper flakes, but that’s just a nice background warmth. To really lean into a true heat element, I suggest adding about one teaspoon of Sriracha directly into your glaze mixture before you start roasting.
If you prefer a vinegar-based heat, like Buffalo wings, skip the Sriracha and instead add a tablespoon of your favorite hot sauce along with the balsamic vinegar. Be careful with the salt, though, as hot sauces often carry a fair amount of sodium. If you’re experimenting with these flavors, you might also enjoy the brightness in my quick tangy cucumber salad on the side!
Alternative Sweeteners for Maple Syrup Roasted Sprouts
Honey is wonderful because it offers incredible viscosity, which really helps that glaze cling, but I know sometimes people prefer to use maple syrup, or maybe they just don’t have honey available. If you go for maple syrup instead of honey, use a 1:1 substitution ratio. Maple syrup tends to be a little thinner than honey, so you might notice the glaze not thickening quite as aggressively in the final minutes of roasting.
If the maple syrup version seems too liquidy, try this: gently warm your final glaze mixture in a small saucepan and let it reduce slightly just until it coats a spoon before you apply it for the final coat. It works wonderfully and delivers those beautiful Maple syrup roasted sprouts!
Another option is using dark brown sugar. If you swap out the honey entirely for brown sugar, you might need to add an extra teaspoon of acid (either more balsamic or maybe a squirt of lemon juice) just to balance the heavy molasses flavor in the sugar. This technique leans toward making Candied Brussels sprouts preparation, which is delicious!
Cooking Method Adjustments: Air Fryer Sticky Sprouts
I know not everyone has a big oven full of space, or maybe you just prefer that lightning-fast cook time of an appliance! If roasting in the oven isn’t your style, you’re in luck, because these sprouts are fantastic in the air fryer. This simple adjustment is perfect for smaller batches and gives you seriously crisp results. Targeting Air fryer sticky sprouts is a super popular request I get, and I’ve got the tested times right here!
The beautiful thing about the air fryer is convection heat comes at your food from every angle, which can speed things up, but it also means we need to adjust our timing slightly compared to the oven method.
Here’s what you need to keep in mind when making the switch:
- Lower the Heat (Slightly): Instead of 400°F, drop that temperature down to 375 degrees Fahrenheit for the air fryer. I find this helps prevent the sugars in our glaze from scorching before the sprout interior is tender.
- Glazing Time is Condensed: Since the air flow is so much stronger, you don’t have as much room for those long roasting sessions. You’ll still want to start them naked, but the glazing needs to happen faster.
We skip the very first 15-minute roast entirely. Instead, toss those pre-oiled sprouts directly into the air fryer basket (again, single layer is your friend here!) and cook for about 8 minutes. When you pull them out after that initial blast of heat, that’s when you quickly toss them with half of the Sticky Brussels Sprouts Glaze you mixed earlier. Give them another 3 to 5 minutes to set that first layer.
Finally, pull them out one last time, brush on the remaining glaze, and give them a quick 3 to 5 minutes to finish caramelizing. Remember what I said about watching them closely? It’s even more crucial in the air fryer! They can go from perfectly glossy to burnt in about 60 seconds flat.
If you’re looking for other ways to master your appliance—like my incredibly easy air fryer baked potato—be sure to check out the cooking guides on the site! Cooking adjustments are all about adapting the heat, and these quick swaps make sure you always get that delicious, sticky finish.
Serving Suggestions for Your Perfectly Caramelized Brussels Sprouts
This side dish is so flavorful and complex, it really deserves a star moment! Because these sprouts have such a distinctive sweet and savory character from the honey and soy, they pair wonderfully with proteins that are either quite simple or that share those slightly earthy, roasted notes. You want something that lets the glazed texture shine without clashing!
When I make a batch of these, my mind immediately goes to comfort food that feels elevated, but still totally doable for a weeknight. They are leagues better than plain steamed veggies, I promise!
Here are a few of my favorite main courses that turn these sprouts into a full, satisfying meal:
- Roasted Chicken or Turkey: The simple, savory juices from roast poultry mix perfectly with any stray bits of glaze that fall onto your plate. It’s classic comfort food, made better.
- Pork Tenderloin: This is the absolute top pairing for me. The slight sweetness in pork just embraces the glaze. If you’re looking for a recipe that matches this side dish perfectly, you have to try my Honey Garlic Oven Pork Tenderloin. They cook around the same time, too, which is a huge win for timing!
- Seared Salmon: If you’re leaning toward fish, a simple pan-seared piece of salmon with just a sprinkle of salt and pepper lets the sprouts carry all the heavy flavor lifting for the side. It feels gourmet but takes minutes.
- Steakhouse Vibes: These are amazing alongside a perfectly grilled steak. They add the complexity and vegetable greenery that you usually have to pay extra for at a fancy restaurant. Trust me, homemade beats restaurant sides every time!
Also, think about balancing the richness! Since the sprouts are sweet and slightly fatty from the roasting oil, they love a side that offers a bit of freshness. A bright, crisp green salad with a light vinaigrette, or maybe a small scoop of plain brown rice to soak up any extra saucy goodness, works wonderfully to complete the plate.
Storage and Reheating Instructions for Leftover Sticky Brussels Sprouts Glaze
Oh, leftovers! Sometimes these glazed beauties are even better the next day when the flavors have really settled in. I always make a double batch just so I don’t have to cook during the week—it’s truly one of my favorite things to pull out of the fridge!
The key to storing these, especially when they have that amazing glaze, is making sure they aren’t packed too tightly while they are still warm. That steam is the enemy of crispiness!
How to Store Your Glazed Sprouts
Once the sprouts have cooled completely to room temperature (this is important!), go ahead and transfer them to an airtight container. If you’re worried about them sticking together, a glass container is usually better than plastic for this. They will keep beautifully in the refrigerator for up to three, maybe even four days. They won’t be quite as crisp as when they first came out of the oven, but the flavor is still rock solid.
What about the extra glaze you made? If you have extra Sticky Brussels Sprouts Glaze that you didn’t use on the sprouts, you can store that separately too. It lasts for weeks if stored in an airtight jar in the fridge, especially since it has honey and vinegar in it. You might need to warm it slightly before using it on another batch of vegetables later on.
The Best Way to Reheat for Crispness
Here is where we need a little strategy. Microwaving these is a hard pass for me, unless you absolutely have no other choice. The microwave heats the moisture inside the vegetable and steams that sticky coating, resulting in sadness—i.e., mushy sprouts. We want to revive that lovely crisp edge!
Your best bet for reheating is definitely the oven or the air fryer:
- Oven Reheat: Spread the sprouts in a single layer on a parchment-lined baking sheet. Heat your oven back up to 350 degrees Fahrenheit. Pop them in for about 7 to 10 minutes. This low-and-slow heat warms them through gently and helps any moisture evaporate, putting back a little of that texture.
- Air Fryer Refresh: If you’re using the air fryer, even better! Use a slightly lower temperature, maybe 325 degrees Fahrenheit, and cook for just 4 to 6 minutes. They crisp up faster this way, so check them at the 4-minute mark.
If you find they look a little dry after reheating, just brush on a tiny bit more of that reserved glaze mixture before putting them back in the heat for the final minute or two. I love knowing I have these flavorful leftovers ready to go; it makes sticking to healthy eating so much easier!
Frequently Asked Questions About This Sticky Brussels Sprouts Glaze
I know you might have a few little lingering thoughts after reading about this unbelievably flavorful topping! It’s what happens when you take something traditional and give it a flavor upgrade. Don’t worry, I’ve collected the most common questions I get about making sure this recipe turns out perfectly for you every single time. Getting that savory sweet side dish flavor just right takes a little know-how, but it’s totally achievable!
Can I prepare the Sticky Brussels Sprouts Glaze mixture in advance?
Yes, absolutely! I love prepping the actual Sticky Brussels Sprouts Glaze ahead of time. Whisking it all together takes maybe two minutes, and having it ready in the fridge means dinner prep shrinks even more. Since it has honey, it might firm up a tad when cold. If you pull it out 20 minutes before you plan to use it, it will soften up to a perfect drizzling consistency. If you forget, just zap it in the microwave for 10 seconds, stir, and you’re good to go! It keeps beautifully in the fridge for up to two weeks.
What is the best way to prevent sogginess when making this Easy Honey Glazed Sprouts?
Ah, the dreaded soggy sprout! This is all about avoiding steam and controlling when the sugar hits the heat. Two things are critical here: First, ensure your sprouts are completely dry before you toss them with that initial bit of olive oil. Patting them down with a paper towel after washing is non-negotiable! Second, and this is huge, they absolutely must be in a single layer on your baking sheet. If the sprouts are crowded, they steam, and steam equals mush. Also, remember the rule from the main instructions: don’t toss them with the glaze until they’ve had at least 15 minutes in the oven to start drying out and getting crispy edges. That layered glazing approach is your best defense against sogginess in these Easy Honey Glazed Sprouts!
What should I use if I don’t have balsamic vinegar?
If you’re out of balsamic vinegar, don’t panic! That little bit of acid is essential because it balances the sweetness of the honey and the saltiness of the soy sauce. It keeps the final product from tasting overwhelmingly like candy. If you don’t have balsamic, you can easily substitute it with an equal amount of red wine vinegar. If you only have plain white vinegar, use just half the amount (about half a tablespoon) and maybe sneak in a few drops of lemon juice to smooth out the sharp edge. The goal is just a touch of brightness!
Is it possible to use a liquid sweetener other than honey?
You can definitely use maple syrup as a direct substitute, as we discussed, but what if you don’t have either? You can make a quick syrup substitute, though the texture will change slightly. Try using ¼ cup of packed dark brown sugar mixed with 1 tablespoon of hot water until it’s dissolved. This gives you that rich, molasses note which pairs incredibly well with the soy sauce. It will make for a beautifully flavored, rich glaze, though it might be slightly less *sticky* than using pure honey. If you’re aiming for a very thick, heavy coating, consider using the reduction trick mentioned earlier to really concentrate that brown sugar syrup.
Can I make this recipe ahead as a meal prep option?
Yes, you can totally make these ahead, and they make a fantastic part of a quick, healthy lunch prep! The key is how you store and reheat them. Cook them completely using the multi-stage process. Once they are totally cool, store them in a container. When you’re ready to eat, reheat them in the air fryer or a hot oven (350°F) for about 5-8 minutes. This heats them through without steaming them, which drastically improves the texture compared to microwaving. They hold up really well this way!
PrintSticky Brussels Sprouts Glaze for Roasted Sprouts
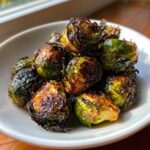
Make perfectly caramelized Brussels sprouts with this simple, sweet, and savory sticky glaze. This recipe uses common pantry ingredients to create a glossy, flavorful coating perfect for roasting or air frying.
- Prep Time: 10 min
- Cook Time: 28 min
- Total Time: 38 min
- Yield: 4 servings 1x
- Category: Side Dish
- Method: Oven Roasting
- Cuisine: American
- Diet: Vegetarian
Ingredients
- 1 pound fresh Brussels sprouts, trimmed and halved
- 2 tablespoons olive oil
- 1/4 cup honey
- 2 tablespoons soy sauce (or tamari for gluten-free)
- 1 tablespoon balsamic vinegar
- 1 teaspoon garlic powder
- 1/2 teaspoon ground ginger
- Pinch of red pepper flakes (optional)
Instructions
- Preheat your oven to 400 degrees Fahrenheit (200 degrees Celsius). Line a baking sheet with parchment paper.
- In a small bowl, whisk together the honey, soy sauce, balsamic vinegar, garlic powder, ground ginger, and red pepper flakes until fully combined. This is your sticky Brussels sprouts glaze.
- In a large bowl, toss the halved Brussels sprouts with the olive oil until lightly coated.
- Place the sprouts in a single layer on the prepared baking sheet.
- Roast for 15 minutes.
- Remove the sprouts from the oven. Brush or drizzle half of the prepared glaze over the sprouts, tossing gently on the pan to coat.
- Return the sprouts to the oven and roast for another 8 to 10 minutes.
- Remove again, brush with the remaining glaze, and roast for a final 3 to 5 minutes until the sprouts are tender and the glaze is thick and glossy. Watch carefully to prevent burning.
- Serve immediately as a savory sweet side dish.
Notes
- For an air fryer sticky sprouts preparation, cook at 375 degrees Fahrenheit, tossing with half the glaze after 8 minutes, and then returning for 3 to 5 minutes until done.
- If your honey is very thick, warm the glaze mixture slightly before mixing to ensure smooth incorporation.
- To achieve a thicker, wing sauce style Brussels sprouts coating, reduce the glaze mixture slightly in a saucepan over medium heat before tossing with the cooked sprouts.
Nutrition
- Serving Size: 1 serving
- Calories: 210
- Sugar: 18
- Sodium: 450
- Fat: 7
- Saturated Fat: 1
- Unsaturated Fat: 6
- Trans Fat: 0
- Carbohydrates: 35
- Fiber: 6
- Protein: 5
- Cholesterol: 0