
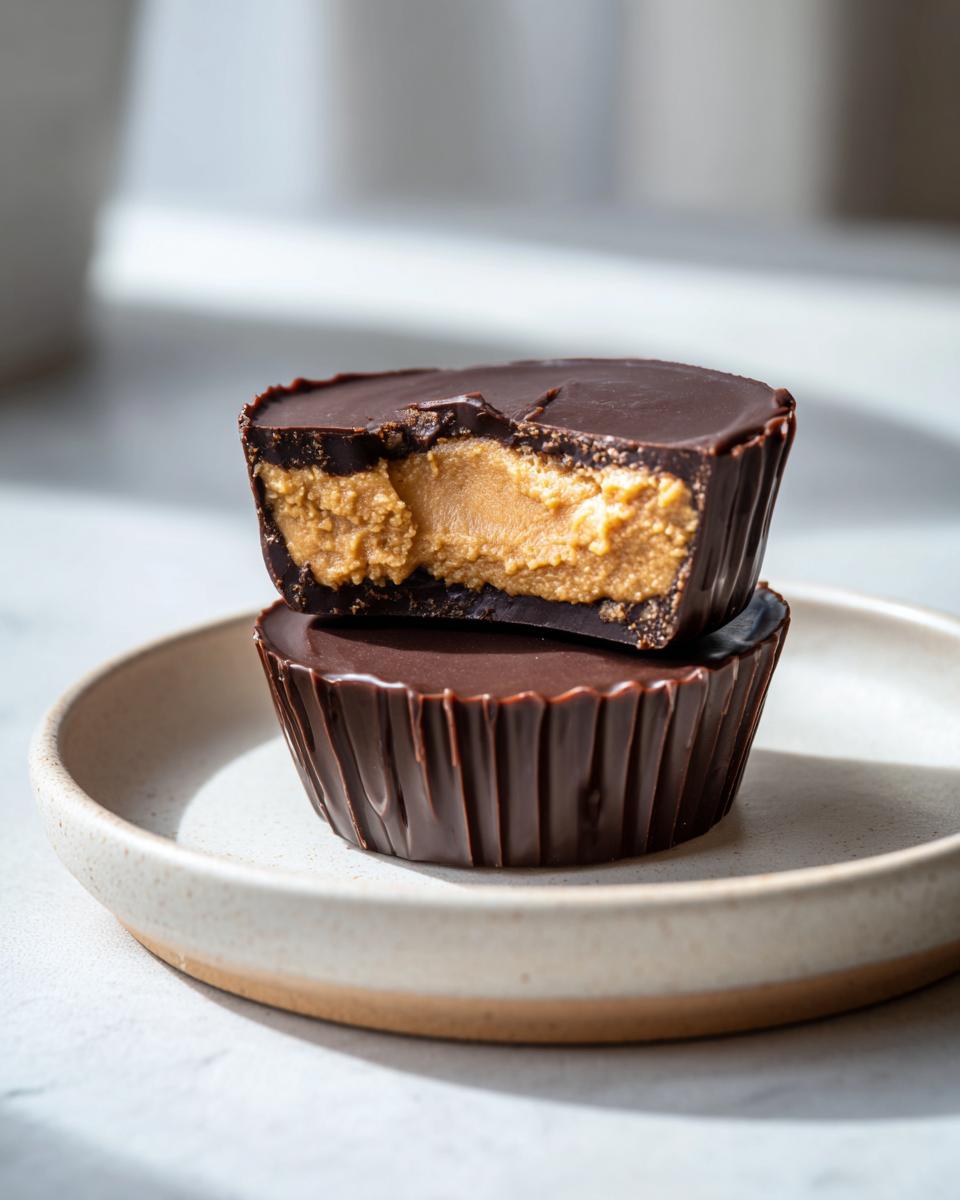
You know that moment, right? You’re just craving that perfect, salty-sweet hit of chocolate and peanut butter—the kind that instantly takes you back to being a kid. But then you look at the store-bought wrappers and sigh, wishing you could get that exact flavor profile without all the extra things we don’t need. That’s why I developed what I am genuinely calling the Easiest 5-Ingredient No-Bake Homemade Peanut Butter Cups recipe!
This treat embodies everything MayaPlate stands for: deliciously simple, intensely flavorful, and genuinely practical. My goal, just like when I started this whole journey, isn’t to complicate your life, but to give you back those moments of joy. Trust me, these Homemade Peanut Butter Cups are shockingly easy and taste so much better than what you find in the candy aisle. I think recreating those classic childhood comforts with simple, clean ingredients is one of the best things we can do in the kitchen.
If you’re looking for more effortless sweets, be sure to check out all my delicious dessert recipes! You won’t regret trying these.
- Why This Easy Peanut Butter Cups Recipe Beats the Store-Bought Version
- Gathering Ingredients for Perfect Homemade Peanut Butter Cups
- Step-by-Step Instructions for Your Easy Peanut Butter Cups Recipe
- Tips for Success Making the Best Homemade Candy
- Variations: Healthy Peanut Butter Cups and Other Treats
- Storage and Making Ahead with Your Peanut Butter Cups
- Frequently Asked Questions About Homemade Peanut Butter Cups
- Estimated Nutrition for These Simple Chocolate Peanut Butter Candy
- Share Your Homemade Peanut Butter Cups Creations
Why This Easy Peanut Butter Cups Recipe Beats the Store-Bought Version
Honestly, making your own peanut butter cups just gives you bragging rights, knowing *you* controlled what went into them. Forget mystery powders or stabilizers! With just five ingredients, you get superior flavor and texture every single time. These treats truly deliver that ‘Better Than Reese’s’ experience we all dream about.
Here’s why spending 20 minutes on these is worth every second:
- The filling is instantly creamy because we use real softened butter.
- You control the sweetness level—perfect for customizing!
- They are fantastic for satisfying those intense cravings—they qualify as the ultimate quick dessert recipes.
Plus, they fit perfectly into my philosophy of providing nourishing food that’s simple and achievable.
The Appeal of No Bake Peanut Butter Cups
The best part about these cups? Absolutely zero oven time. That’s right, these are prime examples of no oven desserts. If it’s too hot to turn on the stove, or if you just need a sweet fix fast, these are your hero. We only rely on the chilling power of the fridge and freezer to set everything up perfectly. It keeps the process so stress-free!
If you love easy, no-fuss treats, you have to try my recipe for soft and chewy M&M cookies next—they are just as simple!
Gathering Ingredients for Perfect Homemade Peanut Butter Cups
Since this is a 5-ingredient recipe, every single component counts! We aren’t hiding anything behind a long list, so make sure you grab exactly what the recipe calls for. This transparency is how we guarantee you get those amazing, classic peanut butter cups at home.
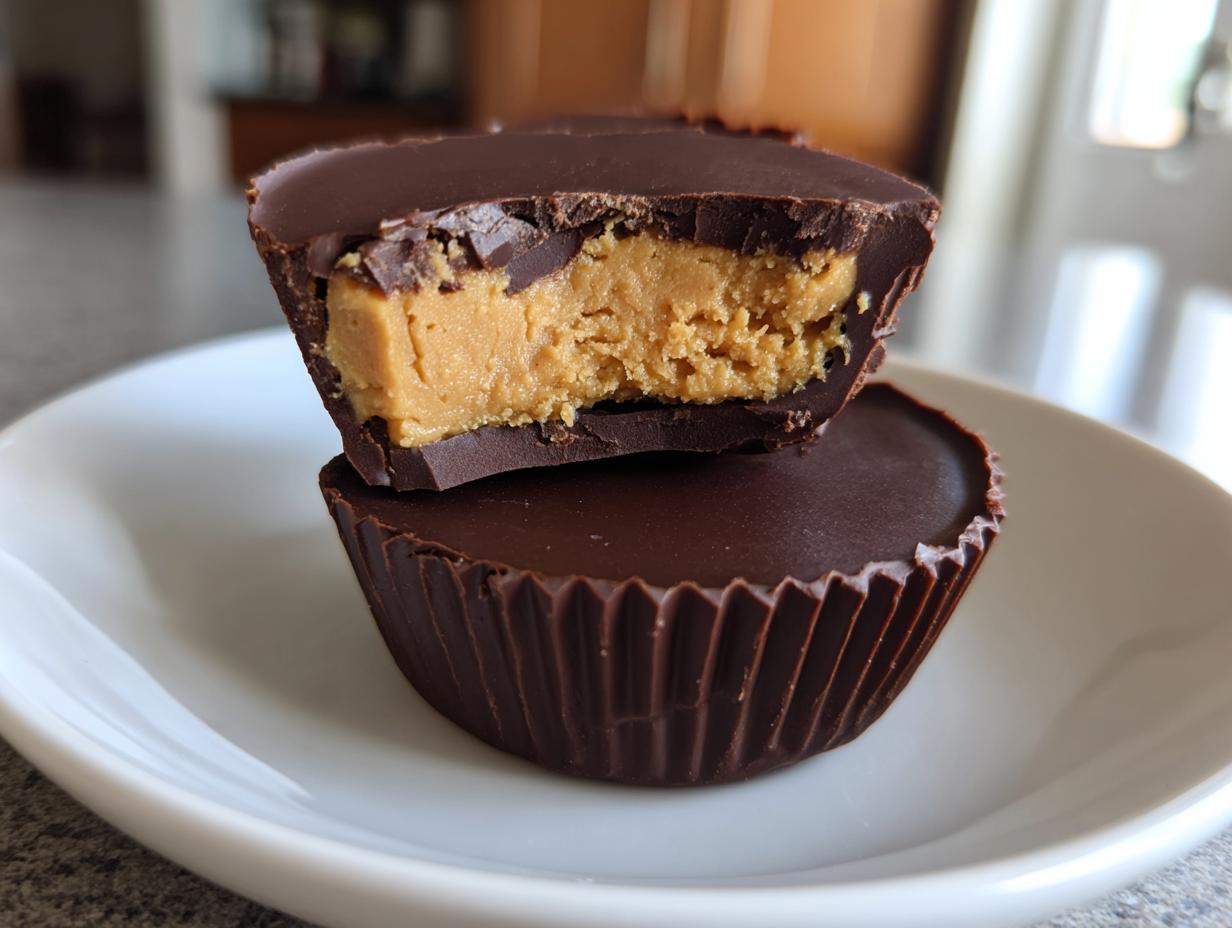
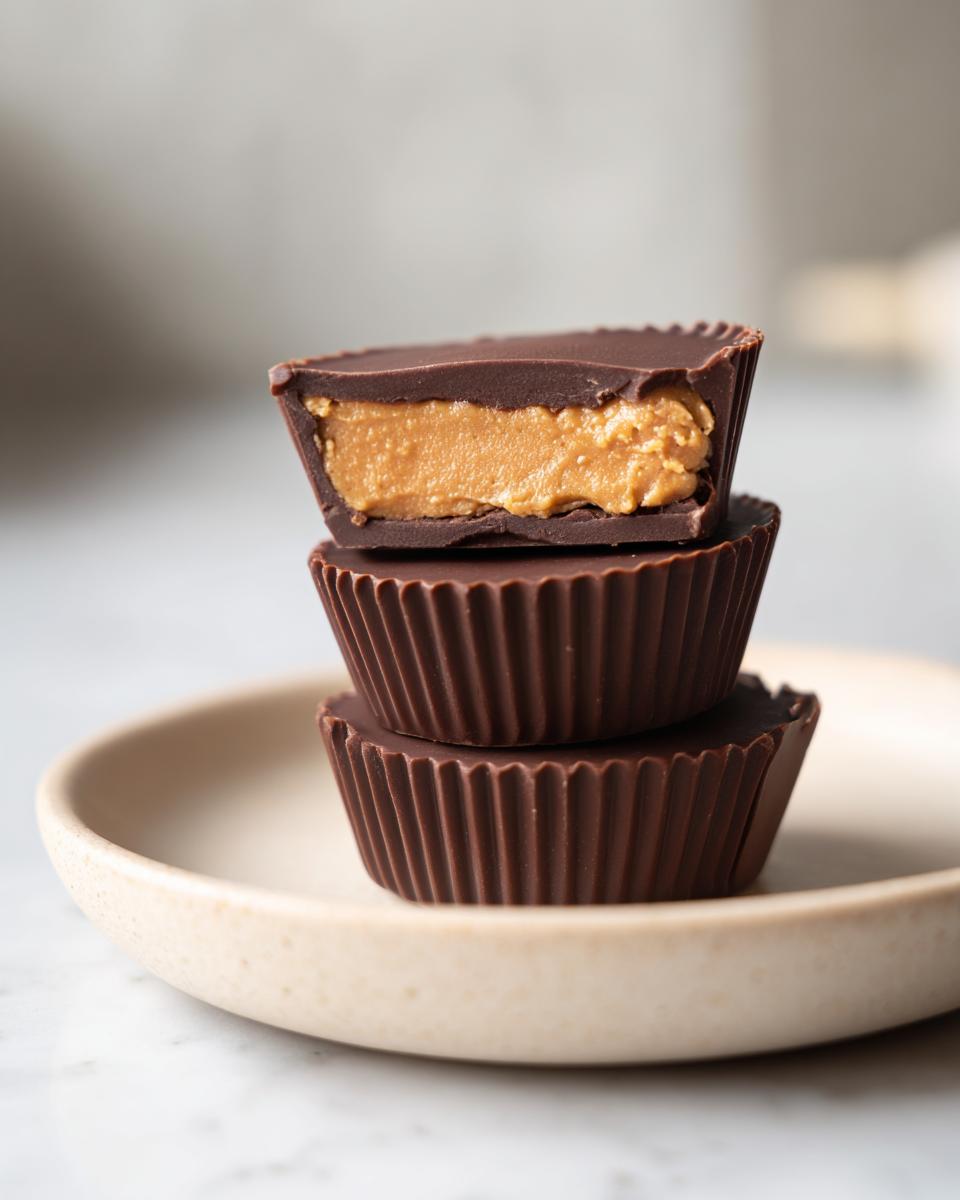
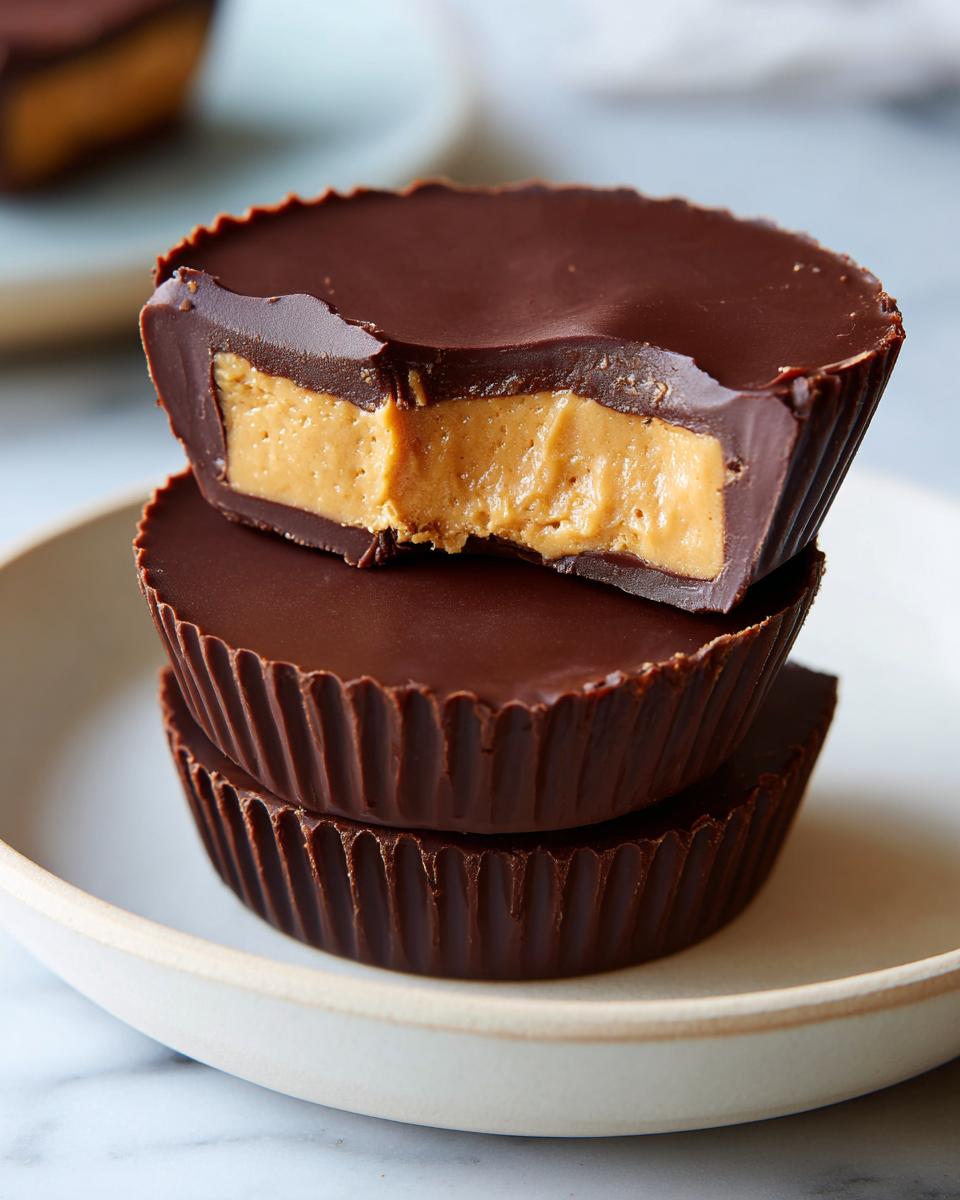
You need creamy peanut butter (skip the natural, oily kind for this filling!), half a cup of softened unsalted butter—and I mean soft, not melted oil! Two cups of powdered sugar are essential for that smooth, sandy texture, plus just a teaspoon of vanilla. Finally, grab 12 ounces of chocolate. For true classic status, use milk chocolate, but dark chocolate works beautifully too!
Ingredient Notes and Simple Chocolate Coatings
The chocolate layer is crucial for the overall texture of your homemade peanut butter cups. You need about 12 ounces, and melting it properly builds the best simple chocolate coatings. I always melt mine slow and steady in the microwave, stirring after every 30 seconds so I don’t scorch it.
A word on the sugar: powdered sugar is non-negotiable here for that light, almost fluffy filling consistency. If you were trying to make a healthier version, you’d swap it for maple syrup, but then you’d need to adjust the fat content slightly because the sugar provides necessary structure. Stick to the powdered sugar for this classic version; it’s the secret to that unmistakable filling!
Step-by-Step Instructions for Your Easy Peanut Butter Cups Recipe
Okay, here is where we bring this magic to life! Since we aren’t turning on any ovens, our workflow is all about timing the layers so they set up perfectly. We are moving fast, but we need to respect the chill time—that’s the secret weapon for perfect no-bake peanut butter cups. After you assemble the base, you’ll want to pop the tin in the freezer while you deal with the chocolate. Trust me on the 15 minutes!
Creating the Fudgy Peanut Butter Filling
First things first: grab your muffin tin and line all 12 cups with paper liners. This is important; don’t skip this! Now for the filling. Get your peanut butter, softened butter, powdered sugar, and vanilla extract together in a bowl. If you’re using a hand mixer, this comes together quickly, but even just a sturdy spoon works. You are looking for a texture that is utterly smooth and fully combined—this is what creates that rich, fudgy peanut butter filling you crave. It shouldn’t look streaky at all.
Once it’s smooth, take about a tablespoon of that mixture and firmly press it down into the bottom of each lined cup. Make sure the base layer is even so the final cup looks professional. Then, immediately slide that tin into the freezer while we move to the chocolate!
Melting Chocolate and Final Assembly for Peanut Butter Cups
Time for the coating! Put your chopped chocolate in a microwave-safe bowl. Here’s the safety tip I always use: microwave it in 30-second bursts. After each burst, stir it well, even if it doesn’t look completely melted yet. Stirring distributes the heat and prevents scorching, which leaves you with grainy, sad chocolate. We want silky smooth chocolate for these peanut butter cups!
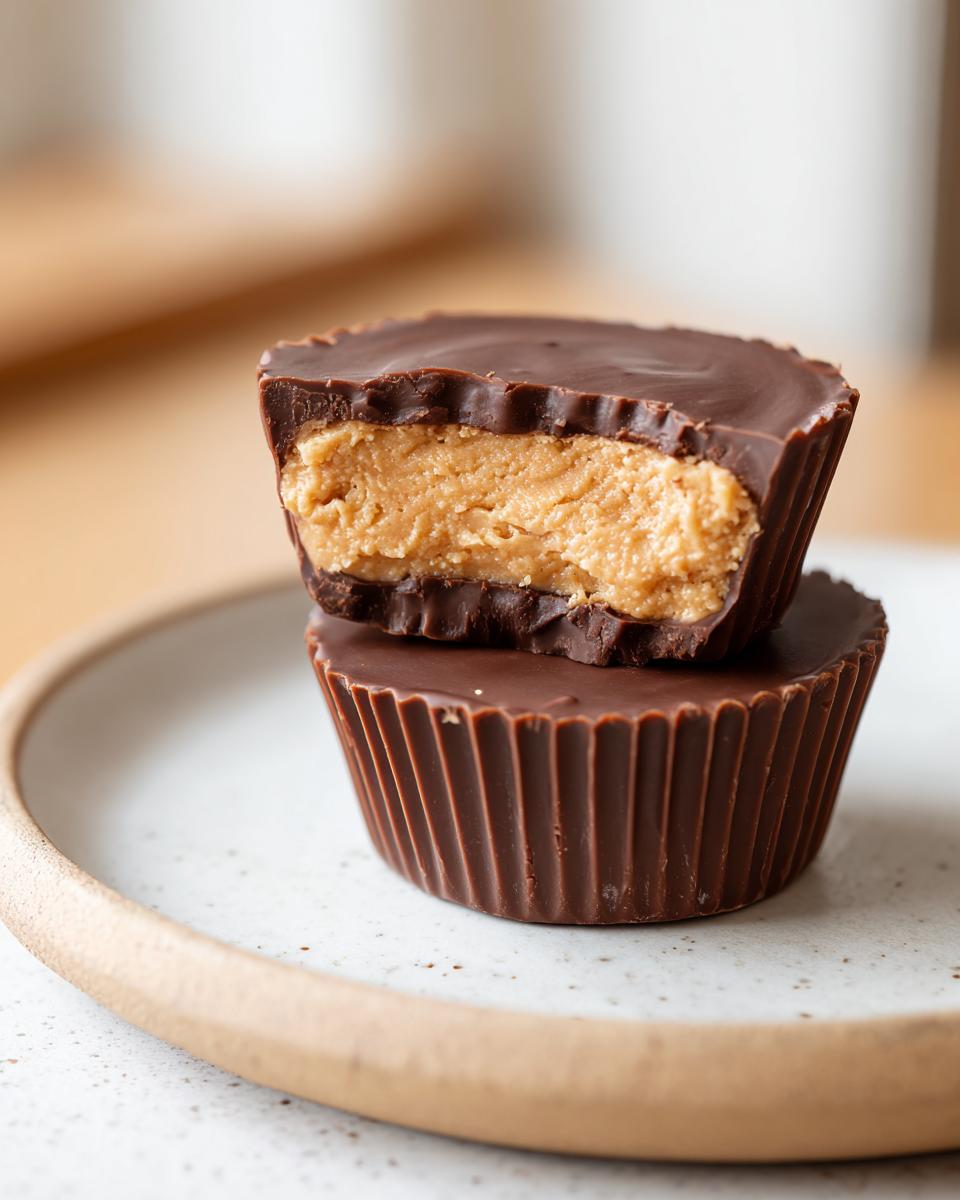
When the chocolate is liquid gold, take the muffin tin out of the freezer. Spoon that melted chocolate over your chilled peanut butter bases to fully cover them up. Back into the fridge they go for the final set. Set a timer for one hour. Seriously, wait the hour! Then, they firm up beautifully, and you can peel those liners off and enjoy the fruits of your quick labor! If you want to see other fun, quick treats, check out my easy praline crunch snack recipe.
Tips for Success Making the Best Homemade Candy
Even though these peanut butter cups are incredibly easy, a few little tricks can take them from great to seriously legendary—the kind of best homemade candy people ask you to make every holiday. My number one tip revolves around temperature control, especially when layering. If your peanut butter filling is too warm when you pour the chocolate over it, the layers will just mingle, and you won’t get that satisfying clean break when you bite into it.
Make sure that peanut butter base is truly solid from the freezer before the chocolate goes on. Resist the urge to rush that first freeze!
Now, here’s a pro tip for the chocolate coating itself: if you notice that chalky white film—we call it ‘bloom’—after they chill, it usually means the temperature changed too fast. Don’t panic! To avoid it next time, once the cups are fully chilled, let them sit on the counter for just five minutes before you move them into an airtight container. It lets them adjust slowly. It’s an extra tiny step, but it keeps your peanut butter cups looking glossy and perfect.
If you love the way brown butter changes things, you might want to try my brown butter chocolate chip cookies for another next-level simple recipe!
Variations: Healthy Peanut Butter Cups and Other Treats
I absolutely love that we can take these basic five ingredients and pivot them into something new! While this recipe relies on powdered sugar for that classic texture, if you’re trying to make healthy peanut butter cups, you can absolutely swap it out. According to my notes, try using maple syrup instead, but remember, you might need to slightly reduce the actual amount until the filling feels firm enough to press into the base.
For richness, don’t be shy about using high-quality dark chocolate instead of milk chocolate—it really concentrates that bittersweet flavor against your sweet filling. And oh my gosh, a tiny sprinkle of flaky sea salt right on top of the melted chocolate layer? It cuts through the richness perfectly, turning these into sophisticated peanut butter chocolate bites.
Need something that packs more of a punch? If you’re looking for more ways to incorporate protein into simple snacks, check out my recipe for easy no-bake protein bars! And if you just want to see how others are tackling these, Carli has some great ideas over at her spot.
Storage and Making Ahead with Your Peanut Butter Cups
One of the best parts about homemade peanut butter cups is that they are fantastic meal preppers! Since they are a no-bake treat held together by chocolate and chilled fats, they store beautifully. You can keep them in an airtight container in the refrigerator for up to a week. Honestly, they taste even better the next day once those flavors have really settled!
If you are making large batches for holidays or just want them handy for quick snacks, definitely toss them in the freezer. They act just like frozen candy bars and hold up perfectly! It’s great for satisfying those random cravings later on. For more practical, make-ahead ideas to simplify your week, take a peek at my easy breakfast ideas collection.
Frequently Asked Questions About Homemade Peanut Butter Cups
I get so many questions about these cups after people try the recipe! It’s funny how many concerns pop up even with something as simple as peanut butter cups. Here are the ones I hear most often:
Can I use natural, runny peanut butter?
Oh, that’s a common roadblock! For this specific recipe, I really recommend using that classic, stabilized creamy peanut butter (the kind you stir when you first open it). Natural, runny peanut butter has too much oil, and that extra fat will keep your filling soft, even when chilled. The result? Your filling might ooze out when you try to break them apart. For the firmest, most rewarding texture, stick to the standard kind for the fudgy center.
Why are my peanut butter cups melting right away?
If your homemade peanut butter cups are melting before they should, it’s almost always temperature related. Did that peanut butter base get firm enough in the freezer before you poured the chocolate? If the base is still cold but soft, the warm chocolate melts it slightly, leading to poor separation between the layers. Also, ensure your final batch is stored in the fridge, not the counter—unless you plan to eat them all in five minutes!
Can I skip the chilling steps?
You absolutely can skip the freezing/chilling steps if you enjoy messy chocolate peanut butter candy, but I wouldn’t recommend it! Those chilling times are what transform this from a messy bowl of ingredients into perfectly formed treats. The 15 minutes in the freezer sets the base so it doesn’t get smeared by the chocolate, and the final hour in the fridge ensures the chocolate shell is hard enough to peel off the liner without breaking. It’s worth the wait, I promise!
Are these kid friendly dessert ideas?
Definitely! This is one of my favorite kid friendly dessert ideas because they love helping mix the filling and pressing the base layer! Because it’s no-bake, it’s a really safe kitchen activity for little ones when supervising the chocolate melting step. They’re fantastic for school treats or just an afternoon pick-me-up. We use these as great grab-and-go snacks, too, so check out my tips for quick, healthy lunch packing for more snack ideas!
Estimated Nutrition for These Simple Chocolate Peanut Butter Candy
As part of keeping things transparent and aligning with my commitment to the Intelligently Nourishing pillar here at MayaPlate, I want to give you a general idea of what’s in these wonderful peanut butter cups. Since we are using simple ingredients, you know exactly what you’re getting!
Based on the recipe ingredients, here are the estimated nutrition facts per one cup serving:
- Calories: 310
- Fat: 21g
- Carbohydrates: 29g
- Protein: 7g
- Sugar: 28g
Just remember, these are just estimates! If you switch from milk chocolate to a higher cacao dark chocolate, those numbers shift slightly. But seriously, for a homemade version of this classic chocolate peanut butter candy, I think you’ll agree that’s pretty accurate for such an indulgent treat!
Share Your Homemade Peanut Butter Cups Creations
That’s it! You have officially mastered the peanut butter cups game. I am so excited for you to take that first bite of your very own, impossibly easy, no-bake creation. These treats really are just too good to keep to yourself, you know?
I really, really want to know what you think! Please jump into the comments below and give this recipe a star rating—did you go five stars? I hope so! I also love hearing what chocolate you ended up using. Did you sneak in some sea salt? Did you use dark or milk chocolate? Every choice makes these homemade peanut butter cups yours.
If you made a batch and snapped a picture, tag me online! And if you have friends begging you for the recipe already, don’t forget to share the love by linking them right back here. If you ever need to get in touch with me about a recipe hiccup or just want to say hello, my contact page is always open at my contact page. Happy snacking!
PrintEasy 5-Ingredient No-Bake Peanut Butter Cups (Better Than Reese’s)
Make these simple, no-bake peanut butter cups using only five ingredients. You get the classic chocolate and peanut butter flavor in a treat that is easier and tastes better than store-bought versions.
- Prep Time: 15 min
- Cook Time: 5 min
- Total Time: 20 min
- Yield: 12 peanut butter cups 1x
- Category: Dessert
- Method: No-Bake
- Cuisine: American
- Diet: Vegetarian
Ingredients
- 1 cup creamy peanut butter
- 1/2 cup unsalted butter, softened
- 2 cups powdered sugar
- 1 teaspoon vanilla extract
- 12 ounces milk chocolate, chopped (or dark chocolate for a richer taste)
Instructions
- Line a 12-cup standard muffin tin with paper liners.
- In a medium bowl, combine the peanut butter, softened butter, powdered sugar, and vanilla extract. Mix with a spoon or electric mixer until the filling is smooth and well combined.
- Press about 1 tablespoon of the peanut butter mixture firmly into the bottom of each lined muffin cup, creating an even base layer.
- Place the muffin tin in the freezer for 15 minutes to set the base.
- While the base sets, melt the chocolate. Place the chopped chocolate in a microwave-safe bowl. Microwave in 30-second intervals, stirring well after each interval, until the chocolate is smooth.
- Remove the tin from the freezer. Spoon about 1 tablespoon of melted chocolate over the peanut butter layer in each cup, spreading it to cover the filling completely.
- Return the muffin tin to the refrigerator and chill for at least 1 hour, or until the chocolate is completely firm.
- Peel off the paper liners and serve your homemade peanut butter cups.
Notes
- For a healthier option, substitute the powdered sugar with a natural sweetener like maple syrup, adjusting the amount to achieve a firm filling consistency.
- If you want a salty contrast, sprinkle a tiny pinch of sea salt on top of the melted chocolate layer before chilling.
- You can use any type of chocolate you prefer, such as semi-sweet or dark chocolate, to change the final flavor profile.
Nutrition
- Serving Size: 1 cup
- Calories: 310
- Sugar: 28
- Sodium: 120
- Fat: 21
- Saturated Fat: 8
- Unsaturated Fat: 13
- Trans Fat: 0
- Carbohydrates: 29
- Fiber: 1
- Protein: 7
- Cholesterol: 20