
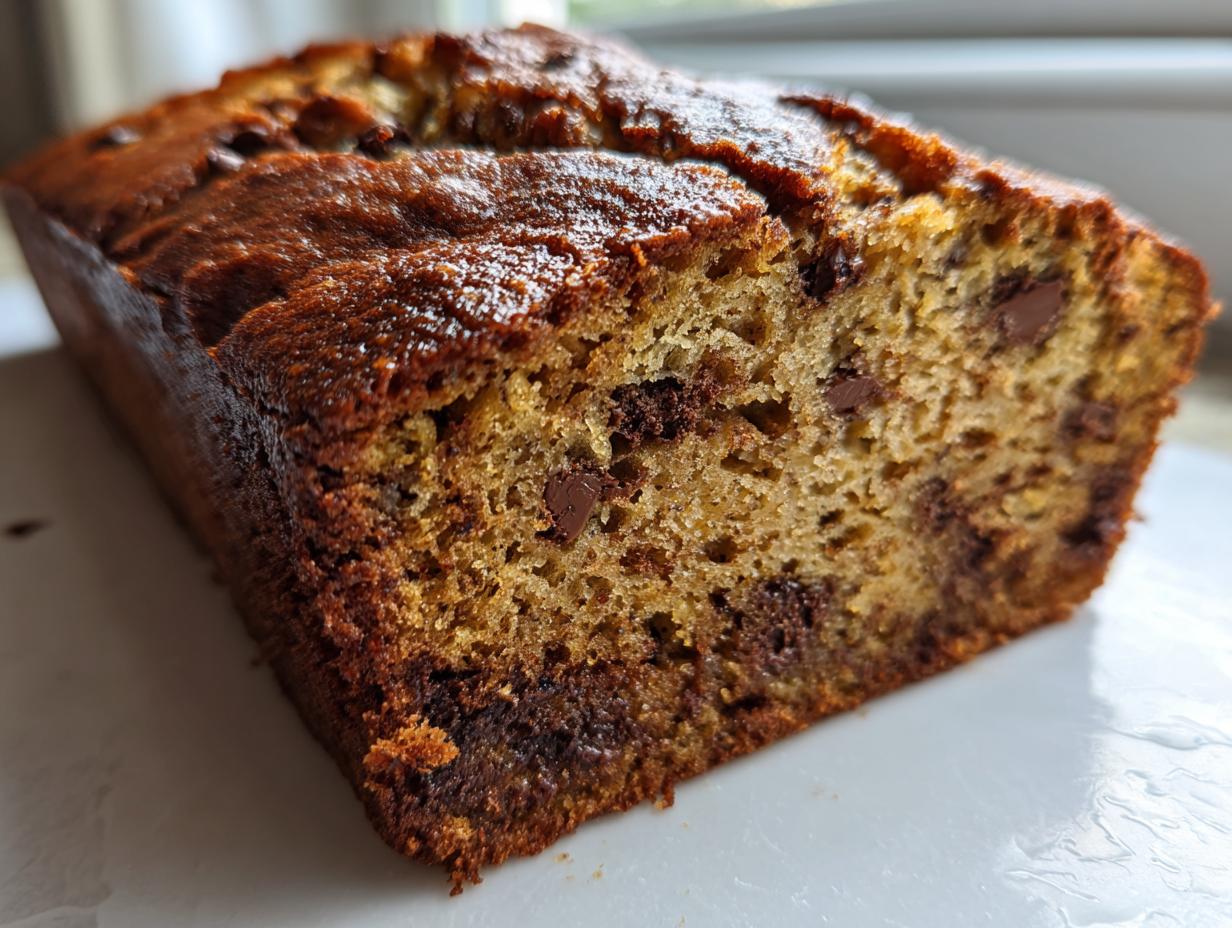
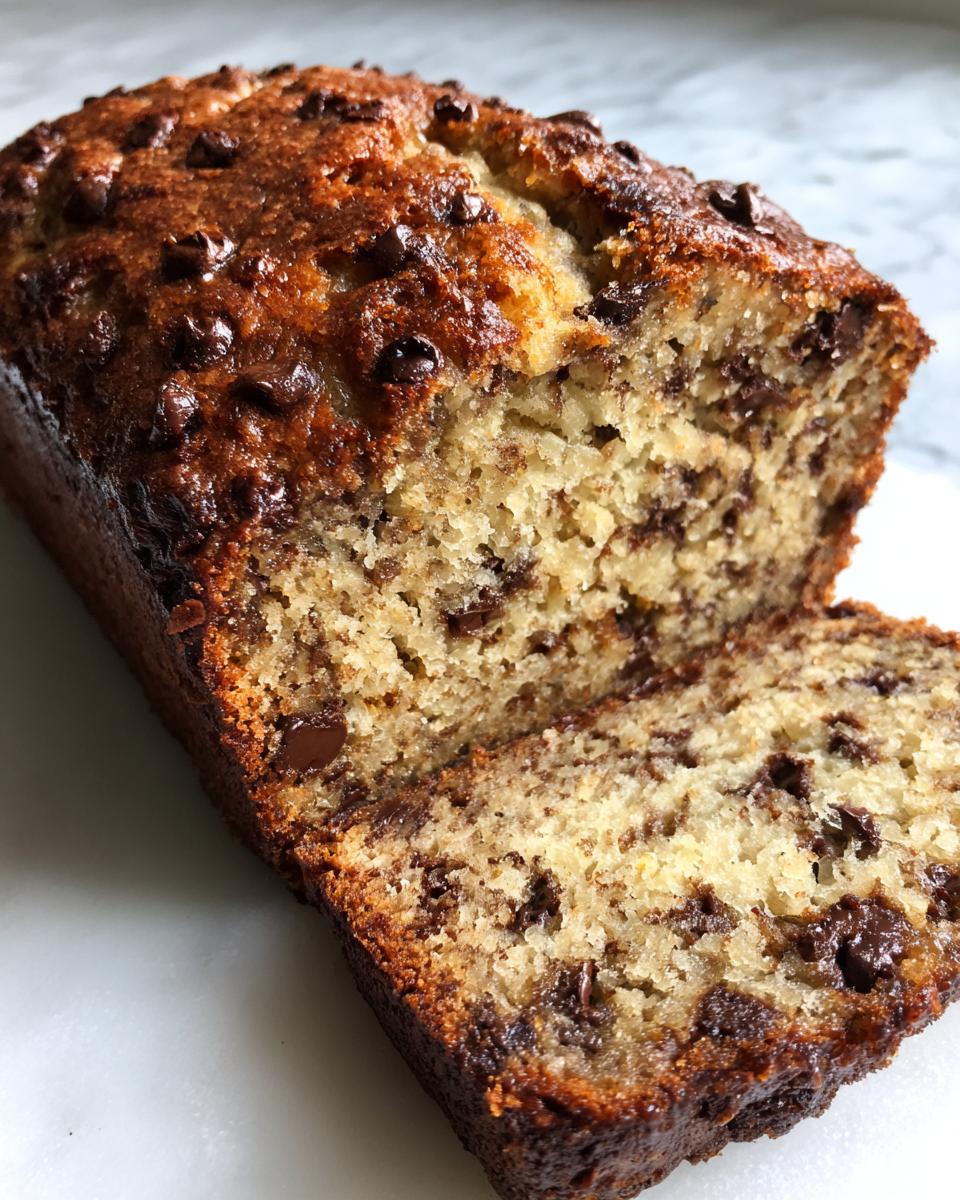
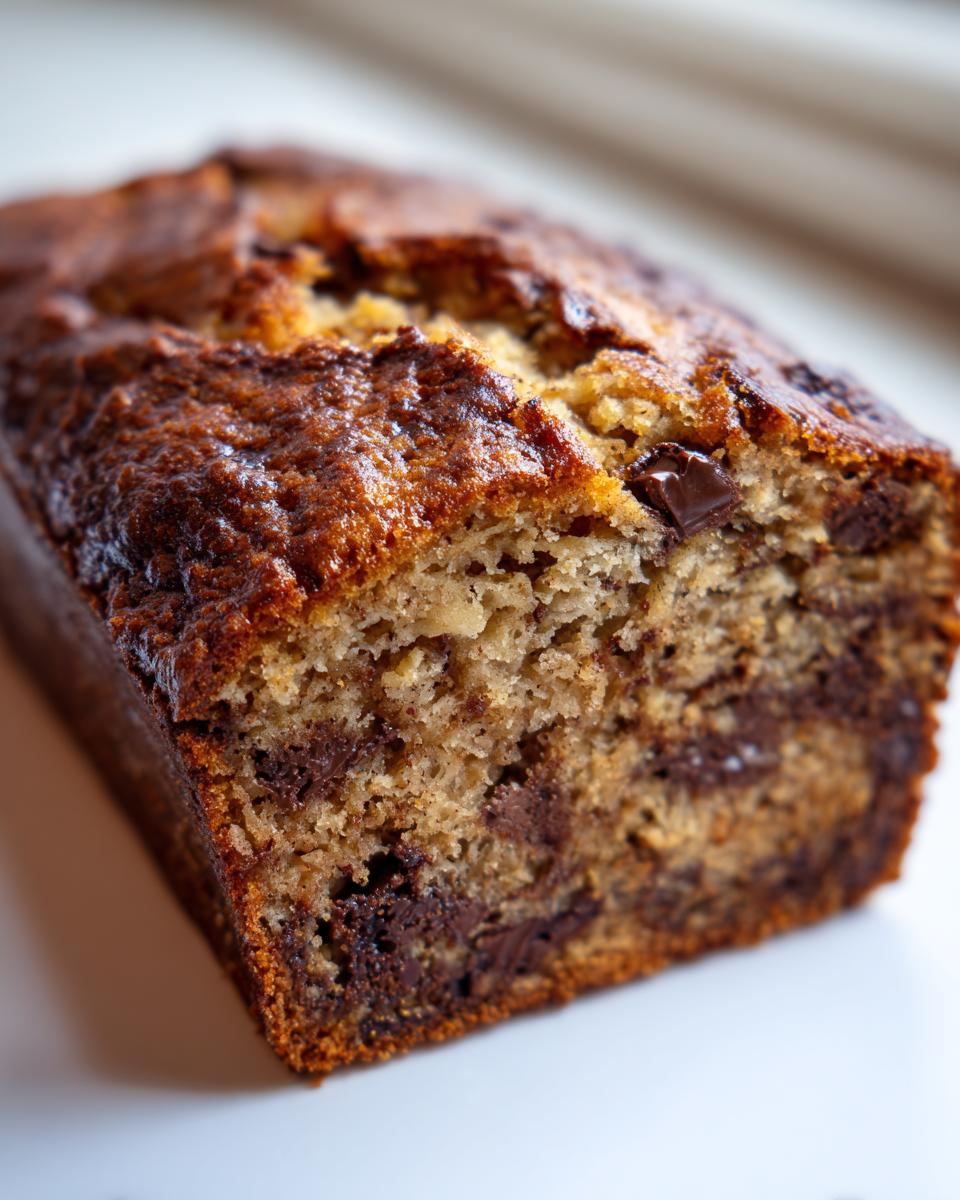
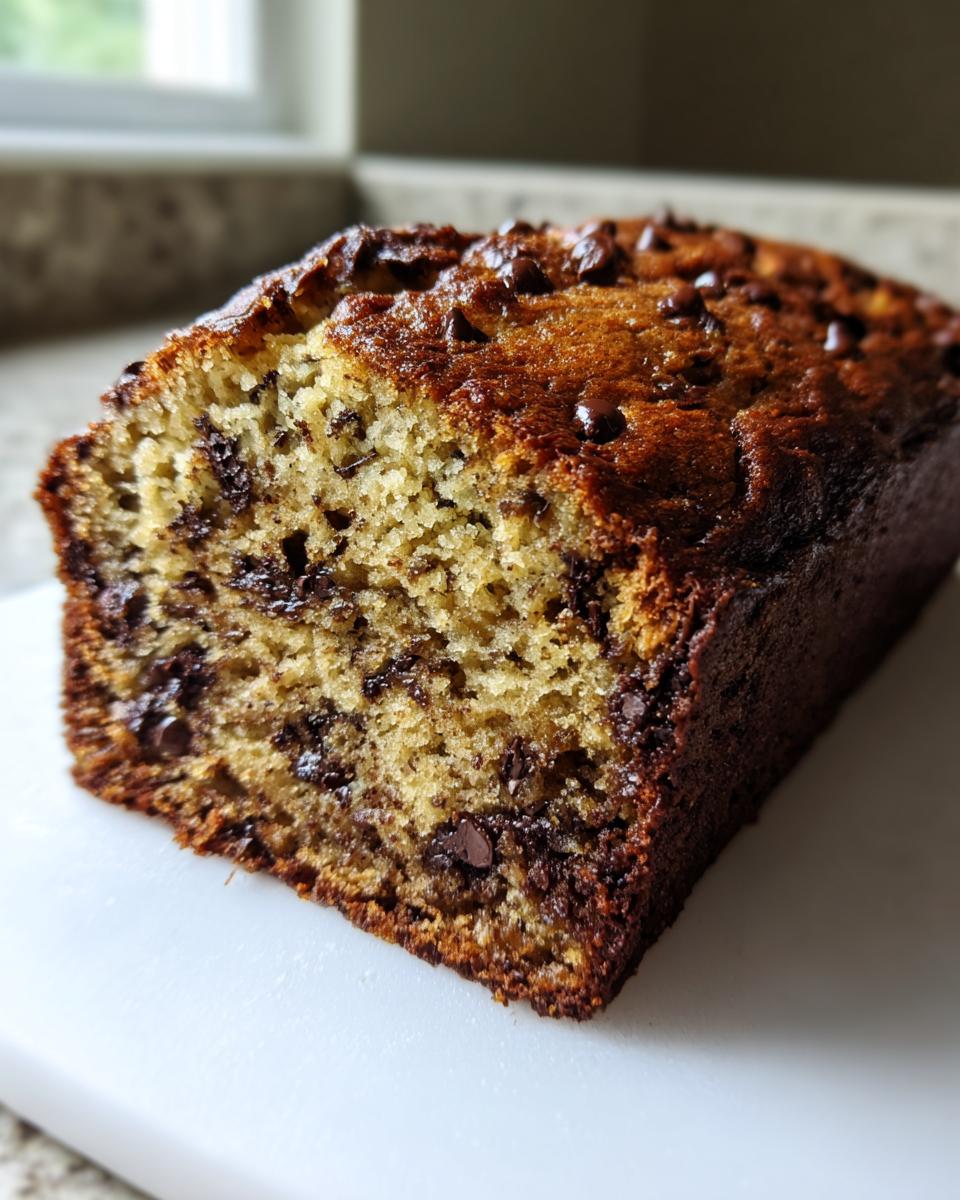
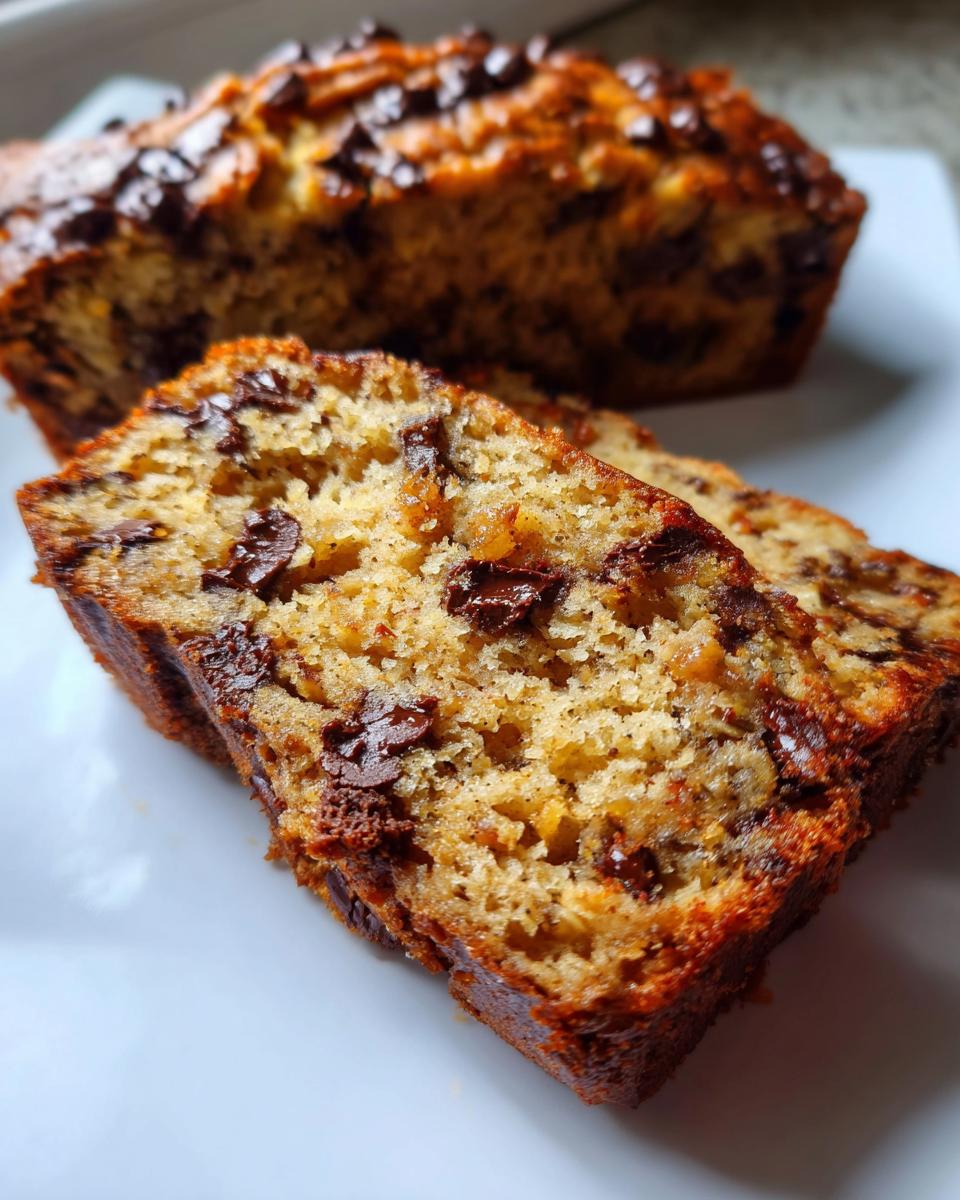
You know that moment when you walk into the kitchen and the smell of warm sugar and spice just settles over you? That’s the feeling I chase every time I pull something out of the oven. For me, nothing beats that comforting aroma of a perfect loaf of banana bread. If you’ve ever been scared off by dry, crumbly loaves, please stop worrying right now! I spent years perfecting this, and what I landed on is truly the foolproof, ultimate moist classic banana bread recipe.
When I started MayaPlate, it was because my own life as a nutritional consultant felt too fast for the slow, comforting things I loved, like my grandmother’s baking. I needed food that tasted like home but worked with my packed schedule. That’s the core of everything we do here: delicious, simple, and genuinely practical solutions for everyday eating. I’m Maya Thompson, and trust me, this banana bread recipe proves you absolutely can have incredible flavor without spending hours waiting by the oven. This is a one-bowl wonder designed for real life.
We kept the integrity of the classic flavor profile but smartened up the process. We talk about whole ingredients and good nutrition, but we never sacrifice that soul-soothing taste. This loaf is perfectly tender, deeply flavorful, and the absolute best way to use up those forgotten brown bananas sitting on your counter. Save the recipe, because once you master this, you won’t look back, and you can use this fundamental technique for all your moist banana bread adventures!
- Why This Easy Banana Bread Recipe Delivers Moisture
- Gathering Ingredients for Your Classic Banana Bread
- Simple Baking: Step-by-Step Instructions for Banana Bread
- Tips for Success Making the Best Banana Bread
- Storage and Make Ahead Breakfast Options for Banana Bread
- Variations on Classic Banana Bread
- Frequently Asked Questions About Banana Bread
- Serving Suggestions for Your Homemade Banana Bread
- Nutritional Estimates for This Comfort Food Baking Recipe
Why This Easy Banana Bread Recipe Delivers Moisture
Okay, let’s talk moisture, because that’s the make-or-break factor for any great banana bread, right? We’re aiming for melt-in-your-mouth tenderness, not something you need a glass of water to swallow. The reason our Easy Banana Bread Recipe is so successful comes down to chemistry, and it’s super simple.
First, we ditch the creaming method for the butter. Instead, we use melted butter. When you cream butter, you incorporate air, which makes a light, cakey texture. But for a dense, super-moist loaf that stays fresh, melted fat coats the flour particles better. This inhibits too much gluten development, which keeps the crumb tender and heavy with moisture. It’s a little trick I picked up trying to maximize flavor while keeping things incredibly speedy.
Also, we skip sour cream or yogurt in the main batter—we rely on the fruit itself! When you look at the ingredients, you see we ask for a specific ripeness level. That transformation of starch into sugar inside the fruit is exactly what we need to pull moisture through the bake. For more tips on other moist bakes, you can check out my guide on moist date nut bread too!
The Secret to Perfect Ripe Banana Recipes
If you take away only one thing today, let it be this: banana ripeness dictates everything. Don’t even think about grabbing bananas that are yellow with just a few brown spots. Those are for peeling and eating as a snack!
For the absolute Best Banana Bread, your bananas need to look sad. I mean truly, heavily spotted, almost black on the peel. The darker they are, the higher their sugar content, and therefore, the more moisture and intense banana flavor they contribute to the final loaf. If you aren’t ready to bake right now, peel your black bananas, mash them up, and toss them in a freezer bag. They’ll be perfect for your next batch of Homemade Banana Bread!
Gathering Ingredients for Your Classic Banana Bread
Alright, let’s get our mise en place ready! Since this is an Easy Banana Bread Recipe and we aren’t setting up an empire of dirty bowls, keeping these ingredients ready to go makes the whole process feel like a dream. I always keep a little stash of those almost-black bananas frozen, just so I can whip up a loaf of Homemade Banana Bread at a moment’s notice. You want everything measured out before you even touch the mixing bowl—that’s the MayaPlate way!
Here is exactly what you need for one beautiful, moist loaf:
- 3 large very ripe bananas, mashed (remember, the sadder looking, the better!)
- 1/2 cup unsalted butter, melted
- 3/4 cup granulated sugar
- 1 large egg, lightly beaten
- 1 teaspoon vanilla extract
- 1 3/4 cups all-purpose flour
- 1 teaspoon baking soda
- 1/2 teaspoon salt
- 1/2 teaspoon ground cinnamon
- 1/2 cup chocolate chips (optional—but seriously, highly recommended!)
If you happen to have run out of bananas, or maybe you just want to cheat *slightly* on the moisture level, check out the notes below. This recipe is solid, but a little adjustment never hurt anyone!
Ingredient Notes and Substitutions for Moist Banana Bread
A few little pointers on getting these basics perfect for your banana bread. First, when measuring that flour—don’t scoop it straight out of the bag with your cup! That compacts it, and too much flour is the number one way to dry out a quick bread. You need to spoon the flour gently into your measuring cup, and then level off the top with a knife. It seems fiddly, but it makes a huge difference to the final crumb texture.
As for my optional add-in, if you’re folding in those chocolate chips (and if you are, use good quality ones, please!), make sure you do it right at the very end, just until you see the last streak of flour disappear. We talked about gluten development earlier—the more you stir after adding the flour, the tougher your loaf gets!
Now, if you are chasing the absolute peak of moistness, I mentioned an optional swap in my notes. If you want to go next-level with the tender crumb, you can substitute 1/4 cup of that all-purpose flour with 1/4 cup of plain, full-fat Greek yogurt. It lends a beautiful, delicate texture, almost like a Banana Loaf Cake. It works like a charm, and honestly, no one will ever know your secret unless you tell them! For more baking inspiration, take a peek at my sweet Alabama pecan bread recipe when you’re ready for something new.
Simple Baking: Step-by-Step Instructions for Banana Bread
This is where the magic—and the simplicity—really shines through. Because this is practically a One Bowl Banana Bread situation, cleanup is an absolute breeze. We’re going to handle everything in one large mixing bowl, which is great for anyone who finds baking intimidating. Remember, we’re aiming for rewarding, practical results here!
First things first: Preheat your oven to 350°F (175°C). If you’re using a standard 9×5 inch loaf pan, go ahead and grease and flour it now. A good coating prevents sticking, which is the last thing we want after putting all that care into this wonderful banana bread!
Step two is mashing. Grab those super ripe bananas—remember what we talked about—and mash them directly into your large bowl until they are mostly smooth. Now, pour in that melted butter and mix it until it’s just incorporated with the banana. We’re building the wet base right here.
Next, stir in your granulated sugar, the single beaten egg, and that teaspoon of vanilla extract. Mix until the wet ingredients look happy and uniform—no streaks of egg white left hanging around. It should look thick and sweet!
Now for the dry team. In a *separate small bowl* (yes, one extra bowl for whisking the dry things is the only exception to the ‘one bowl’ rule, and it’s essential!), whisk together your flour, baking soda, salt, and cinnamon. Whisking them first makes sure the baking soda is evenly distributed so you don’t end up with random pockets of bitter flavor in your slice.
Gradually add those dry ingredients into your wet mixture. This is the critical point where we slow down. You only want to mix until you start to see the flour disappear. Slowly working them in prevents big splatters and keeps things manageable.
Mixing Technique: Avoiding Overmixing in Your Banana Bread
Listen to me: Do not mix this batter until it’s perfectly smooth! I know our instincts as bakers (especially in Simple Baking like this) tell us to whisk everything into submission, but resist! As soon as you add the flour to the wet ingredients, you start developing gluten. If you beat it too much, you get tough, chewy tunnels in your loaf. We do not want tunnels in our banana bread; we want cozy, tender crumb!
Mix only until you see the last few streaks of flour vanish. It’s okay—in fact, it’s perfect—if the batter still looks a little lumpy. If you are adding those chocolate chips, fold them in right at the end using a spatula, not the whisk! Just two or three gentle turns is all you need.
Pour that thick, glorious batter into your prepared pan. It should fill about two-thirds of the way, leaving room for a nice dome on your Banana Loaf Cake.
Baking Times and Testing Doneness for the Banana Loaf Cake
Pop that pan into your 350°F oven. For a standard 9×5 inch pan, this Quick Bread Recipe generally takes between 50 and 65 minutes to bake all the way through. Now, every oven is different, right? That’s why the visual check is second to fiddle with the timer.
Around the 50-minute mark, always test it. Grab a long wooden skewer or even a thin, clean toothpick. Gently insert it right into the thickest part of the center. If it comes out totally clean, you’re done! If you see wet batter clinging to it, give it another 5 to 7 minutes before checking again. If you see *moist crumbs* clinging to the skewer but no wet batter, that’s perfection. That right there is how you guarantee a super Moist Banana Bread and not a dry one.
I always place the cooling pan on a wire rack immediately after taking it out. This lets air circulate underneath and stops the bottom from sweating and getting gummy. We need that structure to set before we even think about slicing into it!
If you’re looking for a great guide on keeping baked goods tender, you might find how I manage creamy rice surprisingly helpful—it’s all about managing heat and mixtures!
Tips for Success Making the Best Banana Bread
We’ve mastered the mixing and timing, but a few last-minute tips can elevate this from a good loaf to truly the Best Banana Bread you’ve ever made. Remember, my goal here at MayaPlate is to make sure you feel confident and that your kitchen smells amazing, not stressful!
One little thing I learned from my early days practicing Simple Baking is that presentation matters, even for a humble loaf. When you take the bread out of the oven, let it sit right in that loaf pan on a wire rack for exactly 10 minutes. Not 5, not 15—10! That brief rest allows the structure to firm up just enough so it won’t crumble when you try to pull it out. If you turn it out too soon, the heavy, moist center might stick or slump.
After those 10 minutes are up, gently turn the pan over onto your wire rack. If you greased and floured properly, it should slide right out. Now, let it cool completely on that rack. I know it’s torture, especially when the aroma is this good, but slicing into a warm banana bread releases all the steam, and steam equals lost moisture. Patience really is key to keeping this loaf wonderfully Moist Banana Bread!
If you prefer a sweeter top—because who doesn’t love a little crunch?—try sprinkling a tablespoon of coarse sugar, like turbinado, over the batter right before it goes into the oven. It gives you this beautiful, glistening crust that’s just so satisfying against the soft interior. It’s an easy way to make your Homemade Banana Bread look professionally finished.
For those times when you want a big effort for a small time investment, remember that this loaf freezes wonderfully. Wrap it tightly once it’s totally cooled, maybe in plastic wrap and then foil—it handles the freezer like a champ. You can find some great examples of other fantastic, freezer-friendly recipes, like my soft peanut butter cookies, that make great grab-and-go snacks, too.
And hey, if you’re looking for a slightly different approach that might use fewer dishes, I saw a great recommendation for a one-pan method you might want to check out for later inspiration! This one-pan classic banana bread recipe looks like it cuts down on cleanup considerably!
Storage and Make Ahead Breakfast Options for Banana Bread
One of the reasons this banana bread recipe is so high on my list of favorites is that it is fantastic for planning ahead. Seriously, this is the perfect Make Ahead Breakfast solution for those chaotic weekday mornings! You bake it once, and suddenly you have satisfying, homemade goodness ready to go.
When you’ve got a whole loaf cooling on the rack and you can’t wait to dig in—I totally get it! But if you want that fantastic moist banana bread texture to last, storage is key. At room temperature, wrapped tightly in plastic wrap or tucked into an airtight container, this bread will stay great for about three to four days. I usually place it in a cool, dark spot in the pantry. If your kitchen is really warm or humid, you might want to wrap it well and keep it on the counter.
But let’s talk freezing, because that’s the real secret to having homemade banana bread on demand. Once the loaf is completely cool—and I mean *completely* cool, or you’ll get condensation—wrap the entire loaf tightly. The method I use is two layers: first, good quality plastic wrap pressed snugly against the surface of the loaf, and then a layer of heavy-duty aluminum foil wrapped around that. This double layer keeps freezer burn away.
You can freeze the whole loaf, or, and this is my personal preference for quick snacks, slice it up first! If you slice it before wrapping, you can grab just one or two pieces whenever you need them, which is perfect when you’re trying to keep portions controlled. It thaws super fast on the counter in about 30 minutes, or you can just pop a slice right in the toaster for a warm treat. It’s comforting, delicious, and helps simplify those busy mornings. For more great ideas on simplifying your menu, take a look at my recipe for a make-ahead brunch bake—it uses the same philosophy!
Variations on Classic Banana Bread
Once you have mastered the basic structure of this incredibly Moist Banana Bread recipe, you have a beautiful canvas to paint on! Part of the joy of baking, even when you’re dedicated to Simple Baking routines, is mixing things up a little bit. I like to think of this basic recipe as the foundation for your perfect Breakfast Loaf Cake, and we can certainly build on that foundation!
The most popular addition, and honestly, the one I often can’t resist, is adding chocolate. We already discussed folding in those chocolate chips right at the end, but let me tell you, you can be generous! I usually don’t measure anymore; I just pour until I feel like it’s enough for rich pockets of melted chocolate throughout the loaf. If you’re feeling fancy with your chocolate chips—maybe using dark, milk, and white mixed together—you should definitely check out my recipe for cannoli cookies for some inspiration on mixing chocolates!
But what if you want something warmer, something with that cozy, autumnal spice? That leads us to the absolute joy of a ribbon swirl! This is where you turn your Classic Banana Bread into something that feels truly special for a weekend brunch.
To create a cinnamon swirl, just take about 1/3 cup of your granulated sugar out of the main recipe and mix it in a small bowl with 2 teaspoons of ground cinnamon and maybe just a pinch of nutmeg. When you pour your batter into the pan (after the initial layer is poured in), you just sprinkle that cinnamon-sugar mixture evenly over the top. Then, take a knife or a chopstick and gently slice it down through the batter in a figure-eight pattern a few times. Be careful not to scrape the bottom of the pan, but just swirl that sugar mixture through the batter. It melts beautifully and creates these delightful, sweet, spiced pockets!
If you want to take that cinnamon swirl idea to the next level, you can actually turn your loaf into a full-on Snickerdoodle experience. It incorporates that swirl but also adds a dollop of sour cream or yogurt right into the batter for extra tenderness, just like we talked about earlier. It’s absolutely divine if you want a different challenge later on for your Sweet Snack Recipes. You can see a fantastic example of that flavor profile over here: Snickerdoodle Banana Bread Recipe. For now, start with the chips; they’re simpler and still unbeatable!
Frequently Asked Questions About Banana Bread
I know you might still have a few little burning questions floating around after all that baking talk! That’s totally fine. When learning any Quick Bread Recipe, especially one you want to get perfect, asking questions is the smartest thing you can do. Here are a few things I hear all the time from folks trying this recipe for the first time. Don’t worry if you fall into these categories—we’ve all been there when learning Beginner Baking Recipes!
Can I use less sugar in this banana bread recipe?
This is a tricky one! You absolutely *can* reduce the sugar, but I have to give you the honest MayaPlate warning: it might impact your texture. Sugar does more than just sweeten in baking; it’s actually crucial for keeping things moist and tender. Sugar keeps water (which comes from the bananas and eggs) locked into the batter.
If you cut back too much—say, by half—you risk ending up with a loaf that browns too quickly on the outside and dries out faster overall. If you want a *slightly* less sweet loaf, try cutting the sugar down by just a tablespoon or two. That slight reduction usually won’t ruin the structure, but going further might make answering the question, How to Make Moist Banana Bread, much harder for you next time around!
What is the best way to use overripe bananas if I don’t want to bake right away?
This is perhaps the most important question a true banana bread lover should ask! You can’t bake when the bananas aren’t ready, but you also can’t let those perfectly soft beauties go to waste. My pro tip is freezing them in pre-measured, mashed form.
Wait until your bananas are deeply spotted—remember, black is best! Peel them, mash them up right then and there with a fork in a bowl. Then, measure out exactly 1 cup or 1.5 cups (depending on how many loaves you want to save for later) and scoop that mashed banana into a heavy-duty freezer bag. Label the bag with the date. When you wake up one morning craving Ripe Banana Recipes, you just pull the bag out the night before and use it straight from the fridge. It thaws perfectly and retains all the moisture and flavor you need for spectacular Homemade Banana Bread.
If you’re looking for more general guidance on applying my baking standards to other recipes, feel free to read up on my general philosophy over on my About Page!
Serving Suggestions for Your Homemade Banana Bread
The best part about baking a perfect loaf of banana bread is finally sitting down to eat it! Honestly, this is one of those rare treats that is delicious exactly as it comes out of the oven, cooled and sliced, or even toasted the next morning. It fits so perfectly into that sweet spot between a decadent dessert and a satisfying Breakfast Loaf Cake.
If you’re having it warm, right when it’s cooled down enough that it’s not steamy anymore, I tend to keep the toppings super simple. A thin swipe of good quality salted butter is all you need. The slight saltiness cuts through the sweetness of the banana and complements the cinnamon beautifully. It makes for a lovely, quick snack any time of day!
For a heartier breakfast, especially if you’re enjoying this as a Make Ahead Breakfast option, try toasting a thick slice. When it’s lightly toasted, the edges get a tiny bit crispy, and you can easily spread on a little cream cheese. I like to mix my cream cheese with a tiny drizzle of maple syrup before spreading it on. It’s wonderful—creamy, soft, and sweet, turning it into a real treat!
If you’re serving this up at brunch, remember that a little extra texture goes a long way. You can serve slices alongside fresh fruit, maybe some berries, to lighten things up. Or, if you want to lean into the comfort food aspect, a scoop of vanilla bean ice cream on a warm slice makes it a fantastic evening dessert. Truly, there’s no wrong way to eat this! For more simple ideas on how to kickstart your mornings, check out my guide to easy breakfast ideas.
If you are looking for a slightly lighter take on this sweet treat—maybe one that focuses on using natural sweeteners throughout—check out this recommendation I found online for an incredibly moist recipe variation! World’s Best Banana Bread – Moist, Flavorful & Easy shows off some different approaches to keeping the loaf delicious.
Nutritional Estimates for This Comfort Food Baking Recipe
I always get asked about the numbers, and while this is definitely comfort food baking, not a strict diet plan, I like being transparent about what’s in that gorgeous loaf! As a nutritional consultant, I know that knowing the breakdown helps you fit this wonderful banana bread into your week without stress. Because everyone bakes a little differently—maybe you used more sugar or went heavy on the optional chocolate chips—these are just estimates based on the recipe as written.
Please remember these are just guides for one slice of our Homemade Banana Bread; yours might vary slightly depending on the exact size of your bananas or how generously you portion it out! This recipe generally yields about 10 satisfying slices that fit perfectly into that Sweet Snack Recipes category.
Here’s a quick look at the approximate breakdown per slice:
- Calories: 280
- Total Fat: 13g (Be mindful of the Saturated Fat at about 8g)
- Carbohydrates: 42g
- Protein: 4g
It’s a pretty balanced profile for a snack or breakfast loaf, full of satisfying carbs to give you energy through the morning. The sugar content is around 18g, which we expected since this loaf relies on natural banana sweetness boosted by granulated sugar for that perfect texture—remember, sugar helps keep it Moist Banana Bread!
It’s good to know where you stand, but honestly, the best part of this recipe is the joy it brings. Knowing you made something this delicious and satisfying from scratch is what really feeds the soul, far more than any calorie count!
PrintFoolproof Moist Classic Banana Bread Recipe
This easy, one-bowl banana bread recipe guarantees an incredibly moist texture using overripe bananas. It is simple enough for beginners and makes a perfect breakfast loaf or sweet snack.
- Prep Time: 15 min
- Cook Time: 60 min
- Total Time: 75 min
- Yield: 1 loaf (about 10 servings) 1x
- Category: Breakfast
- Method: Baking
- Cuisine: American
- Diet: Vegetarian
Ingredients
- 3 large very ripe bananas, mashed
- 1/2 cup unsalted butter, melted
- 3/4 cup granulated sugar
- 1 large egg, lightly beaten
- 1 teaspoon vanilla extract
- 1 3/4 cups all-purpose flour
- 1 teaspoon baking soda
- 1/2 teaspoon salt
- 1/2 teaspoon ground cinnamon
- 1/2 cup chocolate chips (optional)
Instructions
- Preheat your oven to 350°F (175°C). Grease and flour a standard 9×5 inch loaf pan.
- In a large bowl, mash the ripe bananas until mostly smooth.
- Stir the melted butter into the mashed bananas until combined.
- Mix in the granulated sugar, beaten egg, and vanilla extract until smooth.
- In a separate small bowl, whisk together the flour, baking soda, salt, and cinnamon.
- Gradually add the dry ingredients to the wet ingredients. Mix only until just combined; do not overmix.
- If using, gently fold in the chocolate chips.
- Pour the batter into the prepared loaf pan.
- Bake for 50 to 65 minutes, or until a wooden skewer inserted into the center comes out clean.
- Let the banana bread cool in the pan for 10 minutes before turning it out onto a wire rack to cool completely.
Notes
- Use bananas that are heavily spotted or almost black for the best flavor and moisture.
- For an extra moist banana bread, substitute 1/4 cup of the flour with 1/4 cup of plain Greek yogurt.
- If you prefer a crispier top, sprinkle 1 tablespoon of coarse sugar over the batter before baking.
- This bread freezes well. Wrap cooled slices tightly in plastic wrap and then foil.
Nutrition
- Serving Size: 1 slice
- Calories: 280
- Sugar: 18g
- Sodium: 210mg
- Fat: 13g
- Saturated Fat: 8g
- Unsaturated Fat: 5g
- Trans Fat: 0g
- Carbohydrates: 42g
- Fiber: 2g
- Protein: 4g
- Cholesterol: 45mg