
Oh, friend, let’s talk about real comfort food because that’s what we are all craving, especially when the weather turns crisp. Forget those flimsy, cardboard-tasting store-bought options; we are making bakery-style sourdough bread bowls from scratch today! For me, Maya, the founder of MayaPlate, bringing heart back into the kitchen, even for something as simple as dinner, is everything. It’s about pausing the busy day and creating something nourishing and incredibly satisfying. This recipe turns simple flour and water into the perfect edible vessel, sturdy enough for your thickest chowder but tender inside. You can learn more about my philosophy over at the MayaPlate story. Trust me, once you master these, you’ll never look back at a sad, soggy bowl again.
- Why These Are the Best Homemade Bread Bowls You Will Ever Make
- Essential Ingredients for Perfect Sourdough Bread Bowls
- How to Make Bread Bowls: Step-by-Step Sourdough Bread Bowl Tutorial
- Tips for Success When Making Your Edible Soup Bowls
- Serving Suggestions for Your Comfort Food Bread Bowls
- Storage and Reheating Instructions for Soft Bread Bowls Recipe
- Frequently Asked Questions About Making Bread Bowls
- Estimated Nutritional Data for Your Sourdough Bread Bowls
- Share Your Homemade Bread Bowls Experience
Why These Are the Best Homemade Bread Bowls You Will Ever Make
I get it—there are a million recipes claiming to be the best, but these homemade bread bowls are different. The secret sauce? It’s that beautiful, slow fermentation from the sourdough starter! It gives these edible vessels a complex flavor that just screams “bakery quality,” even though you whipped them up right here at home.
For me, this is where we hit peak E-E-A-T. You want crusty, right? You absolutely get it, but it’s balanced perfectly:
- The exterior bakes up beautifully crusty bread bowls tough enough to handle anything, but…
- The interior stays so unbelievably soft and chewy, ready to soak up all that delicious soup.
- The sourdough tang brightens up rich fillings like broccoli cheddar or cheesy dips.
If you need to get your starter happy before you start, check out my guide on making sure your starter is perfectly active. It makes all the difference!

Essential Ingredients for Perfect Sourdough Bread Bowls
Okay, let’s talk about what goes into these beauties. Since we are using sourdough, we have a few non-negotiables to make sure we get that beautiful rise and flavor. Having your ingredients measured out before you start mixing is just common sense for baking success!
Here’s what you’ll need:
- 1 cup warm water (and I mean warm, about 105-115°F, nothing scalding hot!)
- 1 teaspoon active dry yeast
- 1 teaspoon sugar
- 3 cups all-purpose flour, plus more for dusting
- 1 cup active sourdough starter (this needs to be fed and bubbly, please!)
- 1 ½ teaspoons salt
- 1 egg white, beaten with 1 tablespoon water (this is our secret for a nice shine!)
That sourdough starter is the backbone, so we have to talk about how to check it before we move on.
Sourdough Starter Health Check
If your starter isn’t happy, your bread bowls won’t be happy. Before you measure out that cup, do the float test! Drop a tiny spoonful into a glass of water. If it floats right on top, it’s bubbly and ready to go. If it sinks, give it another hour or two to wake up.
How to Make Bread Bowls: Step-by-Step Sourdough Bread Bowl Tutorial
Alright, grab your biggest mixing bowl, because this sourdough bread bowl tutorial is going to walk you through every simple move to get these beauties baked. If you’re looking for tips on achieving that super soft crumb without needing to knead much, check out my guide on easy artisan bread, but for these bowls, we need a little elbow grease!
First thing’s first: activate that yeast in the warm water with the sugar. If it gets foamy in five minutes, you’re golden! Then, pour in your flour, that bubbly starter we just checked, and the salt. Mix it up with a wooden spoon until it looks shaggy—don’t worry about perfection yet. Now, turn it out onto a lightly floured surface and knead like you mean it for about 8 to 10 minutes. You’re looking for smooth and elastic—it should feel alive under your hands.
Toss it in an oiled bowl, cover it, and let it double in size for about an hour to an hour and a half. Once it’s puffed up, gently punch it down. I divide the dough into four equal pieces and shape each one into a tight little round ball. Place those balls on parchment paper, cover gently, and let them rest for another 30 minutes.
This is where the oven matters! Preheat your oven to 400°F (200°C). Remember that shallow pan I mentioned? Put that on the very bottom rack now, empty. Brush your dough balls lightly with the egg wash for that gorgeous shine. Bake them for 20 to 25 minutes until they are deep golden brown. They should sound hollow when you tap the bottom!
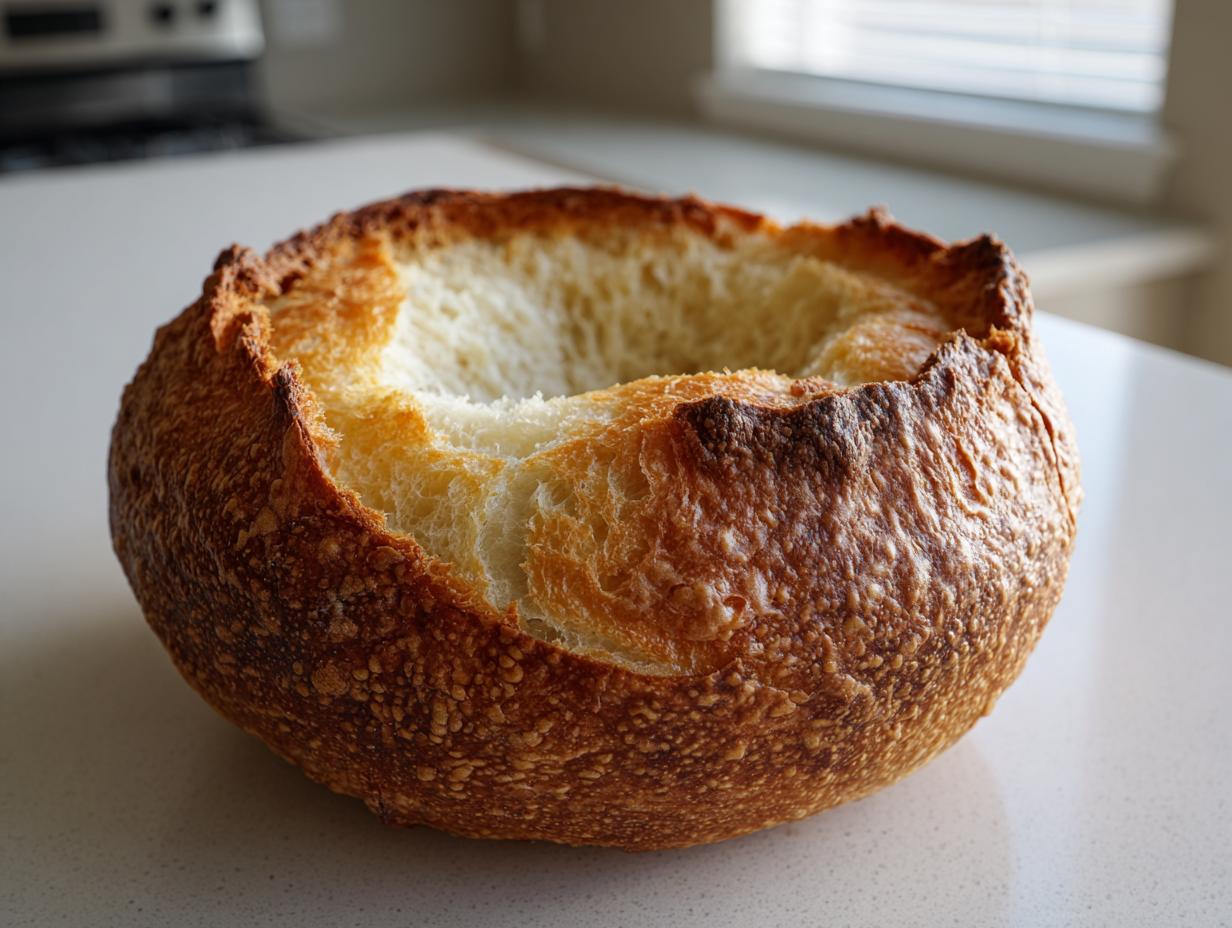
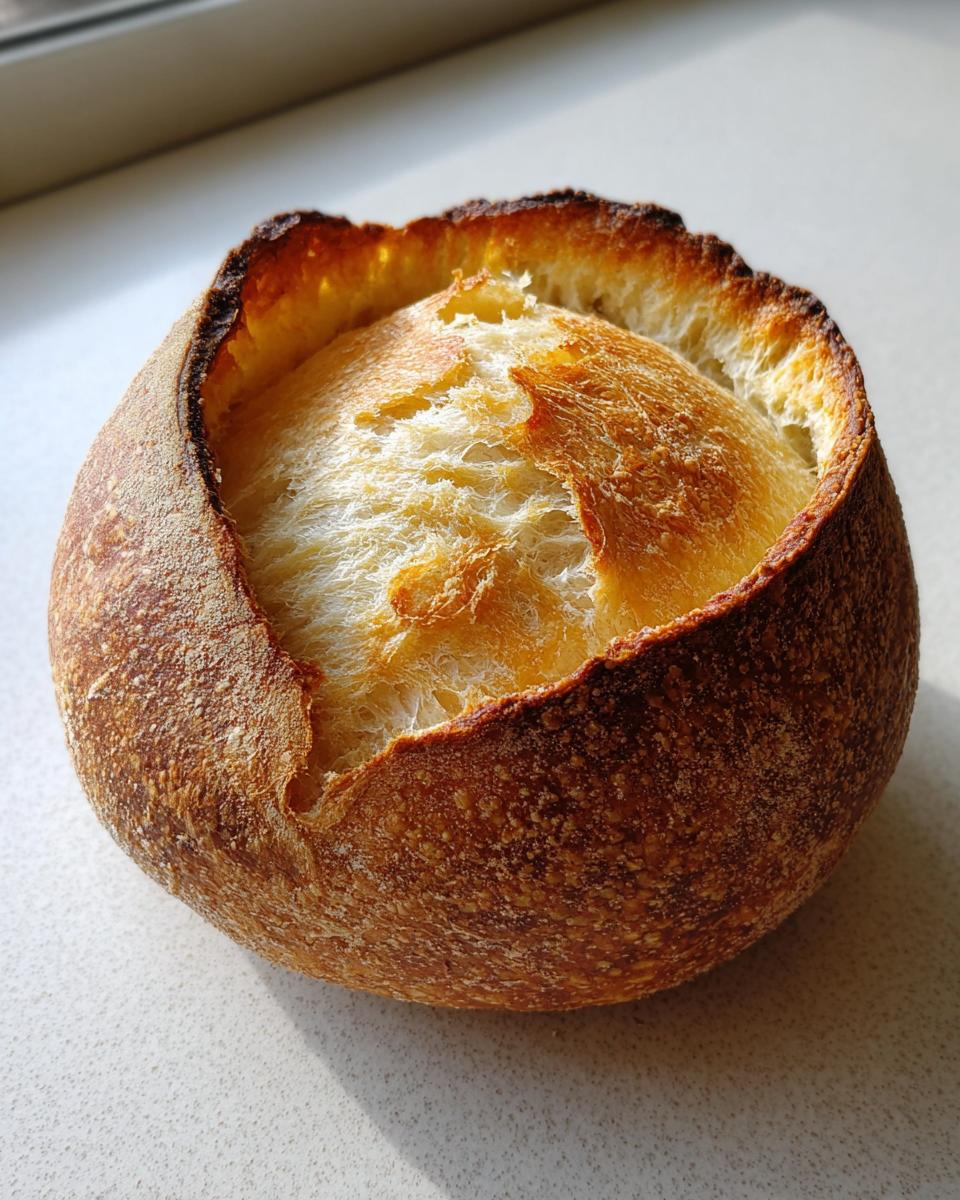
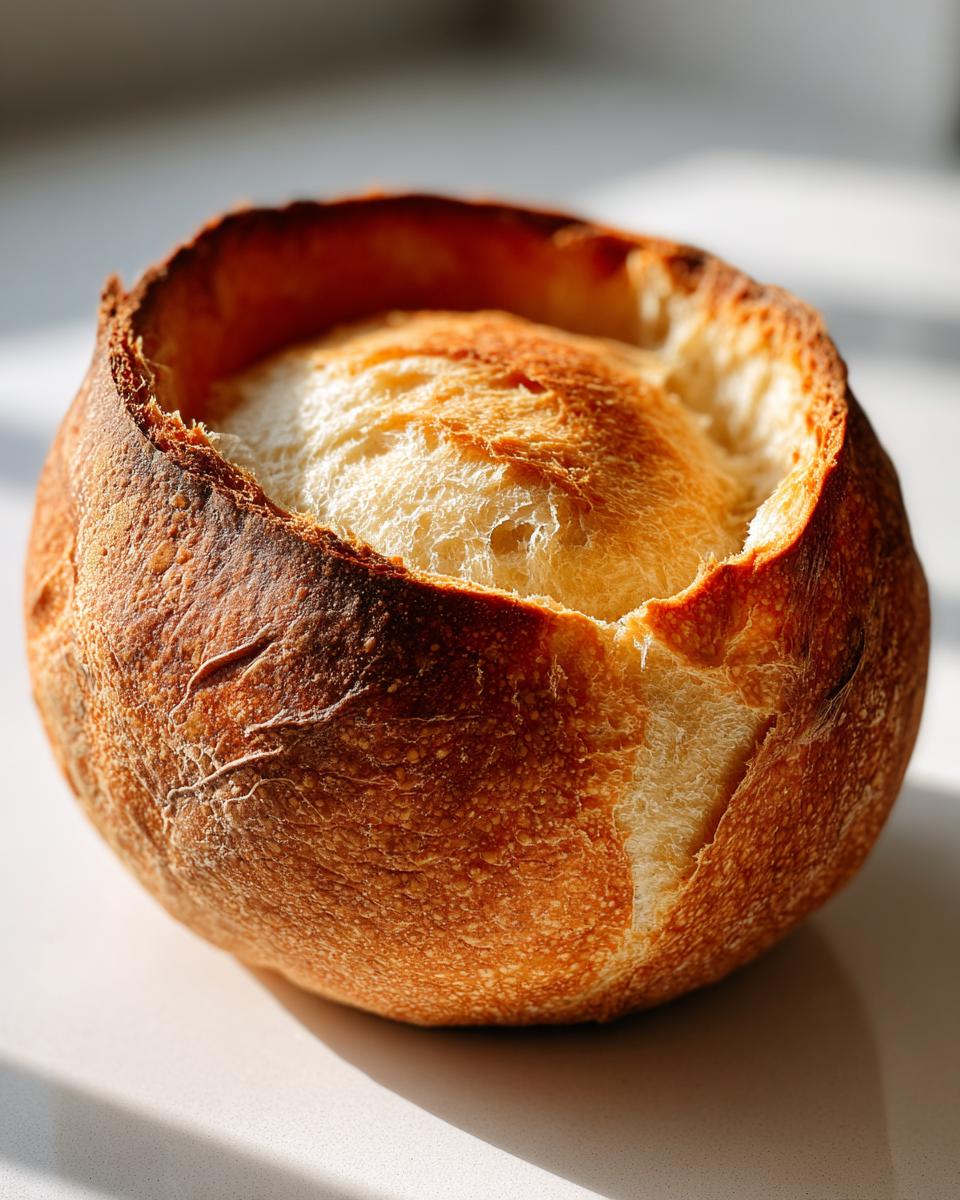
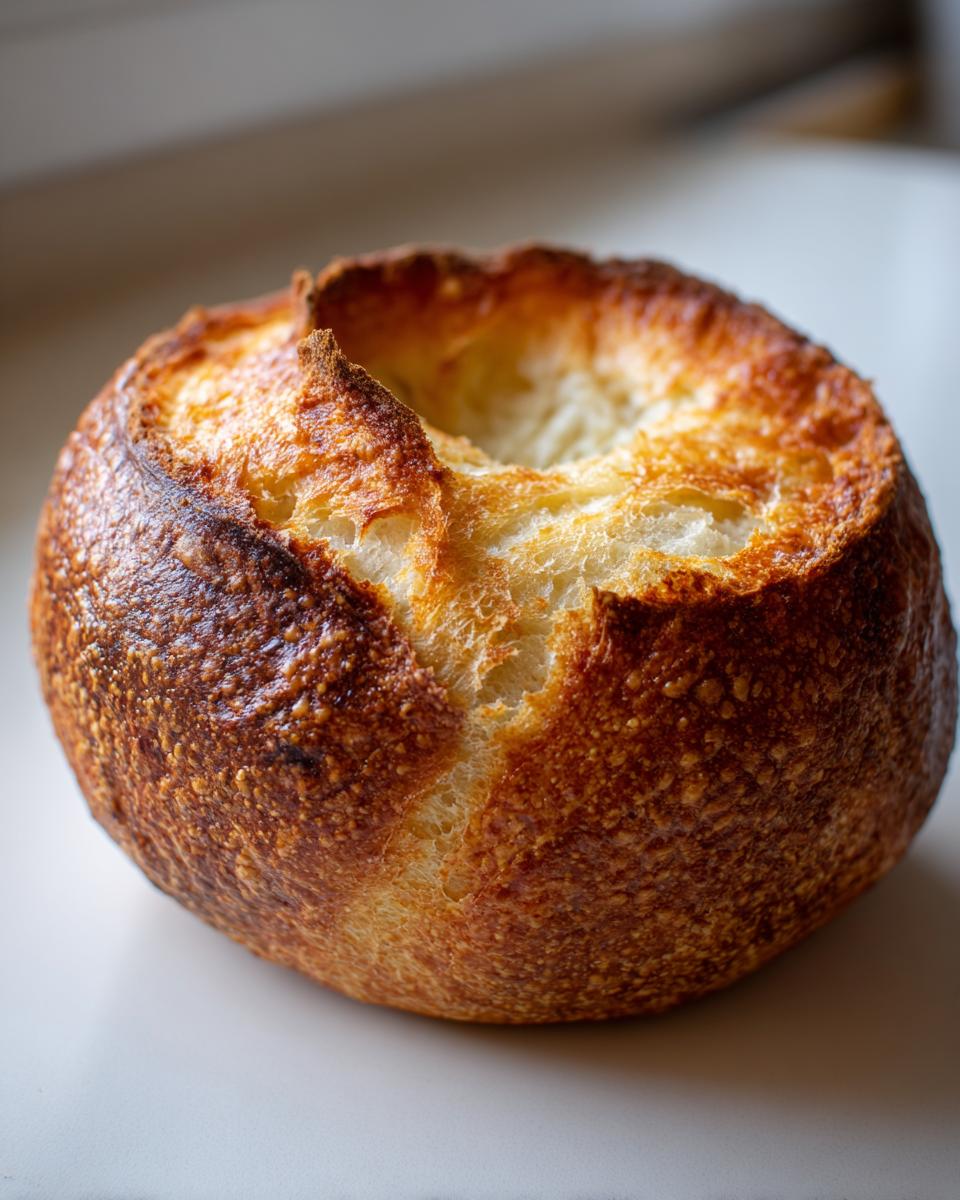
Achieving the Ideal Crusty Bread Bowls Texture
Listen, bread needs steam to create that incredible crackly crust we all dream about. While your loaves are baking, throw a few ice cubes in that hot pan you put on the bottom rack. That burst of steam traps moisture around the dough initially, which lets the loaf expand fully before the crust sets hard. That’s the trick for truly crusty bread bowls with that wonderful soft interior.
Let them cool for at least 15 minutes before you cut into them, or you’ll lose all the steam and the inside will get gummy. That sturdy wall is what makes them perfect vessels!
Tips for Success When Making Your Edible Soup Bowls
Okay, now that you’ve mastered the bake, let’s talk about the little things that can make or break turning those loaves into perfect edible soup bowls. First up: don’t rush the cooling! I learned this the hard way when I pulled one out too soon to hollow it, thinking I was saving time. Honey, it was soup glue inside! You need that full 15 minutes so the inner crumb sets properly.
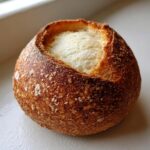
My next major tip is about hollowing. Use a serrated knife, not a regular one, to gently saw out that top circle. When scooping out the soft bread, always leave about three-quarters of an inch of wall thickness. Any thinner and your bowl will start leaking your beautiful stew halfway through dinner. We want sturdy, not soggy!
Finally, if your bread bowls end up on the counter for a few hours and lose that perfect crust, don’t fret! Just dunk the outside quickly under cool water and pop them back into a 350°F oven for about five minutes. It crisps right back up! If you want advice on keeping other baked goods moist, I share my secrets for my moist banana bread here; the principles for keeping a good crust are similar.
Serving Suggestions for Your Comfort Food Bread Bowls
Okay, you’ve baked the bread, you’ve hollowed out the center—now for the best part: filling these incredible comfort food bread bowls! While a hearty, creamy clam chowder is the classic pairing, we need to explore the universe of bread bowl filling ideas available to us. You absolutely have to try the Loaded Baked Potato Soup recipe I have on the site; it’s perfect for dipping right into that fluffy center bread. You can find it right here!
But don’t stop at soup! These sturdy sourdough boats handle heavy dishes beautifully. You could serve creamy chicken alfredo or even a rich beef stew right inside. For parties, they turn any appetizer into an event!
Beyond Soup: Creative Bread Bowls for Dips and More
Seriously, get creative! Thinking about game day or a cozy movie night? Hollow out these sourdough rounds and load them up with a piping hot spinach and artichoke dip—it’s ridiculously good. Or, dare to be different and serve baked spaghetti or chili right in the bowl. These aren’t just soup holders; they are completely edible serving dishes! I once saw a fun idea for serving pasta sauce in them, which you can read about in more detail over at this great article. It truly lets the bread shine.
Storage and Reheating Instructions for Soft Bread Bowls Recipe
Making these loaves ahead is a treat, but you need to store them correctly to keep that interior soft. If you haven’t hollowed them out yet, wrap the whole loaf tightly in plastic wrap once they are completely cooled—this keeps them fresh for about three days. For the soft bread bowls recipe quality, though, I always prefer eating them the day they are baked!
If the bowls are already hollowed out, keep the scooped-out bread crumbs separate. Store the empty bowls in a loosely sealed paper bag at room temperature. If the crust starts softening up, just dust them lightly with water and heat them at 350°F for about 5 minutes to refresh that crunch. I share some great tips for storing other baked goods, like my slow cooker pear butter, over here, but bread usually needs air circulation!
Frequently Asked Questions About Making Bread Bowls
Whenever I post photos of these perfect sourdough creations, the questions start rolling in! It’s totally normal; baking bread can feel a little intimidating at first, but these bread bowls are actually super straightforward once you know the ropes. Here are the top things people ask me about making their own homemade bread bowls.
If you nail the technique, these are the best dinner companion you could ask for! For quick meal ideas using what you might have on hand, I have some simple advice on quick and healthy lunches that might inspire your fillings.
Can I make quick bread bowls without sourdough starter?
Absolutely, you can! While the sourdough starter gives this version that superior, slightly tangy flavor and texture that I just love, if you need quick bread bowls without maintaining a starter, you can swap it out. You’ll need to increase the amount of direct yeast you use and probably cut down on the water a little since the starter itself has moisture.
Just know that the resulting loaf will be fluffier and less naturally chewy—it won’t have that deep, complex flavor that makes these the best you’ll ever make, but it will certainly work perfectly as an edible soup bowl in a pinch! Just skip Step 1 (yeast activation) and mix all your dough ingredients together at once, then knead as directed.
How thick should the walls of the bread bowl be?
This is key to preventing leaks! When you are scooping out the soft interior, pretend you are building a protective wall for your soup. I always aim for about 3/4 of an inch thick all the way around. If you go too thin, especially on the bottom, you risk a catastrophic leak of your delicious chowder, and nobody wants that mess!
Can I make these ahead of time?
Yes, you absolutely can! I often bake the loaves (before hollowing them out) the day before my dinner party. Once they are completely cool, just wrap them tightly in plastic wrap to keep that interior soft. When you are ready to serve, slice off the tops, scoop out the center, and pop them into a 350°F oven for about 7-10 minutes to refresh the crust and warm them up completely before filling.
Is cutting the top circle easier with a serrated knife?
Oh my gosh, yes, always use a serrated knife for the initial cut! A regular smooth knife tends to smash the crust down instead of slicing cleanly through it. Sawing gently with a serrated edge lets you create a perfect, neat lid that lifts right off. It makes the whole process feel so much more effortless.
Estimated Nutritional Data for Your Sourdough Bread Bowls
Since we are striving for intelligently nourishing food here at MayaPlate, transparency about what goes into your body is super important to me! Now, please remember that these numbers are just estimates for one of the four bread bowls before you fill it with potatoes or chowder—the final nutritional count will obviously change based on what amazing filling you choose.
But just looking at the bread itself, which is essentially a beautiful, rustic carb loaded with good fiber from the whole process, here is what the data suggests for a single serving (one bread bowl):
- Calories: About 350 per bowl. That’s honestly pretty reasonable for something this satisfying!
- Carbohydrates: You are looking at around 75 grams, which makes sense for a yeast bread.
- Protein: A solid 12 grams, thanks to the structure of the flour and the sourdough activity.
- Fat: Very low, only about 2 grams total, because we aren’t loading it up with a ton of oil during the mix.
This just proves that homemade bread bowls can absolutely fit into a nourishing meal plan! You get that hearty, comforting component without overloading on the heavy fats. Isn’t that wonderful?
Share Your Homemade Bread Bowls Experience
Whew! We did it! You’ve successfully navigated the yeast, mastered the knead, and now you have four stunning, bakery-quality bread bowls cooling on your counter. I genuinely can’t wait to hear how they turned out for you. This is the moment where the MayaPlate community truly comes alive, and I want to see what masterpieces you filled these edible works of art with!
Please, when you sit down for that cozy evening dinner—whether it’s thick potato soup or a cheesy dip—snap a picture! I love seeing your culinary creativity. Tag us on social media so I can share your success right alongside my own photos. Hearing about your favorite filling ideas is actually one of my favorite parts of this whole process!
If you loved the recipe and you found it helped make your busy weeknight feel a little more special, please take a moment to rate it right here on the page. Those stars really help other home cooks find reliable recipes. And if you have any burning questions that didn’t get answered in the FAQ, drop them in the comments below! I check in often, and nothing makes me happier than connecting with you about your kitchen triumphs. If you ever need to reach out directly with suggestions or feedback, you can always use the contact page!
PrintEasy Homemade Sourdough Bread Bowls: The Perfect Edible Vessel for Any Soup or Dip
Make crusty, bakery-style sourdough bread bowls from scratch. These edible soup bowls have a soft interior and a sturdy crust, making them ideal for holding your favorite creamy soups or dips.
- Prep Time: 20 min
- Cook Time: 25 min
- Total Time: 1 hour 50 min
- Yield: 4 servings 1x
- Category: Baking
- Method: Baking
- Cuisine: American
- Diet: Vegetarian
Ingredients
- 1 cup warm water (about 105-115°F)
- 1 teaspoon active dry yeast
- 1 teaspoon sugar
- 3 cups all-purpose flour, plus more for dusting
- 1 cup active sourdough starter (fed and bubbly)
- 1 1/2 teaspoons salt
- 1 egg white, beaten with 1 tablespoon water (for egg wash)
Instructions
- Activate the yeast: In a large bowl, combine the warm water, yeast, and sugar. Let stand for 5 minutes until foamy.
- Mix the dough: Add the flour, sourdough starter, and salt to the yeast mixture. Mix with a wooden spoon until a shaggy dough forms.
- Knead: Turn the dough onto a lightly floured surface and knead for 8 to 10 minutes until the dough is smooth and elastic.
- First rise: Place the dough in a lightly oiled bowl, turning to coat. Cover the bowl with plastic wrap and let it rise in a warm place for 1 to 1.5 hours, or until doubled in size.
- Shape the bowls: Gently punch down the dough. Divide it into 4 equal pieces. Shape each piece into a tight round ball.
- Second rise: Place the dough balls on a baking sheet lined with parchment paper, leaving space between them. Cover loosely and let them rest for 30 minutes.
- Preheat and prepare: Preheat your oven to 400°F (200°C). Place a shallow pan on the bottom rack to create steam later.
- Bake: Brush the tops of the dough balls lightly with the egg wash. Bake for 20 to 25 minutes, or until the bread bowls are deep golden brown and sound hollow when tapped.
- Cool and hollow: Let the bread bowls cool on a wire rack for at least 15 minutes. Once cool enough to handle, use a sharp knife to cut a circle in the top of each loaf. Gently scoop out the soft interior bread, leaving a sturdy wall about 3/4 inch thick to create your edible soup bowls.
Notes
- Save the scooped-out bread for dipping or making croutons.
- For a crispier crust, place a few ice cubes in the shallow pan on the bottom rack just as you place the bread in the oven to generate steam.
- These bread bowls are perfect for serving creamy clam chowder or loaded baked potato soup.
Nutrition
- Serving Size: 1 bread bowl
- Calories: 350
- Sugar: 2
- Sodium: 350
- Fat: 2
- Saturated Fat: 0
- Unsaturated Fat: 2
- Trans Fat: 0
- Carbohydrates: 75
- Fiber: 3
- Protein: 12
- Cholesterol: 0