
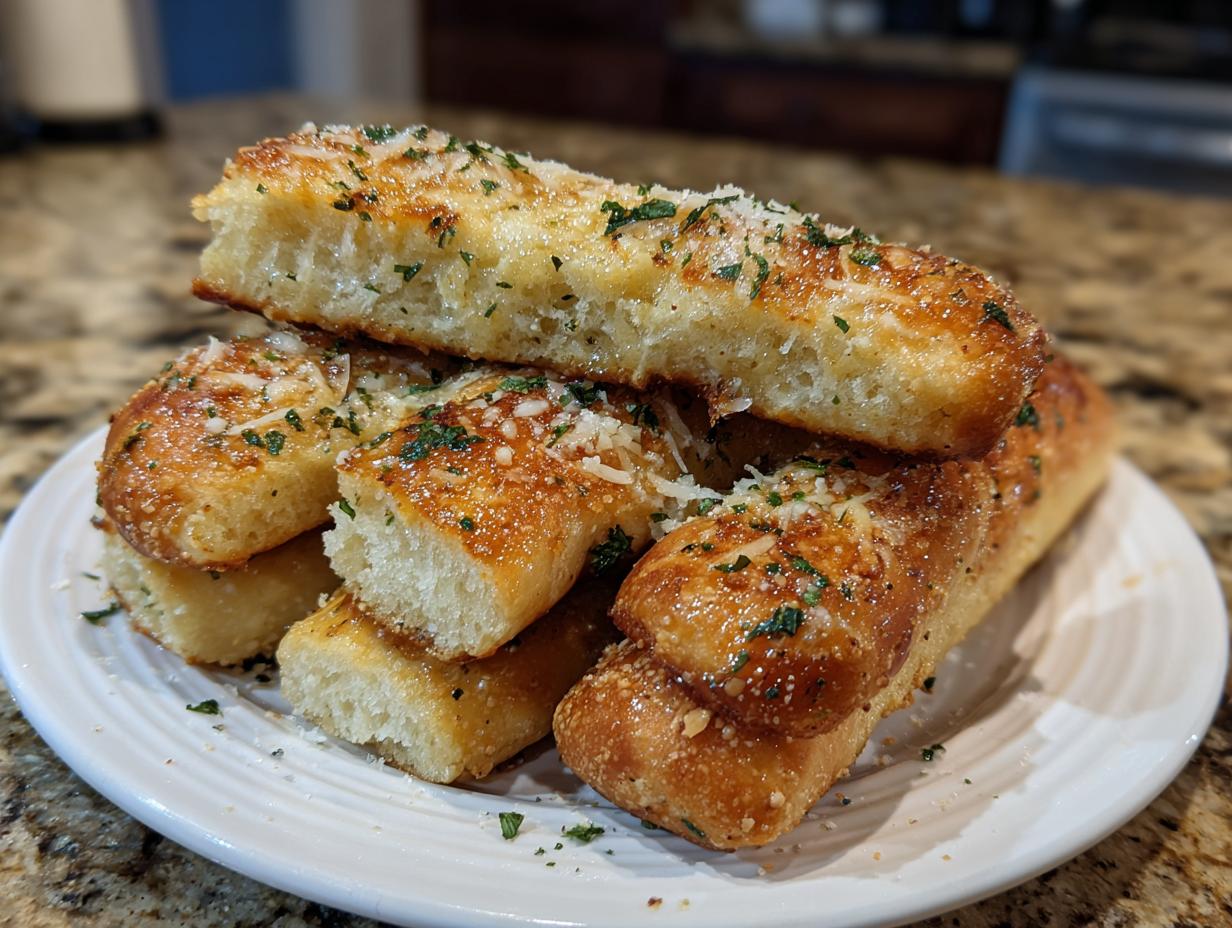
You know those evenings, right? You’ve got pasta simmering or you’re about to cut into a big salad, and all you can think about is dipping something warm, chewy, and buttery into that sauce. That’s when the craving hits for restaurant-style comfort food, specifically those melt-in-your-mouth breadsticks they serve before every meal. For me, that meant one place! Since I started MayaPlate because I wanted to bring that satisfying, home-cooked joy back into my busy week without spending all day in the kitchen, perfecting this recipe was a must. I’m so excited to share what I call ‘The Ultimate Soft & Chewy Olive Garden Copycat Breadsticks with Garlic Parmesan Butter.’ These truly are the easiest, softest breadsticks that hit that nostalgic spot perfectly. To learn more about why I started this mission to bring simple, delicious food back to busy tables, check out our story over at MayaPlate.
- Why These Soft Breadsticks Are the Best Homemade Breadsticks Recipe
- Ingredients for Perfect Olive Garden Breadsticks Copycat
- Step-by-Step Instructions for Buttery Breadsticks
- Tips for Perfect Chewy Breadsticks
- Ingredient Notes and Substitutions for Your Breadsticks
- Make Ahead Breadsticks and Storage Instructions
- Serving Suggestions for Dinner Side Dish Bread
- Frequently Asked Questions About Making Breadsticks
- Nutritional Information Estimate for Your Breadsticks
Why These Soft Breadsticks Are the Best Homemade Breadsticks Recipe
I’m telling you, once you try these, you’ll never go back to the frozen aisle again. My goal here wasn’t just to make any bread, but to hit that exact texture that made us all fall in love with those restaurant **breadsticks** in the first place—soft, slightly pillowy, yet chewy enough to stand up to marinara sauce.
- They have that signature light, airy interior that feels truly decadent, even though they’re secretly better for you than takeout!
- The buttery topping is non-negotiable. We’re loading these up with real garlic and that salty Parmesan kick.
- No fancy equipment needed—this is comfort food made practical for a Tuesday night!
Achieving Restaurant Style Breadsticks Texture
The secret sauce to **Restaurant Style Breadsticks** texture really comes down to just two things: warm water for the yeast and enough kneading time. If your water is too hot, you kill the yeast, and you end up with flat, hard bread which is the opposite of what we want. That 5-7 minutes of kneading builds the gluten structure so these loaves are stretchy and chewy, not crumbly.
Quick Preparation for Easy Breadsticks
You might think making dough from scratch takes forever, but trust me, it doesn’t! We’ve optimized the rise time so that even if you start making these after work, they can be on the table quickly. I find that after about an hour, the dough has nearly doubled, giving us the perfect base for these **Easy Breadsticks** without needing an overnight commitment. It’s essentially a **Quick Bread Recipe** that uses yeast!
Ingredients for Perfect Olive Garden Breadsticks Copycat
Before we get to the fun shaping part, we need our foundation laid out perfectly. Remember how I stress using the right ingredients? It’s vital here, especially for that signature flavor they’re famous for. Using warm water at the right temperature is probably the most crucial starter step for these **breadsticks**, so make sure you have a thermometer handy, or at least use water that feels pleasantly warm—not hot!
For the Homemade Dough Recipe
This is what creates that unbelievably soft interior. Don’t skimp on the olive oil here; it helps tenderize the dough as it mixes.
- 1 1/2 cups warm water (make sure it’s between 105-115°F!)
- 2 1/4 teaspoons active dry yeast
- 2 tablespoons granulated sugar (that’s the yeast’s lunch!)
- 4 cups all-purpose flour, plus extra for dusting
- 1 teaspoon salt
- 1/4 cup olive oil, plus more for brushing the bowl
For the Garlic Parmesan Breadsticks Topping
Okay, this topping is where the magic happens. Seriously, the smell when this melts into the hot bread is heavenly. We are aiming for rich, buttery, and garlicky, so use fresh garlic if you can!
- 1/2 cup unsalted butter, melted (don’t use too little!)
- 4 cloves garlic, minced very finely
- 1 teaspoon dried Italian seasoning
- 1/2 cup grated Parmesan cheese (freshly grated tastes best for these **Garlic Parmesan Breadsticks**)
Step-by-Step Instructions for Buttery Breadsticks
Making these **buttery breadsticks** is mostly hands-off time waiting for the magic to happen, but the active steps are super straightforward. I always put on some music when I make dough because it helps me relax and focus on the kneading, which is important! Remember, great flavor comes from following these steps precisely, which is why I love linking to other great resources like this homemade breadsticks guide if you want another perspective.
Activating Yeast and Mixing the Breadsticks Dough
First thing’s first: we wake up the yeast! Get your warm water—remember, 105 to 115°F is the sweet spot—in a big bowl. Stir in the sugar and sprinkle the yeast right over the top. Now, we wait about five to ten minutes. You shouldn’t touch it until it gets nice and foamy! That foam is the signal that your yeast is happy and ready to work its magic on our **breadsticks** dough.
Once it’s foamy, just stir in that 1/4 cup of olive oil and the salt. Then, you start adding the flour slowly, mixing it up until it looks shaggy—you know, like a messy ball that can barely hold itself together. That’s exactly what we want right before we move to the counter!
Kneading and Rising for Soft Breadsticks
Time to get your hands dirty! Dump that shaggy dough onto a surface dusted lightly with flour. You need to knead this dough for a good five to seven minutes. I know, I know, it seems like a while, but you are looking for a tactile change here. You want it to feel smooth and elastic under your palms. If it feels sticky, add just a touch more flour, but be careful not to deflate it.
When it feels perfect, lightly oil a clean bowl—don’t forget to coat the dough ball itself too by turning it over once. Cover that bowl up tightly with wrap or a towel. Now, find the warmest, draft-free spot in your kitchen. Let it hang out and rise for 60 to 90 minutes until it looks doubled in size. (If your kitchen is chilly, I sometimes warm my oven for just two minutes, turn it off, and let the dough rise inside for a super cozy environment!)
Shaping, Baking, and Applying the Garlic Butter Topping
When that dough is puffy and ready, preheat your oven to 400°F (200°C) and line a big baking sheet with parchment paper—this saves on scrubbing later! Gently punch the air out of the risen dough, just to deflate it a bit. Then, divide it into 12 equal portions.
Now for shaping! Take each piece and roll it out into a long stick, about 10 to 12 inches. They don’t have to be perfect cylinders; they are homemade, after all! Lay them onto your prepared sheet.

Bake them for only 10 to 12 minutes. Keep an eye on them; you want them just lightly golden brown. The minute they come out of the oven—and I mean *the minute*—you need to hit them with the glorious topping. Immediately brush that melted butter, minced garlic, and Italian seasoning mixture all over every warm **breadstick**. The heat melts the butter into the dough pores immediately! Finish with a heavy sprinkle of that grated Parmesan cheese right on top of the butter. That’s how you seal in the flavor!
Tips for Perfect Chewy Breadsticks
Even though this recipe is nearly foolproof, sometimes things happen in the kitchen that you need to troubleshoot! Getting that perfect balance between soft and chewy in these breadsticks really comes down to a few key environmental checks. If you’re aiming for that restaurant quality, trust me, these little details make all the difference.
Controlling Dough Temperature
I’ve stressed the water temperature already, but let’s talk about the rise! The yeast is a living thing, and if your kitchen is chilly, it’s going to take forever, or worse, fail altogether. If you’re worried about the “Quick Bread Recipe” timing slipping away from you, make sure your environment is warm. I test my usual spot next to the pilot light on the stove; if it feels cool, I use that trick of warming the oven briefly and turning it off before placing the dough inside. That gentle heat mimics a perfect summer day for the yeast.
Achieving Golden Brown Cheesy Breadsticks
If you want to go that extra mile and create those incredible **Cheesy Breadsticks** like the ones topping Pinterest, you need to time the cheese just right so it melts without burning. We bake them until they are lightly golden, but if you are adding mozzarella—and you absolutely should sometimes!—sprinkle that cheese on during the last three minutes of the baking time. Pull them out, *then* brush with the garlic butter, and sprinkle the Parmesan on top of that butter. This layering ensures the mozzarella gets gooey while the Parmesan crisps up slightly under the residual heat!
Ingredient Notes and Substitutions for Your Breadsticks
I get so many questions when people first try this recipe asking if they can swap this for that, and honestly, most of the time, yes! But sometimes those swaps can change the texture way more than you expect. Since my goal here at MayaPlate is making sure your food is intelligently nourishing and simple, let’s talk about what happens if you don’t have the exact ingredient called for in the main list. We need to preserve that soft, yielding texture these dough sticks are known for!
Flour Type Considerations
The recipe calls for all-purpose flour because it’s what most people have right in their pantry, making it super practical. But if you want to push the chew factor just a tiny bit more towards a classic Italian breadstick feel, you *can* substitute up to half of the all-purpose flour with bread flour. Bread flour has a higher protein content, which means more gluten development—hello, extra chew! However, if you use all bread flour, you might need an extra tablespoon or two of water because it tends to absorb liquid faster. Keep an eye on the dough shagginess, not just the measurement list.
Garlic Alternatives
Fresh garlic is key to that powerful, fragrant flavor in the topping, but sometimes you’re in a rush or you’re just out, oops! If you have to swap the 4 cloves of fresh minced garlic, you can reach for garlic powder. Fresh garlic packs a punch, so you need a little more powder to match that intensity. I start with about 1 1/2 teaspoons of garlic powder instead of the fresh cloves. You want to dissolve that powder into the melted butter before you brush it on. If you want it extra strong, add a quarter teaspoon of onion powder along with the garlic powder for a flavor boost that mimics fresh aromatics.
Make Ahead Breadsticks and Storage Instructions
One of my favorite things about this **Homemade Breadsticks Recipe** is how well they play with meal prep. Listen, life gets busy, right? Sometimes you want fresh breadsticks ready to go when you pull the pasta out of the boiling water, but you don’t have 90 minutes to play dough daddy during the afternoon. Good news! You can absolutely prepare the dough ahead of time and have it ready for baking right when you need it.
The recipe notes mention this, but I want to emphasize it: the dough can hang out in the fridge for up to 24 hours. Once you finish kneading (Step 3), just put that oiled dough ball in an airtight container and slide it into the refrigerator. It slows the rising process way down, which is perfect for planning dinner the next day. Just make sure when you take it out, you let it warm up on the counter for about 30 to 45 minutes before you try to shape those **breadsticks**.
Reheating for Fresh Flavor
Okay, what if you already baked them last night and now they are sitting on the counter looking a little… firm? Don’t toss them! Even perfectly baked **breadsticks** stiffen up overnight, especially the tips. You need moisture and gentle, fast heat to bring them back to that soft, chewy texture we worked so hard to achieve.
The absolute best way to reheat leftover **breadsticks** is in the oven. Wrap the cooled sticks loosely in aluminum foil—this traps the steam and keeps them from drying out further. Pop them into a preheated 350°F (175°C) oven for about 8 to 10 minutes. If you want to add a little extra flavor booster, you can mix a tablespoon of melted butter with a pinch of garlic powder and brush it lightly over the tops just before wrapping them in the foil. They come out steaming hot and soft like they were pulled straight from the baker’s tray!
Serving Suggestions for Dinner Side Dish Bread
These aren’t just for fancy occasions, even though they taste fancy! I designed this to be the ultimate **Dinner Side Dish Bread**—something that elevates a simple weeknight meal instantly. Since these have a lovely savory, buttery flavor profile, you can really pair them with almost anything Italian or Mediterranean. Forget just serving them with salad; these deserve to be the star alongside a hearty plate!
Best Dips and Sauces
The real fun comes when you treat these **Italian Breadsticks** like little edible spoons! You absolutely need something great for dipping. My first choice, every single time, is a simple, good quality marinara sauce warmed up on the stove. The slight acidity of the tomato just cuts through that richness of our garlic butter topping perfectly. It’s classic for a reason!
But if you’re looking for something creamy, you can’t go wrong with Alfredo sauce. It turns this simple side into a truly indulgent appetizer! I sometimes take a small bowl of Alfredo and sprinkle a tiny bit of extra toasted garlic on top of the dip itself. For those nights when you’re having a big pot of soup, like a minestrone or even a chicken noodle, these make great dunkers, too. They soak up the broth beautifully without falling apart!
Frequently Asked Questions About Making Breadsticks
I totally get it—when you’re craving those perfect, soft, **breadsticks**, you want answers fast! Dealing with dough can sometimes bring up questions, especially if you’re new to working with yeast. I’ve gathered the most common snags I hear about so you can bake with confidence and ensure you get that restaurant-quality result every single time. These answers are based on what I’ve learned making this **Homemade Breadsticks Recipe** over and over for my family. If you have trouble or need help along the way, don’t hesitate to reach out via our contact page!
Can I skip the rise time for these breadsticks?
You absolutely *could* skip the rise time, but I wouldn’t recommend it if you’re hunting for that amazing soft texture everyone loves. The rise, which takes about 90 minutes, is when the yeast is doing its job, producing those gases that make the dough light and airy. If you skip it, you’ll end up with something much denser, more like a flatbread or a cracker base rather than the fluffy **Soft Breadsticks** we are aiming for.
If you are in a massive rush? You can drastically shorten the rise to 30 minutes just to get *some* activity, but the final chew and height won’t be quite as impressive.
How do I make these without yeast?
This is a tricky one for this specific **Olive Garden Breadsticks Copycat** recipe because yeast is essential for that signature light, slightly elastic crumb. If you absolutely must skip the yeast, you aren’t really making breadsticks anymore; you’re making a quick biscuit dough, which is totally different!
If you are desperate and need an extremely **Quick Bread Recipe** substitute, you could try mixing 3 teaspoons of baking powder into your dry ingredients instead of the yeast, sugar, and warm water combo. You’ll need to use regular milk or water instead of the warm water/yeast mix when combining the wet and dry stuff. Just mix until combined—no kneading necessary! But be warned: these **Appetizer Bread Sticks** will bake up more like a soft roll and won’t have that distinct, slightly chewy texture we are targeting here.
Nutritional Information Estimate for Your Breadsticks
I always try to keep things real here at MayaPlate, showing you that you don’t have to sacrifice flavor for healthy eating, but we do need to talk numbers! Now, this is super important: the nutritional breakdown I can give here is just an estimate based on the core ingredients for one of these cheesy, amazing **breadsticks**. The actual count can shift a bit depending on exactly what kind of flour you use or how heavy-handed you are with that glorious butter topping!
I always recommend checking the labels on your specific Parmesan cheese or flour bags if you’re tracking things closely, as brands can vary significantly in fat or sodium content. For transparency, this information is based on the standard amounts we use in the recipe and how we prepare the **Garlic Parmesan Breadsticks** right before serving. You can review my commitment to data handling and privacy over at the Privacy Policy page if you’re curious about how we handle data here.
- Serving Size: 1 breadstick (approx. 1 of 12)
- Calories: 210
- Fat: 10g
- Saturated Fat: 5g
- Carbohydrates: 27g
- Sugar: 2g
- Protein: 5g
- Sodium: 350mg
Soft & Chewy Olive Garden Copycat Breadsticks with Garlic Parmesan Butter
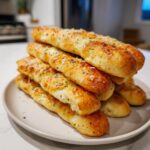
Make restaurant-style breadsticks at home. This easy recipe yields soft, chewy breadsticks topped with a rich garlic parmesan butter, perfect as a dinner side dish or appetizer.
- Prep Time: 20 min
- Cook Time: 12 min
- Total Time: 92 min
- Yield: 12 breadsticks 1x
- Category: Appetizer
- Method: Baking
- Cuisine: American
- Diet: Vegetarian
Ingredients
- 1 1/2 cups warm water (105-115°F)
- 2 1/4 teaspoons active dry yeast
- 2 tablespoons granulated sugar
- 4 cups all-purpose flour, plus more for dusting
- 1 teaspoon salt
- 1/4 cup olive oil, plus more for brushing
- 1/2 cup unsalted butter, melted
- 4 cloves garlic, minced
- 1 teaspoon dried Italian seasoning
- 1/2 cup grated Parmesan cheese
Instructions
- Combine the warm water, yeast, and sugar in a large bowl. Let it sit for 5 to 10 minutes until foamy. This activates the yeast.
- Stir in the salt and olive oil into the yeast mixture. Gradually add the flour, mixing until a shaggy dough forms.
- Turn the dough out onto a lightly floured surface. Knead for 5 to 7 minutes until the dough is smooth and elastic.
- Lightly oil a clean bowl. Place the dough in the bowl, turning to coat. Cover the bowl with plastic wrap or a clean towel and let it rise in a warm place for 60 to 90 minutes, or until doubled in size.
- Preheat your oven to 400°F (200°C). Line a large baking sheet with parchment paper.
- Gently punch down the risen dough. Divide the dough into 12 equal pieces. Roll each piece into a long, thin breadstick shape, about 10 to 12 inches long. Place the breadsticks on the prepared baking sheet.
- Bake for 10 to 12 minutes, or until lightly golden brown.
- While the breadsticks bake, prepare the topping: In a small bowl, combine the melted butter, minced garlic, and Italian seasoning.
- Immediately after removing the breadsticks from the oven, brush the garlic butter mixture generously over the warm breadsticks.
- Sprinkle the grated Parmesan cheese evenly over the buttered breadsticks. Serve warm as a dinner side dish or appetizer.
Notes
- For a quicker rise, place the dough in an oven that has been turned off after warming for a few minutes.
- If you prefer a cheesy breadstick, sprinkle mozzarella cheese over the tops during the last 3 minutes of baking before applying the garlic butter.
- You can make the dough ahead of time and refrigerate it for up to 24 hours for make ahead breadsticks. Allow it to come to room temperature before shaping.
Nutrition
- Serving Size: 1 breadstick
- Calories: 210
- Sugar: 2
- Sodium: 350
- Fat: 10
- Saturated Fat: 5
- Unsaturated Fat: 5
- Trans Fat: 0
- Carbohydrates: 27
- Fiber: 1
- Protein: 5
- Cholesterol: 15