
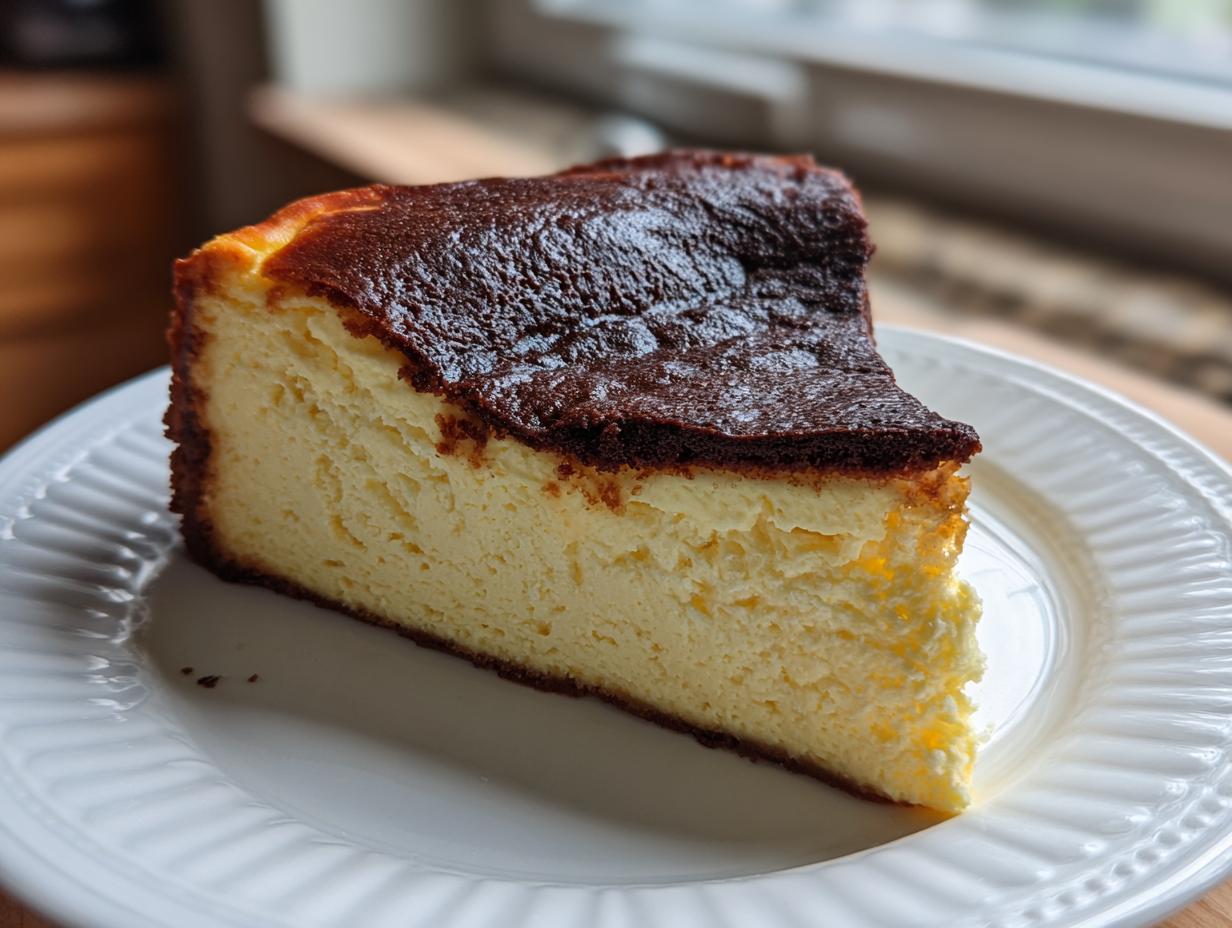
I want to let you in on a little secret, friends. For years, I thought achieving that stunning, bakery-level dessert—the one with the gorgeous, dark, caramelized top that looks impossible to make—was reserved for professional chefs. I mean, let’s be honest, who has time for complicated steps? That’s why I dedicated months to simplifying the famous San Sebastian classic into the absolute best **basque cheesecake** you’ll ever make. Forget the fiddly water baths or worrying about perfect edges. This recipe is my answer to bringing that rustic elegance right into your home kitchen, proving you don’t need fuss to create something truly spectacular.
When I started MayaPlate, I swore I wouldn’t post anything that felt intimidating. This cheesecake is pure joy on a plate, giving you that signature beautifully browned exterior and an irresistibly creamy, custardy center every single time. You can trust me on this one; we’re keeping it simple but maximizing flavor! Check out more of our delicious dessert recipes for more simple indulgences.
- Why This Easy Basque Cheesecake Recipe Is Your New Favorite Dessert
- Essential Ingredients for Your Basque Cheesecake
- Equipment Needed for the Burnt Basque Cheesecake
- Step-by-Step Instructions for the Basque Cheesecake
- Cooling and Chilling: Keys to the Custardy dessert recipe
- Tips for Making Basque Cheesecake in a Loaf Pan
- Storage and Reheating Instructions for Your Basque Cheesecake recipe
- Frequently Asked Questions About Burnt Basque Cheesecake
- Share Your Impressive yet easy baking Masterpiece
Why This Easy Basque Cheesecake Recipe Is Your New Favorite Dessert
I get asked all the time: why should I choose this recipe over others? Well, honestly, it’s because I designed this to knock out all the scary parts of baking cheesecake! I wanted something impressive I could whip up when friends dropped by unannounced, which is why this Basque cheesecake works so well for busy people like us. It’s all about maximizing that wow factor with minimal fuss.
- No Water Bath Needed—Seriously! This is the game-changer. We bake this cheesecake hot and fast. No need to wrap pans in foil or worry about water spilling into the oven. I just don’t have time for that kind of stress!
- Rustic Look is the Goal: Don’t stress the parchment paper! That crinkled, uneven edge that sticks up over the sides? That’s the authentic, rustic look we are aiming for. It screams gourmet without needing hours of decorating.
- Minimal Ingredient List: You only need seven core ingredients. We aren’t messing around with stabilizers or obscure items. This keeps your grocery run simple and your prep time ridiculously fast.
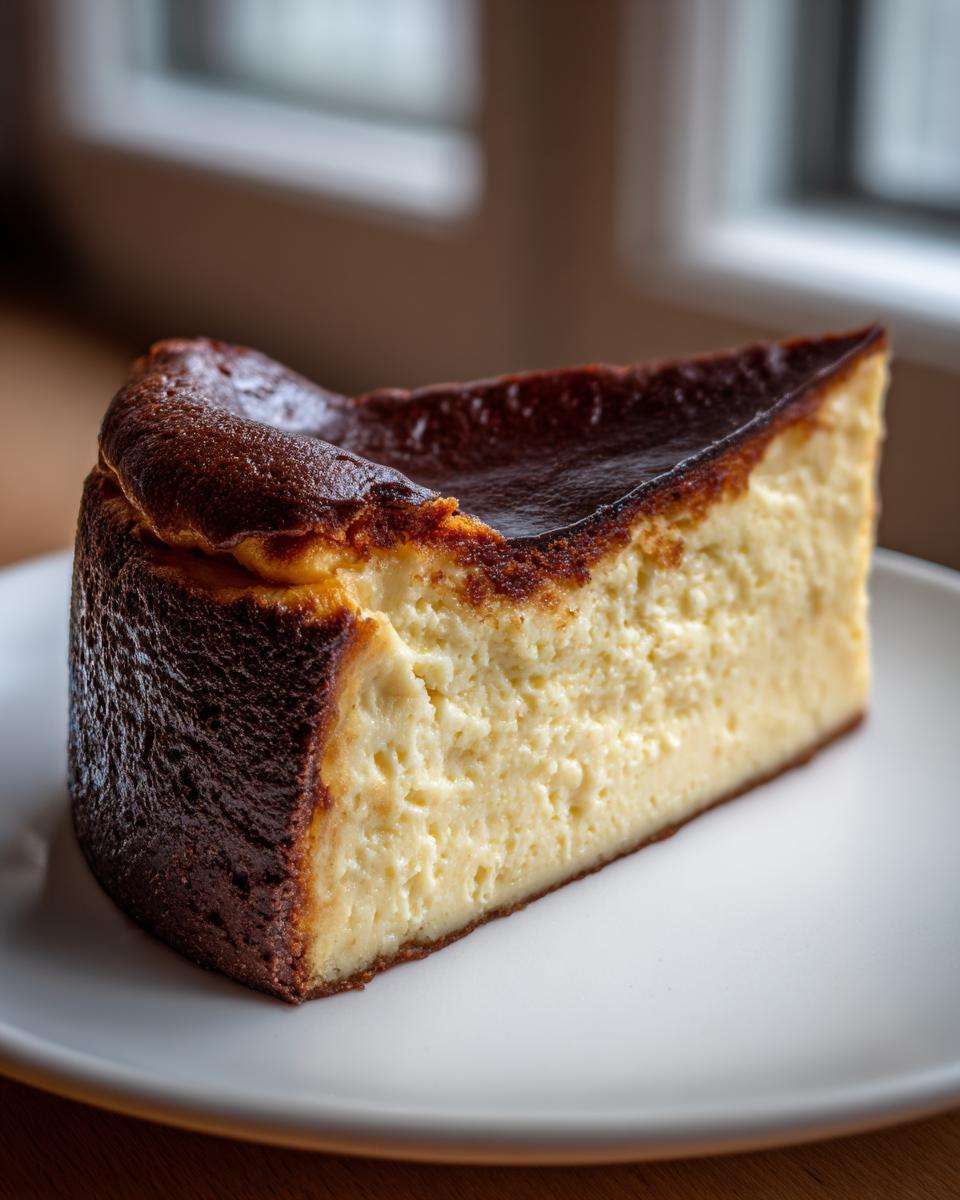
- The Ultimate Textural Contrast: This is what makes this dessert truly addictive. You get that beautifully charred exterior that tastes subtly smoky and sweet, perfectly balanced by the softest center possible.
Achieving the Perfect Caramelized cheesecake top
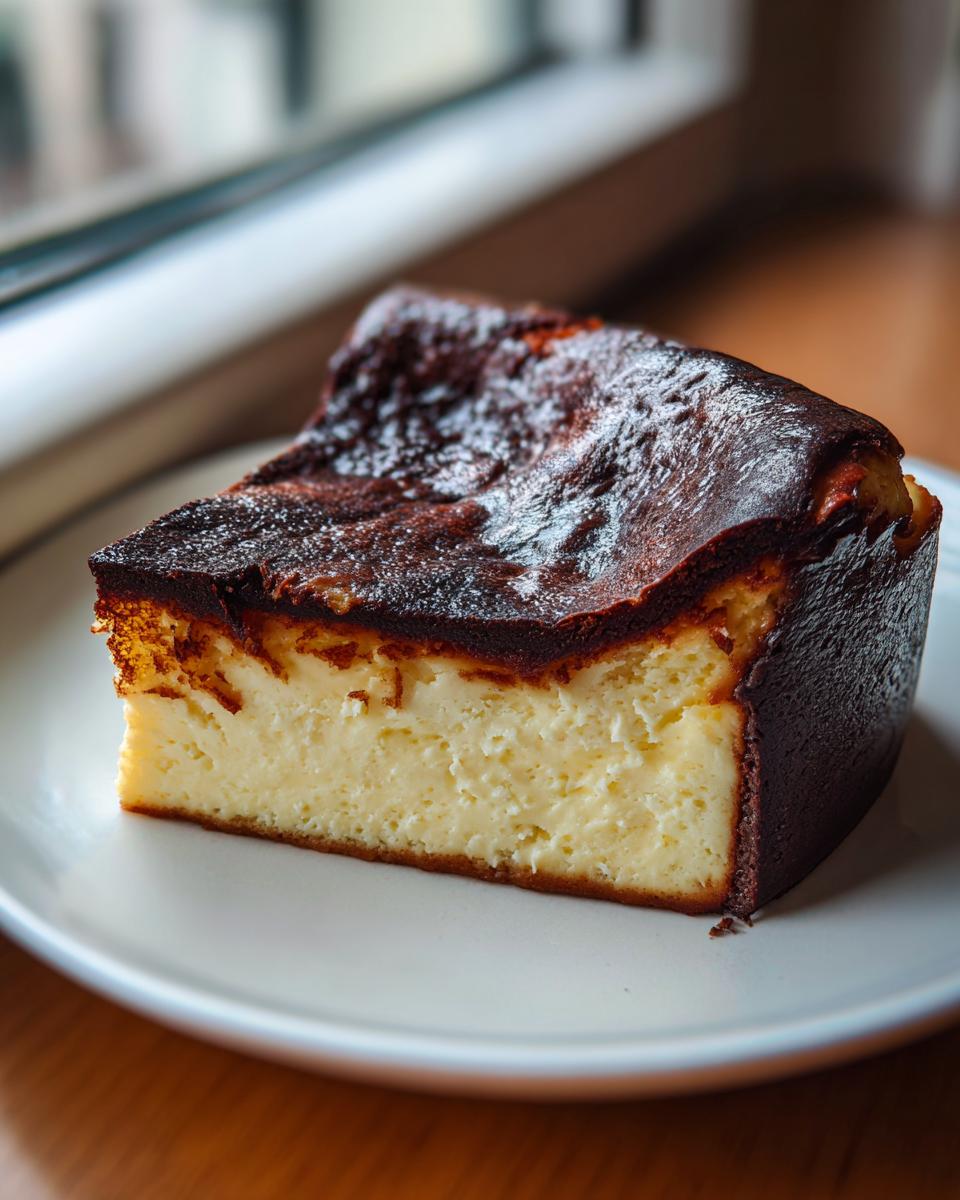
That signature dark top is actually the easiest part, but it trips people up! We crank the oven heat way up—400 degrees Fahrenheit—and we let it bake until the top looks almost dangerously dark. That’s where all the flavor develops! The high, direct heat caramelizes the sugars on the surface without fully cooking the inside. It’s intentional scorching, trust me!
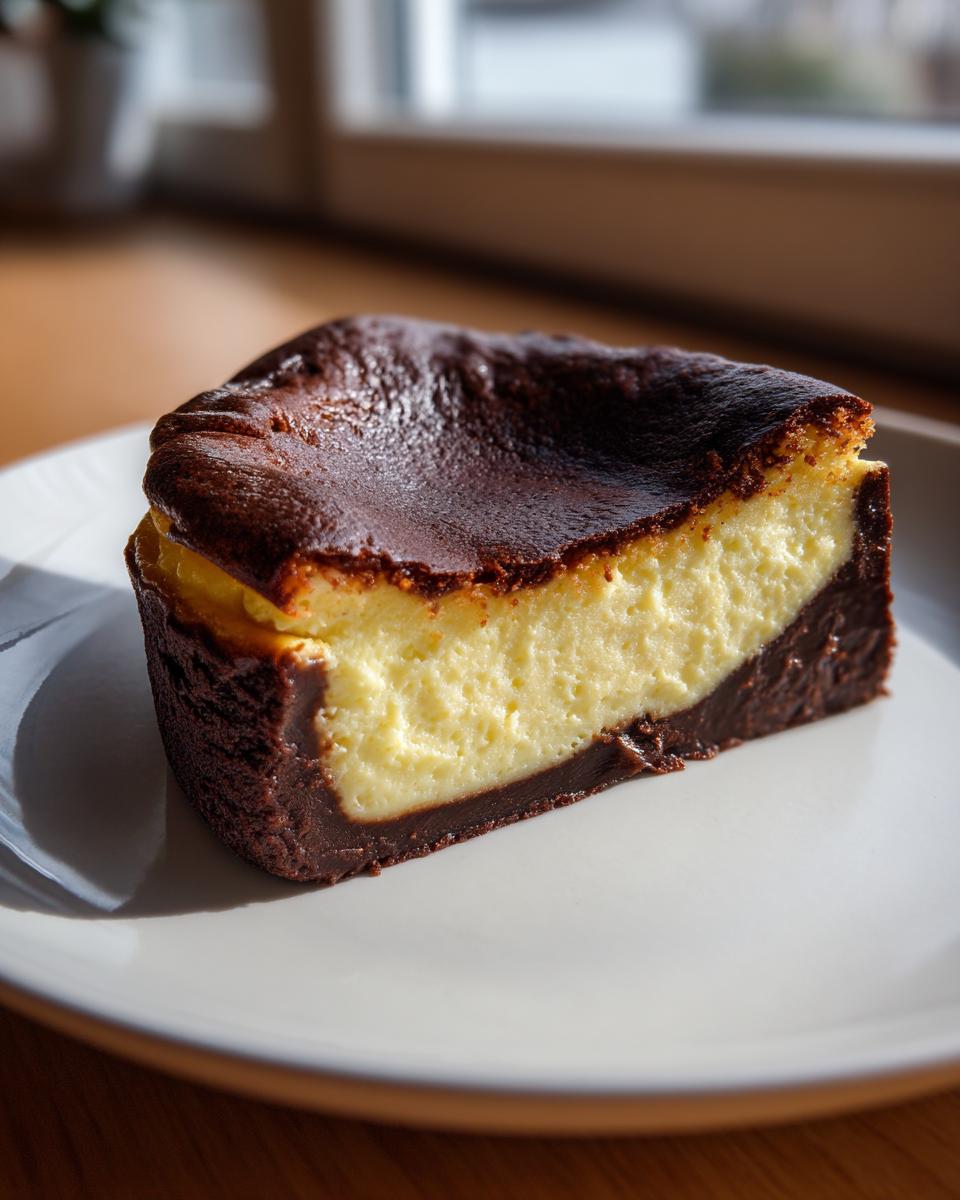
The Secret to a Creamy cheesecake Interior
If you want that decadent, custardy texture that melts in your mouth, you need to treat your ingredients right. The two keys here are making sure your cream cheese is completely smooth *before* adding anything else, and then—this is crucial—you must stop mixing once those eggs are incorporated. If you overmix after the eggs go in, you pull in too much air, and you end up with a structure more like a regular New York cheesecake. We want soft, mousse-like perfection, so remember: mix just until combined!
Essential Ingredients for Your Basque Cheesecake
When it comes to the **Basque cheesecake**, the ingredient list is wonderfully short, which is exactly how I like it! Fewer ingredients mean you can really concentrate on quality, and that’s key for getting that rich, almost decadent result without any fuss. I always lay everything out on the counter before I start so I can check off each item. It keeps me grounded!
Here is exactly what you need, measured precisely:
- 900g full-fat cream cheese, softened
- 1 1/4 cups granulated sugar
- 5 large eggs, room temperature
- 2 cups heavy cream
- 1 teaspoon vanilla extract
- 1/4 cup all-purpose flour
- Pinch of salt
Ingredient Notes and Substitutions
Okay, while the list is short, these details matter a lot for achieving that signature texture. Don’t try to shortcut on the cream cheese! You absolutely must use full-fat cream cheese here. Low-fat just won’t give you that velvety, rich mouthfeel we are chasing. Also, those five eggs need to be at room temperature. If they are cold, they won’t mix smoothly into the cream cheese base, and you’ll end up with tiny lumps in your batter. Take them out about an hour before you plan to bake!
Now, about the flour. We use a little bit of all-purpose flour here mostly just to give the structure something to hold onto during the high-heat bake. But here’s a great tip: if you want to turn this into a naturally **flourless cheesecake**, just swap that 1/4 cup of all-purpose flour for an equal amount of cornstarch. It works like a charm and gives you that similar beautifully soft center!
Equipment Needed for the Burnt Basque Cheesecake
You might think making a gourmet dessert requires a specialized kitchen setup, but honestly, this **Burnt Basque Cheesecake** relies on tools you probably already have. That’s the beauty of simple baking! You don’t need any fancy schmancy gadgets for this one, which is great news for keeping things practical, like we always do here at MayaPlate.
Here’s the short list of what you’ll need ready to go before you even think about turning on the oven:
- 9-Inch Springform Pan: This is non-negotiable for that classic round shape. Because the sides collapse a bit during cooling, the springform makes lifting it out so much easier down the line.
- Electric Mixer (Hand or Stand): While you *could* technically whisk everything, your arm will thank you if you use an electric mixer for beating the cream cheese until it’s super smooth. We need zero lumps!
- Heat-Resistant Parchment Paper: This is your best friend for this dessert. You need two large sheets, which you’ll overlap and crumple slightly before lining the pan. Don’t try to make it neat; the wild wrinkles are what give the cheesecake its incredible rustic look when it bakes up.
- A Sturdy Rubber Spatula: Once you start adding the flour, you ditch the electric mixer. You’ll want a good spatula to gently fold everything together to maintain that delicate, mousse-like batter consistency.
- Instant-Read Thermometer (Optional but helpful): While the visual cues are key (the wobble!), having a reliable thermometer helps you keep an eye on your oven temperature precisely, which is crucial for getting that signature burnt top without overcooking the interior.
That’s it! No bain-marie, no special molds—just the essentials to get this gorgeous, creamy, caramelized delight on your table.
Step-by-Step Instructions for the Basque Cheesecake
Alright, now for the fun part! We’re putting this gorgeous **Basque cheesecake** together. Remember how I said this recipe is simple? The instructions are straightforward clinical, but you have to respect the order of operations, especially when it comes to mixing. We’re aiming for that incredible contrast between the burnt exterior and the custard center, so pay close attention to where we stop mixing!
First things first: get your oven cranking! Preheat your oven to 400°F (200°C). This high heat is what creates that gorgeous, cracked, caramelized surface we love. While it heats up, grab your 9-inch springform pan. You need two large pieces of parchment paper. Don’t try to be neat here—seriously, the messier the better! Crumple the paper up in your hands a bit, then press it into the pan, letting it stick up over all the sides. That overhang—that’s the look we want. It should look like a beautiful, crinkled paper boat holding your batter.
If you want to check out another easy way to get that smooth consistency in sweet things, take a peek at my easy creamy pickle dip recipe—the mixing principle for the base is surprisingly similar!
Mixing the Creamy cheesecake Batter
This is where patience pays off. You want zero lumps, which is why we start slow. Grab your bowl and beat that softened cream cheese until it’s truly silky smooth on its own. Scrape those sides down! Then, we gradually add the sugar, beating until the mixture looks lighter and fluffy—almost like it’s gained some air. That takes a couple of minutes of dedicated effort.
Next come the eggs, one at a time. This is important! Beat well after each egg goes in, just until it disappears into the batter. Once all five eggs are incorporated, slow right down. Now we add the liquid ingredients: the heavy cream and the vanilla. Mix gently until everything is just combined into a flowing, mousse-like liquid. Now, put the electric mixer away!
The final step is folding. Sift your flour and salt right over the top of that beautiful wet mixture. Use your spatula and fold gently—just until you don’t see any dry streaks of flour left. Stop immediately after that. Overmixing the flour will develop gluten and ruin that tender, custardy quality we are aiming for. It should look like a gorgeous, slightly runny batter ready for the oven. Head over to Creamy Pot if you want to see another baker’s approach to the perfect base!
Baking for the Signature Caramelized cheesecake top
Pour that smooth batter into your prepared, crinkled parchment-lined pan. Okay, time to bake this baby! Pop it into that 400°F (200°C) oven for about 50 to 60 minutes. You must watch it closely near the end because the point is to get a deeply **caramelized cheesecake top**.
I’m talking dark brown, almost black spots—don’t panic, that’s the signature char! The visual cue that tells you it’s *done* is twofold: the edges should look set, but when you gently nudge the pan, the center should still have a noticeable, significant wiggle. I mean, it should look like soft gelatin. If the entire thing is firm, you’ve gone too far and you’ll lose that signature creamy interior. Trust the wobble; it sets up later!

Cooling and Chilling: Keys to the Custardy dessert recipe
Okay, I know it’s painful, but this is the hardest part of the entire process: waiting! You cannot—and I mean absolutely *cannot*—just pull this **custardy dessert recipe** out of the oven and slice into it. If you do, it’ll be a soupy mess. We have to respect the two-stage cooling process. It’s essential for getting that dream texture.
First, once the cake is gloriously wobbly and you’ve pulled it from that fiery oven, let it sit right on the wire rack at room temperature. Resist the urge to touch it! It needs at least two hours here. As it cools down slowly, the center continues to set up gently. If you shock it by immediately putting it in the fridge, you risk cracking the top or causing an uneven set.
Once it’s completely cooled down to room temperature—and I mean cool to the touch—then you cover it loosely and pop it into the refrigerator. This is where the magic solidifies. You must let it chill for a minimum of six hours, but honestly, overnight is my non-negotiable rule. That long chill time is what transforms that hot, soft custard into the dense, deeply creamy, rich cheesecake that people rave about.
When it comes to serving, I have another little tip for you that just elevates the whole experience. When you dig it out of the fridge, don’t serve it right away! Let it sit on the counter for about 30 to 45 minutes before cutting. Serving it slightly warmer—closer to room temperature—makes the interior unbelievably velvety, almost like a thick, rich mousse. It just melts better in your mouth, making it the best cheesecake ever. Don’t forget to check out my recipe for chocolate eclair cake if you need another easy-bake crowd-pleaser!
Tips for Making Basque Cheesecake in a Loaf Pan
So, what if you aren’t making a big dessert for a huge crowd? Maybe it’s just you and your partner, or maybe you just want a smaller, more intimate dessert that still packs that incredible flavor punch. That’s where the **Basque cheesecake** loaf pan variation comes in! I love this option because it feels a little more special and rustic, almost like a deep, elegant dessert bread rather than a huge cake.
You use the exact same batter—don’t change a thing about your cream cheese, sugar, or egg ratios. The only real difference is the vessel holding it. For the loaf pan, you still need to line it generously with parchment paper, letting those sides stick up high so they can catch the batter as it bakes up. Again, don’t worry about neatness; messy parchment means delicious cake!
Because the loaf pan is deeper and narrower than our regular 9-inch springform, the heat takes a little longer to penetrate the very center. This means you’ll need to adjust your baking time. I find you usually need to reduce the total baking time by about 10 to 15 minutes compared to the 9-inch round, but you’re still looking for that tell-tale center wobble! Start checking around the 40-minute mark. If you’re looking for comparison ideas on baking in different shapes, check out my date nut bread recipe; I use similar depth-testing intuition there!
This smaller size is fantastic for portion control (if you have any willpower!) and makes a beautiful presentation straight out of the pan. If you want to see a photo example of how beautiful this smaller format looks, Anya over at Recipes by Adam has some stunning loaf pan versions!
Storage and Reheating Instructions for Your Basque Cheesecake recipe
So, you somehow managed to have leftovers of this incredible, rich **Basque cheesecake recipe**? Good for you! That means you’re either hosting a very large party or you really know how to treat yourself. Since this cheesecake is so dense and rich, the good news is that it actually keeps beautifully!
The chilling period sets the texture, but it also helps preserve that glorious flavor for days. Once you’ve cut into it, you need to cover the pan or cover the exposed cut side with plastic wrap. Try not to let plastic touch the surface if you can avoid it, but if you have to, just make sure you press it tight against the cut sides to prevent any drying out.
Keep it tucked away in the refrigerator. Because of all that heavy cream and the cream cheese, it will hold up wonderfully for about four to five days. When you take it out each day, remember my earlier tip: this is not a cold dessert lover! If you serve it straight from the fridge, it will be extremely dense, almost like a firm fudge. While some people like that texture, I think you lose the whole point of the custard!
To bring it back to that melt-in-your-mouth perfection, take your slice out of the fridge about 30 to 45 minutes before you plan on taking a bite. Seriously, let it sit on the counter. That small warming period allows the fats to relax just enough, transforming the interior back into that ridiculously soft, velvety texture you worked so hard to achieve. It’s the best way to enjoy the genuine flavor of this **creamy cheesecake**!
If you ever need another straightforward dessert recipe that stores well for later—though usually not as good as this cheesecake lasts—you have to try my sour cream coffee cake recipe. It’s another one that tastes even better the next day, just like this beauty.
Frequently Asked Questions About Burnt Basque Cheesecake
I always love hearing what you all are wondering when you tackle a new recipe, especially something as dramatic-looking as this **Burnt Basque Cheesecake**! It’s totally normal to have questions when you’re aiming for that perfect contrast between the charred exterior and the ridiculously creamy interior. We’ve covered the steps, but here are a few quick-fire answers to the things I hear most often. If you have more questions after trying it, don’t hesitate to reach out via my contact page!
Can I skip the chilling time for this No water bath cheesecake?
Oh, I wish you could, but please don’t! This is the one step you absolutely cannot rush. When you pull this **no water bath cheesecake** out of the oven, it is supposed to look totally liquid in the middle—that’s the baked wiggle we look for. But that wobble is *hot* unstable custard! If you try to slice it then, it just collapses into a puddle. The chilling time—at least six hours, preferably overnight—allows the starches and fats to fully coalesce and set into that dense, rich final texture. The difference between the baked wobble and the final refrigerated set is the difference between an undercooked mess and a perfect slice of creamy heaven.
Why is my Basque Cheesecake not burnt enough?
If your top came out golden instead of beautifully blackened, it means your oven wasn’t quite hot enough or you pulled it out too soon. Remember, we are blasting this at 400°F (200°C) because we need that intense top-level heat to caramelize fast. If it looks too pale, just slide it back in for another 5 to 10 minutes. Don’t worry about the edges cracking; that’s just part of the charm of this **rustic elegant dessert**. A little honest charring equals maximum flavor, so be brave with that oven dial!
Is this considered a Flourless cheesecake?
That’s a smart question, especially since so many people look for **flourless cheesecake** recipes! In the recipe I provided, I included 1/4 cup of all-purpose flour because it helps stabilize the batter slightly against that high heat. However, I mentioned in the ingredient notes that if you absolutely need it to be naturally flourless, you can swap that 1/4 cup of AP flour with an equal amount of cornstarch. Both work great at achieving that smooth, custardy result, so you have options depending on what’s in your pantry!
Share Your Impressive yet easy baking Masterpiece
Now the ball is totally in your court! I hope you feel as excited as I do about this recipe. Making a **Basque cheesecake** used to sound like something reserved for a fancy trip to Spain, but now you’ve got the foolproof steps to create it right in your own oven. It truly is the pinnacle of **impressive yet easy baking**, and I absolutely live for hearing how it turned out for you!
When you make this—and I hope you do soon—please come back down to the comments below. Tell me how dark you dared to go on that top! Did you serve it room temperature or try sneaking a slice cold? Did you make it as a classic round, or maybe try that adorable easy breakfast ideas-style loaf pan version I mentioned? Your feedback helps me connect with you, and honestly, seeing your successes is the best part of running MayaPlate.
This cheesecake is going to be the absolute showstopper at your next dinner gathering or celebration—it’s easily one of my favorite **dessert recipes for parties** because it looks like you worked for eight hours when it only took 15 minutes of prep. You nailed it!
If you enjoyed simplifying gourmet desserts, please share this post with a friend who needs an easy win in the kitchen. Happy baking!
PrintEasy Burnt Basque Cheesecake with Creamy Center

Make this impressive, rustic Basque Cheesecake. It features a signature caramelized top and an irresistibly creamy, custardy interior. This recipe requires no crust and no water bath, making it simple for any home baker.
- Prep Time: 15 min
- Cook Time: 60 min
- Total Time: 7 hours 15 min
- Yield: 10 servings 1x
- Category: Dessert
- Method: Baking
- Cuisine: Spanish
- Diet: Vegetarian
Ingredients
- 900g full-fat cream cheese, softened
- 1 1/4 cups granulated sugar
- 5 large eggs, room temperature
- 2 cups heavy cream
- 1 teaspoon vanilla extract
- 1/4 cup all-purpose flour
- Pinch of salt
Instructions
- Preheat your oven to 400°F (200°C). Line a 9-inch springform pan with two large pieces of parchment paper, letting the paper overhang on all sides. Do not worry about neatness; the rustic look is part of the charm.
- In a large bowl, beat the softened cream cheese with an electric mixer until completely smooth. Scrape down the sides of the bowl often.
- Gradually add the sugar and beat until the mixture is light and fluffy, about 3 minutes.
- Add the eggs one at a time, beating well after each addition until just combined. Do not overmix once the eggs are added.
- Slowly mix in the heavy cream and vanilla extract until the batter is uniform.
- Sift the flour and salt over the batter. Gently fold the flour mixture into the batter using a spatula until just incorporated. You want a smooth, mousse-like batter.
- Pour the batter into the prepared pan.
- Bake for 50 to 60 minutes. The top should be deeply caramelized, almost black in spots, and the edges should be set. The center should still have a significant wobble, like soft gelatin.
- Remove the cheesecake from the oven. Let it cool completely on a wire rack at room temperature for at least 2 hours. The center will continue to set as it cools.
- Once cooled, cover the pan loosely and chill in the refrigerator for at least 6 hours, or preferably overnight, for the best creamy texture.
- Before serving, carefully remove the parchment paper sides. Serve at room temperature for the richest flavor and softest center.
Notes
- For the best custardy interior, serve this cheesecake at room temperature, not straight from the refrigerator.
- If you prefer a smaller, more intimate dessert, use a loaf pan instead of a springform pan; reduce the baking time by about 10 to 15 minutes.
- This crustless cheesecake is naturally flourless if you substitute the all-purpose flour with an equal amount of cornstarch.
Nutrition
- Serving Size: 1 slice
- Calories: 450
- Sugar: 35g
- Sodium: 250mg
- Fat: 35g
- Saturated Fat: 22g
- Unsaturated Fat: 13g
- Trans Fat: 0.5g
- Carbohydrates: 30g
- Fiber: 0g
- Protein: 8g
- Cholesterol: 180mg