

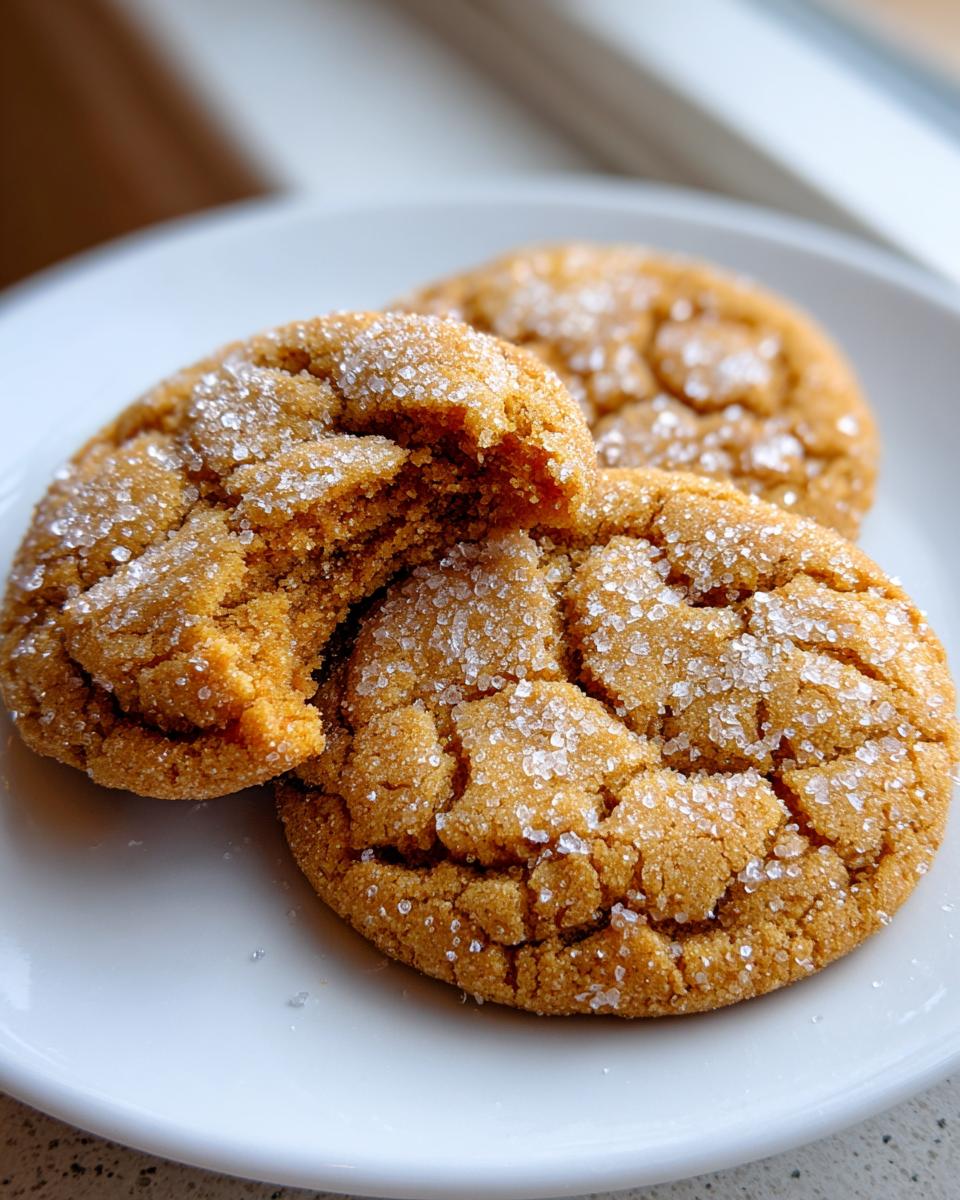
We’ve all made those classic sugar cookies where they’re just… fine. Good, but nothing memorable, right? Well, I’m here to tell you we are skipping “fine” today! We are diving headfirst into something truly special: gourmet brown butter sugar cookies. This recipe radically upgrades the simple classic by infusing the dough with that deep, nutty richness you only get from properly browned butter. The best part? We hit that perfect texture—soft, chewy centers nestled against slightly crisp, sugary edges—without ever having to wait for the dough to chill. As someone who spent years balancing my grandmother’s love for rich flavor with my need for practical solutions, I developed this method precisely so you can achieve bakery style results without sacrificing your whole afternoon. Trust me, once you taste this depth of flavor, you won’t go back! You can read more about my journey right here on MayaPlate.
- Why These Brown Butter Sugar Cookies Are Your New Favorite (Elevated Classic Cookie)
- Ingredients for Gourmet Brown Butter Sugar Cookies
- Mastering the Brown Butter Sugar Cookies Technique: Step-by-Step Instructions
- Baking Tips for Bakery Style Brown Butter Sugar Cookies
- Ingredient Notes and Substitutions for Brown Butter Cookies
- Storage and Reheating Instructions for Soft Baked Cookies
- Serving Suggestions for Your Brown Butter Sugar Cookies
- Frequently Asked Questions About Making Brown Butter Sugar Cookies
- Nutritional Estimate for This Rich Dessert Recipe
Why These Brown Butter Sugar Cookies Are Your New Favorite (Elevated Classic Cookie)
Honestly, taking the time to brown the butter is the biggest little trick you can use in your baking arsenal! It’s what separates these brown butter sugar cookies from every other recipe you’ve ever tried. My goal here, as always, is to give you something that tastes ridiculously gourmet but feels totally achievable mid-week.
Here’s why you’re going to be obsessed:
- Unbelievable Nutty Depth: Browning the butter transforms it from a simple fat into a powerhouse of flavor. It creates these incredible, complex, nutty sugar cookies notes that make you feel like you’re eating a high-end bakery style cookie right out of your own oven.
- The Ultimate Texture Play: We nail that perfect combination of chewy in the middle while keeping those lovely, sparkly, crispy edge cookies, all thanks to the specific way we handle the slightly cooled butter.
- Zero Wait Time – No Chill Cookie Dough! This is a huge win! Because we cook the butter down and then let it cool just enough, it solidifies slightly, giving us enough structure to scoop and bake immediately. Goodbye, waiting game!
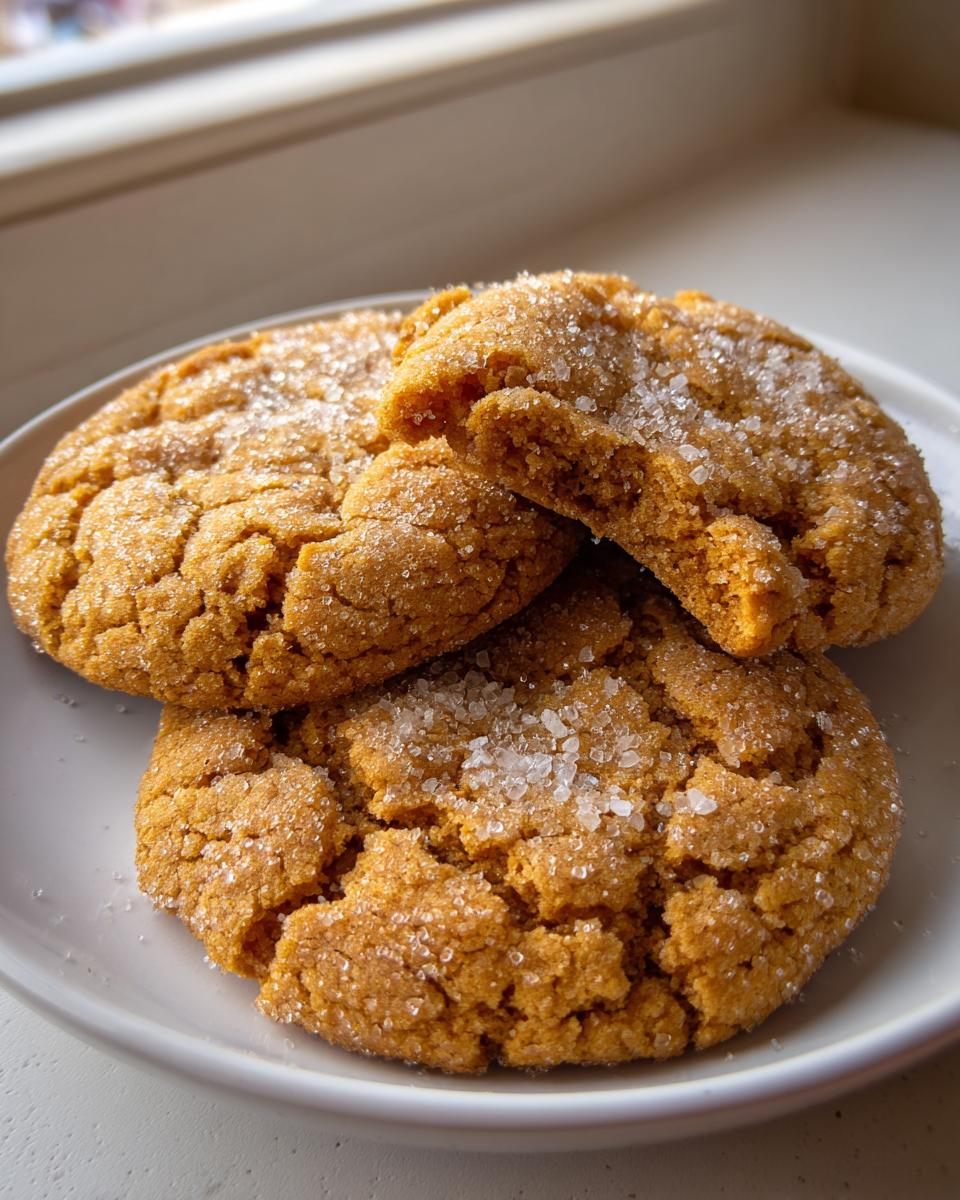
- A Rich Dessert Recipe That Still Feels Classic: You get that comforting, familiar sugar cookie vibe, but with a depth of flavor that makes them feel incredibly sophisticated. They are perfect for gifting or just making your Tuesday night special.
If you’re looking for more ways to bring big flavor into simple recipes, check out some of my other delicious dessert recipes. But trust me, this one is going straight to the top of your rotation!
Ingredients for Gourmet Brown Butter Sugar Cookies
Okay, listen up! Since these are brown butter sugar cookies, the star of the show—the butter—has to be treated right. I always, always grab the best unsalted butter I can find. Because we are browning it, we are literally concentrating that dairy flavor, so using real, quality butter is non-negotiable if you want that intense, nutty depth.
Don’t worry about a separate ingredient list for wet and dry; we’re keeping it streamlined! Here’s what you need for about 20 perfect cookies:
- 1 cup (that’s two full sticks) unsalted butter, browned completely and then cooled until it’s just barely liquid—not hot!
- 1 cup granulated sugar, plus a generous amount of extra for rolling the dough balls.
- 1 large egg, room temperature is best, but honestly, if you’re in a rush, just use it straight from the fridge.
- 1 teaspoon pure vanilla extract. (Don’t substitute the good stuff here; it really shines through!)
- 2 1/4 cups all-purpose flour.
- 1 teaspoon baking soda.
- 1/2 teaspoon salt.
See? Simple ingredients, but that browned butter takes them straight into gourmet territory. It truly is the easiest way to achieve intense flavor in a cookie!
Mastering the Brown Butter Sugar Cookies Technique: Step-by-Step Instructions
This is where the magic happens, and honestly, this whole process is why these brown butter sugar cookies don’t need chilling! The trick is getting that butter perfectly browned first, and then cooling it down *just* enough so it firms up slightly, giving you structure without waiting hours in the fridge. We’re aiming for that perfect chewy inside and that crackly, sweet exterior!
Browning the Butter: Creating Nutty Sugar Cookies Flavor
Get a light-colored saucepan—you need to see those bits forming! Melt your butter over medium heat. It’s going to foam up like crazy, don’t panic, that’s the water cooking off. Keep stirring! You’ll notice the foam subsides, and then, suddenly, you’ll see tiny brown bits forming at the bottom. The smell is key here—it goes from smelling like plain butter to smelling like toasted hazelnuts. As soon as you hit that sweet, nutty aroma, yank it off the heat immediately, pour it into a heatproof bowl, and let it sit for about 15 minutes to cool slightly. It needs to still be liquid enough to mix, but totally cool enough that it won’t scramble the egg!
Learning how to properly brown butter is the cornerstone of easy brown butter baking, and it’s a technique I cover more in-depth if you want to perfect it for all your sweet and savory recipes! Check out my guide here.
Mixing and Shaping for Chewy Sugar Cookies
Once your brown butter has cooled down a little (it should be warm, but not hot to the touch), whisk it hard with the cup of granulated sugar until it looks smooth. Then toss in your egg and vanilla and mix until everything is happy and combined. Now for the dry stuff: whisk your flour, baking soda, and salt separately, then add it to the wet mixture slowly. Seriously, mix this on low speed or just use a spoon until *just* combined. If you overmix, you’ll develop too much gluten and kill that soft, chewy sugar cookie center we are aiming for. Oops!
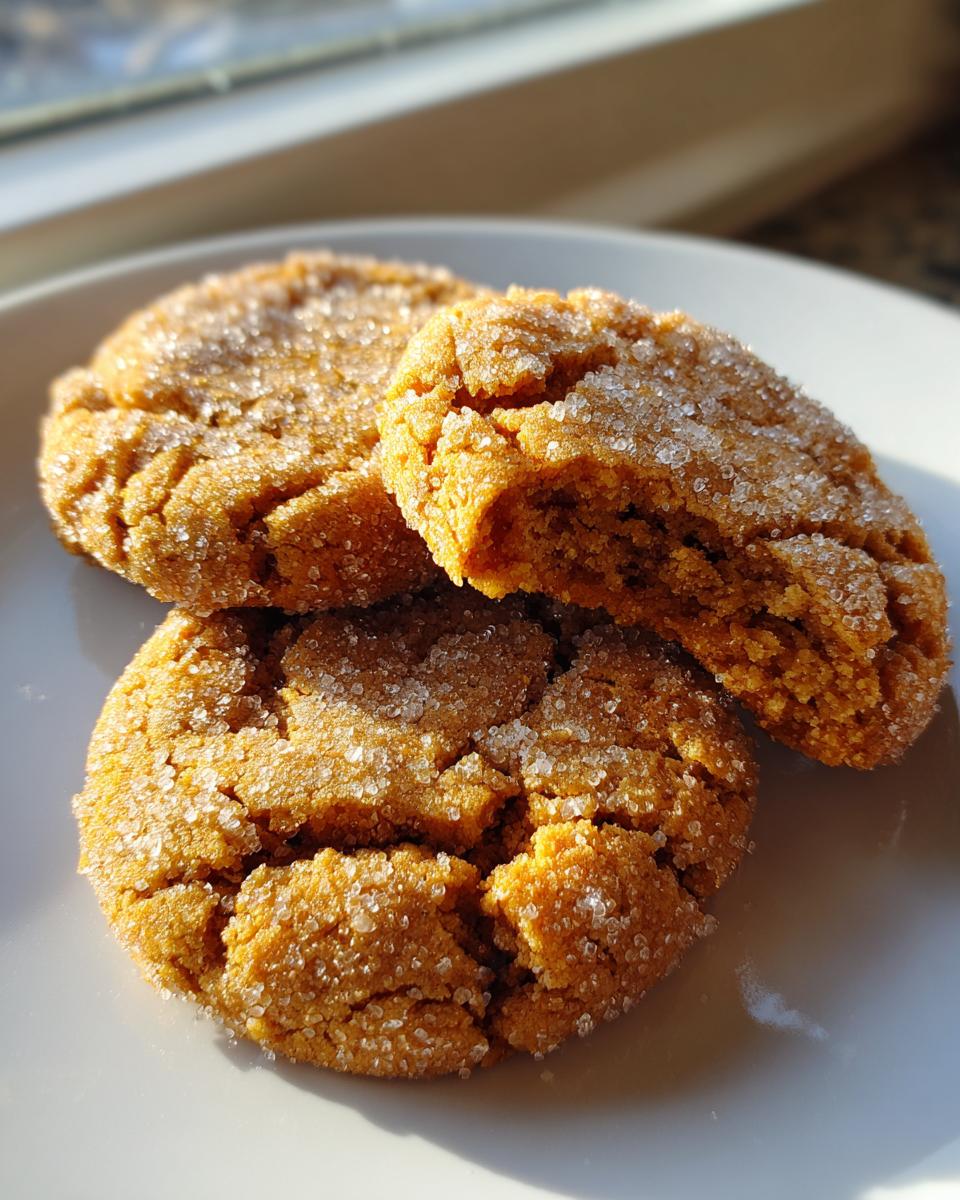
Next, scoop out those dough balls—I use about 1.5 tablespoons each—and this is critical for the finish: roll them *generously* in the extra granulated sugar until they’re totally coated. That sugar coating is what helps make those gorgeous, crispy edge cookies when they bake. Once they are sugared, place them on your parchment-lined sheet and use the bottom of a glass to gently flatten them a bit before sliding them into the oven. Easy peasy!
Baking Tips for Bakery Style Brown Butter Sugar Cookies
Getting these brown butter sugar cookies just right in the oven is really what seals the deal between good and absolutely unforgettable. We want that perfect contrast: set edges that give a little snap, and a center that stays delightfully soft and chewy when you bite into it. Since we skipped the chill time, oven management is super important!
First, make sure your oven is truly ready. Preheat it to 375°F (190°C). I know a lot of recipes call for 350°F, but for these quick-baking cookies, 375°F gives us the structure we need quickly without drying out the center.
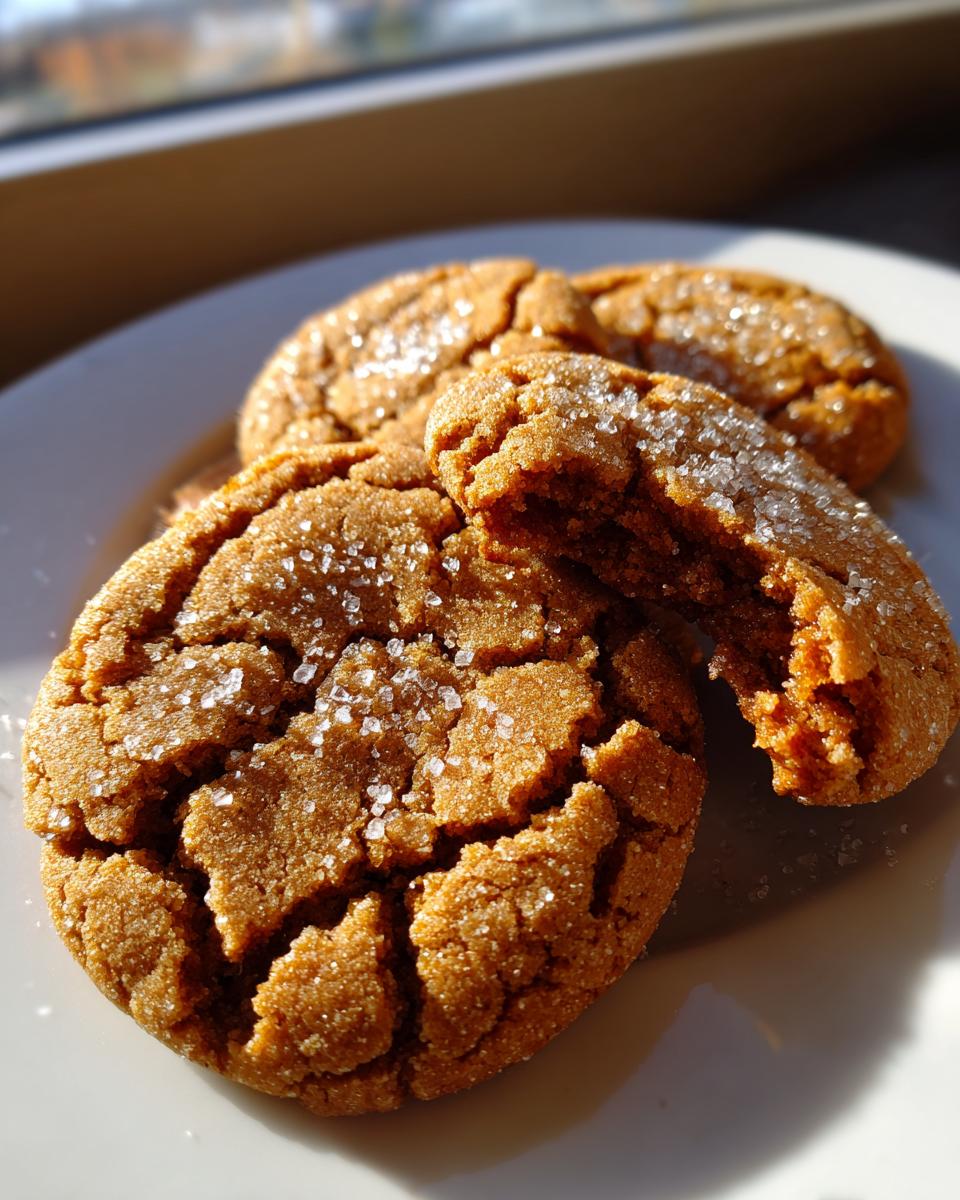
Now, watch them like a hawk from about the 9-minute mark. You’re looking for visual cues. The edges should look set, maybe a tiny bit golden brown, but here is the secret: the center should still look a little underdone, maybe just barely puffy. If the entire top looks matte and completely cooked through, you’ve gone too far and they’ll be crispy all the way through, which isn’t what we want for these soft baked cookies.
The absolute most crucial final step is the resting period. Pull those trays out! You have to let them sit right there on that warm baking sheet for a full five minutes—no touching, no peeking! That residual heat finishes setting the centers without over-baking them. If you try to move them too soon, they’ll likely fall apart because the dough is still very delicate. After five minutes, *then* you can sneak them over to a wire rack to cool completely. That settling time is what transforms them into amazing bakery style cookies!
If you want even more foolproof tips for achieving that signature bakery look and texture in all your favorite treats, I share my top tricks over in my guide to making bakery style cookies.
Ingredient Notes and Substitutions for Brown Butter Cookies
I know some of you are absolute pros at adjusting baking recipes, and some of you are just starting out. Either way, I wanted to chat quickly about the ingredients here, especially that beautiful brown butter, because it changes the whole game for these brown butter sugar cookies!
The biggest question I always get about this specific recipe is, “Maya, since I didn’t chill the dough, won’t these spread into giant, flat puddles?” Nope! And here’s the science secret: when you brown butter, you cook off a portion of the water content. Then, when you cool it for 15 minutes, it sets slightly. It’s not rock hard like refrigerated butter, but it’s much firmer than warm, melted butter. This perfect medium state gives the dough enough immediate structure so you can roll those cookie balls in sugar and plop them right onto the tray without them melting before they even hit the oven. That’s why we skip the chill time for these!
What if you swap the butter?
If you decide to use salted butter instead of the specified unsalted butter for these brown butter cookies, you need to adjust the salt in the dry ingredients. Since we call for 1/2 teaspoon of salt with unsalted butter, if you use salted butter, just skip adding that extra salt completely. Salt is a flavor enhancer, but too much, especially with the already developed flavor from the browned butter, can be overwhelming.
Also, a quick note on sugar: I use granulated sugar for the coating because it creates that lovely, sparkly crust for the crispy edge cookies effect. If you tried to roll them in brown sugar, it would just melt right into the dough, and you’d lose that crucial texture finish. Stick to the granulated sugar for the outside rolling step!
Storage and Reheating Instructions for Soft Baked Cookies
You made these glorious brown butter sugar cookies, and now you have to save some for later, right? Good call! These are so dangerously good, you might need to hide a batch just to make them last past today. Since our main goal with this recipe was those irresistibly soft baked cookies centers, proper storage is key to maintaining that glorious texture.
When they are completely cooled—and I mean totally cool, or else you’ll steam up the container and make them soggy—store them in a good, airtight container. I keep mine on the counter at room temperature. They should stay perfectly fresh and chewy for three to four days. If you manage to keep them that long, that is!
Now, if a couple of days go by and they seem just a *tiny* bit stiffer than when they were fresh out of the oven, don’t panic! This is completely normal. These cookies come back to life with the slightest bit of assistance. My favorite trick is to pop one or two cookies on a microwave-safe plate and zap them for just 8 to 10 seconds. That little burst of warmth softens the sugars and fats right back up, making them taste like they were pulled fresh from the oven 10 minutes ago. It really revitalizes that soft center!
If you’re packing them up for gifting or extended storage, make sure you place a piece of parchment paper or wax paper between layers. We don’t want them sticking together, especially since we worked so hard to get that sugary crust on the outside! For any extra baking help regarding texture longevity, take a peek at my main guide on making all your cookies last longer; you can find it here on MayaPlate.
Serving Suggestions for Your Brown Butter Sugar Cookies
Now that you’ve gone to the trouble of creating these spectacular brown butter sugar cookies—which taste way better than any plain old sugar cookie—you have to serve them right! The nutty, slightly toffee-like flavor we coaxed out of the butter pairs beautifully with a few simple additions. Honestly, they’re perfect on their own with a glass of cold milk, but if you want to elevate them to true gourmet status for company or just a cozy evening, here are my favorite ways to serve them up.
First off, if you’re feeling fancy but want to keep it simple, a quick drizzle of glaze works wonders. It doesn’t need to be a heavy frosting; just a very thin glaze made of powdered sugar and a tiny bit of milk or lemon juice. The slight tang from the lemon cuts through the richness of the brown butter perfectly. I always make sure to drizzle it while the cookies are still slightly warm, so it sets into a beautiful, almost invisible shine.
For the ultimate pairing, especially during those cooler months, you need a warm beverage. Forget basic drip coffee! These cookies beg for a strong, beautiful cup of coffee or maybe a rich hot chocolate. They are perfect for dipping because the sugar coating and slightly crisp edge hold up really well before they get soft. I actually have a recipe for the creamiest stovetop hot chocolate that feels incredibly indulgent but is surprisingly easy to whip up on the fly—it’s the perfect companion to these nutty treats, and you can find it over here.
Finally, I love serving them alongside some good quality dark chocolate. You can melt down a bar of 70% cacao chocolate and let the cookies cool completely, then dip just one edge of the cookie into the melted chocolate before setting it on wax paper to harden again. The bittersweet chocolate brings out the toasted caramel notes in the brown butter. It’s an elevated classic cookie that truly tastes like something you’d pay good money for at a fancy shop. Enjoy every single bite—you earned it!
Frequently Asked Questions About Making Brown Butter Sugar Cookies
I know that even with detailed instructions, sometimes you just have a quick technical question pop up mid-bake, especially when dealing with something new like browning butter! Don’t sweat it. I’ve gathered the questions I get asked most often about these wonderful brown butter sugar cookies so you can move straight into baking success.
Can I chill the dough for these brown butter sugar cookies?
That’s a great question, and it speaks right to the heart of why this recipe is so exciting! Typically, sugar cookie dough *needs* chilling to stop spreading. However, because we use slightly cooled, partially solidified brown butter rather than hot, melted butter, this dough has just enough structure already built in. So, no, you don’t *have* to chill it! That’s the beauty of this no chill cookie dough version. If your kitchen is incredibly hot, chilling for 20 minutes might help slightly, but usually, you can scoop and roll them right away. You can learn more about my favorite no-chill strategies here!
My butter kept burning! What am I doing wrong?
Oh, I’ve been there! Burning butter is a rite of passage, honestly. The key to achieving that deep, nutty sugar cookies flavor without turning it to charcoal is medium heat and *constant vigilance*. If your butter is burning quickly, your heat is too high. You want medium heat. Watch it: it melts, it foams, the foam subsides, and then those tiny milk solids sink and start to turn brown. The moment you smell that rich, toasted aroma—that’s your cue! Pull it off the heat immediately. If you wait until the solids are dark brown, they are already bitter. Aim for light amber, not dark mahogany!
Can I replace the granulated sugar coating with something else for the crispy edge cookies?
You absolutely *can* get creative, but I strongly recommend sticking to the granulated sugar for the coating if you want those defined, crispy edge cookies. The refined crystals of granulated sugar melt just enough in the oven to create that textural shell and that beautiful, sparkly finish. If you try rolling them in brown sugar, the molasses content means the sugar melts completely into the dough, and you lose that crisp exterior entirely. If you want a flavor twist, try mixing cinnamon into the granulated sugar coating—that gives you a lovely spiced crust without losing the crunch!
How do I make sure these are soft baked cookies and not hard cookies?
This is the most important part of achieving a truly gourmet cookie recipe! The secret lies entirely in the pulling the cookies *slightly* early. When you pull them out of the oven, the centers should still look soft, slightly puffy, and maybe even a touch underdone—like they haven’t fully baked through. Don’t let them brown all over! The residual heat while they sit on that hot pan for five minutes is what finishes cooking the center into that perfect chewy state. If you wait until they look fully baked on the tray, they will be firm and dry once they cool down. Trust the process and pull them when they look *almost* done!
Nutritional Estimate for This Rich Dessert Recipe
If you’re counting macros or just curious about what goes into these amazing brown butter cookies—and since they are such a rich dessert recipe—I pulled together the estimated nutrition facts based on the ingredients listed. Remember, these are just estimates, especially since the exact results can shift depending on how much moisture you cook out of the butter or which brand of flour you use!
But for a single, glorious cookie made with this recipe, here’s the ballpark figure:
- Serving Size: 1 cookie
- Calories: 180
- Fat: 9g (with about 5g being saturated, that’s that wonderful butter!)
- Carbohydrates: 23g
- Sugar: 14g
- Protein: 2g
- Cholesterol: 30mg
Even though these are an indulgence, they are still relatively light per cookie compared to some overloaded, frosting-heavy holiday recipes. They balance richness with just enough sweetness. So go ahead and enjoy one—or maybe two—knowing you’ve got a fantastic, flavorful treat in your hands. Sometimes, simple baking upgrades like using brown butter are just what a healthy lifestyle needs for a little burst of joy!
PrintGourmet Brown Butter Sugar Cookies: Soft Centers & Crispy Edges (No Chill Option)
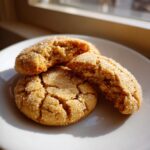
Make bakery style brown butter sugar cookies that achieve a perfect balance: soft, chewy centers with slightly crisp edges. Browning the butter adds a rich, nutty depth that elevates this classic treat.
- Prep Time: 15 min
- Cook Time: 11 min
- Total Time: 26 min
- Yield: 20 cookies 1x
- Category: Dessert
- Method: Baking
- Cuisine: American
- Diet: Vegetarian
Ingredients
- 1 cup (2 sticks) unsalted butter, browned and cooled slightly
- 1 cup granulated sugar, plus extra for rolling
- 1 large egg
- 1 teaspoon vanilla extract
- 2 1/4 cups all-purpose flour
- 1 teaspoon baking soda
- 1/2 teaspoon salt
Instructions
- Melt the butter in a saucepan over medium heat. Continue cooking, stirring often, until the butter foams, then subsides, and brown bits form at the bottom, releasing a nutty aroma. Immediately pour the browned butter into a heatproof bowl and let it cool for 15 minutes until it is still liquid but not hot.
- In a large bowl, whisk together the cooled brown butter and 1 cup of granulated sugar until well combined.
- Beat in the egg and vanilla extract until the mixture is smooth.
- In a separate bowl, whisk together the flour, baking soda, and salt. Gradually add the dry ingredients to the wet ingredients, mixing on low speed until just combined into a dough. Do not overmix.
- Scoop the dough into balls, about 1.5 tablespoons each. Roll each ball thoroughly in the extra granulated sugar until fully coated.
- Place the sugared dough balls onto baking sheets lined with parchment paper, spacing them about 2 inches apart. Flatten each ball slightly with the bottom of a glass.
- Bake at 375°F (190°C) for 9 to 11 minutes. The edges should look set and lightly golden, but the centers may still look slightly soft.
- Let the cookies cool on the baking sheet for 5 minutes before transferring them to a wire rack to cool completely. The centers will set as they cool, resulting in a chewy texture.
Notes
- To brown butter quickly, ensure you use a light-colored saucepan so you can easily monitor the color change of the milk solids.
- For extra crisp edges, press the dough balls down slightly more before baking.
- These cookies hold their shape well, making them excellent for holiday cookie exchanges.
Nutrition
- Serving Size: 1 cookie
- Calories: 180
- Sugar: 14g
- Sodium: 85mg
- Fat: 9g
- Saturated Fat: 5g
- Unsaturated Fat: 4g
- Trans Fat: 0g
- Carbohydrates: 23g
- Fiber: 0g
- Protein: 2g
- Cholesterol: 30mg