
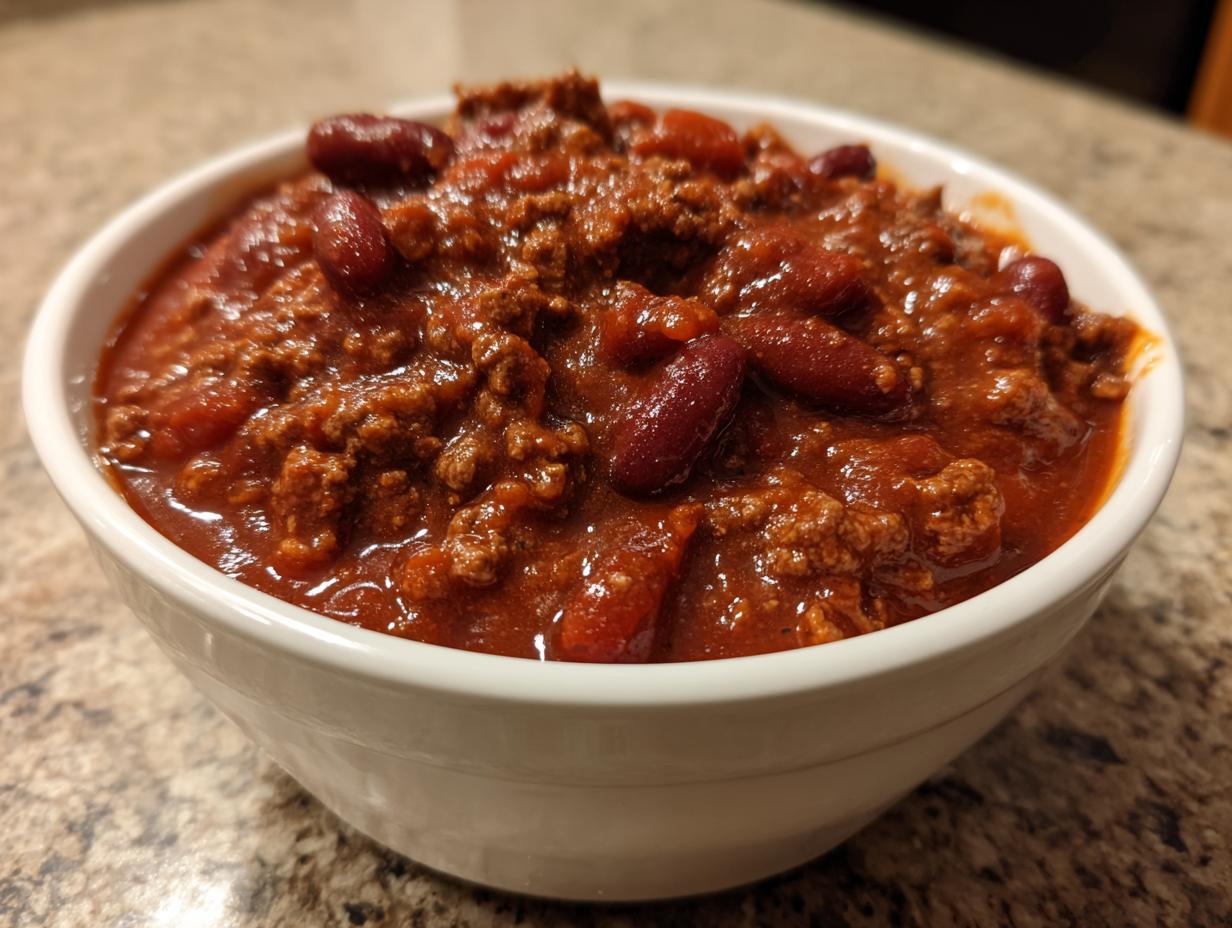
We all have those nights, right? The schedule is totally packed, the kids are tired, and you just *need* something deeply comforting that doesn’t require three hours of simmering. That’s where I live my life, honestly! That’s why I put all my energy into perfecting this recipe. Forget everything else you’ve seen; this is it. This is the Best Chili Recipe you’ll ever need because it tastes like it simmered all day, but it’s actually ready fast enough for a busy Tuesday. I built MayaPlate on blending deep flavor with real-world practicality, and this hearty **chili** is the perfect example of that!
- Why This Classic Chili Recipe is Your New Weeknight Chili Staple
- Simple Chili Ingredients for Your Best Chili Recipe
- How to Prepare This Easy Chili: Step-by-Step Instructions
- Tips for the Best Chili Recipe Success and Variations
- Serving Suggestions: Perfect Chili Toppings Ideas
- Storage and Reheating Instructions for Your Homemade Chili
- Frequently Asked Questions About This Hearty Chili
- Estimated Nutritional Data for This Classic Chili
- Share Your Family Favorite Chili Experience
Why This Classic Chili Recipe is Your New Weeknight Chili Staple
I know what you’re thinking: “Best” chili? Can it really be that good if it’s quick? Absolutely! My goal when creating this weeknight chili was to trick your tastebuds into thinking you spent hours simmering your pots. It’s genuinely hearty chili that comes together fast, and it’s our go-to quick dinner idea.
- It’s a true One Pot Chili, which means cleanup is a dream!
- We use my little secret—a touch of cocoa powder—to give this **chili** incredible depth usually only found in competition versions.
- It relies on simple pantry ingredients, so you don’t need a special grocery run.
Achieving Hearty Chili Flavor in Under an Hour
Most recipes brag about slow cookers, but honestly, who has that time on a Wednesday? This stovetop method is your secret weapon. We only need a minimum of 30 minutes of gentle simmering after browning the beef. That might sound short, but because we build the flavor profile *before* adding the liquids, those 30 minutes are highly effective. It’s a rich, satisfying Stovetop Chili that delivers serious comfort!
Simple Chili Ingredients for Your Best Chili Recipe
Honestly, the beauty of this homemade chili is how few fancy things you need. You probably have most of this stuff kicking around already! I aimed to make this the easiest recipe possible, focusing on **simple chili ingredients** that pack a huge flavor punch. We are using ground beef here, which cooks up fast, and yes, we are absolutely using beans because this is a comforting, hearty chili, not a fancy steakhouse bowl! Grab your measuring cups, and let’s get everything chopped and ready to go. You’ll be amazed how far these staples take us.
- 2 tablespoons olive oil
- 2 pounds ground beef (85% lean recommended—we want flavor, not swimming in grease!)
- 1 large yellow onion, chopped
- 1 green bell pepper, chopped
- 4 cloves garlic, minced
- 1 (15 ounce) can kidney beans, rinsed and drained
- 1 (15 ounce) can pinto beans, rinsed and drained
- 1 (28 ounce) can crushed tomatoes
- 1 (15 ounce) can tomato sauce
- 1 cup beef broth
- 3 tablespoons chili powder
- 1 tablespoon ground cumin
- 1 teaspoon dried oregano
- 1 teaspoon salt
- 1/2 teaspoon black pepper
- 1/4 teaspoon cayenne pepper (optional, but please try it for a little warmth!)
- 1 teaspoon unsweetened cocoa powder (This is our secret weapon for that deep, almost smoky flavor!)
How to Prepare This Easy Chili: Step-by-Step Instructions
Okay, this is the best part! Since we are aiming for a fantastic Weeknight Chili, organization matters. Get your chopping done first, because once that beef hits the hot oil, things move fast. Follow these steps exactly, and you’ll have the richest **chili** flavor possible without taking all day.
Browning the Meat and Sautéing Aromatics for Great Chili
First thing—grab your biggest Dutch oven or heavy pot and get that olive oil over medium-high heat. Cook your 2 pounds of ground beef until it’s totally browned. I mean it—no pink spots left! Once it’s done, take it off the heat and drain away every bit of that excess grease. Trust me, draining the grease now keeps your final **chili** from tasting heavy. Next, you throw in your chopped onion and bell pepper right into the same pot. Let those soften up nicely for about 5 to 7 minutes while you gather your spices. That little bit of beef fat left on the bottom is flavor gold for the veggies!
Blooming the Spices in Your One Pot Chili
This step is crucial for depth! Once the veggies look soft, push them slightly to the side and toss in that minced garlic. Let that go for maybe 30 seconds until you can smell it—don’t burn it! Then, dump in everything else dry: the chili powder, cumin, oregano, salt, pepper, cayenne if you’re brave, and that tiny spoonful of cocoa powder. Stir everything constantly for just one minute. Heating the spices like this is called blooming them, and it releases way more flavor than just tossing them straight into the liquid. It’s a tiny step that makes a huge difference in the final **chili**.
Simmering the Classic Chili for Depth
Now we add the liquids and beans! Pour in your crushed tomatoes, tomato sauce, and beef broth. Don’t forget to rinse and drain those kidney and pinto beans before they go in—we wash off that starchy canning liquid. Stir it all until it’s completely mixed. Bring that whole pot up to a gentle simmer, and then immediately turn the heat down low. Cover the pot slightly (I leave a tiny gap for steam to escape) and let this **Classic Chili** bubble away for a minimum of 30 minutes. If you want that wonderfully thick chili recipe texture I always talk about, pull the lid off entirely for the final 15 minutes of simmering. That helps evaporate just enough liquid to make it perfect before serving.
Tips for the Best Chili Recipe Success and Variations
Even though this is my quick stovetop version, I always get asked about making a big batch for game day. You totally can adapt this! One thing I learned working through nutrition plans is that utilizing slow cooking equals less active time for you, which is exactly what we want as busy people. This recipe is super forgiving, which is why it’s such a reliable Comfort Food Dinner.
Also, remember how we talked about bean texture? If you’re making a huge batch of this **chili with beans** and want it extra thick, here’s my trick: take about a quarter cup of the beans out of the can—before you rinse them—and mash them up with a fork. Stir that paste in with the tomatoes. The starches thicken the whole pot beautifully without needing that extra simmer time.
Converting to a Crockpot Chili Recipe
If you want to turn this into a perfect Crockpot Chili Recipe, it’s so simple! You still absolutely have to brown the beef and sauté the onions, peppers, and garlic on the stove first. Don’t skip that step; it locks in so much flavor! Once everything that needs browning is done, just transfer the whole shebang—meat, veggies, spices, tomatoes, and broth—into your slow cooker. Set it low for 6 to 8 hours, or high for 3 to 4 hours. Pull those canned beans out of the mix and add those in during the last hour of cooking so they don’t get totally mushy. It’s a fantastic way to prep for the week!
Serving Suggestions: Perfect Chili Toppings Ideas
Okay, now that you have this amazing, rich, perfectly spiced **chili**, we need to talk toppings! This is where you take my foolproof base recipe and make it 100% *your* **Comfort Food Dinner**. Seriously, toppings are non-negotiable; they add texture, cool creaminess, or a necessary crunch. Don’t just slap a little cheese on top; go wild! Think of this as the grand finale to your easy weeknight meal.
When I serve this **Hearty Chili**, I always put out a huge spread of bowls so everyone can customize their portion. It makes dinner feel special, even though it only took an hour! Here are the essentials that always disappear first from my table:
- Shredded sharp cheddar cheese (the sharper the better!)
- A dollop of cool sour cream or plain Greek yogurt to cut the heat
- Finely chopped green onions or fresh cilantro for that bright, fresh lift
- Crushed tortilla chips or Fritos for the BEST crunch factor
- Diced avocado for healthy fats and creamy goodness
- A side of warm cornbread—it’s basically mandatory for soaking up the last bits!
Let me know in the comments which of these **Chili Toppings Ideas** you think is the absolute most important! I’m always looking for new ways to dress up my bowl of **chili**!
Storage and Reheating Instructions for Your Homemade Chili
You know, one of the secret superpowers of this specific **chili** recipe is that it’s legitimately better the next day. Seriously! That’s why I love making a double batch when I tackle this on a weeknight—it sets me up so nicely for an easy lunch or another spontaneous meal later in the week.
When it comes to storage, keeping your amazing **chili** fresh is easy, but you have to do it right away. Never, ever leave leftovers sitting out on the counter to cool down. Food safety first, always! You want to get this rich **Hearty Chili** into the fridge within two hours of it finishing simmering.
For the fridge, use airtight containers. Glass ones are my favorite because they seem to hold the temperature better. This **homemade chili** should last beautifully for about 4 to 5 days in the refrigerator. Because it’s packed with tomatoes and beans, it stays robust and flavorful the entire time.
How to Reheat Your Weeknight Chili Perfectly
Okay, reheating is where people go wrong! If you zap the whole batch in the microwave, you end up with hot spots and cold centers. You want that cozy, slow-simmered experience again, remember?
For a single serving, I always recommend the stovetop method. Scoop out what you need into a small saucepan, add just a splash of water—maybe a tablespoon or two—or a little extra broth if it looks super thick. Heat it over medium-low heat, stirring every minute or two until it’s steaming hot all the way through. That little splash of liquid keeps it from scorching on the bottom and helps redistribute all that wonderful flavor.
If you need to reheat a big batch, the slow cooker is your friend! Transfer the cold chili into the Crockpot, set it to low, and give it about 3 hours to gently warm up. It reheats so evenly this way, and the texture stays absolutely perfect! It’s the ultimate plan for ensuring you always have a ready-to-go **Weeknight Chili** waiting for you!
Frequently Asked Questions About This Hearty Chili
I know you have questions! When you’re trying to nail down that perfect **Best Chili Recipe**, you want to make sure you get every detail right. I’ve answered the most common things folks ask me about this **Hearty Chili**—especially the parts that make it feel like an **Award Winning Chili** instead of just Tuesday night dinner.
Can I make this chili vegetarian?
Oh, absolutely! I love that you’re thinking about how to adapt it. To keep that amazing texture we work so hard to build, you want something substantial to replace the ground beef. My favorite swap for this **Easy Chili** is combining lentils and mushrooms. Sauté 1 cup of dried brown or green lentils (rinsed!) with 8 ounces of finely diced mushrooms where you would normally brown the meat. You’ll need to increase your broth slightly as the lentils soak up liquid, but the resulting **chili with beans** is incredibly satisfying and still feels like a true **Comfort Food Dinner**!
What is the purpose of the cocoa powder in this chili?
This is the question I get the most! People get nervous when they see it on the ingredient list, expecting a chocolate dessert smell, but trust me, it’s pure magic for savory food. The cocoa powder doesn’t make it taste like chocolate, **not at all**! It acts like a flavor enhancer, similar to how salt boosts sweetness. It deepens the richness of the *chili powder* and the beef, giving your **homemade chili** that complex, slow-simmered, darker flavor profile that people usually mistake for hours on the stove. It’s my favorite trick for an **Award Winning Chili** flavor profile without any extra effort.
I like it spicy! How can I make this chili hotter?
If you’re a heat seeker like me sometimes, you can easily crank up the temperature in this **Quick Dinner Idea**. The recipe already calls for a tiny bit of cayenne, but that’s just for a little tingle! If you want real fire, I recommend two things. First, double the cayenne pepper—that’s the easiest adjustment. Second, and this is my favorite pro move, add a finely minced jalapeño or serrano pepper right in with the onions and bell peppers in Step 2. You’ll feel the heat bloom when you sauté the spices later! You can always learn more about quick, healthy meals by checking out my lunch tips, but for chili heat, fresh peppers are king!
Estimated Nutritional Data for This Classic Chili
Now, I always want to be upfront with you all. As a nutritionist, balancing flavor with good-for-you ingredients is my whole jam here at MayaPlate. But just remember, since every single person tweaks their **chili**—maybe you use leaner meat, maybe you skip the beans, or maybe you dump half a jar of cheese on top—this data is just an estimate.
This information is calculated based on a standard serving size of 1.5 cups of the base **chili** recipe, yielding 6 servings total, using the ingredients listed. It gives us a great baseline to understand this **Comfort Food Dinner** is actually packed with great protein and fiber!
Here’s what you can generally expect from a bowl of this **Hearty Chili**:
- Serving Size: 1.5 cups
- Calories: Approximately 450 per serving
- Protein: A whopping 32g! This is why this **chili** keeps you full.
- Fat: Around 22g total fat (8g saturated), which comes mostly from that flavorful ground beef.
- Carbohydrates: About 35g total carbs, with a fantastic 10g of dietary fiber thanks to those beans!
- Sodium: Around 650mg. Remember, this is before you add extra salt while seasoning to taste, so watch that portion if you’re tracking sodium closely!
See? It’s wonderfully balanced! It’s filling, keeps your energy steady, and tastes like you spent all day over the stove. That’s the magic of a well-crafted **Easy Chili** recipe!
Share Your Family Favorite Chili Experience
Now, here’s the part I absolutely love the most: hearing from you! I developed this **chili** recipe applying everything I know about creating satisfying, practical meals that my own busy family enjoys. It’s transitioned from a necessity in my kitchen to what I hope becomes a staple in yours. This isn’t just mine anymore; it really becomes yours once you start making it your own!
Did you try the cocoa powder trick? Did you go heavy on the cayenne? Maybe you swapped out the ground beef for turkey in your **Weeknight Chili** prep? I *need* to know! Please, please, please drop a comment below and let me know how your experience went. Was it as easy as promised? Did it pass the smell test while simmering?
If you made this and it earned a spot in your rotation of **Family Favorite Chili** meals, I’d be so grateful if you could leave a quick star rating right under the recipe card. That little bit of feedback helps other busy folks who are scrolling, looking for that one reliable recipe that truly delivers comfort without the commitment.
And hey, if you snap a picture of your beautiful bowl of **Hearty Chili**—maybe piled high with shredded cheese and onions—tag me on social media! Seeing your beautiful, delicious results is honestly the reason I love sharing my real-life kitchen adventures. If you ever need to reach out directly with a question or a photo, you can always pop over to my contact page. Happy cooking, friends!
PrintThe Best Classic Hearty Ground Beef & Bean Chili (Quick Weeknight Version)

This easy, one-pot chili recipe delivers the rich, satisfying flavor of classic comfort food, ready fast enough for any busy weeknight dinner.
- Prep Time: 15 min
- Cook Time: 45 min
- Total Time: 60 min
- Yield: 6 servings 1x
- Category: Dinner
- Method: Stovetop
- Cuisine: American
- Diet: Vegetarian
Ingredients
- 2 tablespoons olive oil
- 2 pounds ground beef (85% lean recommended)
- 1 large yellow onion, chopped
- 1 green bell pepper, chopped
- 4 cloves garlic, minced
- 1 (15 ounce) can kidney beans, rinsed and drained
- 1 (15 ounce) can pinto beans, rinsed and drained
- 1 (28 ounce) can crushed tomatoes
- 1 (15 ounce) can tomato sauce
- 1 cup beef broth
- 3 tablespoons chili powder
- 1 tablespoon ground cumin
- 1 teaspoon dried oregano
- 1 teaspoon salt
- 1/2 teaspoon black pepper
- 1/4 teaspoon cayenne pepper (optional, for heat)
- 1 teaspoon unsweetened cocoa powder (secret ingredient for depth)
Instructions
- Heat the olive oil in a large Dutch oven or heavy-bottomed pot over medium-high heat. Add the ground beef and cook, breaking it apart with a spoon, until it is fully browned. Drain off any excess grease.
- Add the chopped onion and green bell pepper to the pot with the beef. Cook for 5 to 7 minutes, stirring occasionally, until the vegetables soften.
- Stir in the minced garlic, chili powder, cumin, oregano, salt, pepper, cayenne pepper (if using), and cocoa powder. Cook for 1 minute until the spices are fragrant.
- Pour in the crushed tomatoes, tomato sauce, beef broth, rinsed kidney beans, and pinto beans. Stir everything together well.
- Bring the chili mixture to a simmer. Once simmering, reduce the heat to low, cover the pot partially, and let it cook for at least 30 minutes, stirring occasionally. For thicker chili, remove the lid for the last 15 minutes of cooking.
- Taste the chili and adjust salt and spices as needed before serving hot with your favorite toppings.
Notes
- For a Crockpot Chili Recipe variation, brown the beef and sauté the vegetables first, then transfer everything to the slow cooker. Cook on low for 6 to 8 hours or on high for 3 to 4 hours.
- To achieve a thicker chili recipe, mash about 1/4 cup of the beans against the side of the pot before adding the remaining liquid, or simmer uncovered for longer.
- Serve this family favorite chili with toppings like shredded cheddar cheese, sour cream, chopped green onions, or crushed tortilla chips.
Nutrition
- Serving Size: 1.5 cups
- Calories: 450
- Sugar: 10
- Sodium: 650
- Fat: 22
- Saturated Fat: 8
- Unsaturated Fat: 14
- Trans Fat: 0
- Carbohydrates: 35
- Fiber: 10
- Protein: 32
- Cholesterol: 85