
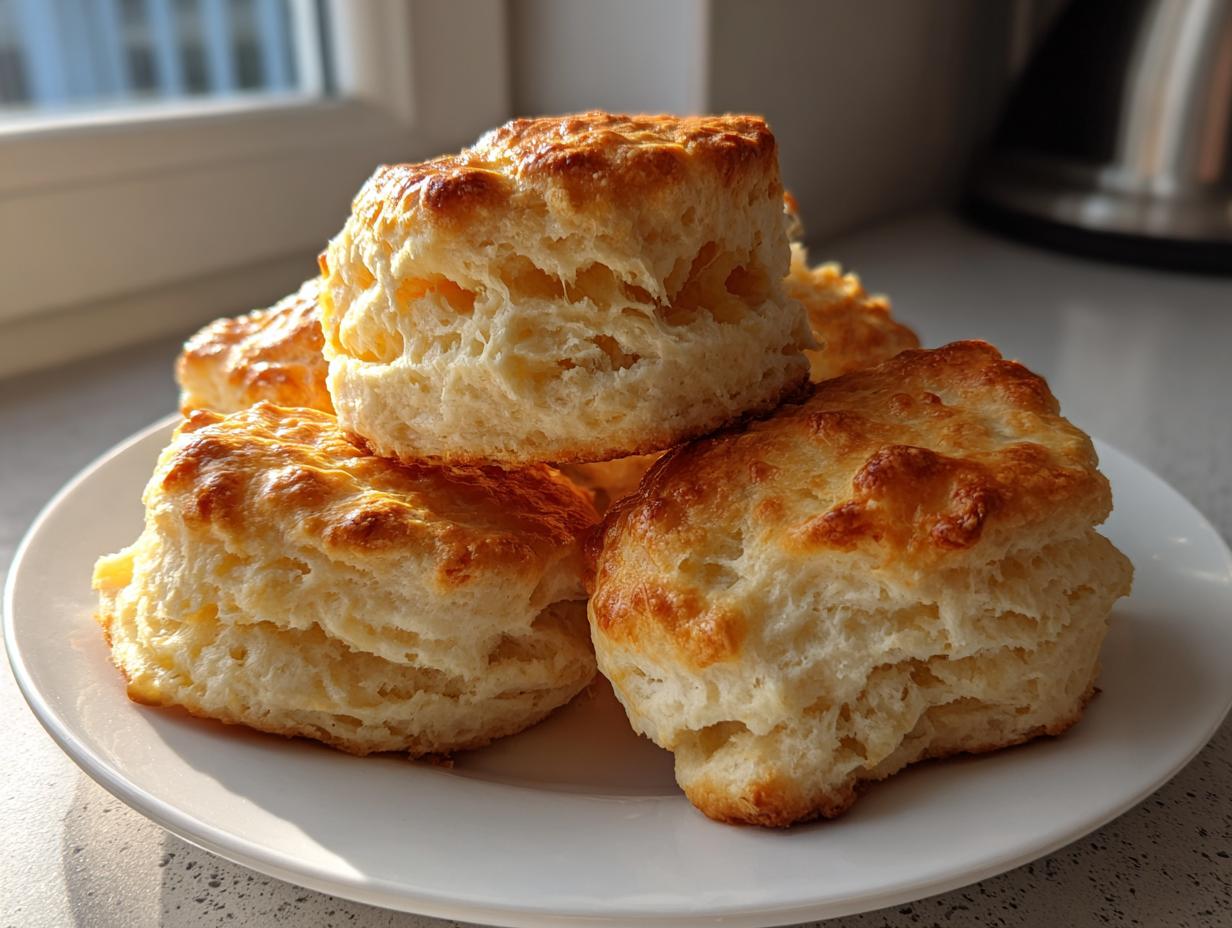
We’ve all been there, desperately seeking that perfect, warm bite of comfort, only to pull thin, sad discs out of the oven. That just won’t do! If you’re chasing that dream of bakery-quality results—biscuits that are impossibly fluffy, remarkably tall, and layered with extra flakes—you’ve found your new go-to. My quest for the ideal buttermilk biscuits is deeply rooted in the memory of my grandmother’s Midwest kitchen, where everything felt slow and intentional. Now, between deadlines, I’ve perfected an approach that honors that warmth but fits perfectly into our busy lives. If you want to know more about how we approach food here at MayaPlate, check out our story right here as I started this journey. Trust me, achieving that Southern-style perfection is easier than you think!
- Why These Are the Best Buttermilk Biscuits You Will Ever Make
- Gathering Ingredients for Perfect Buttermilk Biscuits
- Step-by-Step Instructions for Fluffy Buttermilk Biscuits
- Tips for Truly Tall Buttermilk Biscuits
- Serving Suggestions for Classic Southern Buttermilk Biscuits
- Storage and Reheating Buttermilk Biscuits
- Frequently Asked Questions About Buttermilk Biscuits
- Nutritional Snapshot of These Homemade Biscuits
- Share Your Flaky Buttermilk Biscuits Experience
- Nutritional Snapshot of These Homemade Biscuits
- Share Your Flaky Buttermilk Biscuits Experience
Why These Are the Best Buttermilk Biscuits You Will Ever Make
I know, I know, everyone calls their recipe the “best,” but these truly deliver what people are begging for when they search for buttermilk biscuits. We focus on three main things, and hitting these markers is what separates a soggy hockey puck from a genuine Southern delight.
- They are genuinely fluffy buttermilk biscuits, not flat little discs.
- We talk about how to get those tall buttermilk biscuits that look amazing stacked on a plate.
- The texture is undeniably flaky—we’re talking layers that separate easily when you pull them apart.
If you’re looking for ways to simplify your weeknights without sacrificing satisfaction, check out some of my other quick ideas over here. But first, let’s talk layers!
Achieving Mile High Rise and Flaky Layers
Height comes from two key places: keeping the fat solid and creating structure through layering. It’s all about the cold! When those tiny, cold chunks of butter hit the hot oven, they create steam pockets. That steam is what pushes those layers up and apart, giving you that beautiful rise.
My expert tip is here: When you fold the dough over itself, think of it like turning pages in a book, not rolling a yoga mat. You want to be gentle but firm. This simple folding technique is the secret to a truly flaky biscuit recipe that looks like it came from a bakery counter. It’s how we get those mile high biscuits!
The Secret to Tender Buttermilk Biscuits
The absolute biggest mistake people make with buttermilk biscuits is mixing too much! As soon as those dry ingredients meet the buttermilk, you stop mixing the second you see no more flour streaks. Overmixing develops gluten, and gluten hates tenderness—it makes things tough and chewy!
By respecting the shaggy stage of the dough, you guarantee those tender biscuits. This means they will genuinely melt in your mouth rather than requiring serious jaw work. It’s the balance of cold butter and light mixing that gives you that melt-in-your-mouth quality.
Gathering Ingredients for Perfect Buttermilk Biscuits
Alright, let’s talk supplies! Baking these beautiful buttermilk biscuits is mostly about having the right stuff on hand, and honestly, not much else! Since we are aiming for flavor and texture, the quality—and temperature—of your ingredients matters more than anything else here. You don’t need fancy equipment, just good, cold components. If you’re looking for a project to do alongside your biscuits, I just perfected an easy praline crunch that is divine for snacking! Here is what you need:
- 2 cups all-purpose flour
- 1 tablespoon baking powder
- 1 teaspoon salt
- 1 teaspoon sugar
- 6 tablespoons very cold unsalted butter, cut into small pieces
- 3/4 cup cold buttermilk
- 1 tablespoon melted butter, for brushing
Ingredient Notes and Substitutions
Pay close attention to the word “cold” above—it’s not just a suggestion, it’s a rule! Your butter and your buttermilk must be straight from the fridge, almost painfully cold. If the butter warms up even a little while you’re cutting it in, you’ve lost some potential lift, and it’s just not worth the risk! Remember, those little butter pieces are what create the steam pockets for those gorgeous layers.
Now, regarding substitutions, the buttermilk is key for that slight tang and tenderizing acid, but if you’re totally out, don’t panic. Seriously, I always tell people to turn that milk in your fridge into quick buttermilk if needed. If you have sour cream hanging around, you can use that for part of the liquid, too! The recipe notes mention substituting 1/4 cup of the buttermilk with sour cream for a richer biscuit, and oh my goodness, that is decadent. It really adds a lovely depth to the finished product.
Step-by-Step Instructions for Fluffy Buttermilk Biscuits
Okay, this is where the magic happens! We are moving fast now, but we are moving deliberately. Remember how I stressed keeping everything cold? That pays off right here. The whole process, from mixing to baking, should take us less than 30 minutes! While you are reading these steps, go ahead and preheat your oven to 425 degrees Fahrenheit, or 220 Celsius. You want that heat really ready to shock those butter pockets into submission!
First, take your dry ingredients—the flour, baking powder, salt, and sugar—mix them together really well. We want that baking powder distributed evenly so every biscuit rises equally. Then comes the butter. Drop those cold cubes into the flour mixture. If you happen to be making my easy homemade Alfredo sauce later, you’ll know this part well—we are cutting the fat in until it looks like coarse meal, with some noticeable pea-sized chunks still hanging around.
Now, pour in that cold buttermilk. Mix it gently with a fork until it just comes together. I mean it—stop mixing when it looks vaguely like a shaggy mess. If you keep going, you are doomed to tough biscuits! Turn that dough out and gently pat it into a rectangle about an inch thick. This is where we build structure for our amazing buttermilk biscuits.
The Cold Butter Technique for Flaky Buttermilk Biscuits
This is where our expertise really comes into play! Our target here is maintaining the integrity of that cold butter—that’s the foundation of the melt-in-your-mouth texture. When you follow the folding steps, you are essentially creating dozens of thin layers of dough separated by frozen fat. The real trick to this cold butter biscuits technique is simple lamination, done quickly.
After patting the dough into a rectangle, fold it into thirds, just like folding a business letter. Turn that dough 90 degrees, then pat it down again gently, aiming for about 3/4 inch thick. Repeat that whole folding and patting process one more time. You are layering air and butter simultaneously. Don’t overwork it, or the layers merge, and you lose the desired flakiness!
Cutting and Baking for Maximum Height
When you cut the biscuits—use a sharp 2-inch cutter—please, please PLEASE do not twist it! Pushing straight down keeps those beautiful layers sealed on the sides. If you twist, you weld those layers together, and they won’t separate in the oven. I stack mine for baking; putting the buttermilk biscuits close together on the sheet pan helps support each other as they rise, pushing them upward rather than outward.
Brush the tops with that melted butter—this gives us that gorgeous golden crust. Pop them into that roaring hot 425°F oven. They bake fast, typically just 12 to 15 minutes. Keep an eye out for a deep golden-brown top. As soon as they are done, pull them out, brush with any extra butter, and get them straight to the table!
Tips for Truly Tall Buttermilk Biscuits
Okay, we’ve made the dough, we’ve folded it—now we need to make sure these babies defy gravity! Everybody wants to know how to make tall biscuits, and honestly, it boils down to respecting the science of steam and structure. If you master these few final steps, you’ll be pulling up those mile-high beauties every single time. For more ideas on quick breakfast success, check out my collection of easy breakfast ideas!
First off, let’s talk about your biscuit cutter again. I know it’s tempting, especially when the dough feels gorgeous and supple, but that twist is the enemy of height. When you twist, you seal the edges. Think of it like crimping a pie crust, but we don’t want that here! We need clean, vertical sides so the dough can shoot straight up when the oven heat hits it.
The next big secret comes straight from my notes: placement matters for rise! If you want the tallest, fluffiest buttermilk biscuits possible, put them close together on your baking sheet. When they snuggle up side-by-side, they aren’t allowed to spread out sideways, so they force all that beautiful steam up, pushing them toward the heavens! If you want individual, slightly shorter biscuits, space them an inch or two apart, but for true height, touching is better.
Also, don’t be shy with the chilling time if you need a break. If your kitchen is warm, or if you feel like you’ve handled the dough a little too much while folding, pop the cut-out shapes onto the baking sheet and chill them in the freezer for five, maybe even ten minutes, before they go into the oven. That ensures the butter is rock solid right up until the last possible second. That shock of cold hitting 425°F heat is what guarantees maximum lift. You are going to be so proud when you see them rise!
Serving Suggestions for Classic Southern Buttermilk Biscuits
Now that you have achieved buttery perfection, it’s time for the best part: eating them! These buttermilk biscuits are the absolute cornerstone of classic southern baking. Of course, you can’t go wrong with a generous spread of salted butter right when they come out of the oven. That golden melt is heavenly.
But we always make a double batch because you know they are essential for soaking up everything good. These are simply the best biscuits for gravy you’ll ever need—thick, sturdy, and ready for a blanket of white sauce. For breakfast, slather them with homemade jam or honey. Honestly, just the smell alone is enough to get everyone running to the table!
Storage and Reheating Buttermilk Biscuits
I always hope my buttermilk biscuits disappear the moment they come out of the oven, but let’s be real—sometimes life gets in the way! The fantastic news is that these are still delicious the next day, provided you store them correctly. If you have leftovers, never store them in the refrigerator if you can help it. Cold air dries them out faster than anything. Instead, keep them in an airtight container or a zip-top bag right on the counter at room temperature for up to two days.
If you need them to last longer, say you baked them for future quick lunches, you can freeze them! Once they cool completely, wrap each biscuit tightly in plastic wrap, and then tuck them all into a freezer-safe bag. They’ll be good for about a month this way.
Bringing Them Back to Life (Avoid the Microwave!)
Now, when it’s time to eat those leftovers—and this is critical for maintaining that fluffy texture we worked so hard for—please avoid the microwave if you can. I know it’s fast, but microwaving instantly turns those beautiful layers dense and rubbery. We don’t want sadness at breakfast!
The best way to revive your buttermilk biscuits is in the oven. Wrap them loosely in foil and pop them into a 350°F oven for about 5 to 8 minutes. The foil traps the steam and gently warms the inside, bringing back that soft, just-baked tenderness. If you want that crisp top layer back, unwrap them for the last minute of heating. This little step truly restores them to their flaky glory and respects all that hard work you put into making them!
Frequently Asked Questions About Buttermilk Biscuits
I get so many questions about these biscuits—which tells me you all are serious about ditching the can for good! It’s normal to troubleshoot a bit when you are aiming for that perfect Southern texture. If you have run into trouble or are planning ahead, maybe I can clear up some common questions for you! If you ever have a question I haven’t covered, feel free to reach out on my contact page; I love hearing from you all!
Can I make these buttermilk biscuits without buttermilk?
Oh, that’s a tough one, but yes, you can absolutely make substitutions in a pinch! Buttermilk is wonderful because the acid helps tenderize the flour gently, aiding in that soft texture. If you don’t have the real deal, you can make “DIY buttermilk.” Just take regular milk—whole milk is best—and stir in one tablespoon of white vinegar or lemon juice for every cup of milk you need. Let it sit on the counter for about five to ten minutes until it looks slightly curdled. That works perfectly!
As I mentioned earlier, if you happen to have sour cream, swapping out a quarter cup of the buttermilk for sour cream makes them incredibly rich, too. While I haven’t tested straight milk without an acid, I wouldn’t recommend it for this specific recipe, as you’ll miss out on that perfect tenderizing effect that makes these buttermilk biscuits shine.
What is the easiest way to get fluffy buttermilk biscuits?
If there is one takeaway I could scream from the rooftops about achieving those amazing results, it’s this: Keep your fat—the butter—as cold as humanly possible! Seriously, take your butter out of the freezer just briefly before cutting it into cubes if you have a warm kitchen. When that butter melts slowly in the oven, it releases steam, and that steam is trapped by the dough structure you built during the folding process.
The second easiest way is handling the dough as little as possible. Remember the shaggy dough test? If you mix until it’s perfectly smooth, you’ve already lost the battle for fluffiness. Aim for those gorgeous fluffy buttermilk biscuits by stopping your mixing prematurely. A little lumpy dough is a happy dough!
How do I get perfectly round, tall buttermilk biscuits?
This is all about technique at the final cutting stage, and it’s one of the things I stress most passionately! You need a sharp biscuit cutter that you dip in flour between every single cut. Dip it, press it straight down through the dough, and lift it straight up. Do not, under any circumstances, twist that cutter!
Twisting seals the edges of the layers you worked so hard to create. If the edges are sealed, the steam can’t push the layers apart, and those biscuits stay shorter. Also, remember my tip about placement? For truly tall buttermilk biscuits, put them right next to each other on the baking sheet. It forces them to climb upwards instead of spreading outwards. They’ll come out gorgeously tall and perfectly round, ready for smothering in gravy!
Nutritional Snapshot of These Homemade Biscuits
Now, because I come from a background in nutrition, I know some of you might be wanting the big picture on what you’re consuming. Remember that buttermilk biscuits, especially the flaky, buttery kind, are meant to be an indulgence—a side comfort food, not the main course every day! These numbers are rough estimates based on the ingredients listed above and should be used for general guidance only.
Here is a quick look at the estimated breakdown for one biscuit:
- Serving Size: 1 biscuit
- Calories: 220
- Fat: 12g
- Carbohydrates: 25g
- Protein: 4g
- Sugar: 1g
- Sodium: 350mg
We keep the sugar pretty low here, which is nice since we tend to add honey or jam later! As always, if you need perfect precision for specific dietary needs, I recommend calculating based on the exact brands you use, but this gives you a great baseline for enjoying these buttery biscuits guilt-free as part of a balanced meal.
Share Your Flaky Buttermilk Biscuits Experience
I absolutely live to see your successes! There is nothing better than knowing I helped bring that moment of grandmotherly comfort back to your table. When you make these Fluffy, Tall, and Extra Flaky Buttermilk Biscuits, I want to see them!
Please take a picture and tag me on social media—tell me how high they rose! Did you serve them with gravy or smothered in strawberry jam? Hearing about your kitchen wins truly makes my day and validates all the testing that went into achieving that perfect recipe. Don’t be shy, leave a comment down below, rate this recipe with stars, and let me know what Southern baking staple you might want to tackle next. Happy baking, everyone!
Nutritional Snapshot of These Homemade Biscuits
Now, because I come from a background in nutrition, I know some of you might be wanting the big picture on what you’re consuming. Remember that buttermilk biscuits, especially the flaky, buttery kind, are meant to be an indulgence—a side comfort food, not the main course every day! These numbers are rough estimates based on the ingredients listed above and should be used for general guidance only.
Here is a quick look at the estimated breakdown for one biscuit:
- Serving Size: 1 biscuit
- Calories: 220
- Fat: 12g
- Carbohydrates: 25g
- Protein: 4g
- Sugar: 1g
- Sodium: 350mg
We keep the sugar pretty low here, which is nice since we tend to add honey or jam later! As always, if you need perfect precision for specific dietary needs, I recommend calculating based on the exact brands you use, but this gives you a great baseline for enjoying these buttery biscuits guilt-free as part of a balanced meal. If you are trying to keep things cleaner throughout the week, take a peek at some quick, healthy lunch ideas for inspiration!
Share Your Flaky Buttermilk Biscuits Experience
I absolutely live to see your successes! There is nothing better than knowing I helped bring that moment of grandmotherly comfort back to your table. When you make these Fluffy, Tall, and Extra Flaky buttermilk biscuits, I want to see them!
Please take a picture and tag me on social media—tell me how high they rose! Did you serve them with gravy or smothered in strawberry jam? Hearing about your kitchen wins truly makes my day and validates all the testing that went into achieving that perfect recipe. I always love seeing how you enjoy the food that comes out of your ovens. If you’re hungry for more sweet treats, check out my delicious dessert recipes for more joy-inducing food!
Don’t be shy, leave a comment down below, rate this recipe with stars, and let me know what Southern baking staple you might want to tackle next. We are all about making good food accessible here at MayaPlate, and your feedback helps us all eat well and feel our best. Happy baking, everyone!
PrintFluffy, Tall, and Extra Flaky Southern Buttermilk Biscuits
Create classic Southern buttermilk biscuits that are tall, fluffy, and layered with flaky texture. This recipe uses cold ingredients and simple folding techniques for bakery-quality results at home.
- Prep Time: 15 min
- Cook Time: 15 min
- Total Time: 30 min
- Yield: 8 servings 1x
- Category: Breakfast
- Method: Baking
- Cuisine: Southern American
- Diet: Vegetarian
Ingredients
- 2 cups all-purpose flour
- 1 tablespoon baking powder
- 1 teaspoon salt
- 1 teaspoon sugar
- 6 tablespoons very cold unsalted butter, cut into small pieces
- 3/4 cup cold buttermilk
- 1 tablespoon melted butter, for brushing
Instructions
- Combine the flour, baking powder, salt, and sugar in a large bowl. Whisk to mix the dry ingredients thoroughly.
- Add the very cold butter pieces to the flour mixture. Use a pastry blender or your fingertips to cut the butter into the flour until the mixture resembles coarse crumbs with some pea-sized pieces of butter remaining.
- Make a well in the center of the dry ingredients and pour in the cold buttermilk. Use a fork to gently mix until just combined. Do not overmix; the dough will be shaggy.
- Turn the dough out onto a lightly floured surface. Gently pat the dough into a rough rectangle about 1 inch thick.
- Fold the dough into thirds, like a letter. Turn the dough 90 degrees and gently pat it down again to about 3/4 inch thickness. This folding creates the flaky layers. Repeat this fold and pat process one more time.
- Use a 2-inch biscuit cutter to cut out the biscuits. Press the cutter straight down without twisting to keep the layers intact for maximum rise. Gather scraps gently and cut any remaining biscuits.
- Place the cut biscuits close together on an ungreased baking sheet or in a cast iron skillet. For taller biscuits, place them touching.
- Brush the tops lightly with melted butter.
- Bake in a preheated oven at 425 degrees Fahrenheit (220 degrees Celsius) for 12 to 15 minutes, or until the biscuits are golden brown on top.
- Remove from the oven and brush the tops immediately with any remaining melted butter for extra richness. Serve warm.
Notes
- Keep all your ingredients, especially the butter and buttermilk, very cold. This is the secret to flaky layers.
- Do not twist the biscuit cutter when cutting the dough; press straight down to maintain the layers you created during folding.
- For extra height, place the biscuits touching each other on the baking sheet before baking.
- If you prefer a richer biscuit, substitute sour cream for 1/4 cup of the buttermilk.
Nutrition
- Serving Size: 1 biscuit
- Calories: 220
- Sugar: 1
- Sodium: 350
- Fat: 12
- Saturated Fat: 7
- Unsaturated Fat: 5
- Trans Fat: 0
- Carbohydrates: 25
- Fiber: 1
- Protein: 4
- Cholesterol: 25