
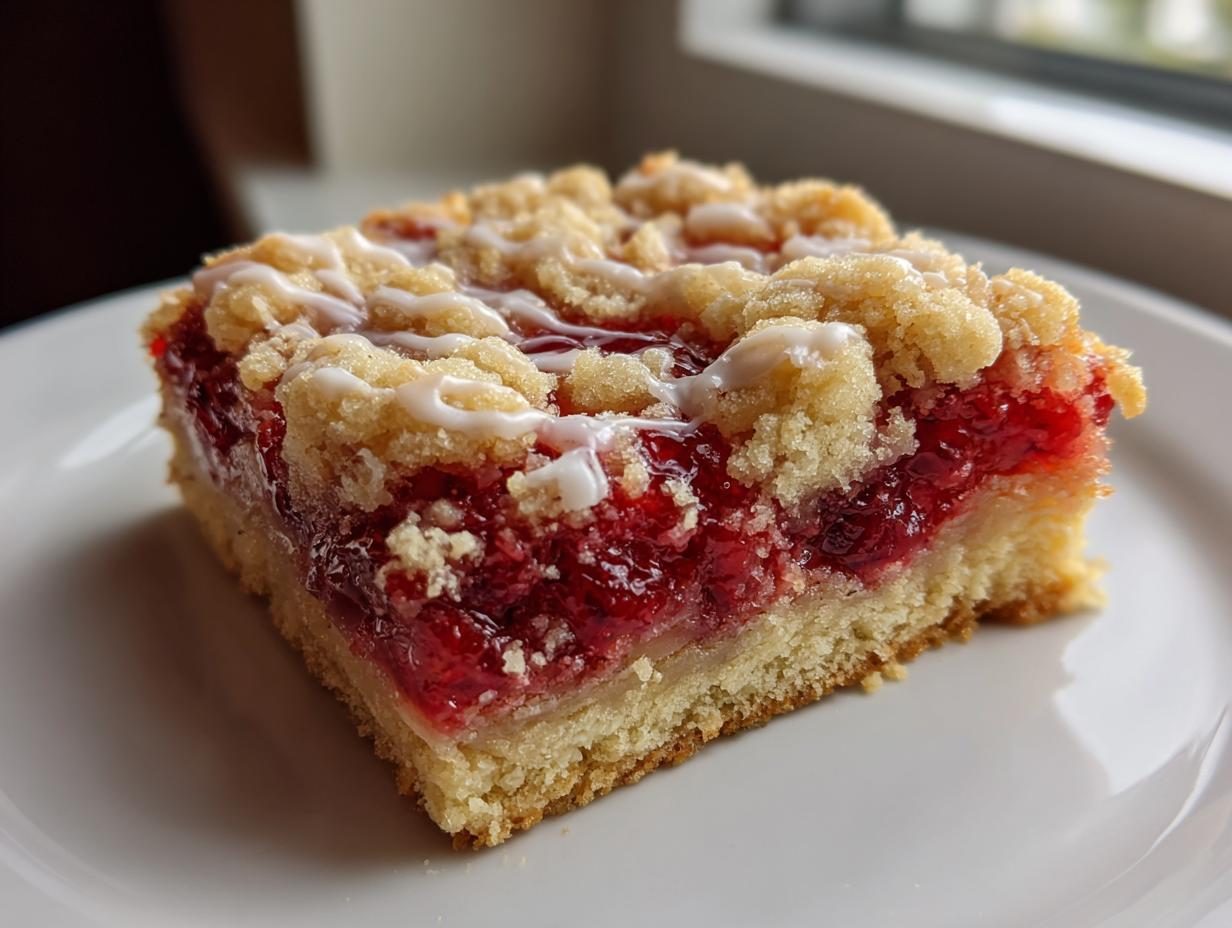
Do you ever just crave that classic, bright flavor of cherry pie but really don’t want to deal with rolling out dough and crimping edges? Trust me, I absolutely get it. Life moves fast, and sometimes we need that instant comfort without the fuss. That’s where these incredible, no-stress cherry pie bars come in! Here at MayaPlate, we focus on giving you delicious, practical joy, and these fit the bill perfectly. They capture that wonderful buttery crust flavor my grandmother always made back in the Midwest—the warmth of that baking spirit—but packed into a super simple, sliceable square. Making these allows you to enjoy that holiday-level dessert satisfaction any Tuesday night!
If you’re looking for more simple, indulgent desserts tailored for a busy life, I think you’ll love my collection of delicious dessert recipes.
- Why These Easy Cherry Pie Bars Are Your New Favorite Simple Cherry Dessert
- Gathering Ingredients for Perfect Cherry Pie Bars
- How to Make Cherry Pie Bars Step-by-Step
- Tips for Success with No-Fail Pie Bars
- Make Ahead Dessert Bars: Storing Your Cherry Pie Bars
- Variations for Your Cherry Pie Bars Recipe
- Serving Suggestions for These Dessert Bars for a Crowd
- Frequently Asked Questions About Easy Cherry Pie Bars
- Estimated Nutritional Snapshot for Cherry Pie Bars
- Share Your Experience Making These Easy Fruit Bars
Why These Easy Cherry Pie Bars Are Your New Favorite Simple Cherry Dessert
These easy cherry pie bars are total game-changers when you need something quick that tastes like you spent all afternoon on it. Seriously, these are the definition of potluck friendly bars! You get all the sweet-tart cherry flavor you expect from grandma’s pie, but you skip all the messy pie dish drama. They become our go-to for any gathering because they travel beautifully.
Here is why I think you’ll fall head-over-heels for this format:
- They are incredibly quick to assemble—way faster than rolling dough!
- That buttery crust holds everything together perfectly.
- Cutting them into neat squares means no messy slices and no leftovers!
Plus, they hold up so well, making them ideal for picnics or big events.
The Magic of Buttery Shortbread Bars
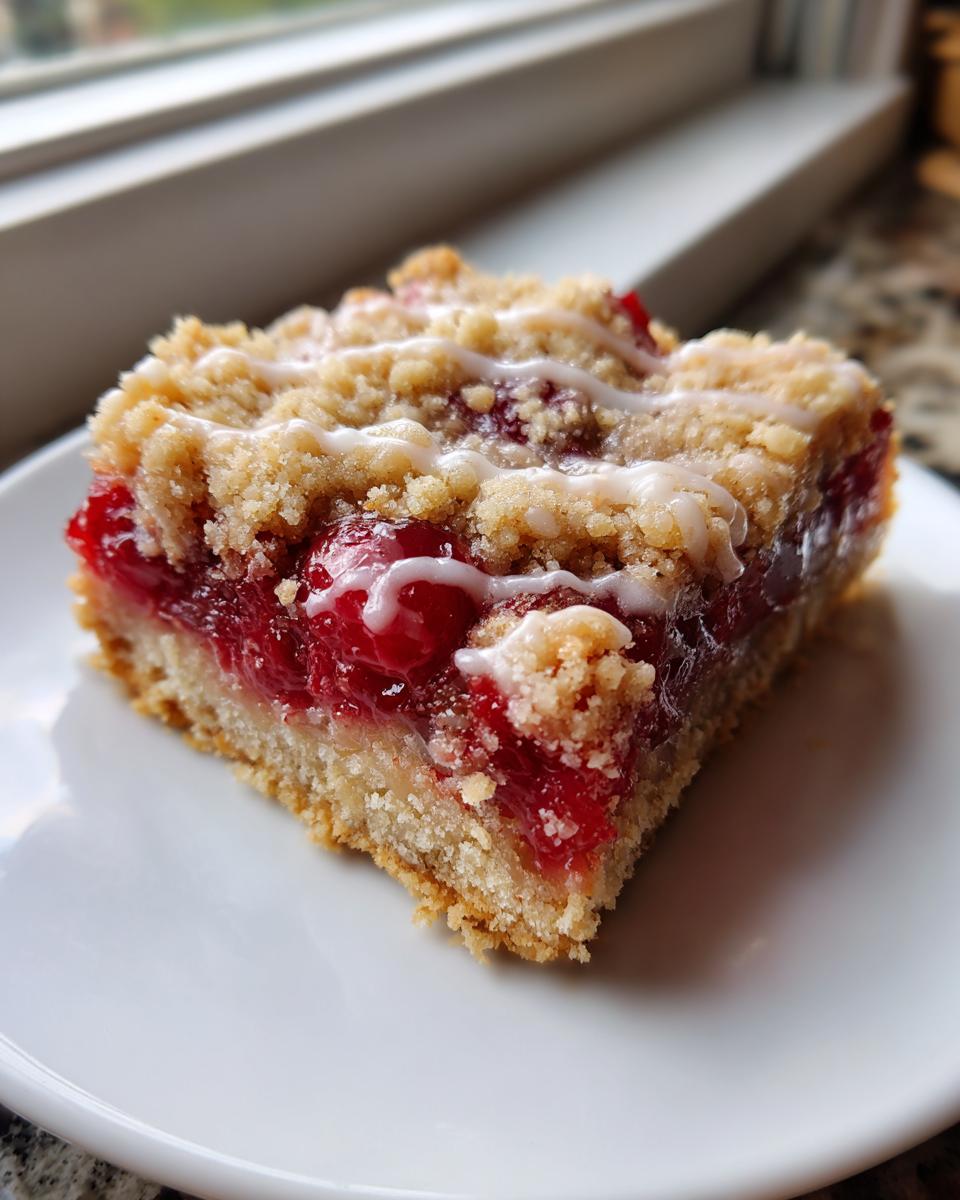
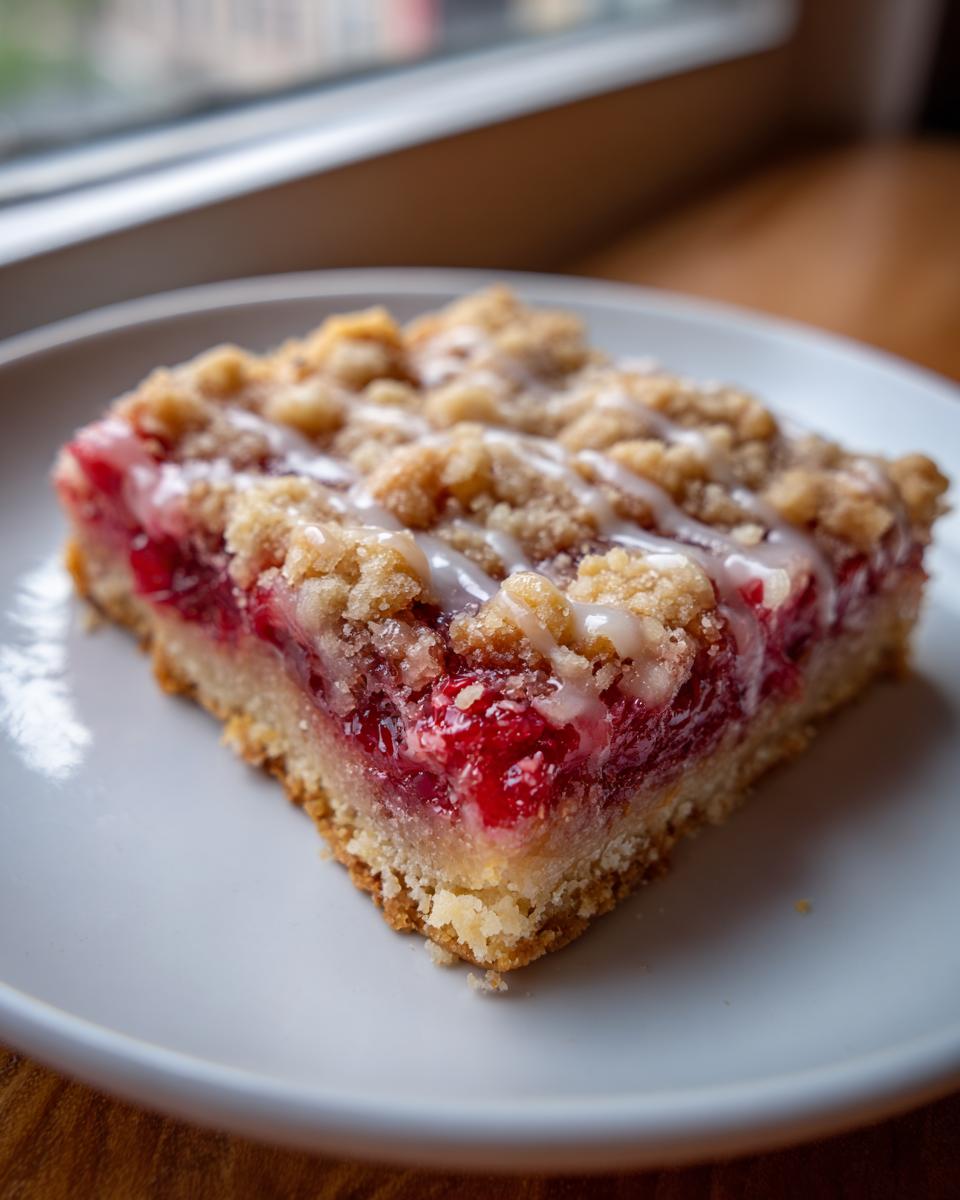
The base of this entire recipe relies on that rich, buttery shortbread. It’s sturdy enough to hold the gooey cherry filling without getting soggy, which is my biggest fear with fruit bars! When you press that dough into the pan, you’re building a compact, flavorful foundation. Baked properly, it gets slightly crisp around the edges, offering the perfect texture contrast to the soft fruit inside. It truly mimics a perfect, flaky pie bottom without any complicated folding or chilling.
If you’re trying to find ways to streamline your mornings, make sure you check out my easy breakfast ideas while you’re here!
Gathering Ingredients for Perfect Cherry Pie Bars
Okay, let’s talk ingredients. Because this is an easy recipe, we want to keep things straightforward, but we still need specifics so you get that amazing buttery snap in the crust! Having everything measured and ready before you even turn on the oven makes the assembly process smooth. Remember, this recipe is perfectly balanced for a standard 9×13 inch baking pan—make sure you have that ready to go, lined with parchment, for easy lifting later.
If you’re looking for ways to save prep time during your busy week, check out my quick, healthy lunch ideas for later this week!
For the Buttery Shortbread Crust and Crumble Topping
This dough does double duty! You’ll need ingredients that bring that rich, melt-in-your-mouth flavor. Remember, we’re dividing this total dough amount. Two-thirds presses down for the solid bottom crust, and the remaining one-third is crumbled over the top for that lovely textured topping.
- 1 cup unsalted butter, make sure it’s softened! Not melted, just soft enough to press a finger into.
- 1 cup granulated sugar
- 1/4 teaspoon salt (don’t skip this; it brightens everything up!)
- 2 large eggs
- 1 teaspoon vanilla extract
- 1/2 teaspoon almond extract (this adds such a wonderful background note!)
- 2 1/2 cups all-purpose flour
For the Sweet Cherry Filling and Almond Glaze Dessert Bars
This is where the magic pie flavor comes from. Since we want this recipe fast, we rely on a good quality canned filling. Yes, canned filling is totally acceptable here—it helps us achieve those simple sweet cherry squares!
- 1 (21-ounce) can cherry pie filling. Check the label to make sure it looks thick!
- 1 cup powdered sugar (for that pretty finish)
- 1-2 tablespoons milk (you’ll use this to adjust the glaze thickness)
- 1/2 teaspoon vanilla extract (mix this into the powdered sugar for the glaze base)
How to Make Cherry Pie Bars Step-by-Step
If you’re ready to tackle this simple cherry dessert, follow along! Learning how to make cherry pie bars is really just mastering three simple phases: crust prep, filling, and the little finishing touch. The key here, especially for that buttery crust texture, is keeping your hands off the dough once the flour goes in! Overmixing is the enemy of a tender shortbread, so be gentle.
Don’t forget to keep your oven set to 350°F (175°C) throughout the process. You can check out some of my favorite simple weeknight dinners for the rest of your menu planning!
Preparing the Pan and Crust Base for Your Cherry Pie Bars
First, get that 9×13 inch pan lined with parchment paper, making sure you leave some overhang on the sides. That overhang is going to be a lifesaver when you try to lift these out later! In your bowl, cream that softened butter, sugar, and salt until it’s light and fluffy—this traps the air we need for structure. Beat the eggs in one by one, followed by those extracts. Then, and this is important, add the flour slowly and mix until *just* combined. See those tiny flour streaks? That’s okay! Now, take two-thirds of that dough mixture and firmly press it into the base of your prepared pan. That’s your beautiful, sturdy bottom crust.
Layering the Filling and Topping
This is the fun part! Carefully spread that entire can of cherry pie filling evenly over the base crust. Don’t worry about being utterly precise right to the edges; just aim for good coverage. Next, take the remaining one-third of the dough and just crumble it loosely over the top of the cherries. It doesn’t need to be perfect; we want little pockets of crusty goodness! Pop the whole thing into the oven and bake for about 35 to 40 minutes. You’re looking for the topping to look lightly golden brown around the edges.
Glazing and Cutting Your Sweet Cherry Squares
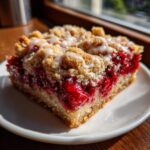
Now, resist the urge to glaze! Seriously, you have to let these cool completely in the pan on a rack. If you try to put the glaze on hot bars, it will melt into a sticky mess instead of that pretty, opaque finish. Once they are totally cool (this might take an hour or so, hang in there!), whisk together the powdered sugar, a half teaspoon of vanilla, and just a tablespoon of milk. Keep adding milk a tiny bit at a time until it’s thick but still easily drizzles off your whisk. Drizzle that almond glaze over the top and let it set up for about 15 minutes before you use those parchment overhangs to lift the whole slab out and cut them into neat sweet cherry squares.

Tips for Success with No-Fail Pie Bars
I want everyone to have success making these no-fail pie bars because they are just too good not to share! The biggest thing you can control is temperature. Remember when we talked about softening the butter? It needs to be truly soft for the crust to cream correctly and trap those essential air pockets. If your butter is too cold, the dough will be crumbly and won’t press right.
If you’re worried about a soggy bottom layer—which, ew, totally gross—the parchment paper step is crucial. It prevents the crust from sticking and cooking unevenly against the metal itself. Also, make sure that cherry filling is spread right to the edges of the crust base, leaving no bare spots. That way, when you sprinkle the topping on, you seal the moisture in immediately! Don’t forget to check out my recipe for easy homemade apple fritters next time you’re craving a baked treat!
Make Ahead Dessert Bars: Storing Your Cherry Pie Bars
One of the best features of these beautiful, simple fruit bars is how wonderfully they hold up for future snacking. This is a huge win when you are planning for a big event or just trying to keep treats around the house! Because the buttery shortbread crust is sturdy and the filling is cooked, these aren’t the fussy desserts that fall apart if you look at them wrong.
You absolutely do not need to chill these dessert bars. In fact, I find they taste even better the next day once the flavors have really settled into that crust. Keep them stored in a single layer in an airtight container right on the counter. Room temperature storage is perfect for up to three days.
If you happen to glaze them ahead of time, that’s fine too! Just make sure the glaze is completely dry and set before stacking or covering them. For a bit of different flavor inspiration for your next batch, you might want to peek at my recipe for an easy orange juice cake—that glaze technique is fantastic too!
Variations for Your Cherry Pie Bars Recipe
See, the beauty of a solid base like this buttery shortbread crust is that you can tweak it slightly without ruining the whole thing! I love having a base recipe that can stand up to small experiments. If you get tired of the almond note, don’t worry—these cherry pie bars are super adaptable.
For instance, if you want to lean into a brighter, tangier profile, you can skip the almond extract entirely in the crust and stir in about a teaspoon of fresh lemon zest instead. That little bit of citrus really cuts through the sweetness of the filling, making it feel almost like a summer treat. And wow, does it smell heavenly while baking!
If you happen to be someone who likes a bit more texture, you can easily pivot into something that feels closer to cherry crumble bars. You don’t need a whole new recipe for that! Just take about half a cup of rolled oats, maybe a quarter cup of chopped pecans if you have them, and mix those right into the dough reserved for the topping. When you crumble that oat mixture over the cherry filling, it bakes up beautifully crisp. It gives the entire bar a chewier, nuttier bite. I always keep this recipe handy because it’s so easy to switch up for holidays or just when the mood strikes differently. For another fun cookie bar concept, run over and check out my white chocolate raspberry cookies—another guaranteed crowd-pleaser!
If you want to see someone else’s gorgeous take on this concept, especially if you’re interested in adding a different topping finish, you should definitely look at this recipe for cherry pie bars. It’s always great to see how other home cooks put their spin on things!
Serving Suggestions for These Dessert Bars for a Crowd
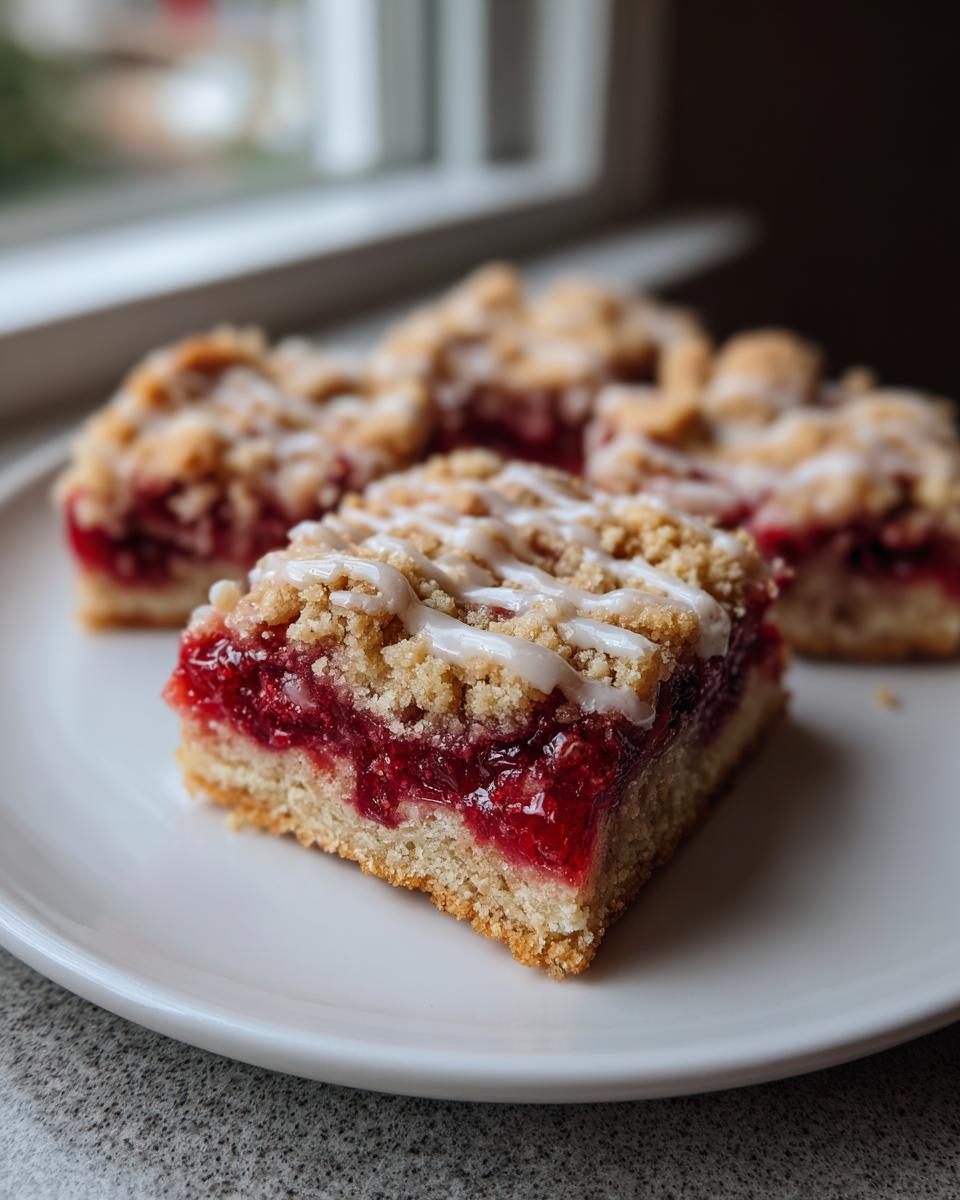
When you bring these out to a gathering, you want them to look as good as they taste, right? The beauty of these sliceable treats is they are totally fuss-free for serving, which is exactly what we aim for here. Since these are fantastic dessert bars for a crowd, presentation really does make eating them even more fun!
After you’ve let that lovely almond glaze set up and you’ve sliced everything into neat squares, here are a few ways I love to present them, especially if I’m hosting a barbecue or a big family potluck.
Keep it Simple and Let the Bars Shine
Honestly, sometimes the best way to serve these is exactly as they are. Arrange them on a big platter or tiered stand and let the colors of the cherry filling peek out next to the white glaze do the talking. People can easily grab one without needing plates and forks. This is perfect for casual get-togethers. I usually serve these slightly after room temperature, not piping hot or cold from the fridge, just so that buttery crust has that perfect crumbly texture.
Elevate Them with a Cool Companion
If you want to dress them up just a touch without adding a whole second dessert to the spread, a cool, creamy sidekick is always the winner. A small scoop of good quality vanilla bean ice cream placed right next to a warm-ish bar (if you heat them for 10 seconds in the microwave!) is heavenly. The hot/cold contrast is divine. Alternatively, a light dollop of freshly whipped cream on top of each square makes them feel a little fancier.
If you are looking for another simple, classic dessert showcasing pastry skills without the headache, you absolutely must try my recipe for the classic biscuit shortcake. It delivers that comforting, homemade flavor profile in a totally different format!
Frequently Asked Questions About Easy Cherry Pie Bars
I know when you grab a new recipe, you’ve probably got a few mental speed bumps you need to jump over first. That’s totally normal! I’ve gathered up the most common things folks ask me about these easy cherry pie bars so you can get started with total confidence. If you’re looking for another creamy, decadent, yet surprisingly simple bake, you have to check out my Basque burnt cheesecake recipe!
Can I use fresh or frozen cherries instead of canned cherry pie filling in these cherry pie bars?
That’s a great question if you have beautiful fresh cherries on hand! Honestly, for the sake of speed and consistency—since we’re focusing on an easy fruit bars recipe—the canned filling is what I strongly recommend. It’s pre-sweetened and thickened perfectly for this exact application. If you must use fresh or frozen, you’ll need to cook them down first. You’ll want to simmer the pitted cherries with about a half-cup of sugar and a tablespoon of cornstarch whisked in water until it’s bubbly and thick, kind of like jam. Then you let that cool completely before spreading it on the crust. It adds a good 15-20 minutes to your prep, but trust me, the flavor is worth the extra step!
What gives the glaze its flavor in this simple cherry dessert?
This is one of those little secrets that makes a big difference! We use both vanilla extract and a touch of almond extract in the crust, and I carry that complimenting flavor right into the glaze. While the powdered sugar and milk make the base smooth, the little bit of vanilla mixed in with the powdered sugar helps it pop. If you are a big fan of the almond flavor that’s in the crust, feel free to swap the vanilla in the glaze for a tiny bit more almond extract to really enhance that background note. It pairs beautifully with the cherry!
How do I prevent the shortbread crust from becoming too hard when making these square cherry pie treats?
Oh, nobody wants a tile masquerading as a dessert bar! The key to keeping those buttery shortbread bars tender, chewy on the bottom, and crumbly on top lies entirely in how you treat the flour. Once you add the flour to the creamed butter, sugar, and eggs, you need to mix it on the very lowest speed possible, or even just fold it in by hand, until you see **just** the last few streaks of flour disappear. That’s it! Stop mixing immediately. Overmixing develops the gluten, which is what turns a tender shortbread into a hard cookie base. Gentle hands make for the best, most moist cherry bars!
Estimated Nutritional Snapshot for Cherry Pie Bars
I always try to give you the full picture here on MayaPlate, even when we’re talking about a simple indulgence like these cherry pie bars. Since we aren’t counting every macro, I won’t get too bogged down in the details, but it’s good to have a general idea if you’re planning your meals for the whole week!
Below is a snapshot based on the recipe details we used—but and I want to be super clear about this—these numbers are **estimates**! When you use your favorite brand of canned filling or a different type of butter, those figures can shift a little bit. Treat this as a happy guideline for one serving of these delicious, sliceable squares.
- Serving Size: 1 bar
- Calories: 280
- Sugar: 25g
- Fat: 15g
- Carbohydrates: 35g
- Protein: 3g
If you are looking for something satisfying that balances out that sugar level, you might want to pair a bar with a nice, filling soup later in the week. I have a truly amazing lemon ginger turmeric chicken and rice soup that is pure comfort food!
Share Your Experience Making These Easy Fruit Bars
And that’s it! You have officially conquered the world of simple, incredible baking with these easy fruit bars. I truly hope that making these cherry pie bars brought a moment of real joy to your hectic day. They are always such a hit, whether I bring them to a big family reunion or just have them sitting on the counter for an afternoon snack!
Now, I really, really want to hear from you! Did you serve these dessert bars for a crowd? Did they disappear instantly? Please take a moment to leave a rating below—if you loved them as much as we do, give them a shining 5 stars! Drop a comment and tell me if you stuck to the almond glaze or if you tried a different spin on the topping.
Seeing your successes is the best part of running MayaPlate. If you snap a picture of your beautifully sliced squares, tag me on social media so I can share your handiwork! Happy baking, friends. When you’re ready for your next practical, comforting bake, you absolutely have to try my foolproof recipe for the easy Tater Tot Casserole. Sometimes comfort food just has to be savory!
PrintEasy Cherry Pie Bars with Buttery Shortbread Crust
Make these simple cherry pie bars featuring a rich, buttery shortbread crust and sweet cherry filling. This recipe is perfect for potlucks and gatherings.
- Prep Time: 20 min
- Cook Time: 40 min
- Total Time: 60 min
- Yield: 24 servings 1x
- Category: Dessert
- Method: Baking
- Cuisine: American
- Diet: Vegetarian
Ingredients
- 1 cup unsalted butter, softened
- 1 cup granulated sugar
- 1/4 teaspoon salt
- 2 large eggs
- 1 teaspoon vanilla extract
- 1/2 teaspoon almond extract
- 2 1/2 cups all-purpose flour
- 1 (21-ounce) can cherry pie filling
- 1 cup powdered sugar (for glaze)
- 1–2 tablespoons milk (for glaze)
- 1/2 teaspoon vanilla extract (for glaze)
Instructions
- Preheat your oven to 350°F (175°C). Line a 9×13 inch baking pan with parchment paper, leaving an overhang for easy removal.
- In a large bowl, beat the softened butter, granulated sugar, and salt until the mixture is light and fluffy.
- Beat in the eggs one at a time, mixing well after each addition. Stir in the vanilla extract and almond extract.
- Gradually add the all-purpose flour to the wet ingredients and mix on low speed until just combined. Do not overmix the dough.
- Press two-thirds of the dough mixture evenly into the bottom of the prepared baking pan to form the crust.
- Spread the entire can of cherry pie filling evenly over the crust layer.
- Crumble the remaining one-third of the dough mixture over the cherry filling layer.
- Bake for 35 to 40 minutes, or until the topping is lightly golden brown.
- Let the bars cool completely in the pan on a wire rack. Cooling is important before glazing.
- Prepare the glaze: Whisk together the powdered sugar, milk, and vanilla extract until smooth. Add milk slowly to reach a pourable consistency.
- Drizzle the almond glaze over the cooled cherry pie bars.
- Once the glaze sets, lift the bars out of the pan using the parchment paper overhang and cut them into squares.
Notes
- You can use a homemade cherry filling if you prefer, but canned filling makes this recipe quick and easy.
- For a richer flavor, substitute 1/4 teaspoon of almond extract for the vanilla extract in the crust mixture.
- These dessert bars are excellent for making ahead; store them covered at room temperature for up to three days.
Nutrition
- Serving Size: 1 bar
- Calories: 280
- Sugar: 25
- Sodium: 110
- Fat: 15
- Saturated Fat: 9
- Unsaturated Fat: 6
- Trans Fat: 0
- Carbohydrates: 35
- Fiber: 1
- Protein: 3
- Cholesterol: 45