
You know how sometimes you just need a vegetable side dish that actually tastes like you put in some effort, but you only have about twenty minutes before everyone starts asking if dinner is ready? I live for those moments now! My background in nutrition taught me that we should always eat more greens, but my real-world schedule taught me those greens need to be fast. That’s where simple weeknight dinners meet gourmet flavor with our star: broccolini. This 15-Minute Garlic Lemon Roasted Broccolini is hands-down the best way to get tender-crisp, slightly charred stems on your plate in a flash. Trust me, this recipe transforms baby broccoli from boring to bright!
- Why This 15-Minute Garlic Lemon Roasted Broccolini is Your New Go-To
- Ingredients for the Best Broccolini Recipe
- How to Prepare Garlic Roasted Broccolini Step-by-Step
- Alternative Method: Quick Sautéed Broccolini
- Tips for Success with Sheet Pan Broccolini
- Serving Suggestions for this Flavorful Veggie Side Dish
- Storage and Reheating Instructions for Leftover Broccolini
- Frequently Asked Questions About Cooking Broccolini
- Nutrition Snapshot for This Quick Broccolini Side Dish
Why This 15-Minute Garlic Lemon Roasted Broccolini is Your New Go-To
Honestly, this isn’t just another vegetable recipe; it’s a lifesaver for busy evenings. I developed this for myself when I needed something nourishing after a long day of consulting!
- It’s the ultimate quick healthy lunch or dinner side, perfect for getting veggies on the table fast.
- It fits almost any diet—naturally gluten-free and keto-friendly, too.
- Broccolini just cooks beautifully; it has a sweeter, milder flavor than standard broccoli.
Speed: Achieving Perfect Broccolini in Under 15 Minutes
When I say 15 minutes, I mean it! Because we’re roasting this, the oven does all the hard work while you focus on your main dish. It’s the definition of a quick broccolini side dish. Before you know it, you’ve got perfectly cooked greens.
Flavor Profile: Bright Lemon and Savory Garlic Roasted Broccolini
The magic here is in the simplicity. We hit those incredible flavor notes everyone loves: fresh garlic, a zing of lemon, and that beautiful slightly charred texture you only get from high-heat roasting. It’s the dream garlic roasted broccolini combination we all crave for a flavorful veggie side dish.
Ingredients for the Best Broccolini Recipe
When I put together the ingredient list for this broccolini, I focused on making sure every element packed a punch. You’ll need one bunch of broccolini—just trim those little ends off, they can be a bit tough. Then, we use two tablespoons of olive oil and three cloves of garlic, which you absolutely have to mince finely. Salt and pepper come next, followed by the bright finish: fresh lemon juice and zest, though the zest is totally optional if you’re in a hurry.
Ingredient Notes and Substitutions for Broccolini
This base recipe is naturally a fantastic, simple, and keto friendly broccolini option, especially when you skip the Parmesan. If you can’t find broccolini, you can use regular broccoli, but make sure you cut those stalks thinner so they roast evenly with the florets. If you’re making this a true baby broccoli recipe masterpiece, feel free to throw on two tablespoons of good grated Parmesan right at the end—it melts beautifully over the hot greens!
How to Prepare Garlic Roasted Broccolini Step-by-Step
When you’re aiming for the best broccolini recipe, the technique really matters! This entire process, from walking to the oven to pulling out that perfectly roasted treat, takes about 20 minutes total, which is just fantastic for a busy schedule. My method uses a standard sheet pan, which I love because cleanup is a breeze. Before we pop it in, make sure you get your oven preheated to 400 degrees Fahrenheit. Remember what I learned from my time analyzing meal prep? Organization equals speed, especially when dealing with roasted vegetables!
Prepping and Seasoning Your Broccolini
First things first, focus on the broccolini itself. You need to trim those tough, woody ends off the bottom of the stalks—just snap them off until you hit the tender part. Then, lay all that beautiful green on your sheet pan. Don’t crowd it! If the pieces are piled on top of each other, they steam instead of roast, and we want that lovely char, not mush! This is crucial for a great garlic roasted broccolini that’s ready in minutes.
Now for the flavor bomb. In a little bowl—not directly on the pan, trust me, it gets messier—mix your olive oil with the minced garlic, salt, and pepper. You really need to massage this mixture into every piece of broccolini. Use your clean hands for this if you can! Make sure every stalk is coated so the roasting process works its magic equally across the bunch. This even coating is what makes it such an easy broccolini recipe.
Roasting Time and Achieving Tender-Crisp Broccolini
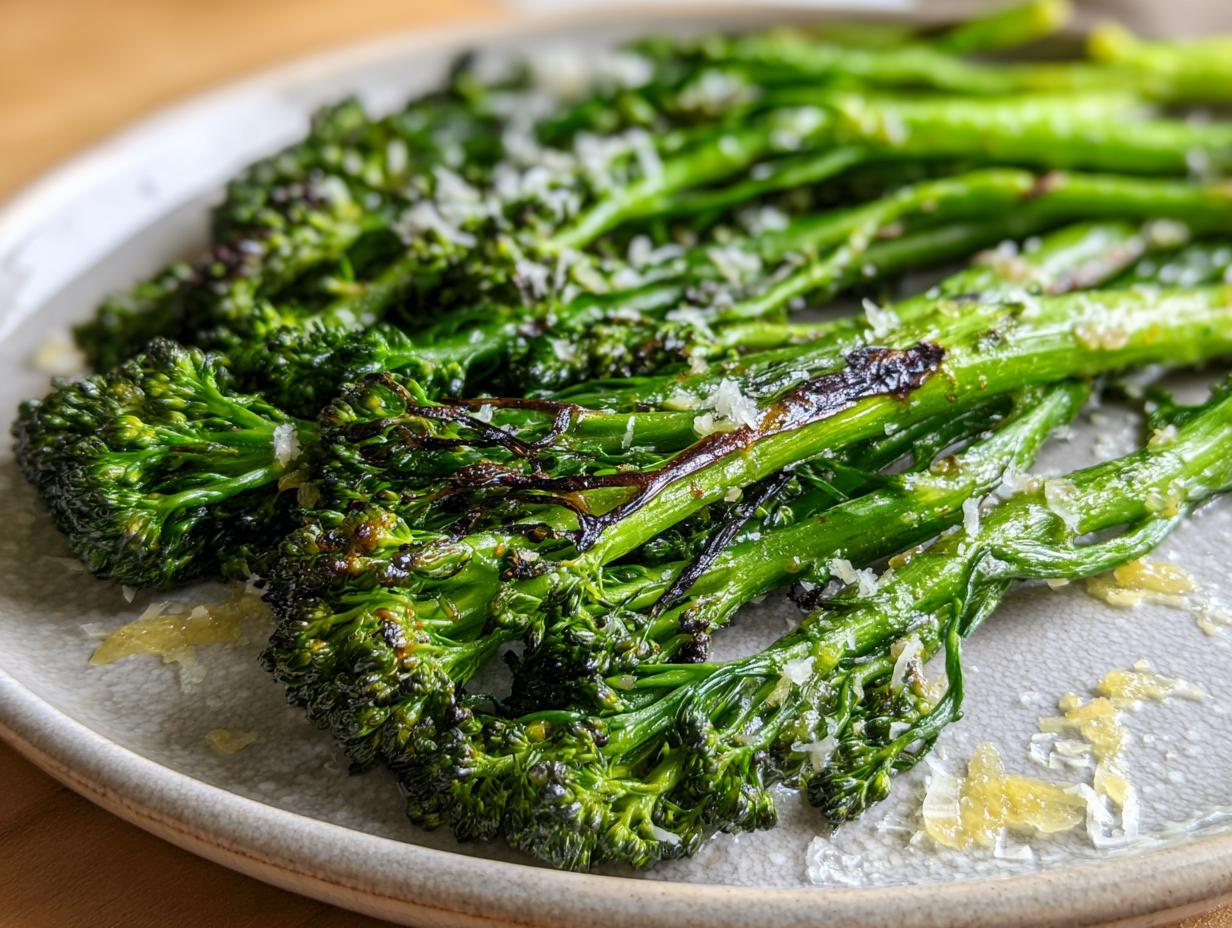
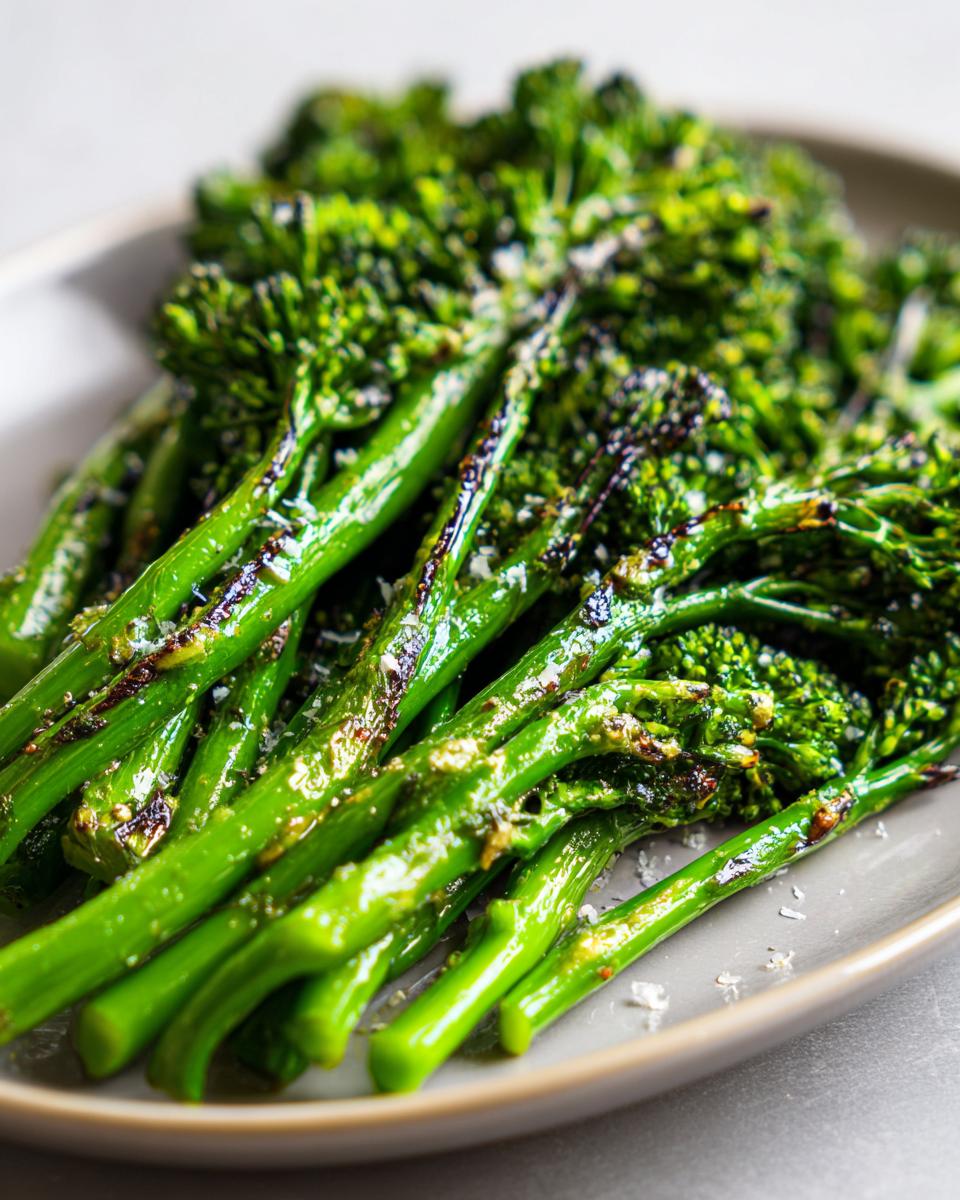
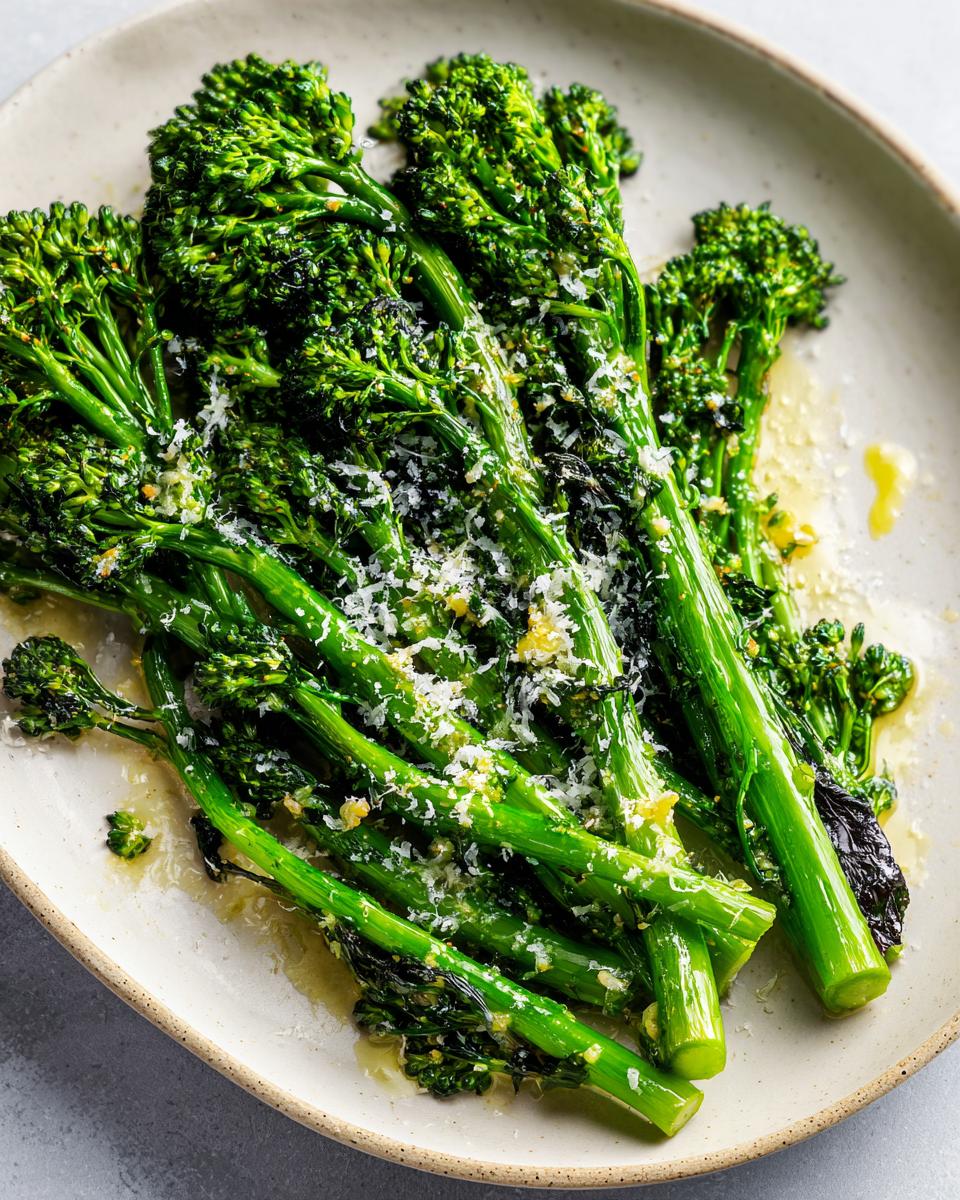
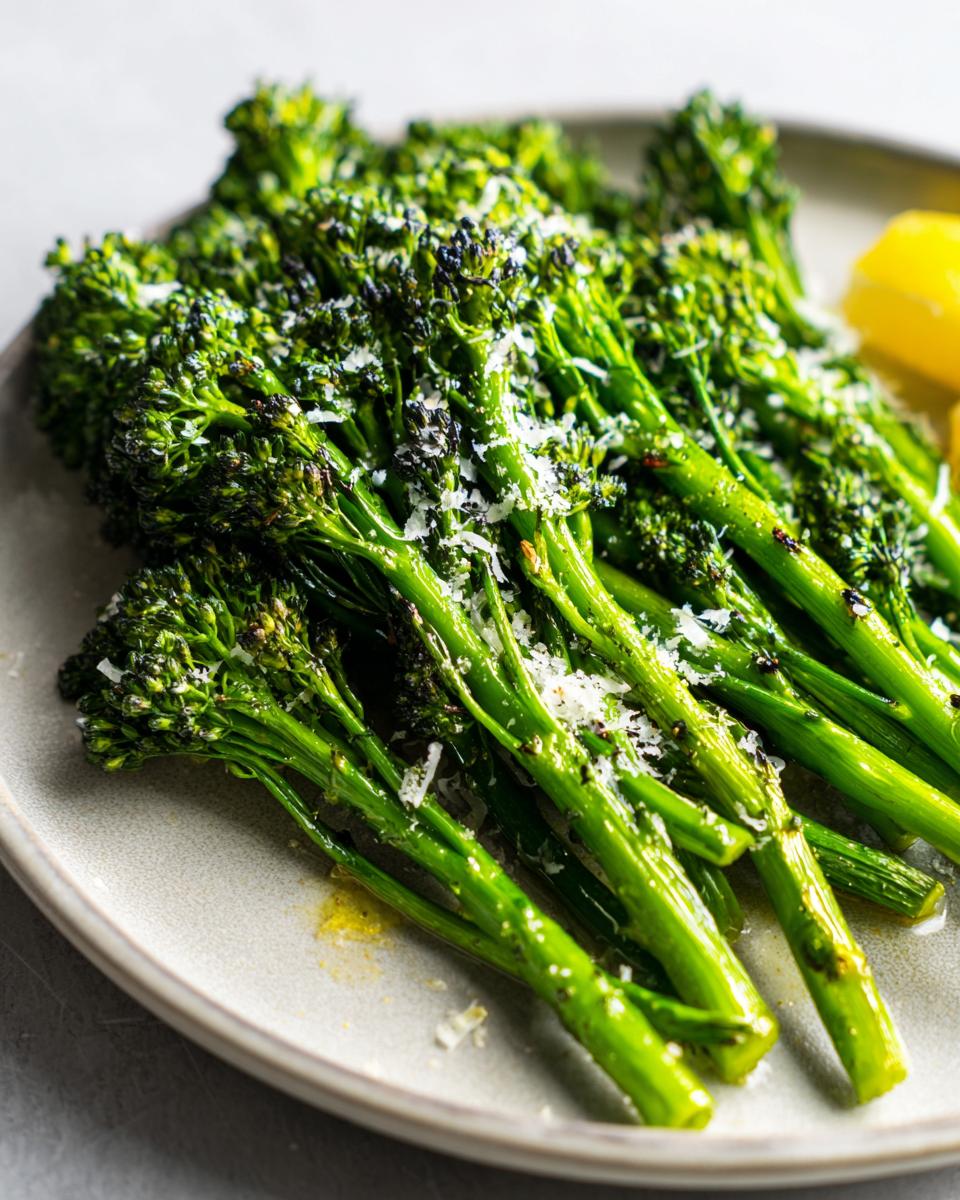
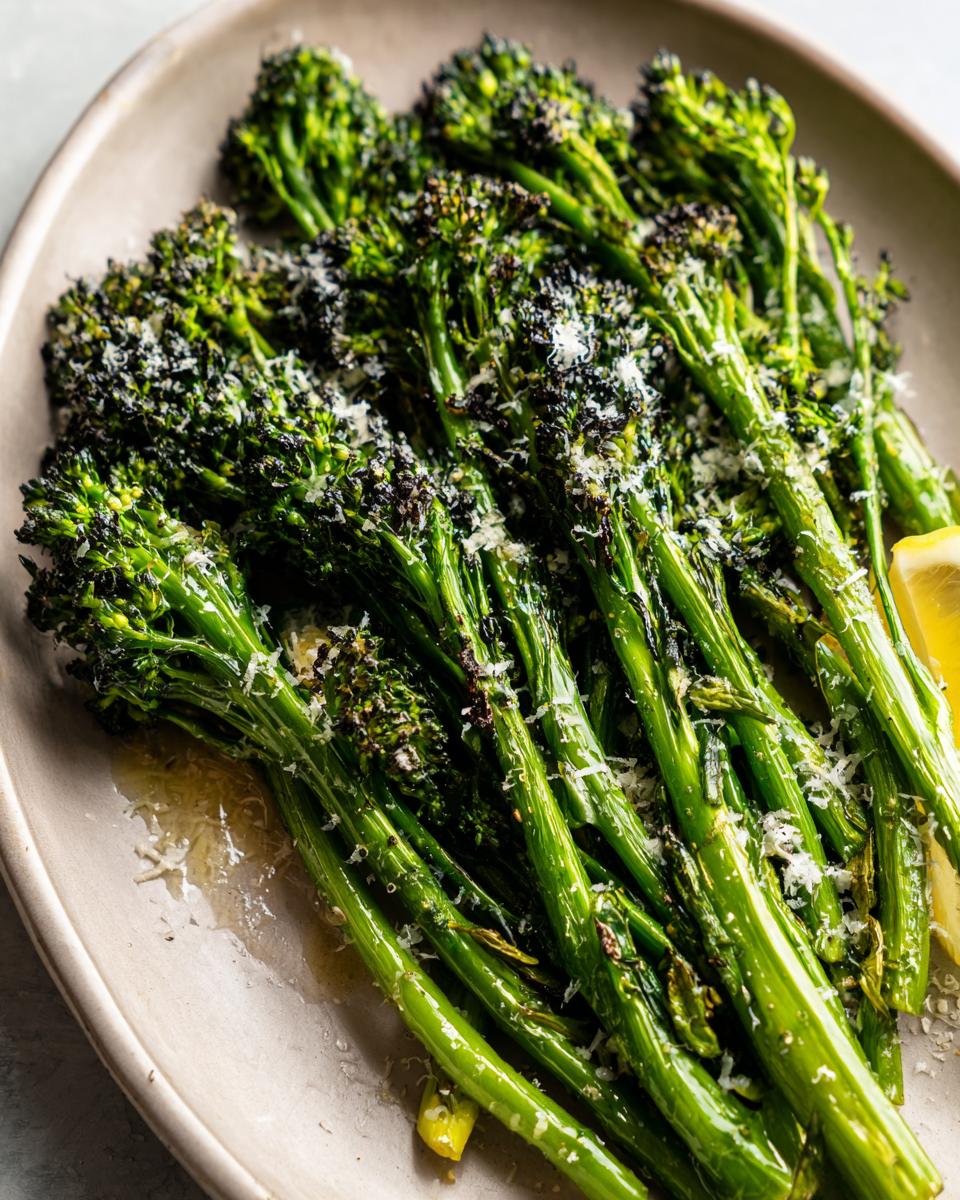
Once your broccolini is seasoned and laid out in a single layer, slide that sheet pan into the hot oven. We are aiming for 12 to 15 minutes. This timing ensures the stalks are tender when pierced but still have a little bit of structural integrity—that desirable tender-crisp texture. Look for the florets to get just slightly browned or charred at the tips; that’s where all the yummy flavor concentrates. This is the best way to learn how to cook broccolini so it’s never bland!
When those 15 minutes are up, pull the pan out fast. Don’t let it sit! You need to hit it right away with the finishing bright flavors. Drizzle on that fresh lemon juice—it hits the hot greens and instantly brightens everything up. If you’re using the zest, sprinkle it on now too. If you’re adding that optional Parmesan, toss it on while it’s screaming hot so it melts just a little bit before serving. Because this is so fast, it makes for the perfect 15 minute vegetable side!
Alternative Method: Quick Sautéed Broccolini
Okay, sometimes you don’t even have time to preheat the oven, right? I totally get that. If you need to get this gorgeous green side dish on the table even faster than roasting allows, we absolutely need to talk about sauteed broccolini. This method is fantastic because it keeps the cook time down to about 10 minutes total. You can whip up a quick batch of my easy 5-minute garlic aioli while the pan heats up!
For this, you’ll use a large skillet. Get about the same amount of olive oil shimmering over medium-high heat. Toss in your minced garlic first, but be careful—it goes from fragrant to burnt in about three seconds flat! Once you can really smell that garlic aroma, throw in the trimmed broccolini. You’ll want to add a splash of water or broth—just a tablespoon or two—and immediately cover the pan. This traps the steam and really softens those stalks quickly.
Let it steam under the lid for about 4 minutes on high. Then, uncover it, let that liquid cook off, and let the broccolini start to get those lovely brown spots where it touches the pan. Finish it just like the roasted version: a squeeze of fresh lemon juice right at the end. It’s proof that you don’t need an hour to make deeply satisfying side dishes. If you want to check out another great option for a super fast way to enjoy this vegetable, this guide on sauteed broccolini with garlic is superb too!
Tips for Success with Sheet Pan Broccolini
Even though this broccolini recipe is incredibly straightforward, I always want to share a few pro-tips I’ve picked up—especially since I’ve tested this a million ways, sometimes rushing, sometimes taking my time! The number one rule, whether you use a sheet pan or the air fryer, is to avoid overcrowding. Seriously, if your pieces are overlapping too much, they are going to steam, and then you lose that beautiful crispiness we worked so hard to build up with the olive oil and garlic.
If you’re using a big bunch of broccolini, you might need to split it between two pans or use two sheet pans placed on different racks. Better to use two pans than to end up with mushy greens, I always say! Since I’m so obsessed with fast cooking, I’ve also started using this method when I make my air fryer salmon recipe because it’s just as quick.
Using an Air Fryer for Crispy Broccolini
Speaking of the air fryer, this is an absolute game-changer if you are only cooking for two or three people and don’t want to heat up the whole oven. You season your broccolini exactly the same way—toss it with the oil, garlic, salt, and pepper. Then, instead of spreading it on a sheet pan, you load it into your air fryer basket.
The key change is the temperature and time. Set your air fryer to 380 degrees Fahrenheit and let it run for about 8 to 10 minutes total. Remember to shake that basket about halfway through! This technique gives you fantastic, crunchy tips on the florets and perfectly tender stalks. It’s such a fast way to make an easy broccolini recipe.
Also, if you find your stalks are a little thicker than the norm, one trick my friend taught me (and I absolutely love it) is to lightly blanch them first. Drop the trimmed broccolini into boiling water for just one minute, then immediately toss it into the ice bath. This guarantees a bright green color and tender texture before you even hit the oven or air fryer. It adds a step, but it guarantees a great result for any healthy green side dish!
Serving Suggestions for this Flavorful Veggie Side Dish
The beauty of perfectly seasoned broccolini is that it plays so nicely with almost anything you put on your plate. Because this garlic roasted broccolini has such a bright, clean finish from the lemon, it cuts through richness beautifully. I often think of it as the perfect answer when you need great flavorful veggie sides for a standard weeknight meal.
For those nights when you’re having something heavy, like a rich protein or a creamy sauce, this recipe is your balancing act. It goes incredibly well alongside baked salmon—the lemon complements the fish so well. It’s also my go-to green when I’m making something comforting like sliced roast chicken or pork tenderloin. You really don’t need fancy sauces when the vegetable tastes this good on its own!
If you’re looking for something totally indulgent—maybe a night when you’re treating yourself—pair it with my famous creamy Chicken Alfredo. The vibrant, slightly charred broccolini stops the whole meal from feeling too heavy. And the best part? It holds up well! If you have leftovers, it still tastes pretty great cold the next day, making it an easy addition to lunch bowls.
Honestly, since this easy broccolini recipe takes under 15 minutes, don’t feel like you need a massive main dish to justify it. It’s perfect next to a simple steak or even just scrambled eggs for a super nutritious breakfast or lunch. This baby broccoli recipe is more versatile than most people give it credit for!
Storage and Reheating Instructions for Leftover Broccolini
Now, while this broccolini is definitely best eaten fresh—that char flavor fades a little bit after a day—we all know leftovers happen! And when they do, I want to make sure you can reheat them without turning them into sad, steamed mush. That’s a non-starter in my kitchen, even when I’m just dealing with an easy broccolini recipe.
The best way to store any leftover roasted vegetables like this is to get them into an airtight container as soon as they’ve cooled down to room temperature. Don’t leave them sitting on the counter for hours; food safety first! Stored properly, this quick broccolini side dish should stay nicely fresh in the fridge for about three to four days. It maintains its flavor better than some other greens, thanks to that coating of olive oil.
The Best Way to Reheat Roasted Broccolini
Please, I’m begging you, avoid the microwave if you can. Microwaving broccolini is the fastest route to rubbery stalks and limp florets. It just doesn’t respect the effort you put into roasting it!
My preferred reheat method is a quick trip back to the oven or, even better, a hot skillet. If you’re reheating a whole serving, toss the broccolini onto a baking sheet and stick it in a 350-degree oven for about five minutes. This just crisps everything back up slightly. If you’re only reheating a small portion, grab a skillet, add just a tiny splash of water or olive oil, and heat it over medium-high heat for two or three minutes, tossing constantly. Since this is already flavored with garlic and lemon, you shouldn’t need to add anything else, but a tiny sprinkle of salt never hurts!
If you are truly in a rush and the microwave is your only option, use short bursts—like 30 seconds at a time—and lay the broccolini out in a single layer on a plate covered with a damp paper towel. The towel helps trap just enough steam to keep it from completely drying out, though the texture will suffer a bit. See? Even with leftovers, we’re working to keep this baby broccoli recipe tasting good!
Frequently Asked Questions About Cooking Broccolini
I get so many amazing questions about this broccolini recipe after people try it! Since it’s something people don’t cook every single day, it’s natural to wonder about substitutions or comparisons. I’ve rounded up the most common ones I hear so you feel totally confident making this healthy green side dish!
What is the difference between broccolini and broccoli?
This is probably the most asked question! They look alike, but they aren’t the same plant, though they are related. Standard broccoli has those huge, dense heads and thick stalks. Broccolini (sometimes called baby broccoli) is actually a hybrid cross between regular broccoli and Chinese broccoli, or Gai Lan. It has much longer, thinner stalks and smaller, looser florets. The best part? Broccolini florets and stalks are tender much quicker than tough regular broccoli, which is why it excels in a fast roast like this easy broccolini recipe!
Can I make this broccolini recipe vegan or dairy-free?
Absolutely, yes! Because the base flavor relies on olive oil, garlic, and lemon, this inherently makes a fantastic vegan dish. The only part you need to adjust is the optional finishing touch of Parmesan cheese. If you’re keeping it dairy-free, just skip the Parmesan entirely—the lemon will provide plenty of brightness! If you miss that savory, salty kick, you can certainly substitute it with a nutritional yeast blend or your favorite store-bought vegan Parmesan alternative. And just to confirm: this whole garlic roasted broccolini recipe is already naturally gluten-free, so no worries there!
If you want to read more about the philosophy behind why simple ingredients make the best food, you can check out my About MayaPlate page. Knowing the ‘why’ helps you trust the ‘how’ in the kitchen!
Nutrition Snapshot for This Quick Broccolini Side Dish
As someone with a background in nutrition, I always want you to know what you’re putting into your body, even when you’re whipping up a super fast quick healthy lunch side dish. This broccolini dish is wonderfully light! Here’s a quick look at what’s packed into one serving of this 15-Minute Garlic Lemon Roasted Broccolini, based on the core ingredients used.
Keep in mind these numbers are estimates! They can shift a bit depending on how much oil you really used to coat everything or if you skipped the optional Parmesan cheese. But generally, for one serving (which is 1/4 of the recipe), you’re looking at about 95 Calories. That’s fantastic for a satisfying side dish!
In terms of fats, most of that 7 grams comes from the healthy olive oil we use for roasting. We keep the saturated fat low, only about 1 gram. Because we are sticking to whole food ingredients, the carbohydrate count sits around 6 grams, with 2 grams of that being beneficial dietary fiber. That makes this a great option for almost any eating style, reinforcing why this is such a wonderful keto friendly broccolini base recipe.
The protein content is modest, coming in right around 4 grams, giving you a nice little boost. And because we use minimal salt in the recipe development phase, the sodium is relatively low as well. It’s a truly clean, bright, and uncomplicated way to eat more green vegetables!
Print15-Minute Garlic Lemon Roasted Broccolini

Make this quick and flavorful broccolini side dish. Roasting brings out a slight char, and the lemon and garlic create a bright taste. This recipe is ready in 15 minutes and works well for weeknight dinners.
- Prep Time: 5 min
- Cook Time: 15 min
- Total Time: 20 min
- Yield: 4 servings 1x
- Category: Side Dish
- Method: Roasting
- Cuisine: American
- Diet: Gluten Free
Ingredients
- 1 bunch broccolini, ends trimmed
- 2 tablespoons olive oil
- 3 cloves garlic, minced
- 1/4 teaspoon salt
- 1/8 teaspoon black pepper
- 1 tablespoon fresh lemon juice
- 1 teaspoon lemon zest (optional)
- 2 tablespoons grated Parmesan cheese (optional)
Instructions
- Preheat your oven to 400 degrees Fahrenheit. Arrange the trimmed broccolini in a single layer on a sheet pan.
- In a small bowl, combine the olive oil, minced garlic, salt, and pepper.
- Pour the oil mixture over the broccolini on the sheet pan. Toss everything together with your hands until the broccolini is evenly coated.
- Roast for 12 to 15 minutes. You want the florets to be slightly browned and the stalks tender-crisp.
- Remove the sheet pan from the oven. Immediately drizzle with fresh lemon juice and sprinkle with lemon zest, if using.
- Transfer the roasted broccolini to a serving dish. Sprinkle with Parmesan cheese before serving, if desired.
Notes
- For a quicker cook time, you can use an air fryer set to 380 degrees Fahrenheit for 8 to 10 minutes, shaking the basket halfway through.
- If you prefer a softer texture, you can blanch the broccolini in boiling water for 1 minute before tossing it with the oil and roasting.
- This recipe is naturally gluten-free and keto friendly.
Nutrition
- Serving Size: 1/4 of recipe
- Calories: 95
- Sugar: 1
- Sodium: 250
- Fat: 7
- Saturated Fat: 1
- Unsaturated Fat: 6
- Trans Fat: 0
- Carbohydrates: 6
- Fiber: 2
- Protein: 4
- Cholesterol: 2