
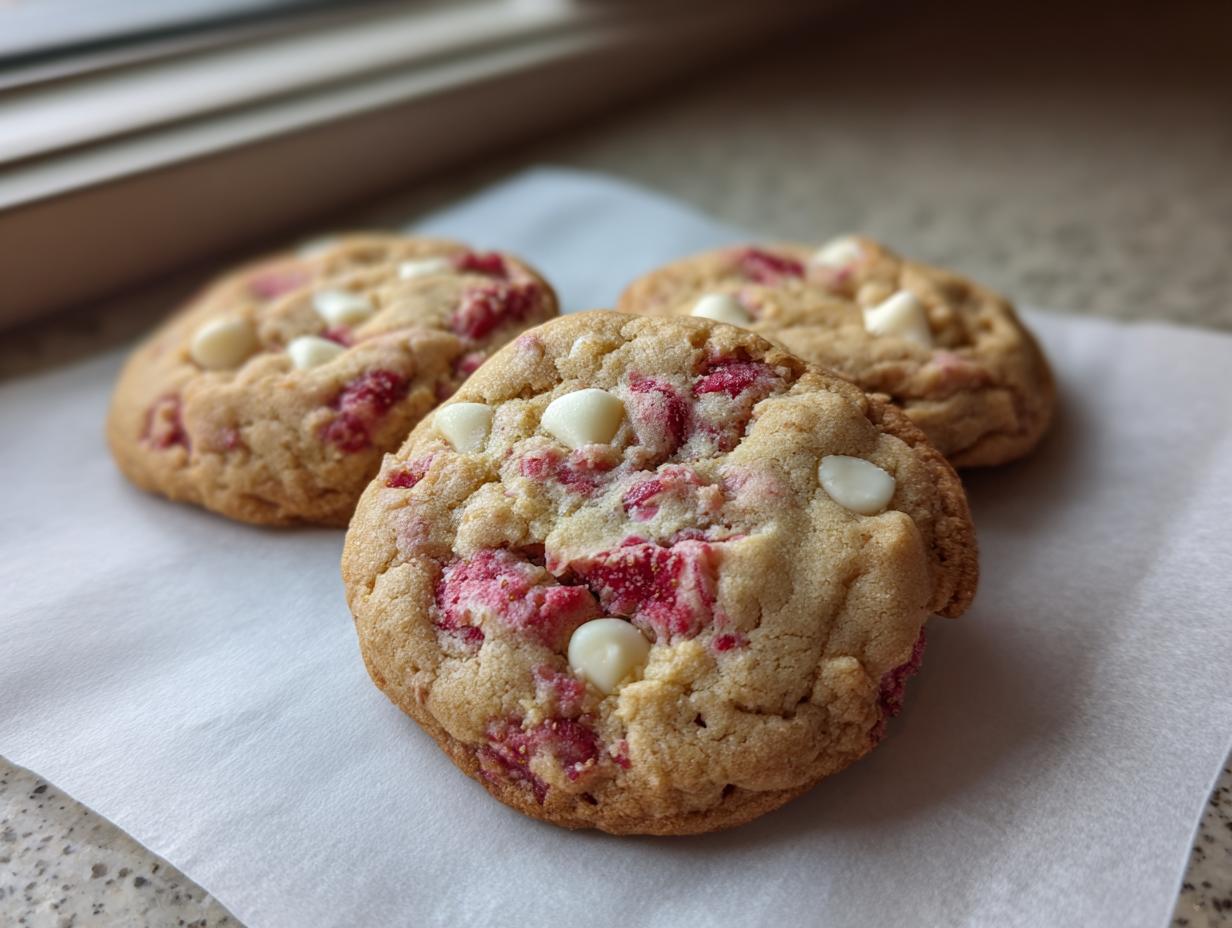
Oh my gosh, let’s talk texture, because seriously, a great cookie makes or breaks my day! I’m Maya, and when I set out to create the ultimate soft and chewy white chocolate raspberry cookies, I knew it had to fit into *real* life. Forget those recipes that demand you chill the dough forever; we are aiming for that dreamy, bakery-style result, but ready in under an hour. This recipe is my answer to those busy days when you need a little bit of joyful, delicious comfort fast. It proves we can have incredible flavor without sacrificing our schedule. Trust me, this sweet and tart combination is going to be your new obsession!
- Why You Will Love These White Chocolate Raspberry Cookies
- Essential Ingredients for Perfect White Chocolate Raspberry Cookies
- Step-by-Step Instructions for Soft Baked White Chocolate Raspberry Cookies
- Baking Equipment Needed for Your White Chocolate Raspberry Cookies
- Troubleshooting Common Issues with Raspberry Cookie Recipe Success
- Storage and Reheating Instructions for Homemade Cookies
- Serving Suggestions for Sweet and Tart Cookies
- Frequently Asked Questions About White Chocolate Raspberry Cookies
- Sharing Your Delicious White Chocolate Raspberry Cookies
Why You Will Love These White Chocolate Raspberry Cookies
I’m telling you, these aren’t just cookies; they’re instant happiness baked into a circle. Life is too short for dry, crumbly cookies, so I developed these with absolute chewiness as the main goal. Here’s why you need to stop scrolling and start creaming that butter right now:
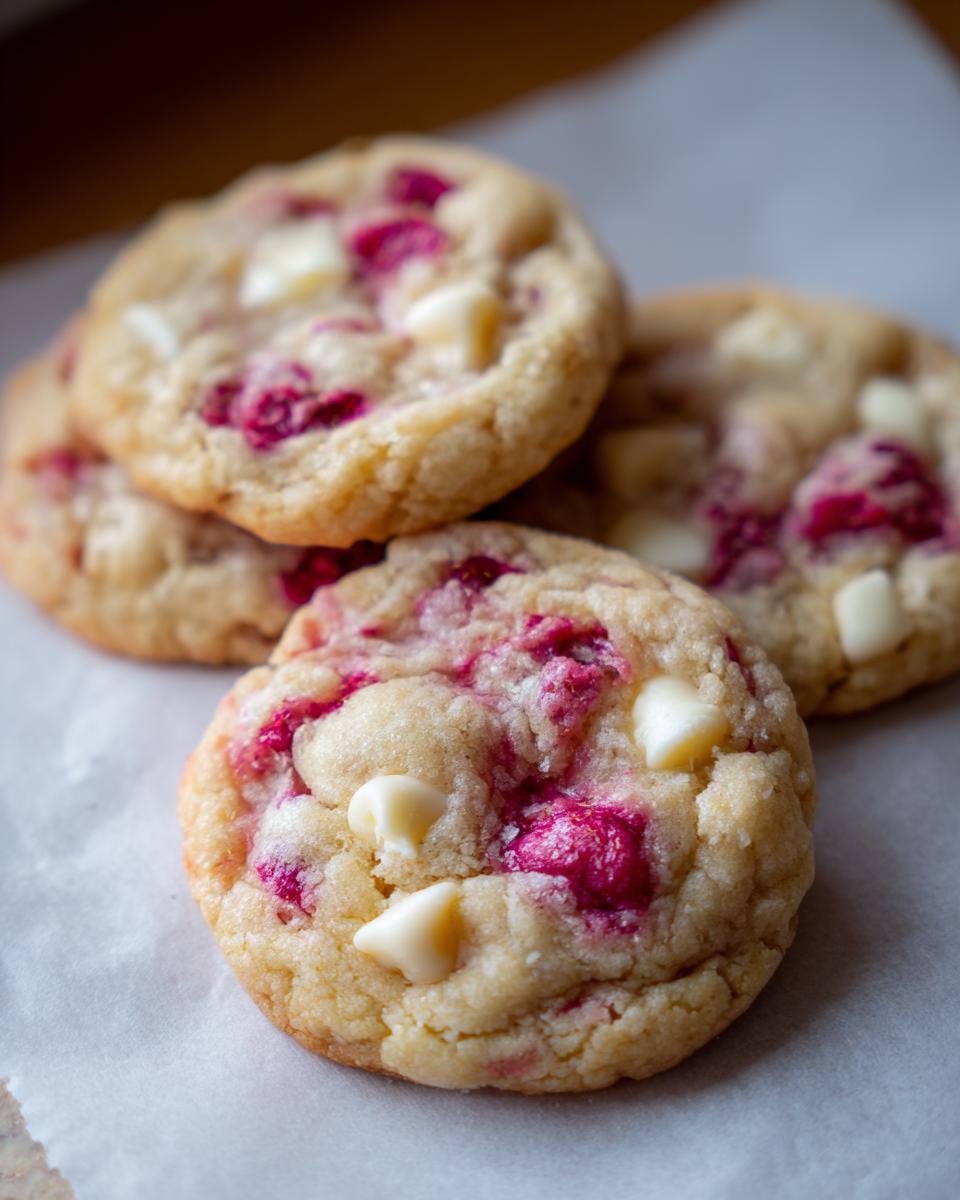
- Seriously Soft and Chewy Texture: We nail that perfect texture that sinks just slightly when you press on it. They stay wonderfully soft the next day, which is key around here!
- That Perfect Sweet and Tart Balance: You get the rich, creamy melt of the white chocolate against the bright, slightly sharp burst from the raspberries. It keeps the cookie from tasting too sugary, making it instantly irresistible.
- Speedy Satisfaction—No Chilling Required! This is my practical promise to you. You won’t have to wait hours for a dough block to firm up. If you need a gourmet cookie **now**, this recipe delivers beautifully without the chill time.
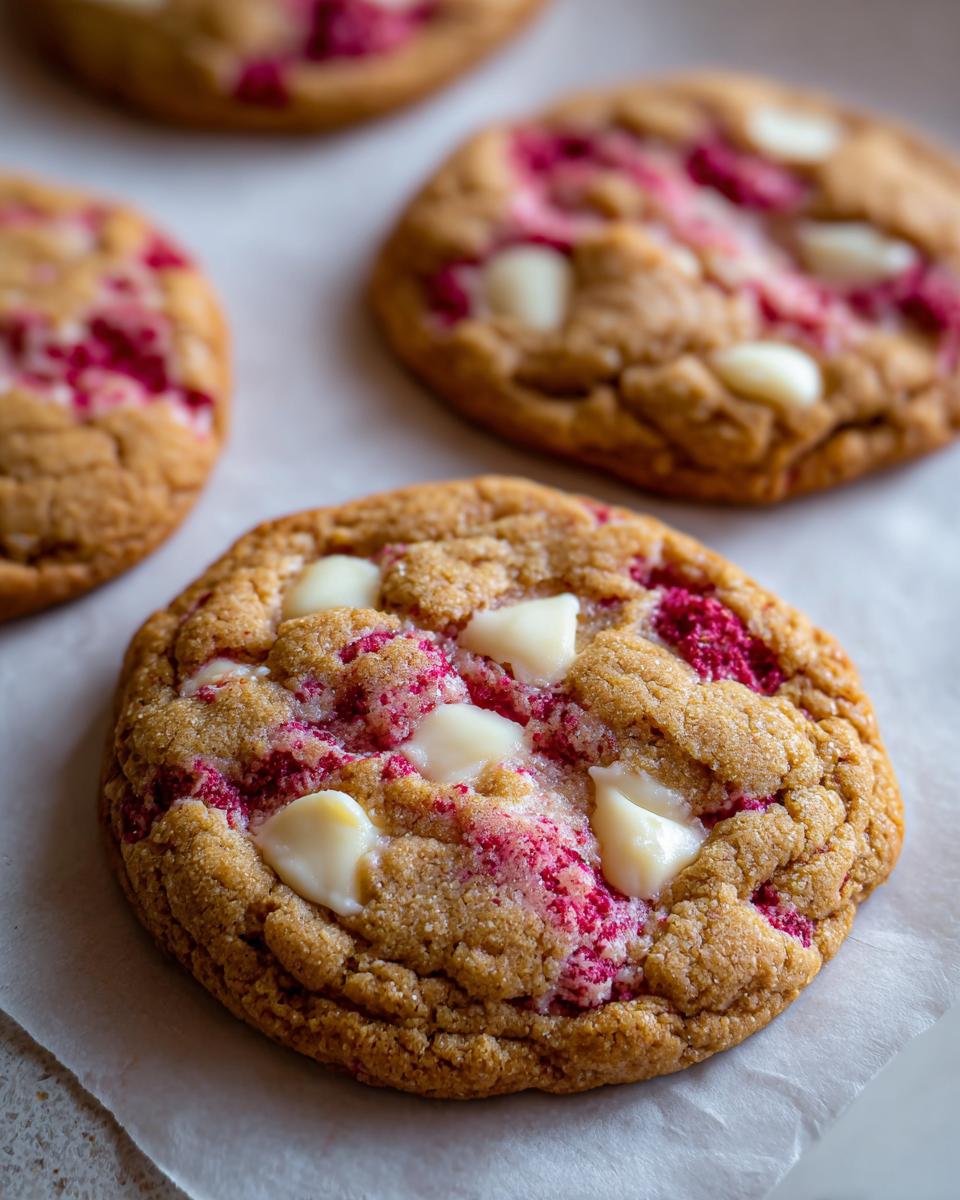
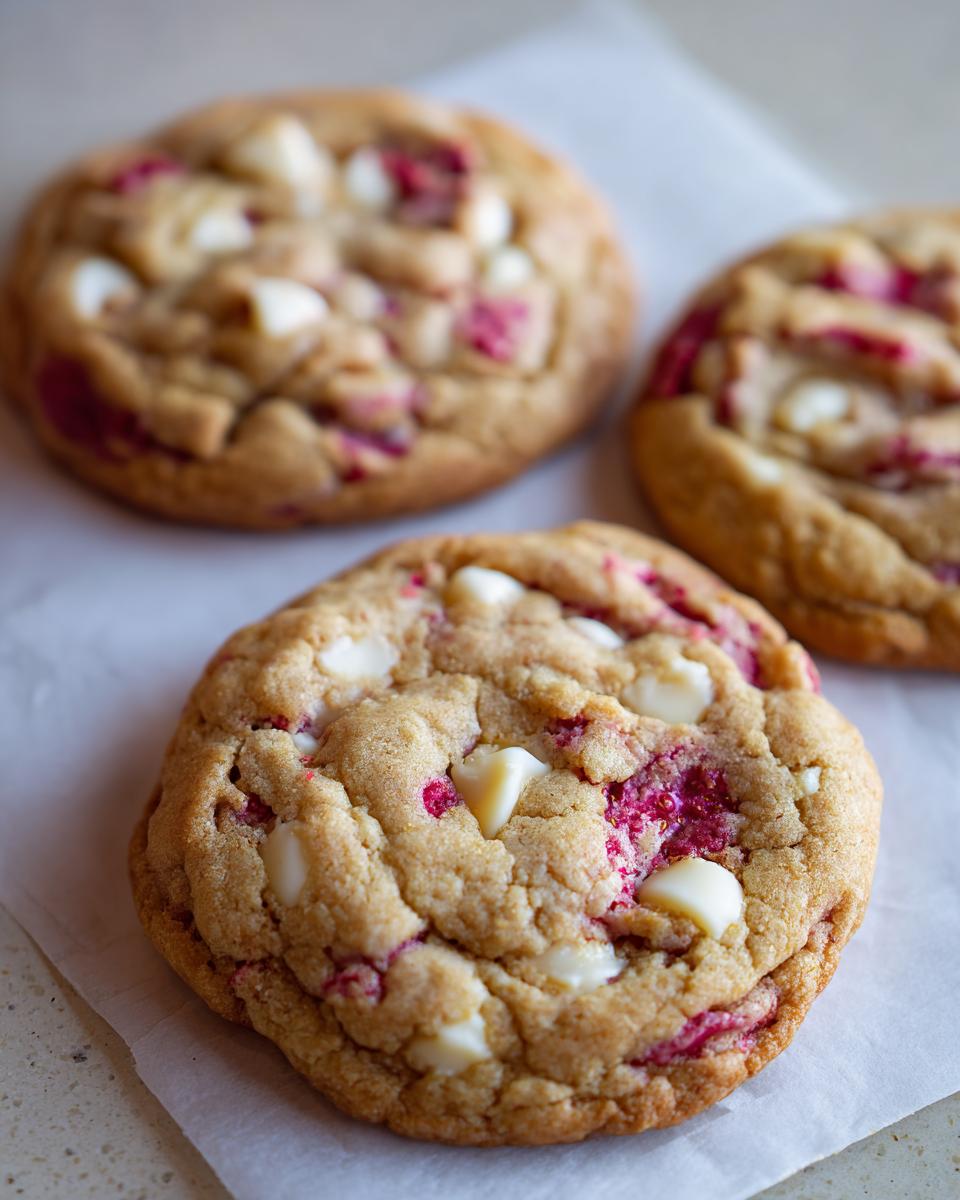
- Incredible Visuals for Sharing: Who doesn’t love a bright pop of pink/red against creamy white? They look like something you bought from a fancy bakery, but you made them yourself. They are gorgeous for gifting or just making your kitchen look colorful!
- Easy Cookie Baking for Everyone: We use simple techniques that work reliably, making this a fantastic recipe even if you’re just starting out on your baking journey. No fussy steps involved, I promise.
Essential Ingredients for Perfect White Chocolate Raspberry Cookies
To make these truly shine, we can’t skimp on the quality or the prep of our components. Think of our ingredients as the actors in a wonderful play—each one has a critical role! Here’s what you’ll need to gather for about two dozen **white chocolate raspberry cookies**:
- 1 cup (2 sticks) unsalted butter, softened (Make sure it’s really softened, not melted!)
- 3/4 cup granulated sugar
- 3/4 cup packed light brown sugar (That molasses note is non-negotiable for chewiness!)
- 2 large eggs
- 1 teaspoon vanilla extract
- 1/2 teaspoon lemon zest (This is optional, but oh, it just brightens everything up!)
- 2 1/4 cups all-purpose flour
- 1 teaspoon baking soda
- 1/2 teaspoon salt
- 1 cup white chocolate chips or chunks (I prefer the chunks for those gooey pockets!)
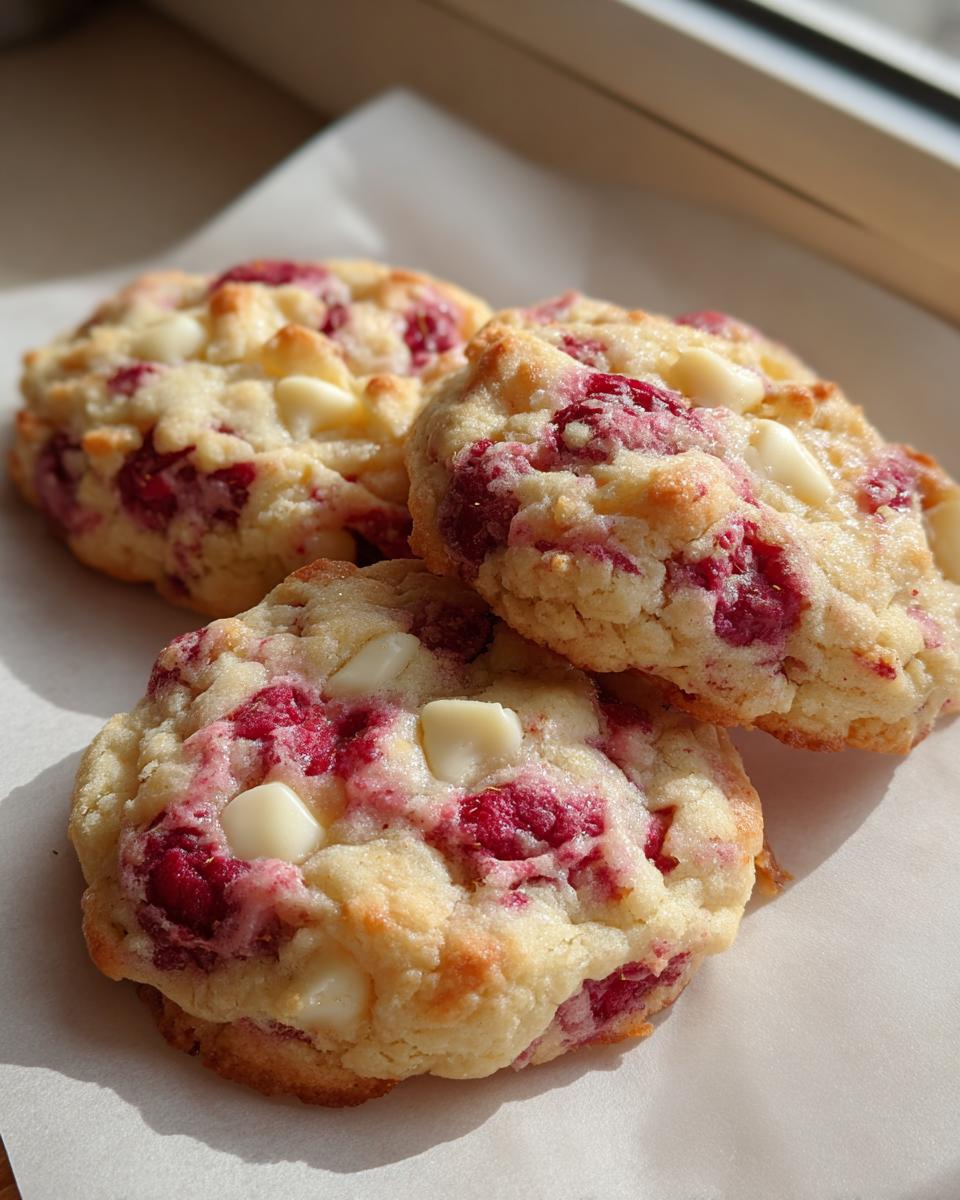
- 1 cup fresh or frozen raspberries (If you use frozen, please read my notes below—don’t thaw them!)
Ingredient Notes and Substitutions for Your Raspberry Cookie Recipe
Okay, Maya’s Kitchen Rules for Ingredients are straightforward. Because we rely on these simple elements for big flavor, how you handle them matters a lot. Especially when we are using fruit in our easy cookie baking venture!
First, the white chocolate. If you can find good quality white chocolate bars and chop them into irregular chunks, do it! Chunks melt differently than chips; they create those wonderful, creamy pools in the finished cookie. Chips are totally fine, but chunks give you that gourmet feel.
Now, about those beautiful raspberries. If you’re using fresh, you’re golden, just toss them in gently at the end. If you grab the frozen ones from the freezer drawer like I often do, you absolutely MUST toss them with one tablespoon of flour before they meet the dough. I know it sounds weird, but this little trick helps stop the bright color from bleeding too much through your batter and turning the whole batch swamp-colored. Plus, it stops them from sinking to the bottom!
Don’t skip the lemon zest if you have one, even just a teensy bit. It doesn’t make the cookie taste like lemon; it just pops the flavor of the raspberry and cuts through the richness of that **creamy white chocolate** perfectly. It’s my secret touch for a more complex, **sweet and tart cookie** experience.
Step-by-Step Instructions for Soft Baked White Chocolate Raspberry Cookies
Okay, time to get our hands dirty! Since we aren’t chilling the dough for these **white chocolate raspberry cookies**, we need to be smart about mixing so we don’t end up with hard hockey pucks. Our goal is that soft, chewy texture, so keep that mixer moving, but not *too* fast!
- First thing first: get your oven hot! Preheat to 375°F (190°C) and line those baking sheets with parchment paper. That paper is your best friend for easy cleanup, trust me.
- Grab your big bowl and cream that softened butter, granulated sugar, and the light brown sugar together. You need to beat this mixture until it looks fluffy and just slightly pale—that takes a solid 3 minutes. This initial step is where we build the air pockets for texture!
- Next, throw in your eggs, one at a time, making sure each one is fully incorporated before you add the next. Then, stir in the vanilla and that optional lemon zest if you’re using it.
- In a separate bowl, just whisk your dry stuff—flour, baking soda, and salt—together quickly.
- Now, pay close attention! Add the dry mixture into the wet stuff slowly, mixing only on low speed until you see maybe 80% of the flour disappear. Seriously, put the mixer down. If you overmix here, you’ll develop too much gluten, and poof! Forget about those gooey chewy cookies you were promised.
- This is the fun part: gently fold in your white chocolate chunks and your raspberries with a sturdy spatula. If your raspberries are fresh, just break them up a little bit with the spatula as you mix them in.
- Scoop rounded tablespoons of dough onto your prepared sheets, leaving about two inches between them because they are going to spread just a little bit.
- Bake them for just 9 to 11 minutes. I always aim for 9 or 10 minutes. You want the edges to look set, but the center should still look a touch underdone. That’s the secret to maximum chewiness.
- Leave them on the hot pan for five minutes—this lets them firm up safely—before moving them gently onto a wire rack to cool completely.
Tips for Achieving Bakery Style White Chocolate Raspberry Cookies
Want to trick everyone into thinking you bought these at a fancy cookie shop? It comes down to a few finishing touches and preparation hacks. These small details really elevate simple **raspberry cookie recipes**!
Remember how I mentioned frozen raspberries? If you used those, make sure you dusted them lightly in flour first. It stops them from sinking down to the bottom of the pan while baking, keeping the fruit nicely distributed throughout the cookie. Also, I know I said no chill time, but if you have an extra 30 minutes, covering that dough bowl and sticking it in the fridge really helps create a thicker cookie height. That’s a classic trick for that amazing bakery style look.
Another thing—don’t press down on the dough balls before baking! Let the oven do the work. When you pull them out, if you want them perfectly round, you can take a large circular cookie cutter (bigger than the cookie itself, admittedly) and swirl it around the warm cookie edges for about 10 seconds. It pushes the edges back in and gives that beautiful, thick border.
Baking Equipment Needed for Your White Chocolate Raspberry Cookies
You don’t need a million fancy gadgets to make amazing **white chocolate raspberry cookies**! Honestly, I developed this recipe because I wanted something I could whip up when the craving hit, using kitchen staples I already had lying around. But, just to make sure you’re set up for success and keep things easy—especially if you’re new to easy cookie baking—here is the short list of equipment I use every single time.
- Mixing Bowls: You’ll want at least two. One large one for creaming the butter/sugars and mixing the wet ingredients, and a medium one just for whisking your dry flour mixture together.
- Electric Mixer: Handheld or stand mixer is fine! You really need the power to cream the butter and sugars properly for those 3 minutes we talked about. Doing it by hand is a workout, but it’s possible if you’re tough!
- Rubber or Silicone Spatula: Essential for the final fold. You need to be gentle when adding the chocolate and berries so you don’t deflate all that air you just whipped into the butter.
- Baking Sheets (At least two): To get the best bake, you don’t want to crowd the cookies. Having two means you can keep a second batch ready to go while the first cools slightly.
- Parchment Paper: I cannot stress this enough! It prevents sticking completely, helps the cookies bake evenly on the bottom, and makes cleanup a total dream. We love time-saving wins here.
- Cookie Scoop or Two Spoons: A medium cookie scoop (about a Tablespoon size) is perfect for making sure every cookie is uniform in size, which helps them bake at the same rate. If you don’t have one, two regular spoons work just fine!
That’s really it! See? Nothing too intimidating. Having these basics ready means you spend less time hunting for tools and more time enjoying the smell of warm raspberries coming out of your oven.
Troubleshooting Common Issues with Raspberry Cookie Recipe Success
Sometimes, even when you follow the recipe perfectly, baking throws you a little curveball. Don’t panic! When I’m working with fruit, especially berries, I know things can sometimes get a little messy or flat. Think of these little hiccups not as failures, but as opportunities to learn how these specific **white chocolate raspberry cookies** behave. I learned most of my best kitchen secrets by messing things up first, so let’s go over what might happen and how to fix it!
If your cookie dough seems way too wet when you’re ready to scoop, don’t just dump in more flour willy-nilly. That throws off the moisture balance you need for that soft result. Add about one tablespoon of flour at a time, mix it in gently with your spatula, and check the consistency again. You want it just firm enough to hold its shape on the spoon.
Ever pull your cookies out, and they look like flat, oily puddles? That usually means your butter was too warm when you started creaming, or maybe you skipped my suggestion to chill the dough if you have time. If they spread too thin during baking, your next batch should definitely go into the fridge for that 20-30 minute rest period. Alternatively, if you’re baking right away, try using slightly less butter next time—maybe cut back by a tablespoon. That usually firms up the edges nicely!
And let’s tackle the dreaded raspberry color bleed again. If you see that pinkish/purplish stain creeping into your gorgeous vanilla batter, it means the moisture from the raspberries was released too early. If you forgot to toss the frozen berries in flour (or next time you use fresh ones and they look super juicy), just take a tiny pinch of flour on your fingertip and gently work it around the berry right before you fold it in. It buffers the moisture release. It sounds like a small thing, but it keeps those white chocolate puddles looking bright and beautiful, helping you achieve those **gourmet cookies** that look professional.
If your cookies come out the other side too dry, you likely baked them a minute or two too long. Remember, for **soft baked cookies**, we want them slightly *underdone* in the center when they come out of the oven at 375°F. They finish setting up on the hot pan. If you end up with one too many hard cookies, don’t worry—those are perfect for dunking in a big mug of coffee or tea!
For leftover cookie dough situations, check out my tips for storing cookie dough—it works for these too! Keep that dough wrapped up tight, and you’ll have emergency **white chocolate raspberry cookies** ready any time you need a little sweet pick-me-up.
Storage and Reheating Instructions for Homemade Cookies
Okay, so you made a huge batch of these beautiful **white chocolate raspberry cookies**, and now you have to resist eating them all in one sitting! That’s a tough job, but preserving their fresh-baked magic is actually super easy. It all comes down to keeping the air out!
Whenever I have leftovers—which is rare, honestly—I store my **homemade cookies** in a sturdy, airtight container right on the counter. Do not put them in the fridge! Why? The fridge sucks the moisture right out of baked goods, and we want these cookies to stay soft and chewy, not rock hard.
At room temperature, sealed up tight, these babies will stay perfectly soft and chewy for a good three to four days. If you’re lucky enough not to eat them all by then, they can actually last almost a week, but I find the texture is *best* in that first few-day window when the raspberries are still bright.
How to Reheat Cookies for That Fresh-Out-of-the-Oven Experience
If your cookies have been sitting out for a day or two and you want that gooey, melt-in-your-mouth sensation back—you know, when the white chocolate is slightly soft again—you need a quick zap of warmth. My favorite method is the microwave, but you have to be careful not to unleash the dreaded cookie hardening effect!
Here is the trick: Take one or maybe two cookies (don’t try to reheat too many at once!) and give them about 8 to 10 seconds on a microwave-safe plate. That short burst is just enough to warm the butter and melt the white chocolate just a *tiny* bit, bringing back the softness immediately. Five seconds shy of done is better than five seconds too long!
If you’re feeling ambitious and want that crispy edge, pop them in a toaster oven at about 300°F (150°C) for about two minutes. That low-and-slow warmth reactivates the fats without fully cooking the cookie again. Either way, make sure you have a glass of cold milk ready—it’s the perfect companion for reviving these **sweet and tart cookies**!
Serving Suggestions for Sweet and Tart Cookies
Now that you’ve perfected these **white chocolate raspberry cookies**, the hardest job is deciding when (and how!) to eat them. Since they hit that gorgeous sweet spot between creamy and tart, they pair up with almost anything, but I have a few tried-and-true suggestions that take them from a simple snack to a real moment.
For the daytime crew, they are absolutely divine alongside a strong cup of coffee. The bitterness of the coffee really lets that **creamy white chocolate** shine through. Or, if you’re enjoying these as part of your afternoon break, a simple cup of Earl Grey tea works wonderfully—the slight bergamot notes complement the fruit nicely.
If you are serving these as a proper dessert, you HAVE to try them warm with a scoop of good quality vanilla bean ice cream. The contrast between the warm, gooey cookie and the cold, rich dairy? Chef’s kiss! It’s an absolute winner when you want something a little more decadent than just the cookie on its own.
But here’s my little secret when I’m entertaining adults and want to lean into that tart side of the raspberry kick—I make a batch of my Lemon Drop Martini Recipe! The bright, sharp citrus echoes the tartness in the berries, and it makes for a really fun, cohesive pairing for a summer gathering or a fancy dessert night. It’s unexpected, but everyone always raves about the flavor combination.
Honestly, though, my favorite way to enjoy any of my **fruity dessert recipes** is standing right over the counter, grabbing two **homemade cookies**, and eating them standing up while making a strong cup of tea. Sometimes, the simplest presentation is the best one!
Frequently Asked Questions About White Chocolate Raspberry Cookies
I get so many great questions about these **white chocolate raspberry cookies** after people try them the first time! Baking is science, but sometimes it feels like magic, and I love helping you all feel like kitchen wizards. Here are some of the most common things I hear, so you can nail the recipe on batch one!
Why are my cookies spreading out so much and baking flat?
Ugh, the dreaded flat cookie! This usually comes down to two things, sometimes even both. First, check your butter temperature. If the butter is too soft or even slightly melted when you cream it, the structure just collapses in the heat. It needs to be soft, but still cool to the touch. Second, and this is a big one for **easy cookie baking**—chill your dough! Even though I wrote this recipe to be quick with no chilling required, if you find your cookies spread wafer-thin, stick that dough in the fridge for 30 minutes. That rest firms up the fat, ensuring you get those beautiful, thick, bakery-style edges we are aiming for.
Can I replace the fresh/frozen raspberries with dried ones?
You certainly can, but you might not get the same texture burst! Dried raspberries are more intense in flavor but they don’t provide the necessary moisture balance that fresh or frozen berries do. If you opt for dried, I highly recommend crushing them slightly. They don’t need to be pre-soaked like raisins, but crushing them ensures you get that tart flavor distributed throughout without huge, hard chunks. It’s a good option if you’re making these ahead of time or for holiday cookie trays!
Is using lemon zest really necessary for this recipe?
No, it’s not an absolute must, but I strongly encourage you to try it! If you look at the linked recipe from Daily Cooksy, they feature lemon prominently, and for good reason. The goal of the lemon zest in my version isn’t to make the cookie taste like lemon; it’s to cut through the intense sweetness of the white chocolate. It acts like a tiny flavor amplifier, making the raspberry taste even brighter and cleaner. If you skip it, you’ll still have a delicious cookie, but you’ll be missing that little ‘zing’ that makes these **creamy white chocolate recipes** truly addictive.
How can I make sure my white chocolate stays creamy and doesn’t burn?
This usually happens when the dough is overmixed after the chocolate is added, or if the oven temperature is way too high. Because white chocolate has a lower melting point than milk or dark chocolate, it requires gentle handling at the end. Make sure you are folding it in by hand with a spatula after you stop the mixer. Also, avoid baking these past 11 minutes; if you notice the chips sweating or looking slightly browned on top, pull them immediately! They finish setting up on the hot baking sheet, so underbaking slightly is better than overbaking when you have delicate chips involved.
For more great tips on mastering quick and reliable baking, check out my main guide on easy cookie baking right here on MayaPlate!
Baking Equipment Needed for Your White Chocolate Raspberry Cookies
You don’t need a million fancy gadgets to make amazing **white chocolate raspberry cookies**! Honestly, I developed this recipe because I wanted something I could whip up when the craving hit, using kitchen staples I already had lying around. But, just to make sure you’re set up for success and keep things easy—especially if you’re new to easy cookie baking—here is the short list of equipment I use every single time.
- Mixing Bowls: You’ll want at least two. One large one for creaming the butter/sugars and mixing the wet ingredients, and a medium one just for whisking your dry flour mixture together.
- Electric Mixer: Handheld or stand mixer is fine! You really need the power to cream the butter and sugars properly for those 3 minutes we talked about. Doing it by hand is a workout, but it’s possible if you’re tough!
- Rubber or Silicone Spatula: Essential for the final fold. You need to be gentle when adding the chocolate and berries so you don’t deflate all that air you just whipped into the butter.
- Baking Sheets (At least two): To get the best bake, you don’t want to crowd the cookies. Having two means you can keep a second batch ready to go while the first cools slightly.
- Parchment Paper: I cannot stress this enough! It prevents sticking completely, helps the cookies bake evenly on the bottom, and makes cleanup a total dream. We love time-saving wins here.
- Cookie Scoop or Two Spoons: A medium cookie scoop (about a Tablespoon size) is perfect for making sure every cookie is uniform in size, which helps them bake at the same rate. If you don’t have one, two regular spoons work just fine!
That’s really it! See? Nothing too intimidating. Having these basics ready means you spend less time hunting for tools and more time enjoying the smell of warm raspberries coming out of your oven.
Troubleshooting Common Issues with Raspberry Cookie Recipe Success
Sometimes, even when you follow the recipe perfectly, baking throws you a little curveball. Don’t panic! When I’m working with fruit, especially berries, I know things can sometimes get a little messy or flat. Think of these little hiccups not as failures, but as opportunities to learn how these specific **white chocolate raspberry cookies** behave. I learned most of my best kitchen secrets by messing things up first, so let’s go over what might happen and how to fix it!
If your cookie dough seems way too wet when you’re ready to scoop, don’t just dump in more flour willy-nilly. That throws off the moisture balance you need for that soft result. Add about one tablespoon of flour at a time, mix it in gently with your spatula, and check the consistency again. You want it just firm enough to hold its shape on the spoon.
Ever pull your cookies out, and they look like flat, oily puddles? That usually means your butter was too warm when you started creaming, or maybe you skipped my suggestion to chill the dough if you have time. If they spread too thin during baking, your next batch should definitely go into the fridge for that 20-30 minute rest period. Alternatively, if you’re baking right away, try using slightly less butter next time—maybe cut back by a tablespoon. That usually firms up the edges nicely!
And let’s tackle the dreaded raspberry color bleed again. If you see that pinkish/purplish stain creeping into your gorgeous vanilla batter, it means the moisture from the raspberries was released too early. If you forgot to toss the frozen berries in flour (or next time you use fresh ones and they look super juicy), just take a tiny pinch of flour on your fingertip and gently work it around the berry right before you fold it in. It buffers the moisture release. It sounds like a small thing, but it keeps those white chocolate puddles looking bright and beautiful, helping you achieve those **gourmet cookies** that look professional.
If your cookies come out the other side too dry, you likely baked them a minute or two too long. Remember, for **soft baked cookies**, we want them slightly *underdone* in the center when they come out of the oven at 375°F. They finish setting up on the hot pan. If you end up with one too many hard cookies, don’t worry—those are perfect for dunking in a big mug of coffee or tea!
For leftover cookie dough situations, check out my tips for storing cookie dough—it works for these too! Keep that dough wrapped up tight, and you’ll have emergency **white chocolate raspberry cookies** ready any time you need a little sweet pick-me-up.
Storage and Reheating Instructions for Homemade Cookies
Okay, so you made a huge batch of these beautiful **white chocolate raspberry cookies**, and now you have to resist eating them all in one sitting! That’s a tough job, but preserving their fresh-baked magic is actually super easy. It all comes down to keeping the air out!
Whenever I have leftovers—which is rare, honestly—I store my **homemade cookies** in a sturdy, airtight container right on the counter. Do not put them in the fridge! Why? The fridge sucks the moisture right out of baked goods, and we want these cookies to stay soft and chewy, not rock hard.
At room temperature, sealed up tight, these babies will stay perfectly soft and chewy for a good three to four days. If you’re lucky enough not to eat them all by then, they can actually last almost a week, but I find the texture is *best* in that first few-day window when the raspberries are still bright.
How to Reheat Cookies for That Fresh-Out-of-the-Oven Experience
If your cookies have been sitting out for a day or two and you want that gooey, melt-in-your-mouth sensation back—you know, when the white chocolate is slightly soft again—you need a quick zap of warmth. My favorite method is the microwave, but you have to be careful not to unleash the dreaded cookie hardening effect!
Here is the trick: Take one or maybe two cookies (don’t try to reheat too many at once!) and give them about 8 to 10 seconds on a microwave-safe plate. That short burst is just enough to warm the butter and melt the white chocolate just a *tiny* bit, bringing back the softness immediately. Five seconds shy of done is better than five seconds too long!
If you’re feeling ambitious and want that crispy edge, pop them in a toaster oven at about 300°F (150°C) for about two minutes. That low-and-slow warmth reactivates the fats without fully cooking the cookie again. Either way, make sure you have a glass of cold milk ready—it’s the perfect companion for reviving these **sweet and tart cookies**!
Serving Suggestions for Sweet and Tart Cookies
Now that you’ve perfected these **white chocolate raspberry cookies**, the hardest job is deciding when (and how!) to eat them. Since they hit that gorgeous sweet spot between creamy and tart, they pair up with almost anything, but I have a few tried-and-true suggestions that take them from a simple snack to a real moment.
For the daytime crew, they are absolutely divine alongside a strong cup of coffee. The bitterness of the coffee really lets that **creamy white chocolate** shine through. Or, if you’re enjoying these as part of your afternoon break, a simple cup of Earl Grey tea works wonderfully—the slight bergamot notes complement the fruit nicely.
If you are serving these as a proper dessert, you HAVE to try them warm with a scoop of good quality vanilla bean ice cream. The contrast between the warm, gooey cookie and the cold, rich dairy? Chef’s kiss! It’s an absolute winner when you want something a little more decadent than just the cookie on its own.
But here’s my little secret when I’m entertaining adults and want to lean into that tart side of the raspberry kick—I make a batch of my Lemon Drop Martini Recipe! The bright, sharp citrus echoes the tartness in the berries, and it makes for a really fun, cohesive pairing for a summer gathering or a fancy dessert night. It’s unexpected, but everyone always raves about the flavor combination.
Honestly, though, my favorite way to enjoy any of my **fruity dessert recipes** is standing right over the counter, grabbing two **homemade cookies**, and eating them standing up while making a strong cup of tea. Sometimes, the simplest presentation is the best one!
Frequently Asked Questions About White Chocolate Raspberry Cookies
I get so many great questions about these **white chocolate raspberry cookies** after people try them the first time! Baking is science, but sometimes it feels like magic, and I love helping you all feel like kitchen wizards. Here are some of the most common things I hear, so you can nail the recipe on batch one!
Why are my cookies spreading out so much and baking flat?
Ugh, the dreaded flat cookie! This usually comes down to two things, sometimes even both. First, check your butter temperature. If the butter is too soft or even slightly melted when you cream it, the structure just collapses in the heat. It needs to be soft, but still cool to the touch. Second, and this is a big one for **Easy Cookie Baking**—chill your dough! Even though I wrote this recipe to be quick with no chilling required, if you find your cookies spread wafer-thin, stick that dough in the fridge for 30 minutes. That rest firms up the fat, ensuring you get those beautiful, thick, bakery-style edges we are aiming for.
Can I replace the fresh/frozen raspberries with dried ones?
You certainly can, but you might not get the same texture burst! Dried raspberries are more intense in flavor but they don’t provide the necessary moisture balance that fresh or frozen berries do. If you opt for dried, I highly recommend crushing them slightly. They don’t need to be pre-soaked like raisins, but crushing them ensures you get that tart flavor distributed throughout without huge, hard chunks. It’s a good option if you’re making these ahead of time or for holiday cookie trays! If you’re interested in other fruity options, check out some great ideas over at Daily Cooksy.
Is using lemon zest really necessary for this recipe?
No, it’s not an absolute must, but I strongly encourage you to try it! The goal of the lemon zest in my version isn’t to make the cookie taste like lemon; it’s to cut through the intense sweetness of the white chocolate. It acts like a tiny flavor amplifier, making the raspberry taste even brighter and cleaner. If you skip it, you’ll still have a delicious cookie, but you’ll be missing that little ‘zing’ that makes these **Creamy White Chocolate Recipes** truly addictive.
How can I make sure my white chocolate stays creamy and doesn’t burn?
This usually happens when the dough is overmixed after the chocolate is added, or if the oven temperature is way too high. Because white chocolate has a lower melting point than milk or dark chocolate, it requires gentle handling at the end. Make sure you are folding it in by hand with a spatula after you stop the mixer. Also, avoid baking these past 11 minutes; if you notice the chips sweating or looking slightly browned on top, pull them immediately! They finish setting up on the hot baking sheet, so underbaking slightly is better than overbaking when you have delicate chips involved.
For more great tips on mastering quick and reliable baking, check out my main guide on easy cookie baking right here on MayaPlate!
Sharing Your Delicious White Chocolate Raspberry Cookies
Now that you’ve got a cooling rack full of the best **white chocolate raspberry cookies** you’ve ever made, I truly want to hear about it! This community is all about sharing those little kitchen wins, and honestly, seeing your creations popping up on my social feeds is the best part of my day.
Did you try the optional lemon zest trick? Did you chill the dough for those extra-thick bakery vibes? What did you pair them with? Don’t keep your successes—or even your questions—to yourself!
Please, take a moment and leave a rating for the recipe right below this section. Star ratings really help other bakers know that these quick, **gourmet cookies** are worth their time. Even a quick comment saying “They were perfectly chewy!” makes a huge difference to me.
And if you’re snapping photos (and I know you are, these look gorgeous!), tag me on Instagram! I always check the tags and I love sharing what you all create in your own kitchens. It keeps the inspiration flowing for me to keep developing these practical, joyful recipes you rely on.
I’m so glad you took the time to bake with me today. If you want to learn more about why I started this whole process of making delicious food fit busy lives, you can always check out my About Page. Happy baking, and enjoy every single sweet and tart bite!
PrintSoft and Chewy White Chocolate Raspberry Cookies

Make these soft and chewy white chocolate raspberry cookies for a perfect sweet and tart dessert. This recipe is straightforward and yields bakery-style results quickly.
- Prep Time: 15 min
- Cook Time: 11 min
- Total Time: 26 min
- Yield: About 2 dozen cookies 1x
- Category: Dessert
- Method: Baking
- Cuisine: American
- Diet: Vegetarian
Ingredients
- 1 cup (2 sticks) unsalted butter, softened
- 3/4 cup granulated sugar
- 3/4 cup packed light brown sugar
- 2 large eggs
- 1 teaspoon vanilla extract
- 1/2 teaspoon lemon zest (optional, for brightness)
- 2 1/4 cups all-purpose flour
- 1 teaspoon baking soda
- 1/2 teaspoon salt
- 1 cup white chocolate chips or chunks
- 1 cup fresh or frozen raspberries (if frozen, do not thaw)
Instructions
- Preheat your oven to 375°F (190°C). Line baking sheets with parchment paper.
- In a large bowl, cream together the softened butter, granulated sugar, and brown sugar until light and fluffy. This takes about 3 minutes.
- Beat in the eggs one at a time, mixing well after each addition. Stir in the vanilla extract and lemon zest, if using.
- In a separate medium bowl, whisk together the flour, baking soda, and salt.
- Gradually add the dry ingredients to the wet ingredients, mixing on low speed until just combined. Do not overmix.
- Gently fold in the white chocolate chips and the raspberries using a spatula. If using fresh raspberries, break them slightly as you fold them in.
- Drop rounded tablespoons of dough onto the prepared baking sheets, spacing them about 2 inches apart.
- Bake for 9 to 11 minutes, or until the edges are set and the centers look slightly soft. For chewier cookies, slightly underbake.
- Let the cookies cool on the baking sheets for 5 minutes before transferring them to a wire rack to cool completely.
Notes
- If you use frozen raspberries, gently toss them with one tablespoon of flour before adding them to the dough. This helps prevent the color from bleeding too much into the batter.
- For a thicker, bakery-style cookie, chill the dough for 30 minutes before scooping.
- If you prefer a stronger tart flavor, use freeze-dried raspberries that you crush slightly and mix into the dough.
Nutrition
- Serving Size: 1 cookie
- Calories: 210
- Sugar: 18g
- Sodium: 110mg
- Fat: 12g
- Saturated Fat: 7g
- Unsaturated Fat: 5g
- Trans Fat: 0.2g
- Carbohydrates: 25g
- Fiber: 1g
- Protein: 2g
- Cholesterol: 35mg