
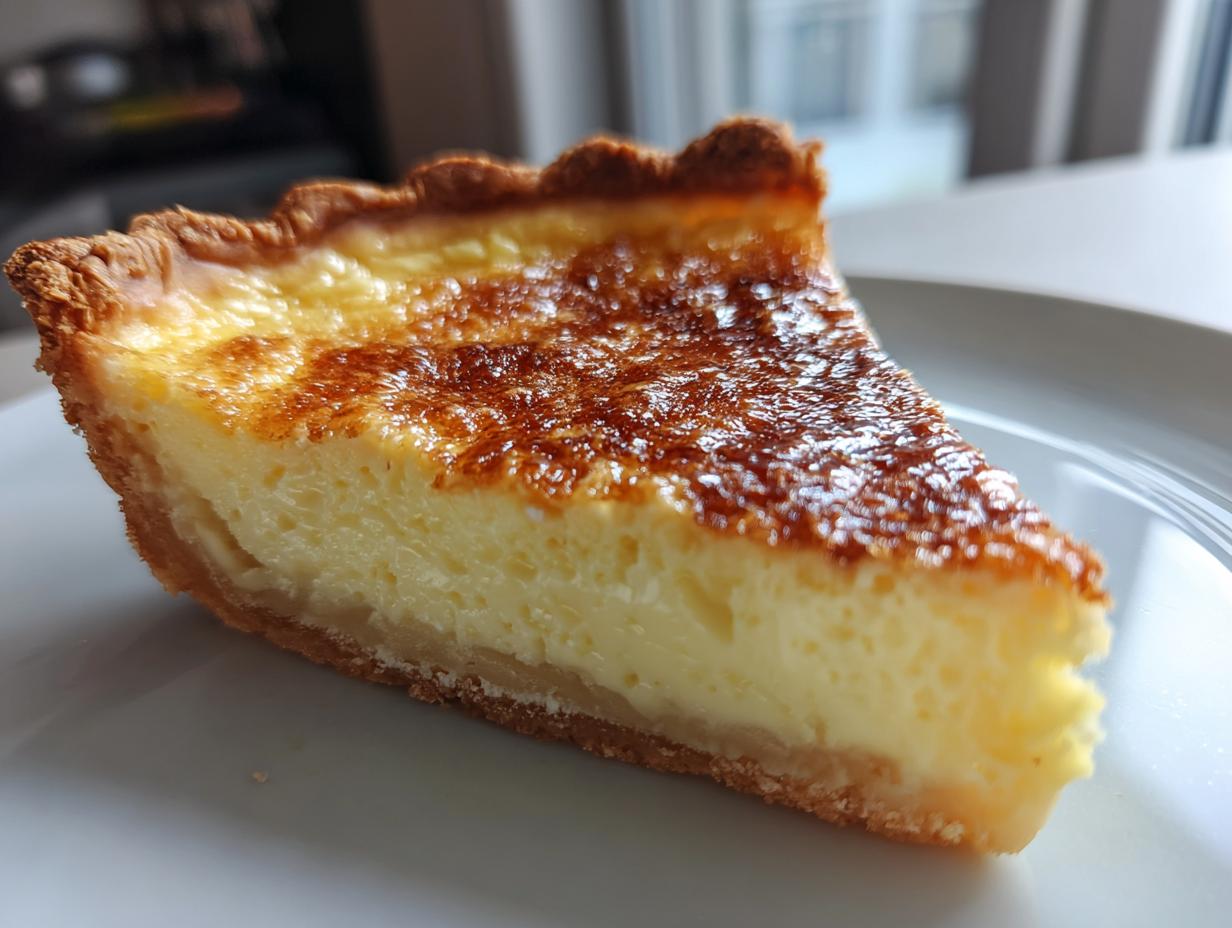
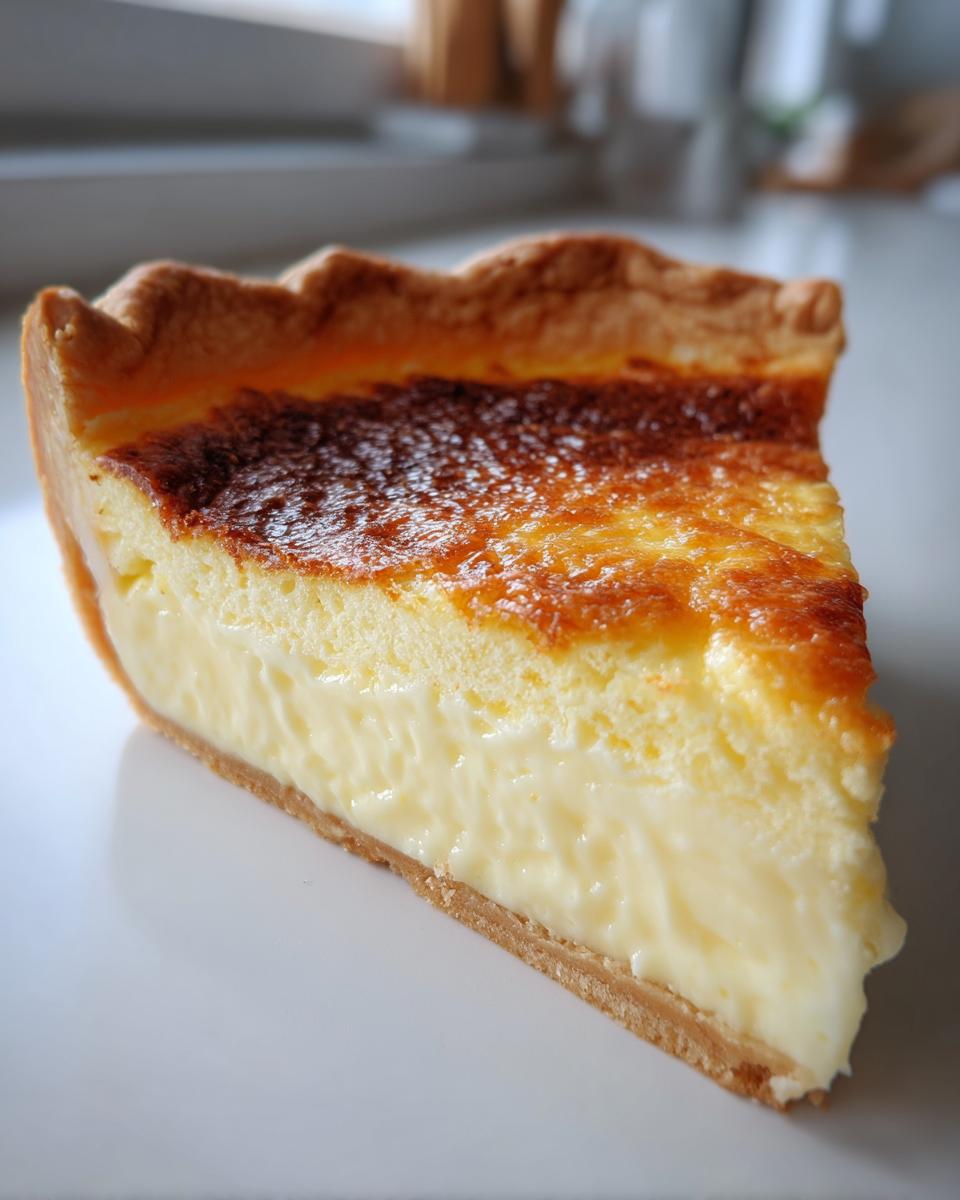
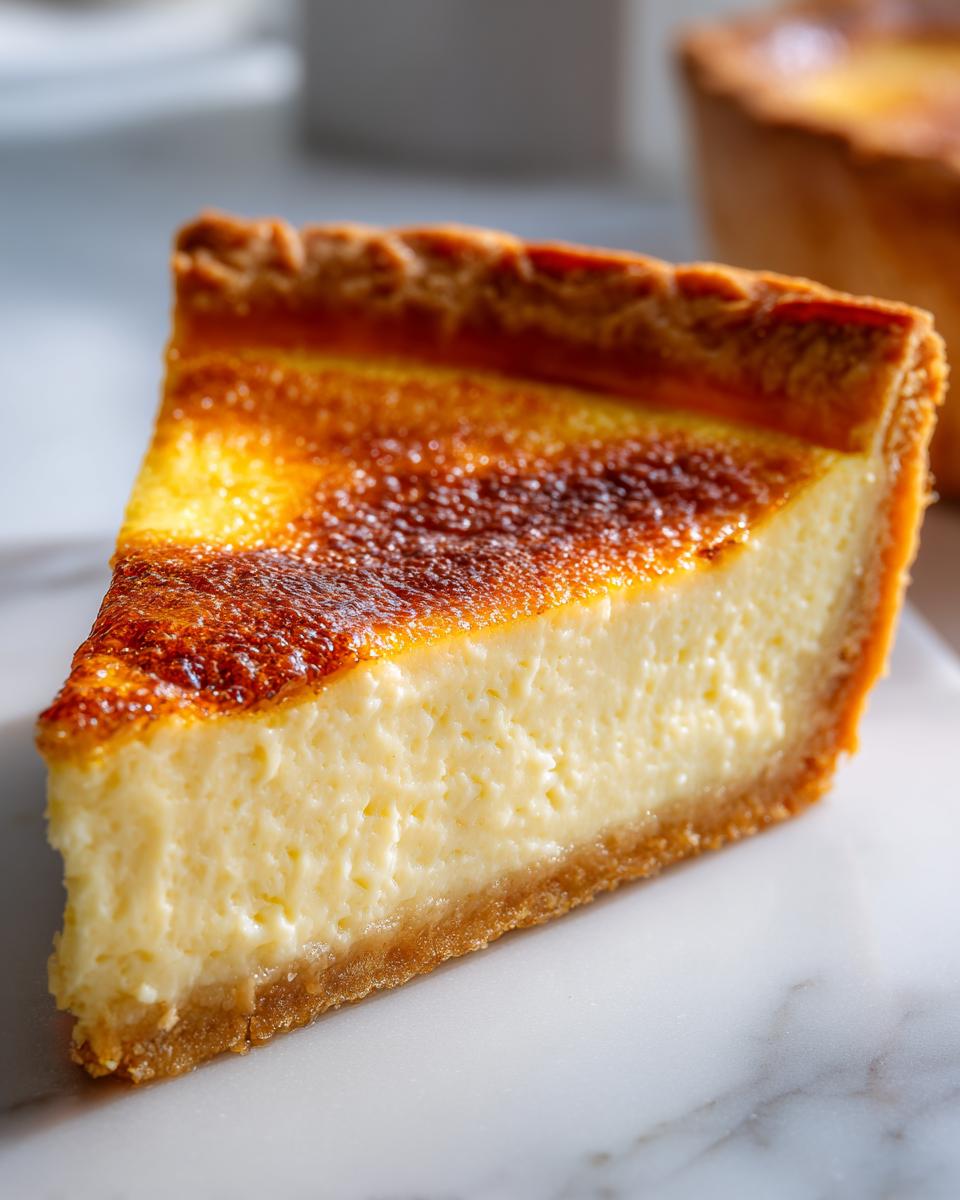
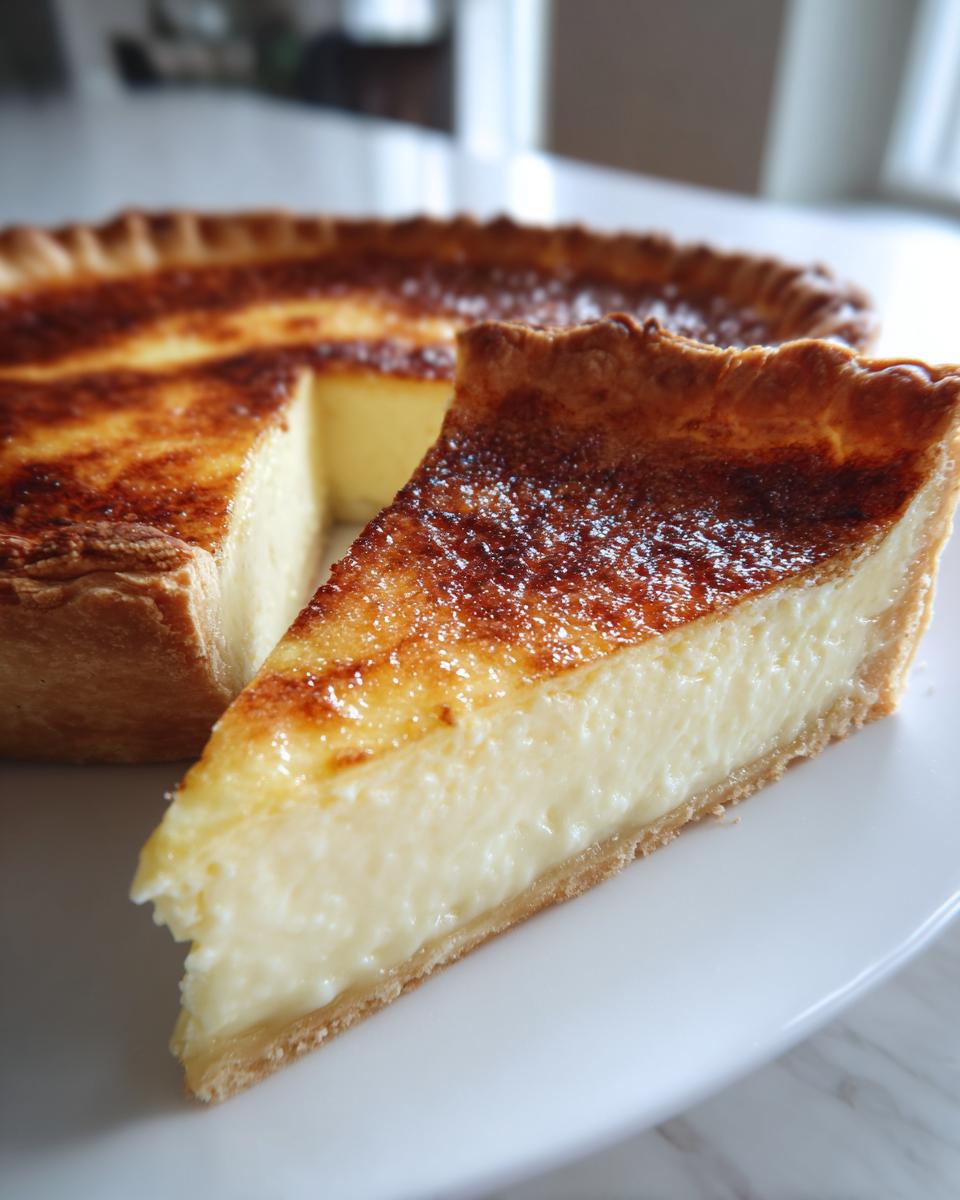
You know that smell when you walk into Grandma’s kitchen around the holidays? That warm, comforting blend of vanilla and spice that just instantly melts away any stress you were carrying? That’s the feeling I chase every single time I bake my Old Fashioned Silky Creamy Egg Custard Pie. This isn’t just any dessert; achieving that unbelievably smooth, velvety filling is the key, and trust me, I’ve cracked the code after years of practice, balancing my love for tradition with my background in nutrition. Because that’s what MayaPlate is all about—making nourishing food practical, which you can read more about on our About Page! Forget dry or rubbery textures—this classic custard pie recipe is the foolproof throwback your Sunday dinner or Christmas Eve table truly needs.
- Why This Old Fashioned Custard Pie Recipe is Your New Favorite
- Ingredients for the Perfect Silky Custard Pie
- How to Prepare Old Fashioned Custard Pie
- Tips for Baking the Best Custard Pie Every Time
- Serving Suggestions for Your Holiday Pie Centerpiece
- Storage and Make Ahead Holiday Desserts for Your Custard Pie
- Frequently Asked Questions About Making Custard Pie
- Nutritional Information for This Sweet Creamy Baked Treat
- Share Your Old Fashioned Custard Pie Experience
Why This Old Fashioned Custard Pie Recipe is Your New Favorite
If you’ve ever been let down by a baked custard that turned tough or cracked into a desert landscape, I promise this recipe is different. This is pure Old Fashioned Comfort Food, simplified for your modern kitchen. It’s all about that nostalgia factor served up fast.
- Guaranteed velvety, silky texture that melts in your mouth.
- Simple ingredients mean this is fantastic for Foolproof Custard Baking.
- It’s the ideal, comforting centerpiece for Christmas Eve or any big family dinner.
Achieving That Velvety Smooth Dessert Texture Secrets
My biggest tip for that gorgeous, unblemished top isn’t just about temperature—though we cover that later! You absolutely must strain your filling. Seriously, grab a fine-mesh sieve. Pouring the pre-mixed liquid through saves you from any weird, undispersed bits of egg white, which is the #1 cause of uneven texture. These are my essential Smooth Dessert Texture Secrets. Don’t skip it, okay?
Simple Egg Dessert Perfect for Any Occasion
Even though this custard pie feels elegant, the prep time is ridiculously fast—we’re talking minutes! That makes it perfect. You can whip this up after dinner one night for a stunning Dessert for Sunday Dinner the next day. It’s a sweet, simple egg dessert that never feels complicated to make, even on a tight schedule.
Ingredients for the Perfect Silky Custard Pie
This recipe truly shines because it relies on just a few incredibly simple pantry staples. We aren’t adding fillers or weird thickeners here—just good, honest ingredients. Precision matters when baking with eggs, so measure carefully! The quality of your vanilla extract makes a huge difference in this otherwise simple, Vanilla Baked Good. You’ll see how quickly this ingredient list comes together.
- 1 (9 inch) unbaked pie crust (we’ll talk more about that in the next section!)
- 3 large eggs
- 1/2 cup granulated sugar
- 1/4 teaspoon salt
- 1 teaspoon pure vanilla extract
- 1/4 teaspoon ground nutmeg
- 1 1/2 cups whole milk
Ingredient Notes and Substitutions for Your Custard Pie
Let’s talk crust first. I absolutely love a crisp, homemade crust, but frankly, sometimes life happens! Using a store-bought 9-inch crust is totally fine for this custard pie, especially when you’re busy. Just unroll it and fit it in. Now, for the milk—whole milk is non-negotiable if you want that rich, creamy mouthfeel we are aiming for. Skim milk just won’t cut it for texture.
Also, please use *pure* vanilla extract, not imitation. The flavor payoff is huge! As for the nutmeg, fresh ground is always best, but the recipe calls for 1/4 teaspoon of ground—stick close to that measurement, as nutmeg can easily make your dessert taste like potpourri if you get carried away!
How to Prepare Old Fashioned Custard Pie
Okay, now for the fun part—turning these simple ingredients into something truly comforting! Baking this classic dessert is straightforward, but the method is where the magic happens. We’re relying on gentle handling because this is an egg-based filling. Understanding *why* we do things this way makes all the difference between good From Scratch Baking and truly excellent results.
First things first, you need to get that oven warmed up to 375 degrees Fahrenheit. No need to blind bake the crust; this pie bakes beautifully with the custard poured right into that raw shell. Just set your unbaked 9-inch pie crust into the plate and move on to the filling!
Mixing the Creamy Pie Filling Tutorial
Grab a medium bowl and start with the eggs. Whisk those guys until they are nice and pale yellow—a little frothy is fine, but don’t turn them into meringue! Next, whisk in just enough sugar and salt to combine. We want them incorporated, not aggressively aerated. That’s vital! If you beat too much air in here, the baked pie puffs up too much and then collapses, giving you those dreaded cracks. Remember my earlier tip? Once the vanilla and nutmeg are in, slowly pour in the milk while just gently whisking. The mixture needs to be uniform but calm.
Baking Your Custard Pie for a Crack-Free Top
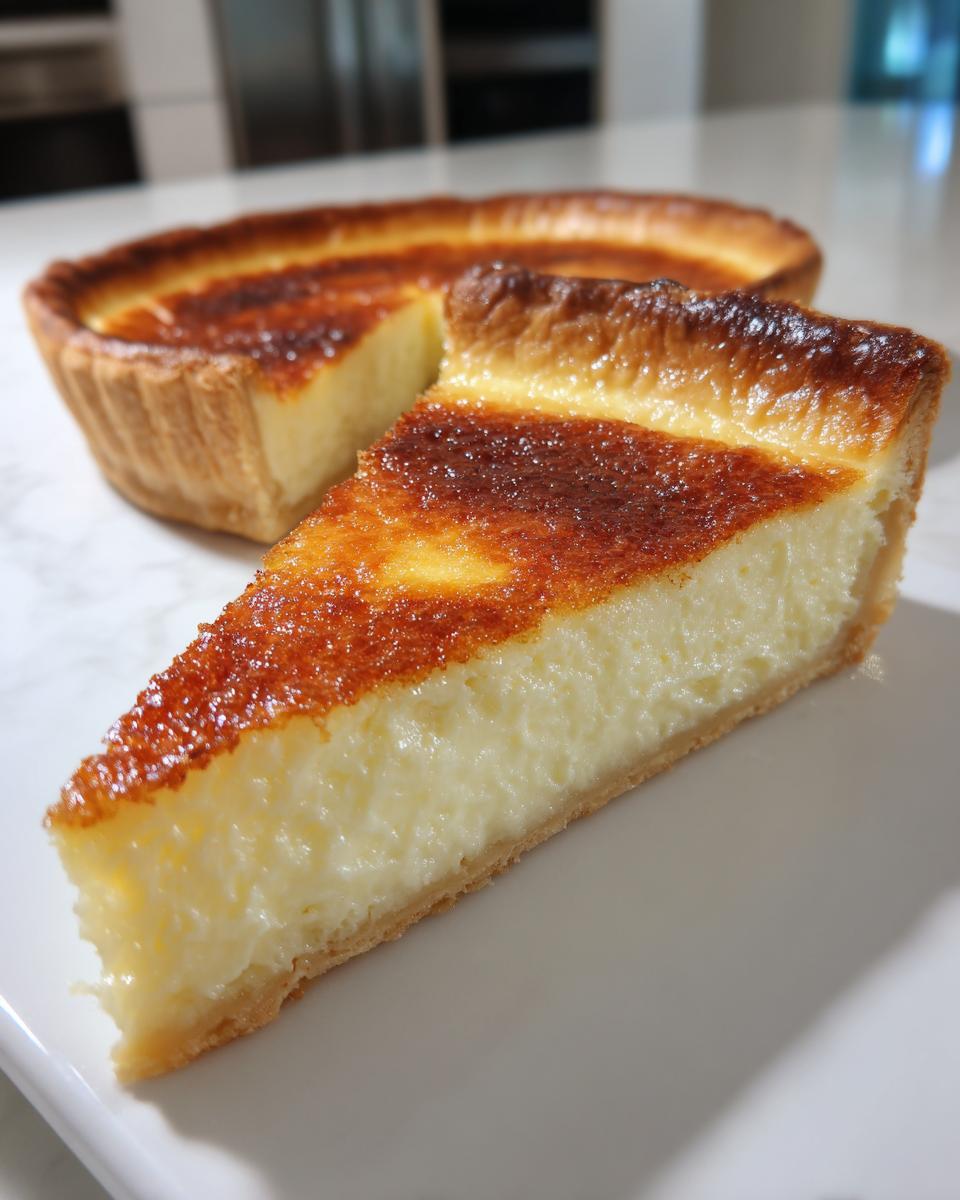
Here’s our first heat trick for a beautiful custard pie! We start hot, then drop the temperature way down. Bake at 375°F for exactly 15 minutes. This just sets the crust edges a little. Then, reduce that heat sharply to 325°F and continue baking for another 30 to 40 minutes. You’re looking for a very specific doneness: the edges should look completely set, but when you *gently* nudge the pie plate, the very center should still have a tiny bit of jiggle, kind of like set Jell-O.
The second secret to keeping the top smooth is cooling slowly. As soon as you pull it out, put it on a wire rack to cool down gradually. Resist the urge to put it straight into the fridge! This slow transition prevents that final rapid shrinkage that causes cracks. If you want more tips on getting perfect pie crusts when you’re not using a store-bought version, check out my guide on making dough from scratch!
Tips for Baking the Best Custard Pie Every Time
I know we covered the two-step baking temperature, which is huge for a crack-free top, but there are a few other little tricks I picked up over the years that make this one of those truly reliable Classic Homemade Pie Recipes. When you’re aiming for that silky perfection, every small detail counts, trust me!
My very first tip, which I almost forgot to mention in the main instructions because I get so excited about the oven temps, is straining the filling. If you want that truly unbeatable, smooth dessert texture that makes people ask for the recipe, you have to strain the mixture through a fine-mesh sieve right before you pour it into that unbaked crust. It catches anything that might make your custard bumpy.
Another thing I always do, especially if I’m baking this for holiday gatherings, is protecting the edges. Those beautiful, flaky edges look so good, but they brown way too fast! About halfway through that lower baking time (when you’ve dropped it to 325°F), grab a small piece of aluminum foil and loosely tent it just over the crust rim. It keeps it golden, not burnt.
Finally, remember I mentioned it tastes best chilled? That’s not just my opinion; it’s necessary for the structure to fully set up and become that dense, creamy treat we’re aiming for. You need at least four hours in the fridge before slicing. You can see a great video on some general pie tips from another baker over here: check this out! Making this dessert ahead of time is why it’s one of my favorite make-ahead holiday desserts, by the way.
Serving Suggestions for Your Holiday Pie Centerpiece
Once that beautiful custard pie has chilled completely and is ready to slice, the presentation just makes it feel extra special. Even though it stands perfectly on its own, a little something on top really brings out that warm vanilla and nutmeg finish. This is truly one of the loveliest Christmas Baked Goods you can feature on your table!
My absolute favorite way to serve it is with a light, airy topping that doesn’t compete with the smooth custard filling. A big dollop of freshly whipped cream is perfect—you can sweeten it just slightly or leave it plain. If you need a quick fix, a very light dusting of cinnamon or powdered sugar works too, just like my grandma sometimes did. If you are feeling ambitious and want an extra vanilla punch, you could even serve it alongside one of my ultimate moist vanilla cupcakes, though honestly, this pie needs no company!
Storage and Make Ahead Holiday Desserts for Your Custard Pie
I always tell people that the hardest part of making this custard pie is waiting for it to chill! Seriously, you need patience here. It must chill for at least four hours in the refrigerator. I often make mine the day before we plan to serve it, which makes it a fantastic Make Ahead Holiday Dessert. Chilling lets that beautiful, fragile custard set up completely so you get those clean slices we talked about.
Once it’s fully chilled, it keeps wonderfully well, usually for about three to four days covered tightly in the fridge. Don’t even think about trying to reheat a slice; it will just ruin that perfect creamy texture we worked so hard to achieve! This pie is meant to be served cold or just slightly cooler than room temperature. If you need tips on storing leftovers from other recipes, I have some general tips over here, but for this one, just keep it cold and covered. Easy peasy!
Frequently Asked Questions About Making Custard Pie
I get so many questions about this pie, which just tells me how much everyone loves this classic flavor! It’s one of those Nostalgic Family Recipes that pops up year after year. Here are the ones I hear most often when readers reach out, including how to get in touch if you have more specifics you need answered by checking out my Contact Page!
Can I use pre-made pie crust for this custard pie?
Absolutely, yes! Please don’t feel obligated to make a crust entirely from scratch if you don’t have the time or energy. Using a good quality, store-bought crust is perfectly fine, and honestly, it makes this recipe qualify as one of the best Beginner Friendly Pie Recipes out there. You still get that amazing, silky filling without the crust stress.
What is the secret to a truly creamy pie filling?
It boils down to air and filtering! The real secret is gentle handling during the mixing stage—do not over-whisk the eggs and sugar, or you introduce too much air, causing bubbles and cracks. And secondly, strain, strain, strain! Pushing that liquid through a fine-mesh sieve right before baking is the best way to guarantee that unbelievably smooth, creamy base that makes this pie so special.
Can I add cinnamon directly to the filling instead of just nutmeg?
You definitely can! Nutmeg gives that traditional spiced note, but cinnamon is wonderful here too. If you want to switch it up or add a bit more warmth, go ahead and swap out the nutmeg for about 1/2 teaspoon of ground cinnamon, or even use a 1/4 teaspoon of both! It blends beautifully with the vanilla and keeps it a fantastic Vanilla Baked Good, just with an extra little kick!
Nutritional Information for This Sweet Creamy Baked Treat
I always try to keep track of what we’re eating, even with comfort classics like this custard pie! Since I come from a nutrition background, I know you appreciate knowing the breakdown, even for a truly special treat. Here is the estimated nutritional content for one slice of this delicious Sweet Creamy Baked Treat. Please remember these numbers are just estimates based on the standard recipe ingredients we used.
- Serving Size: 1 slice
- Calories: 250
- Fat: 12g
- Carbohydrates: 25g
- Protein: 9g
- Sugar: 18g
It turns out, because it’s mostly eggs and milk, it gives you a nice little protein bump too! Enjoy!
Share Your Old Fashioned Custard Pie Experience
Now that you’ve baked this wonderfully simple and silky custard pie, I really want to hear all about it! Did you have a family member who always made this? Did the slow cooling method finally give you that crack-free top you’ve always dreamed of?
Please jump down into the comments below and let me know what you thought! Rating the recipe helps other folks trust how good this Classic Homemade Pie Recipe really is. If you had any unique twists—maybe you snuck in a tiny bit of almond extract with the vanilla—share that secret, too!
And hey, if you snapped a photo of your beautiful, creamy finished pie, I would absolutely love to see it! Tag me on social media so I can celebrate your success. Seeing your beautiful Old Fashioned Comfort Food on your table truly makes my day. For more recipe updates and baking tips, you can always check out the latest on our Privacy Policy page!
PrintOld Fashioned Silky Creamy Egg Custard Pie

Make this classic, old fashioned egg custard pie for a comforting dessert. The filling is velvety smooth, infused with vanilla and nutmeg, and baked in a flaky crust. This recipe is simple and guarantees a flawless texture, perfect for holidays or Sunday dinner.
- Prep Time: 15 min
- Cook Time: 45 min
- Total Time: 60 min
- Yield: 8 servings 1x
- Category: Dessert
- Method: Baking
- Cuisine: American
- Diet: Vegetarian
Ingredients
- 1 (9 inch) unbaked pie crust (store-bought or homemade)
- 3 large eggs
- 1/2 cup granulated sugar
- 1/4 teaspoon salt
- 1 teaspoon pure vanilla extract
- 1/4 teaspoon ground nutmeg
- 1 1/2 cups whole milk
Instructions
- Preheat your oven to 375 degrees Fahrenheit. Place the unbaked pie crust into a 9-inch pie plate. Do not pre-bake the crust.
- In a medium bowl, whisk the eggs until they are light yellow and slightly frothy.
- Add the sugar and salt to the eggs. Whisk until just combined. Do not over-mix, as this can introduce too much air, leading to cracks.
- Stir in the vanilla extract and ground nutmeg.
- Slowly pour in the whole milk while gently whisking until the mixture is uniform.
- Pour the custard filling into the unbaked pie crust.
- Bake at 375 degrees Fahrenheit for 15 minutes.
- Reduce the oven temperature to 325 degrees Fahrenheit. Continue baking for 30 to 40 minutes more, or until the edges are set but the center still has a slight jiggle when gently shaken.
- Remove the pie from the oven. Allow it to cool completely on a wire rack before slicing. Cooling slowly helps prevent the top from cracking.
Notes
- For a guaranteed smooth texture, strain the finished custard mixture through a fine-mesh sieve before pouring it into the crust.
- To prevent the crust edges from burning, cover them loosely with aluminum foil halfway through the baking time.
- This pie tastes best when chilled for at least 4 hours before serving. It is a wonderful make ahead holiday dessert.
Nutrition
- Serving Size: 1 slice
- Calories: 250
- Sugar: 18g
- Sodium: 180mg
- Fat: 12g
- Saturated Fat: 5g
- Unsaturated Fat: 7g
- Trans Fat: 0g
- Carbohydrates: 25g
- Fiber: 1g
- Protein: 9g
- Cholesterol: 95mg