
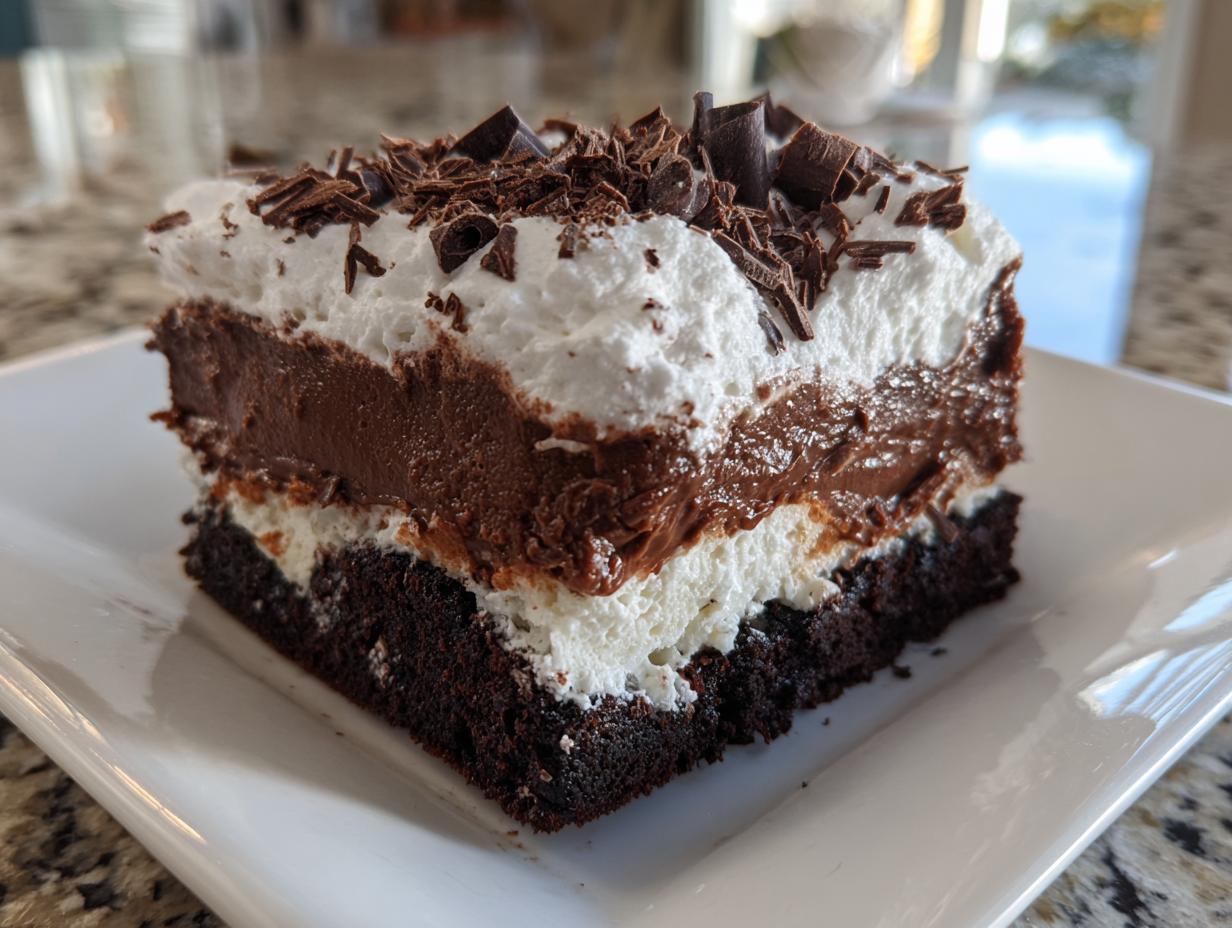
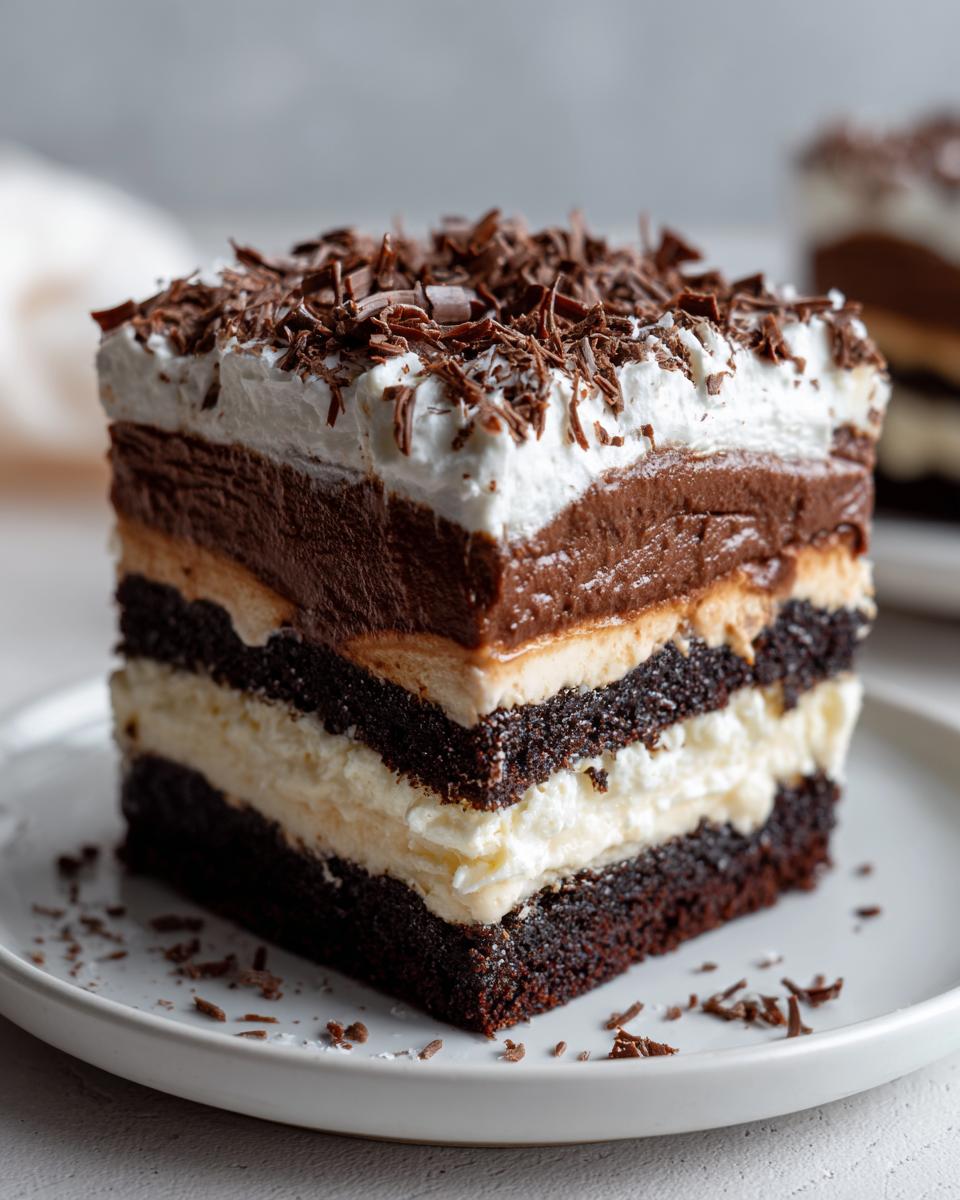
When you need a showstopper dessert, but the thought of turning on the oven makes you sweat, I totally get it. We all deserve something incredibly decadent, something that tastes like you spent hours layering and fussing, but doesn’t actually require that time, right? That’s why I am so excited to share the ultimate solution: the brownie refrigerator cake. This isn’t just quick; it’s smart cooking.
At MayaPlate, we live by three core beliefs: everything needs to be Deliciously Simple, Intelligently Nourishing, and Genuinely Practical. This amazing cake hits every single one of those points. It uses pre-made fudgy brownies and layers them with creamy fillings that set up beautifully in the cold. I developed this because, honestly, my busy consulting schedule meant I often skipped dessert altogether! This gorgeous, layered masterpiece lets you serve something unbelievably rich and satisfying for potlucks or family nights, proving you never have to compromise on that comforting, joyful feeling food should bring.
Trust me, after chilling overnight, you’ll have a perfect slice ready to go. You can find more desserts like this in my collection of delicious dessert recipes.
- Why This Brownie Refrigerator Cake Is Your New Go-To Dessert
- Gathering Ingredients for Your Brownie Refrigerator Cake
- Step-by-Step Assembly of the Brownie Refrigerator Cake
- Expert Tips for the Best Brownie Refrigerator Cake
- Storage and Serving This Make Ahead Chilled Cake
- Frequently Asked Questions About This Easy Refrigerator Dessert
- Serving Suggestions for Your Decadent Chocolate Treat
- Nutritional Estimates for This Rich Brownie Pudding Dessert
- Share Your Ultimate Brownie Refrigerator Cake Success
Why This Brownie Refrigerator Cake Is Your New Go-To Dessert
Why do I keep this recipe taped inside my pantry door? Because it checks every box for when life is just too hectic for baking! It’s the kind of dessert that screams decadence but whispers, “I hardly tried.” It’s truly built for the way we live now, balancing indulgence with practicality.
- It requires absolutely zero oven time, which is a huge win in the summer.
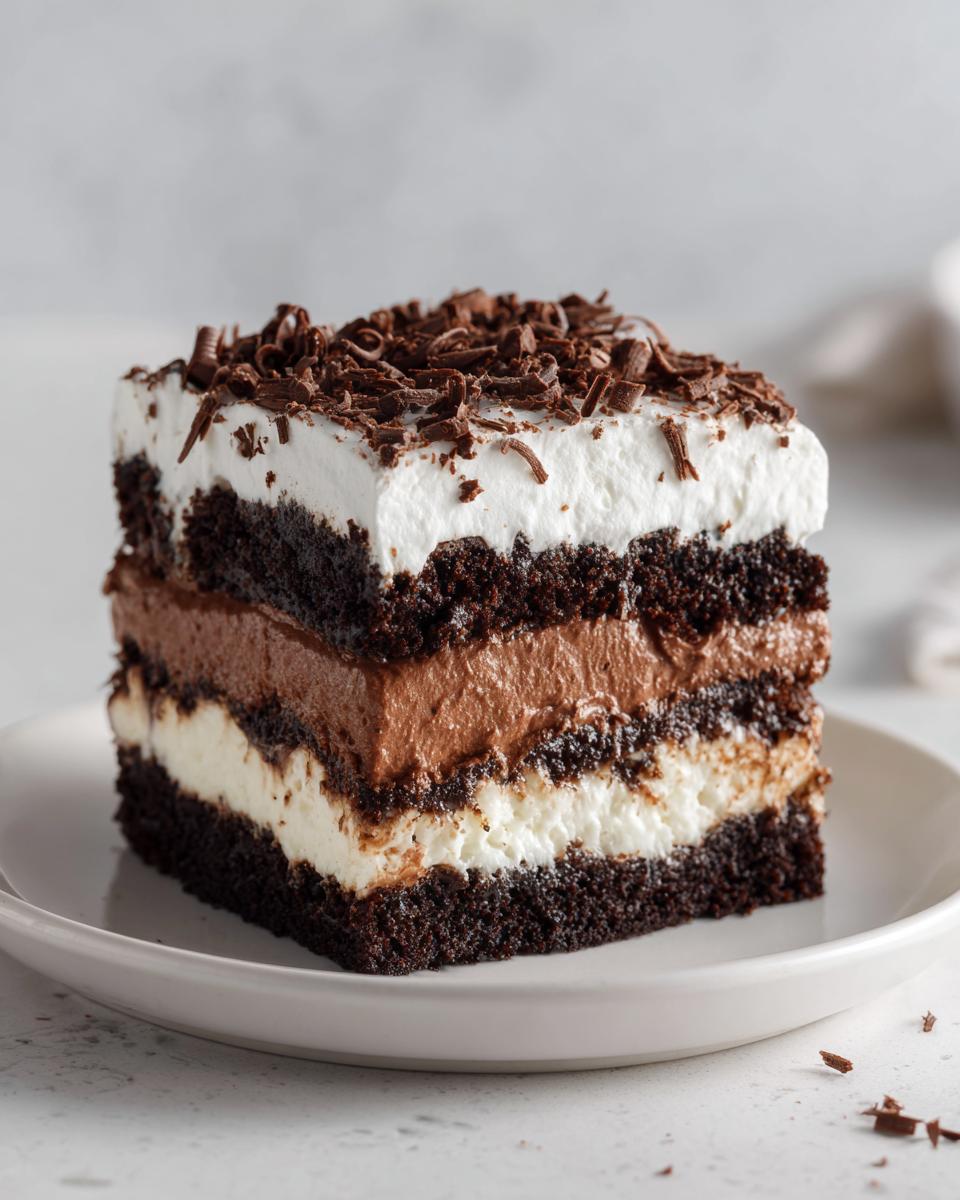
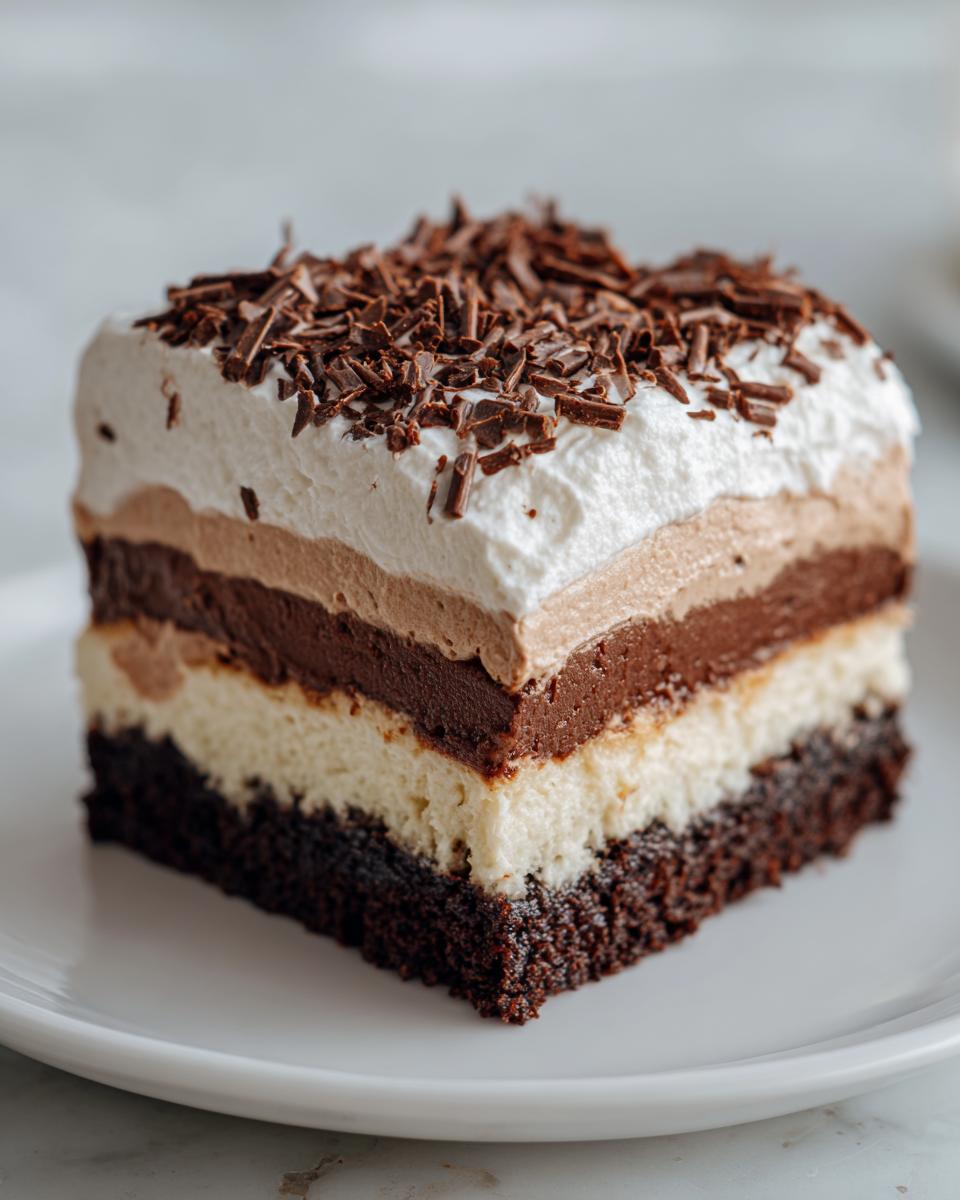
- The layers look stunning when you slice them, making it look gourmet.
- It tastes even better the next day, which is the best kind of planning!
If you’re looking for more recipes that fit seamlessly into your busy life, check out my tips for simple weeknight dinners.
The Ultimate No Bake Brownie Dessert Experience
This is the dream if you’re after a No Oven Dessert Idea. We’re skipping the whole baking process for the main components—we just need those fudgy brownies ready to go. The magic happens entirely in the fridge; that chilling time lets the cream cheese and pudding layers meld beautifully with the chocolate. It firms everything up perfectly so you get that satisfying, dense, yet creamy texture we all crave in a chilled dessert.
Make Ahead Chilled Cake for Stress-Free Entertaining
This is my secret weapon for last-minute invites! Because it needs hours (or ideally overnight) to set up correctly, you can literally assemble the entire brownie refrigerator cake the day before your party. It emerges from the fridge looking absolutely perfect and ready to be sliced. It’s truly a Crowd Pleasing Chocolate Dessert that saves your sanity on entertaining days.
Gathering Ingredients for Your Brownie Refrigerator Cake
Gathering the components for our brownie refrigerator cake is half the fun! Since this is a no-bake assembly job, make sure everything is ready to go before you start cutting those brownie squares. We’re keeping it straightforward with store-bought brownies to save the precious hands-on time. You’ll notice we aren’t making anything from scratch here, which is exactly the point!
For the Fudgy Brownie Base
- 1 (18.25 ounce) package fudge brownie mix (and whatever else the box tells you to add for fudgy brownies—eggs, oil, water, you know the drill!)
For the Cream Cheese Filling
This layer is what gives us that amazing tang to cut through all the chocolate. Make sure your butter and cream cheese are truly softened, or you’ll end up with lumps!
- 1 (8 ounce) package cream cheese, softened
- 1 cup powdered sugar
- 1/2 cup unsalted butter, softened
- 1 teaspoon vanilla extract
For the Rich Brownie Pudding Dessert Layer
This layer turns our dessert into the Rich Brownie Pudding Dessert sensation everyone talks about. Using instant pudding is key because we don’t want to stand over the stove!
- 1 (3.4 ounce) package instant chocolate pudding mix
- 2 cups cold milk
- 1 (8 ounce) container frozen whipped topping, thawed
- 1/4 cup chocolate chips or shavings for garnish
Step-by-Step Assembly of the Brownie Refrigerator Cake
Putting together this brownie refrigerator cake is like building a perfect, edible dream. Since we baked the brownies first, this is all about careful layering and letting the cold do the heavy lifting. Make sure your brownies are absolutely room temperature—warm brownies fighting cold cream cheese? That’s a recipe for a mess, trust me!
Baking and Preparing the Brownie Layers
First things first: bake those brownies according to the package for that fudgy result we love; don’t overbake them! Once they come out of the oven at the 35-minute mark, you have to let them cool completely in that 9×13 pan. Seriously, walk away! Once cooled, you’ll use a knife to cut them into neat squares or rectangles. The goal is to cut enough pieces to cover the bottom of your final 8×8 or 9×9 serving dish snugly. Think of it like Tetris, but way tastier!
Creating the Cream Cheese Filling and Pudding Mix
Now we whip up our no-bake fillings. For the cream cheese layer, beat that softened cream cheese, powdered sugar, butter, and vanilla until it’s totally smooth—no grainy bits allowed! Next up is the pudding. Whisk the instant chocolate pudding mix with the cold milk. You only need to whisk for about two minutes until you see it just start to thicken up. It’s okay if it seems a little loose; it sets more in the fridge later.
Layering Your Chocolate Layered Cake
Time to build this masterpiece! Start by placing your first layer of brownie pieces tightly on the bottom of your dish. Spread half of that beautiful cream cheese mixture evenly over the brownies. Then, gently dollop and spread half of the pudding mix on top of the cream cheese. Add your second row of brownie pieces, followed by the remaining cream cheese, then the remaining pudding. Finally, you’ll gently spread that thawed whipped topping all over the top. You can check out more baking assembly ideas here.
Cover this gorgeous creation tightly with plastic wrap and get it into the refrigerator. Remember, this isn’t a quick fix; this is a Chocolate Layered Cake that needs time to fully meld. You need at least six hours, but trust me, overnight makes this so much easier to slice!
Expert Tips for the Best Brownie Refrigerator Cake
Even though this is a no-fuss recipe, a few little tricks will take your layered dessert from good to absolutely show-stopping. Since we aren’t baking this final assembly, our focus is purely on texture and structure before that long chill. If you want beautiful slices, you’ve got to put the careful planning in now!
Achieving Perfect Layer Definition
If you plan on trying to get super neat slices—and who doesn’t?—you absolutely have to line your final square pan with parchment paper before you start assembling. Let the paper hang over the edges like little handles. This lets you lift the entire chilled cake out when it’s ready, saving you from digging around with a spatula and messing up those clean lines. It makes serving this Easy Refrigerator Dessert so much less messy.
Maximizing Flavor in the Pudding Layer
I know the recipe calls for cold milk for the instant pudding, but if you want to truly enhance that chocolate profile, swap out the regular milk for cold chocolate milk! It adds a depth that you just can’t get otherwise without adding cocoa powder or melting actual chocolate into the mix. If you’re looking for more ways to boost flavor in your desserts, take a peek at my other delicious dessert recipes!
Storage and Serving This Make Ahead Chilled Cake
This is where patience pays off! For the structure of your brownie refrigerator cake to set properly, you need time. I know it’s tempting to sneak a fork in after a couple of hours, but don’t! You must chill it for a minimum of six hours, though I always push for overnight. That solid chill time integrates the layers so they cut beautifully.
Once chilled and set, eat it straight from the fridge! It’s meant to be a cool, satisfying treat. If you have leftovers of this wonderful dessert, just cover your pan tightly with plastic wrap and keep it right where it belongs—in the refrigerator. It stays fantastic for about three to four days!
Frequently Asked Questions About This Easy Refrigerator Dessert
I always get questions when people see this beauty come out of the fridge! It’s a simple recipe, but those little logistical things can trip people up. Here are the most common things I hear about making this Cream Cheese Filling Icebox Cake.
Can I substitute the instant pudding mix?
You certainly can, but you need to watch your liquid amounts! If you use stove-top pudding (the kind you cook on the burner), you’ll need to make sure it cools completely before layering, and you might need to slightly reduce the milk called for on its box, because cooked pudding is generally thicker than the instant kind. If you wanted to swap flavors—maybe butterscotch?—you absolutely can! It just changes the overall profile of this Easy Refrigerator Dessert.
How long does this dessert last in the fridge?
Because we used cream cheese and dairy products, we always want to err on the side of caution. Since this is a Make Ahead Chilled Cake, it’s best eaten within three to four days when stored tightly covered in the refrigerator. If you’re not sure you’ll finish it that fast, it actually freezes really well, too! Just make sure it’s wrapped super tightly in plastic wrap and foil.
What if I don’t have a 9×13 pan for the brownies?
That’s not a problem at all! The key is how you cut the brownie pieces to fit your final 8×8 or 9×9 pan. If you baked your brownies in a smaller pan, say an 8×8, you’ll have more squares, meaning your layers will be thicker. If you baked them in a larger pan, you’ll have skinnier pieces, which might mean your brownie layers end up thinner—that just means you get more creamy filling per bite, which I definitely don’t see as a negative! If you’re whipping up other quick recipes, don’t forget to check out my tips for quick healthy lunch ideas.
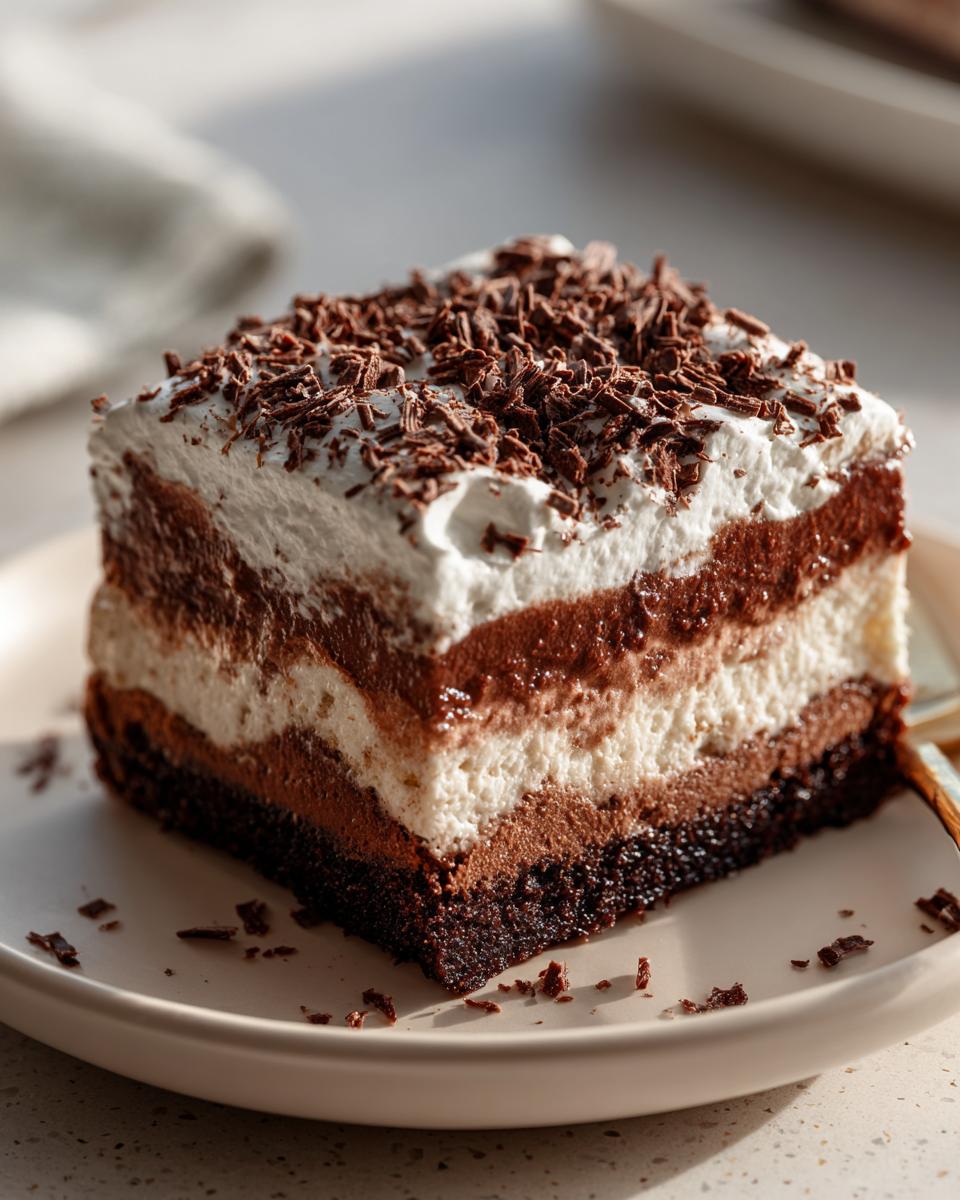
Serving Suggestions for Your Decadent Chocolate Treat
Now that you’ve put in the work to assemble this incredible brownie refrigerator cake, it’s time to think about the presentation! Because this dessert is so rich and decadent on its own, you actually don’t need a lot of fuss, but a little something extra always elevates the experience. I love starting with a very light dusting of high-quality cocoa powder right before serving, just for good looks.
If you want true perfection, serve a slice alongside a strong, hot cup of black coffee—it cuts through that creamy filling beautifully. For a brighter contrast, stack a few fresh raspberries on top; their tartness balances the deep chocolate flavor perfectly. It’s honestly amazing on its own, but these little additions, found in my collection of delicious dessert recipes, take it over the top!
Nutritional Estimates for This Rich Brownie Pudding Dessert
Okay, let’s be real, this is a treat, not a health food! But for those of you who track things (I totally get it, my background in nutrition means I can’t help myself!), here are the rough estimates per slice for this Rich Brownie Pudding Dessert. Remember, since we are using a boxed mix and full-fat ingredients like butter and cream cheese, these numbers reflect an indulgent slice.
These figures should be taken as an estimate, as the exact breakdown depends heavily on the specific brand of brownie mix you choose. It’s designed to be satisfying, decadent, and perfect for those times when you just need that amazing chocolate fix!
- Calories: 450
- Fat: 25g
- Carbohydrates: 55g
- Protein: 5g
Share Your Ultimate Brownie Refrigerator Cake Success
I truly hope you love making this brownie refrigerator cake as much as I do! Once you’ve let it chill and served up those perfect, creamy slices, I’d love to hear all about it. Please leave a rating and tell me in the comments how this easy refrigerator dessert held up at your gathering!
If you snap a picture, tag me! Connecting with you over satisfying food is why I do this. Need to get in touch about substitutions or ideas? Head over to my contact page. Happy layering!
PrintUltimate No-Bake Fudgy Brownie Refrigerator Cake with Cream Cheese & Chocolate Pudding Layers
Make this decadent Brownie Refrigerator Cake, a rich, no-bake dessert perfect for parties or make-ahead preparation. It features fudgy brownie layers alternating with creamy fillings, setting perfectly after chilling in the refrigerator.
- Prep Time: 30 min
- Cook Time: 35 min
- Total Time: 7 hours 5 minutes
- Yield: 9 servings 1x
- Category: Dessert
- Method: No-Bake/Chilling
- Cuisine: American
- Diet: Vegetarian
Ingredients
- 1 (18.25 ounce) package fudge brownie mix (plus ingredients listed on box for fudgy brownies)
- 1 (8 ounce) package cream cheese, softened
- 1 cup powdered sugar
- 1/2 cup unsalted butter, softened
- 1 teaspoon vanilla extract
- 1 (3.4 ounce) package instant chocolate pudding mix
- 2 cups cold milk
- 1 (8 ounce) container frozen whipped topping, thawed
- 1/4 cup chocolate chips or shavings for garnish
Instructions
- Prepare the brownies according to the package directions for a fudgy result. Bake in a 9×13 inch pan. Let the brownies cool completely in the pan.
- Once cool, cut the brownies into uniform squares or rectangles that will fit snugly in the bottom of an 8×8 inch or 9×9 inch square pan, depending on how thick you want the layers. Set aside.
- Prepare the cream cheese layer: In a medium bowl, beat the softened cream cheese, powdered sugar, softened butter, and vanilla extract until smooth and creamy. Set aside.
- Prepare the chocolate pudding layer: Whisk the instant chocolate pudding mix with the cold milk for about two minutes until it begins to thicken. Let it stand for five minutes.
- Assemble the cake in the serving dish (you can line it with parchment paper for easy removal, or assemble directly in the dish). Place a single layer of brownie pieces on the bottom.
- Spread half of the cream cheese mixture evenly over the brownie layer.
- Top the cream cheese layer with half of the prepared chocolate pudding.
- Add a second layer of brownie pieces over the pudding.
- Spread the remaining cream cheese mixture over the second brownie layer.
- Top with the remaining chocolate pudding.
- Spread the thawed whipped topping evenly over the pudding layer.
- Sprinkle the top with chocolate chips or shavings.
- Cover the pan tightly with plastic wrap and refrigerate for at least 6 hours, or preferably overnight, to allow the layers to set firmly.
- Slice and serve this crowd-pleasing chocolate dessert cold.
Notes
- For an easier assembly, you can bake the brownies in a slightly larger pan and cut them into strips to line the bottom and middle layers, rather than squares.
- If you prefer a stronger chocolate flavor, use chocolate milk instead of regular milk when preparing the pudding mix.
- This make-ahead chilled cake tastes best when it has set for a full 8 hours in the refrigerator.
Nutrition
- Serving Size: 1 slice
- Calories: 450
- Sugar: 45g
- Sodium: 250mg
- Fat: 25g
- Saturated Fat: 14g
- Unsaturated Fat: 11g
- Trans Fat: 0.5g
- Carbohydrates: 55g
- Fiber: 2g
- Protein: 5g
- Cholesterol: 55mg