
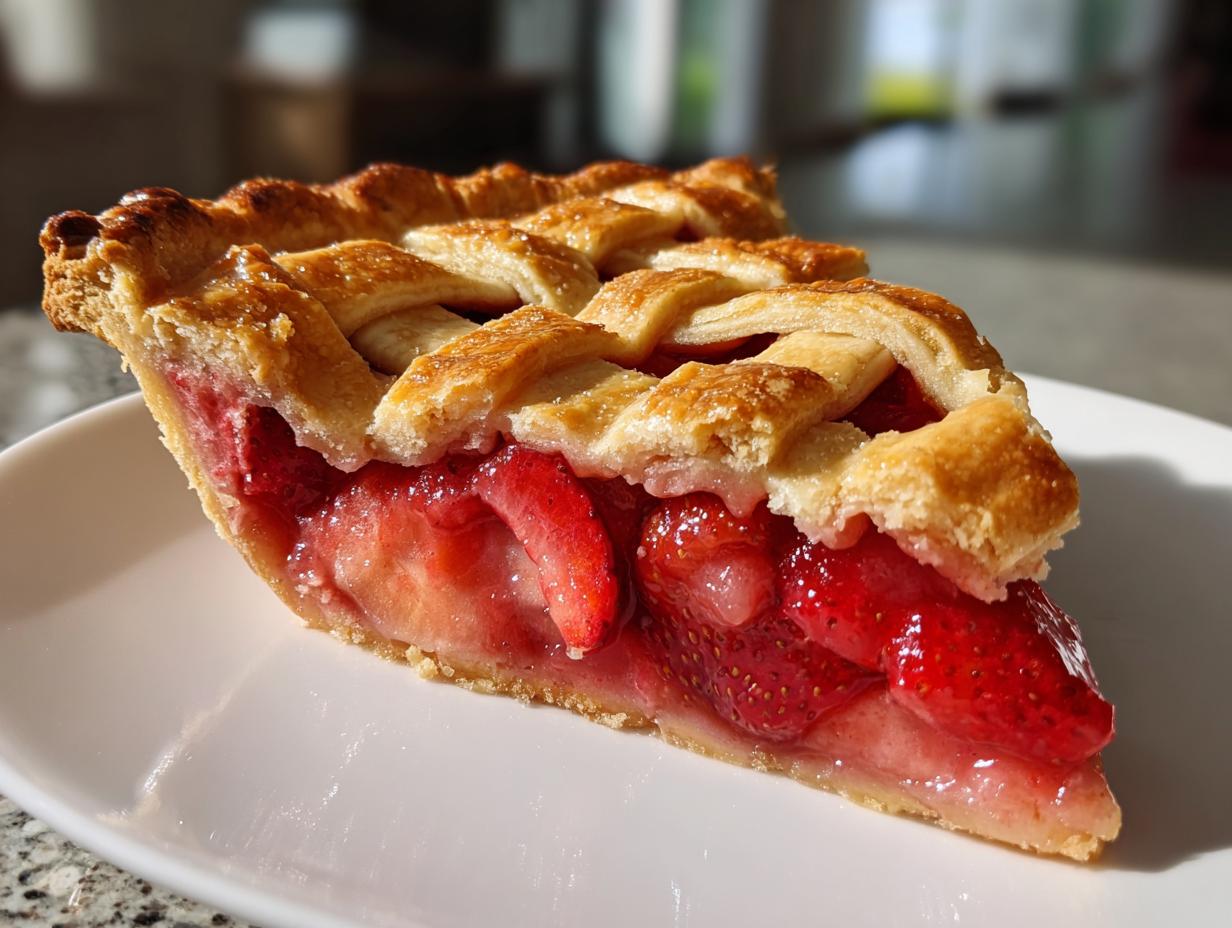
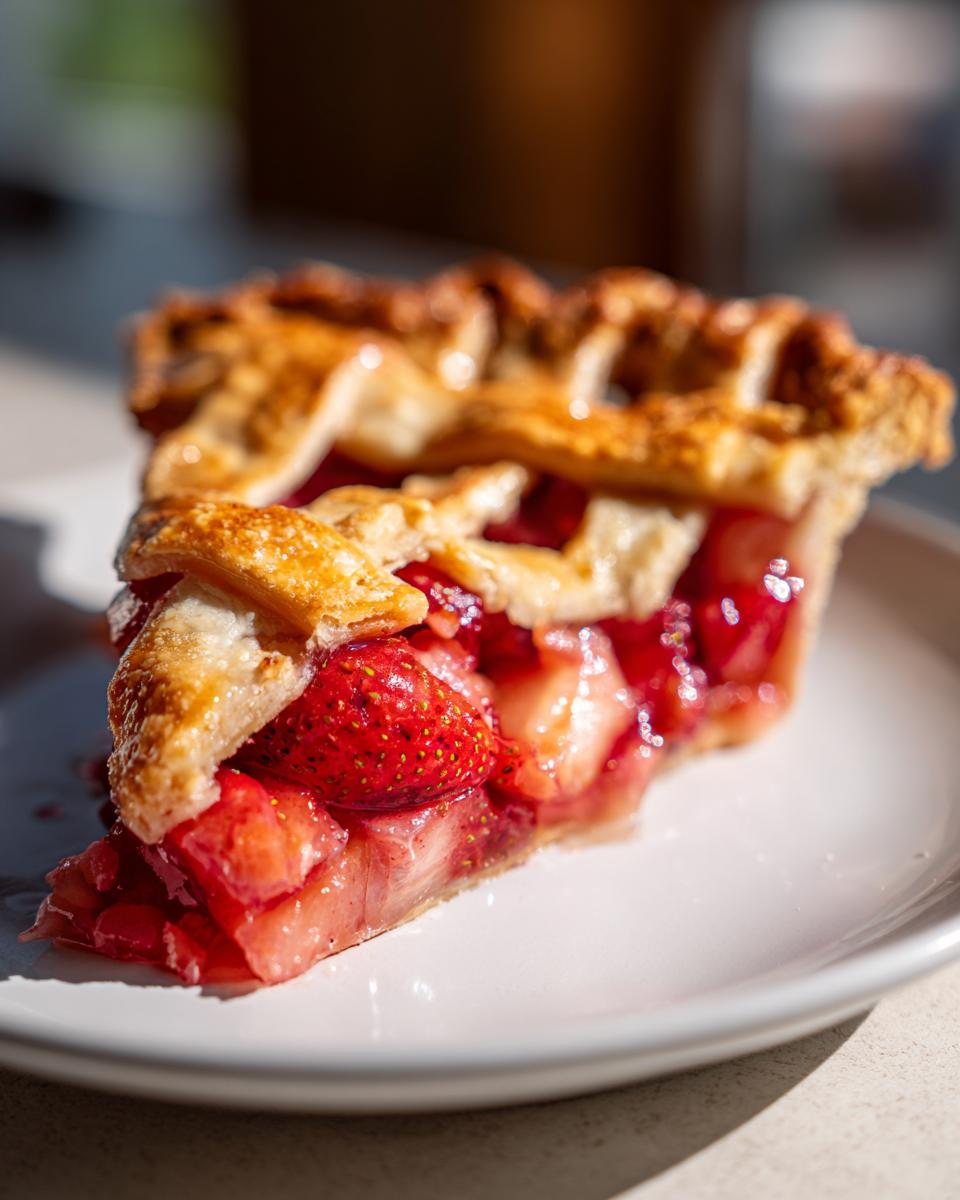
Oh, there is nothing that screams summer joy quite like pulling a fruit pie out of the oven! When those seasonal flavors hit their peak, you just have to celebrate with a slice of something truly special. I’m Maya, and when I develop a recipe, I think about what my grandmother taught me about comfort mixed with the smart, practical approach I use now. That’s how we land here, with what I truly believe is The Absolute Best strawberry rhubarb pie with Flaky Lattice Crust. It nails that perfect sweet and tart balance, which is the whole game for this classic dessert. If you’re looking for homemade satisfaction that nourishes the soul, you’ve found it. You can find more of my keepers for satisfying treats over in my collection of delicious dessert recipes!
- Why This Strawberry Rhubarb Pie Recipe Stands Out
- Ingredients for the Absolute Best Strawberry Rhubarb Pie
- How to Make Strawberry Rhubarb Pie From Scratch
- Tips for Making the Best Strawberry Rhubarb Pie
- Serving Suggestions for Your Classic Rhubarb Dessert
- Storage and Reheating Instructions for Strawberry Rhubarb Pie
- Frequently Asked Questions About Making Strawberry Rhubarb Pie
- Estimated Nutritional Data for This Strawberry Rhubarb Pie
- Share Your Homemade Rhubarb Pie Creations
Why This Strawberry Rhubarb Pie Recipe Stands Out
I know everyone claims they have the absolute best version, but hear me out on why this particular strawberry rhubarb pie recipe genuinely shines. For me, it comes down to making sure we respect both the fruit and the pastry. This isn’t some fussy gourmet item; it’s achievable for everyone, which is why I think it might become the best rhubarb pie you’ve ever made.
- The filling is gorgeous—never runny or watery.
- The crust? Oh my goodness, it shatters perfectly!
- It balances that famous tart rhubarb so well against the sweetness.
Achieving the Perfect Sweet and Tart Pie Filling
The secret to that sweet and tart pie filling that doesn’t leak all over your oven is the cornstarch. We use a generous amount to grab all the juice the strawberries and rhubarb release. Letting them sit together for 15 minutes before mixing in the starch helps draw out some of that liquid upfront. It’s an easy step, but it prevents that sad, soupy mess you sometimes get.
Flaky Pie Crust Tutorial: Tips for Success
When it comes to the pastry, you absolutely must keep things cold! This is the core of my flaky pie crust tutorial. If your butter melts even a little before it hits the oven, you end up with tough pastry instead of flaky layers. We want small, visible chunks of butter in there—those melt during the bake and create the steam pocket responsible for that beautiful flakiness. Don’t overwork it; that’s rule number one!
Ingredients for the Absolute Best Strawberry Rhubarb Pie
Okay, let’s talk about what goes into this amazing spring dessert. When you’re working with peak-season fruit, you don’t need a million fancy things—you just need quality basics handled correctly. I’ve broken this down into the two main components: the incredible dough and the star, the fruit filling. Remember, if your base ingredients are good, your final strawberry rhubarb pie will sing!
For the Flaky Pie Dough
This is where keeping things cold really matters. I mean *ice* cold! Seriously, stick your butter back in the freezer for five minutes while you measure the flour if you have to. These amounts make enough for a full double crust, which you need for the lattice or whatever topping you choose.
- 2 1/2 cups all-purpose flour (You gotta bake from scratch for this flavor!)
- 1 teaspoon salt
- 1 cup (2 sticks) cold unsalted butter, cut into cubes (the colder, the flakier!)
- 1/2 cup ice water, plus more if needed (Use actual ice water!)
For the Sweet and Tart Pie Filling
This mix is all about balancing the sweetness of the berries with the pure tang of the rhubarb stalks. I always taste my mixture before pouring it in—if your rhubarb is exceptionally sour that week, don’t be afraid to add an extra tablespoon or two of granulated sugar. That’s what makes this the ultimate sweet and tart pie filling.
- 6 cups fresh rhubarb, cut into 1-inch pieces (Chop them nice and chunky!)
- 4 cups fresh strawberries, hulled and halved
- 1 3/4 cups granulated sugar (Adjust this based on your fruit!)
- 1/2 cup packed light brown sugar
- 1/2 cup cornstarch (This is your thickening hero!)
- 1 tablespoon lemon juice (Just a little brightness helps!)
- 1 teaspoon vanilla extract
- 1 large egg, beaten (For brushing the top for a golden finish)
- 1 tablespoon coarse sugar (For sprinkling on top—hello, crunch!)
How to Make Strawberry Rhubarb Pie From Scratch
Alright, folks, time to put on our aprons! Making this absolute showstopper of a strawberry rhubarb pie doesn’t have to be intimidating. We are taking it slow, step-by-step, to ensure that classic fruit pie flavor without any kitchen drama. Just like any good foundation, whether it’s pastry or even getting a starter going like I do over here with sourdough starter, technique is everything. Follow these instructions exactly, and you will end up with a beautiful, bubbly, homemade dessert! Remember to be precise, almost like when you’re waiting for that sugar cookie icing to set hard—timing matters!
Chilling and Preparing the Strawberry Rhubarb Pie Dough
First thing’s first: that dough needs to rest! After you cut the cold butter into your flour and salt, dribble in just enough ice water until the dough barely holds together. Don’t squish it into a tight ball; just lightly bring it together. Divide it into two flat disks, wrap them tight, and put them in the fridge for at least one hour—honestly, two or three is even better if you can manage it. Cold dough equals those lovely, airy pockets in your finished crust.
Mixing the Juicy Fruit Pie Filling
While that dough is chilling, get your fruit going. Combine the rhubarb and strawberries in a big bowl. In a separate little dish, whisk your sugars and cornstarch together really well. The cornstarch is vital for grabbing all the liquid from this very juicy fruit pie, so make sure there are no clumps before you dump it over the fruit! Add your lemon juice and vanilla, toss gently, and let it sit for a quarter-hour. This short soak is key.
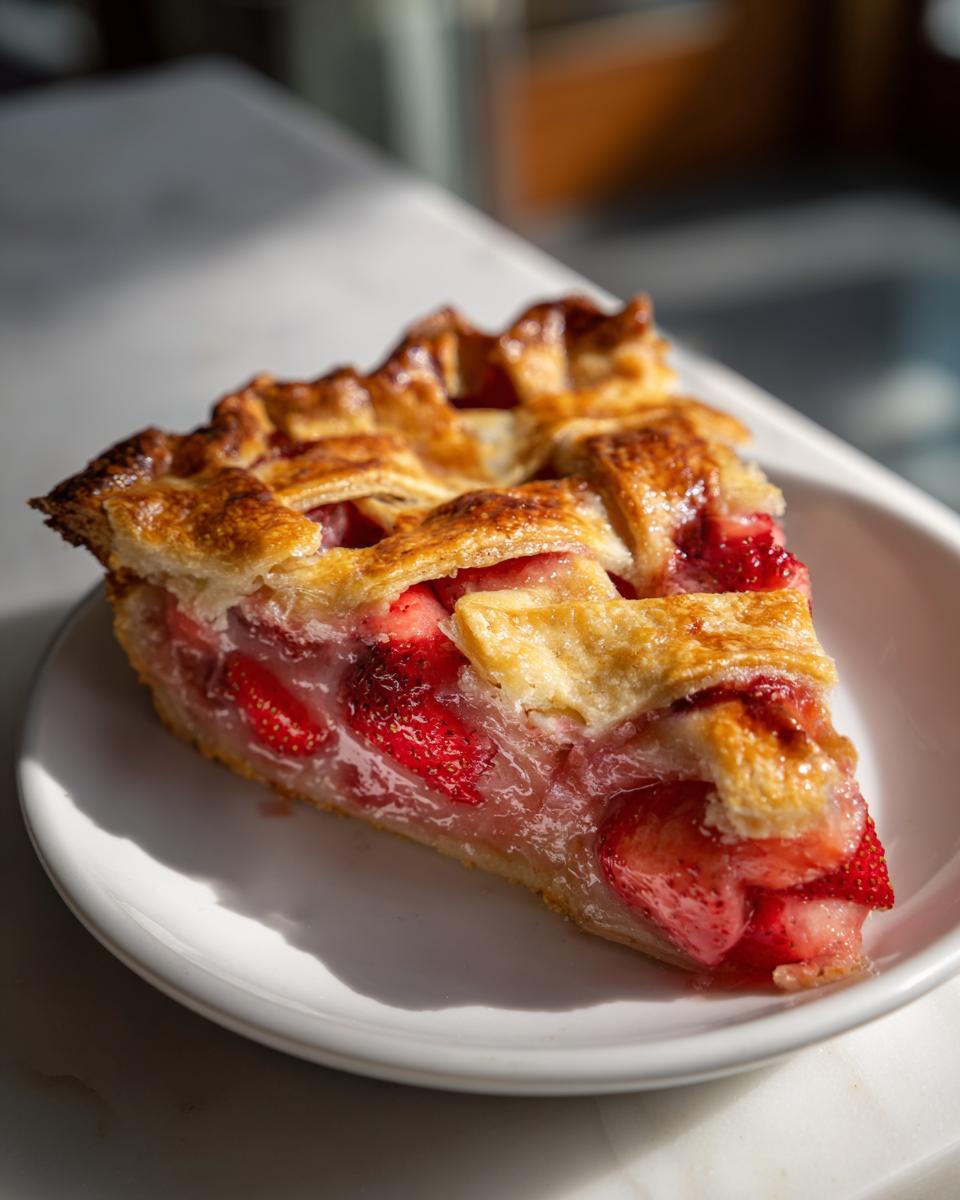
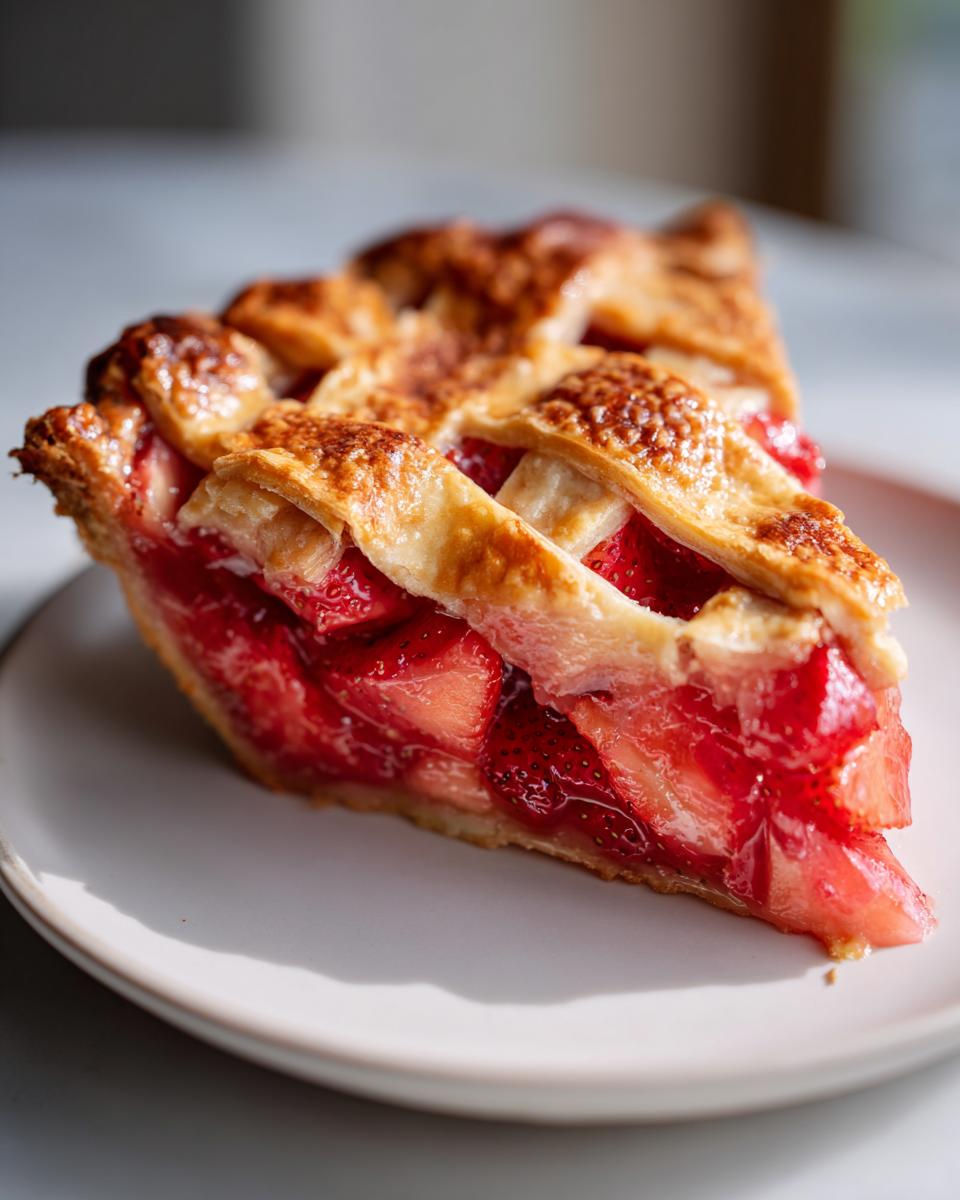
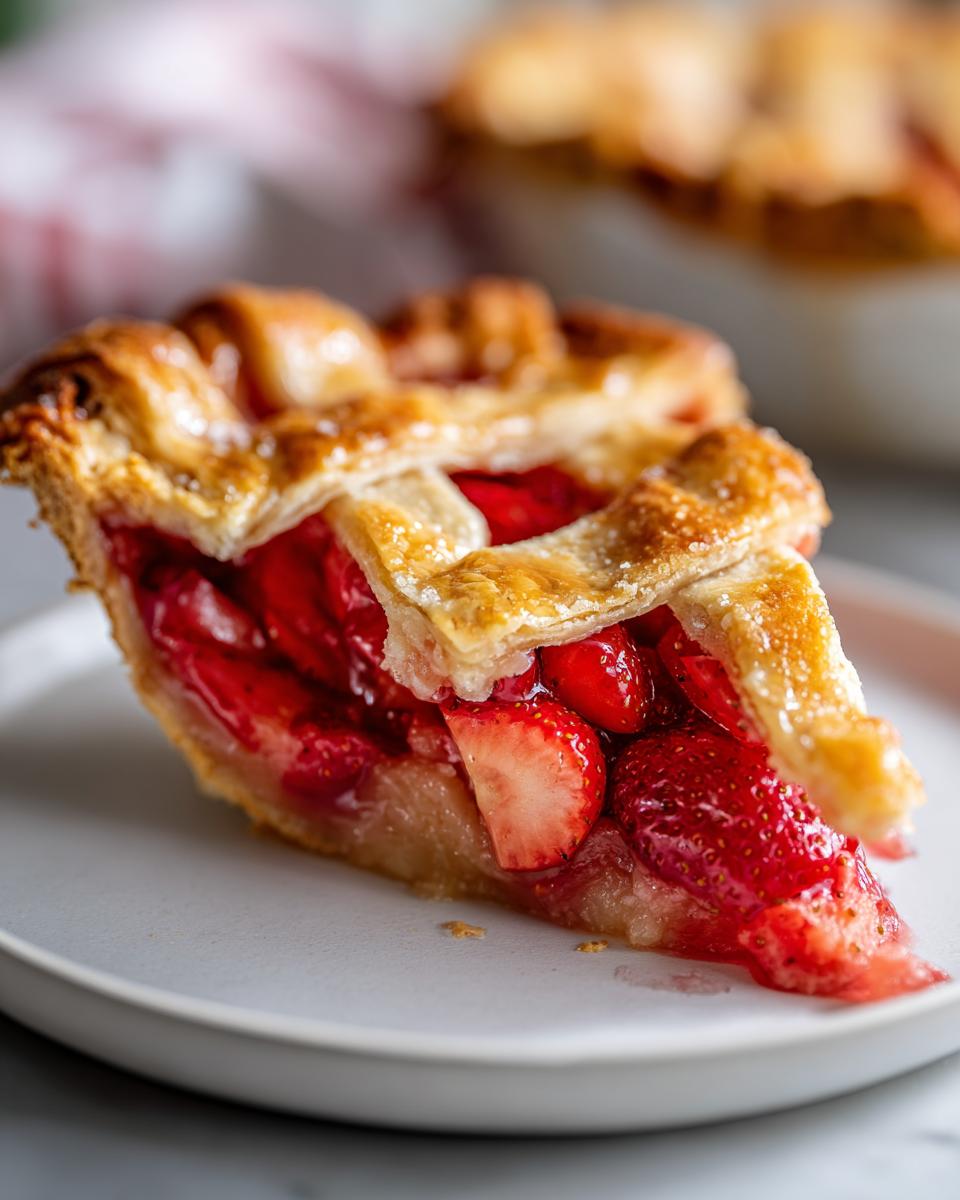
Assembling the Lattice Pie Design
Take one chilled disk and roll it out large enough for your pie plate. Ease it in gently; remember some of that overhang for sealing later. Now for the fun part: the lattice pie design! Roll out the second piece and cut even strips—aim for about 3/4 inch wide. Weave them over the top of the fruit filling. When you’re done, trim everything, fold the overhang over, and crimp those edges beautifully. Don’t forget to brush the whole top with egg wash and sprinkle on that coarse sugar for sparkle.
Baking and Cooling the Homemade Rhubarb Pie
Start high! Set your oven to 400°F. Bake for 20 minutes until the crust starts setting nicely. Then, drop the heat down to 375°F for another 40 to 50 minutes, or until you see that filling bubbling nicely. For reference, check out how the folks over at The Kitchn handle their bake times! This is the most important part for a homemade rhubarb pie success: Once it’s out, walk away! It needs a full four hours on a cooling rack. If you slice it hot, that gorgeous filling you thickened with cornstarch will run out. Patience truly pays off here!
Tips for Making the Best Strawberry Rhubarb Pie
Honestly, perfecting this strawberry rhubarb pie is all about leaning into the little secrets that make every bite taste like summer picnic perfection. I’ve gathered the best wisdom from my own messy baking adventures to help you nail it on your first try. Trust me, taking these small extra steps elevates your pie game instantly!
Ingredient Notes and Substitutions for Your Strawberry Rhubarb Pie
One big question I always get is about toppings. If weaving a lattice feels like too much gymnastics on a busy day, you can absolutely swap it out! Instead of the top crust strips, you can make a simple streusel or crumb topping using some oats, flour, sugar, and cold butter. Mix that with your fingers until you get lovely little crumbles to scatter over the fruit.
Also, what if you can’t find fresh rhubarb? Don’t panic! If you use frozen fruit instead, make sure you don’t thaw it first—just toss it right from the freezer into the sugar mixture. You will likely need to add about 10 to 15 extra minutes to the total baking time to make sure the center gets hot enough to set. You can read more about some of my other quick baking fixes for when time is tight, like for cookies, right here!
For more award-winning inspiration on flavor combinations, you should check out what the experts are doing over at House of Nash Eats!
Serving Suggestions for Your Classic Rhubarb Dessert
We did the hard work, we baked the beautiful, bubbly, golden pie—now we get to eat it! This classic rhubarb dessert is honestly incredible all by itself, but I think every slice deserves a little something extra on the side. It’s all about contrast, right? Something creamy to cut through that vibrant tartness is just heavenly.
My number one choice, without fail, is vanilla ice cream. That cold, rich sweetness melting slowly over the warm, slightly spiced fruit is just pure magic. If you want something a bit lighter, a lightly sweetened dollop of homemade whipped cream adds a lovely, airy texture that contrasts beautifully with the flaky crust.
But hey, if you’re hosting and want to impress people beyond dessert, I’ve got a great little palate cleanser that matches that sweet-and-tart vibe perfectly. You should take a peek at my recipe for a lemon drop martini; it’s a fantastic little sip to enjoy before or after serving the pie!
Pro tip for presentation: If you’re serving slices immediately after they cool down a bit (maybe 2 hours instead of waiting the full 4), those warm slices absolutely require that melting ice cream coating. If you are serving it the next day, just warm those slices slightly in the oven for five minutes, and then add your topping!
Storage and Reheating Instructions for Strawberry Rhubarb Pie
You’ve made it! You survived the bake, you waited the agonizing four hours for it to set (I hope!), and now you have gorgeous leftovers. Storing your strawberry rhubarb pie correctly is crucial so that next day’s slice is just as good as the first. Remember, because we used a good amount of starch and sugar, it’s fairly stable, but we want to protect that delicate crust!
For general storage, you can actually leave the pie on the counter, loosely tented with foil or plastic wrap, for a day or maybe two. Keep it away from any direct sunlight or drafts. Since the filling has a lot of fruit sugar, it’s pretty safe sitting out, but if your kitchen runs hot, or if you made this during a humid summer week, go ahead and put it in the fridge. Covering it tightly helps prevent the crust from getting soggy in the fridge environment.
If you decide to chill it, just know that the crust might lose a tiny bit of that fresh-from-the-oven crunch. Don’t worry! We can fix that right up when reheating. I always recommend reheating individual slices rather than the whole pie if you can. Pop a slice onto a baking sheet—not the microwave, please!—at about 325°F for about 10 to 15 minutes until it’s warmed through. This gentle heat dries the bottom crust out just enough to bring back some of that flaky texture.
For the best advice on handling fruit pies after they cool, I always check out the tips shared at All Quick Easy Recipes. They really get into the nitty-gritty of preserving that perfect texture!
Frequently Asked Questions About Making Strawberry Rhubarb Pie
I love getting your questions! Baking is always a learning process, and honestly, sometimes the things that seem obvious to me—like exactly how long to cool a pie—aren’t always clear to everyone else. That’s why I think having this little FAQ section is so helpful for anyone wanting to tackle this homemade rhubarb pie!
How can I prevent my strawberry rhubarb pie filling from being too runny?
This is probably the number one question I get for any fruit pie, and with rhubarb, it’s super important because it releases so much liquid! The main defense is that half-cup of cornstarch we mix right in with the sugar. Make sure you whisk that starch thoroughly so it’s perfectly distributed before adding it to the fruit. But really, the *biggest* defense is the cooling time. Seriously, you must let this pie cool on a rack for a full four hours. If you slice it early, all that effort you put into thickening the sweet and tart pie filling just leaks away. Be patient!
Can I use frozen fruit instead of fresh for this strawberry rhubarb pie recipe?
Yes, absolutely you can, especially if you’re craving pie outside of peak season! Just remember what I mentioned earlier in the tips section: do not thaw the fruit first! Dump the frozen rhubarb and strawberries right into the bowl with the sugar and starch. Because the frozen fruit releases more water as it heats up, you might notice the filling seems a bit looser, so adding that extra 10 to 15 minutes to the baking time is usually necessary to get it fully thickened and bubbly. It’s a great way to bring summer flavors to your table anytime!
What makes this pie a great choice for seasonal spring desserts?
This is the perfect seasonal spring dessert because it captures the exact moment when those two incredible ingredients hit their prime! Rhubarb comes up first, offering that bracing tartness, and right behind it are the sweet, fragrant early strawberries. Making this pie right when they are both available is just the best way to welcome warmer weather and celebrate flavor. It’s traditional, it’s bright, and it reminds everyone that spring has truly arrived!
If you’re looking for other easy meals to balance out all the baking you’re going to be doing, you can check out my simple chicken and rice casserole for a weeknight win. Happy baking!
Estimated Nutritional Data for This Strawberry Rhubarb Pie
Now, I know what you’re thinking! You’re looking at this gorgeous, flaky, buttery slice of heaven and wondering if you should feel guilty. Resist that thought! Food is meant to be enjoyed, and this pie is part of that soulful connection we talk about here at MayaPlate. While this recipe is all about flavor and tradition, I always like to give you a rough idea of what you are working with nutritionally.
Keep in mind that because everyone’s rhubarb and strawberries pack a slightly different punch, and we all use slightly different amounts of butter in the crust, these numbers are just good estimates. They are based on an 8-serving yield. Think of this as guidance, not gospel!
- Serving Size: 1 slice
- Calories: 410
- Sugar: 35g (Yes, it’s a treat!)
- Sodium: 280mg
- Fat: 22g
- Saturated Fat: 14g (That’s the butter working its magic!)
- Carbohydrates: 52g
- Protein: 5g
This is definitely a dessert meant for sharing and savoring! We focused on making the best rhubarb pie in terms of flavor, and that means enjoying it without worrying too much about the exact breakdown. That flaky crust and vibrant filling are part of the joy of baking!
Share Your Homemade Rhubarb Pie Creations
Whew! We made it through the dough-chilling, the lattice-weaving, and the long, agonizing wait for that pie to set. Now comes the best part—seeing your gorgeous creations! When I develop a recipe like this strawberry rhubarb pie, it’s not really finished until I know it’s made it to someone else’s table and brought a little moment of joy.
I absolutely want to hear how it went for you! Did your lattice turn out perfectly? Did you manage to resist slicing it for the full four hours? Don’t be shy! Head down to the comments below and let me know how you found the sweet and tart balance. Leaving a rating helps other bakers feel confident enough to tackle this classic fruit dessert, too.
If you snap a picture of your golden-brown beauty—maybe sitting next to a scoop of vanilla ice cream—please tag us on social media! Seeing your pies really means the world to me, Maya, and it keeps that tradition of soulful, delicious home-baking alive. If you have any last-minute questions that popped up while you were baking, feel free to send them over via the contact page. Happy baking, everyone!
PrintThe Absolute Best Strawberry Rhubarb Pie with Flaky Lattice Crust

Make the perfect sweet and tart strawberry rhubarb pie featuring a golden, flaky lattice crust. This classic summer fruit pie recipe balances the tang of rhubarb with sweet strawberries for a satisfying homemade dessert.
- Prep Time: 45 min
- Cook Time: 65 min
- Total Time: 110 min
- Yield: 8 servings 1x
- Category: Dessert
- Method: Baking
- Cuisine: American
- Diet: Vegetarian
Ingredients
- 2 1/2 cups all-purpose flour
- 1 teaspoon salt
- 1 cup (2 sticks) cold unsalted butter, cut into cubes
- 1/2 cup ice water, plus more if needed
- 6 cups fresh rhubarb, cut into 1-inch pieces
- 4 cups fresh strawberries, hulled and halved
- 1 3/4 cups granulated sugar (adjust based on fruit tartness)
- 1/2 cup packed light brown sugar
- 1/2 cup cornstarch
- 1 tablespoon lemon juice
- 1 teaspoon vanilla extract
- 1 large egg, beaten (for egg wash)
- 1 tablespoon coarse sugar (for sprinkling)
Instructions
- Prepare the Pie Dough: In a large bowl, whisk together the flour and salt. Cut in the cold butter using a pastry blender or your fingers until the mixture resembles coarse crumbs with some pea-sized pieces of butter remaining. Gradually add the ice water, one tablespoon at a time, mixing until the dough just comes together. Divide the dough in half, flatten each half into a disk, wrap in plastic, and chill for at least 1 hour.
- Prepare the Filling: In a large bowl, combine the cut rhubarb and strawberries. In a separate small bowl, whisk together the granulated sugar, brown sugar, and cornstarch. Pour the sugar mixture and lemon juice over the fruit. Gently toss to coat. Stir in the vanilla extract. Let the filling sit for 15 minutes while you roll out the dough.
- Assemble the Bottom Crust: On a lightly floured surface, roll out one disk of dough into a 12-inch circle. Carefully transfer the dough to a 9-inch pie plate. Trim the edges, leaving a 1-inch overhang. Chill the crust while you prepare the topping.
- Create the Lattice Top: Roll out the second disk of dough. Cut the dough into even strips, about 3/4 inch wide. Weave the strips over the filling to create a lattice design. Trim the strips and crimp the top and bottom crust edges together to seal.
- Bake the Pie: Preheat your oven to 400°F (200°C). Brush the lattice crust lightly with the beaten egg wash and sprinkle with coarse sugar. Place the pie on a baking sheet to catch any drips.
- Bake for 20 minutes at 400°F. Reduce the oven temperature to 375°F (190°C). Continue baking for another 40 to 50 minutes, or until the crust is golden brown and the filling is thick and bubbly. If the edges brown too quickly, cover them loosely with foil.
- Cool Completely: Transfer the pie to a wire rack. You must let the pie cool for at least 4 hours before slicing. This cooling time allows the filling to set properly, preventing a runny pie.
Notes
- To achieve a truly flaky pie crust, keep your butter and water as cold as possible throughout the mixing process.
- If you prefer a different topping, substitute the lattice strips with a simple streusel or crumb topping made from flour, sugar, oats, and cold butter.
- If using frozen fruit, do not thaw them first, but you may need to increase the cornstarch slightly and add 10-15 minutes to the total baking time.
Nutrition
- Serving Size: 1 slice
- Calories: 410
- Sugar: 35g
- Sodium: 280mg
- Fat: 22g
- Saturated Fat: 14g
- Unsaturated Fat: 8g
- Trans Fat: 0.5g
- Carbohydrates: 52g
- Fiber: 3g
- Protein: 5g
- Cholesterol: 55mg