
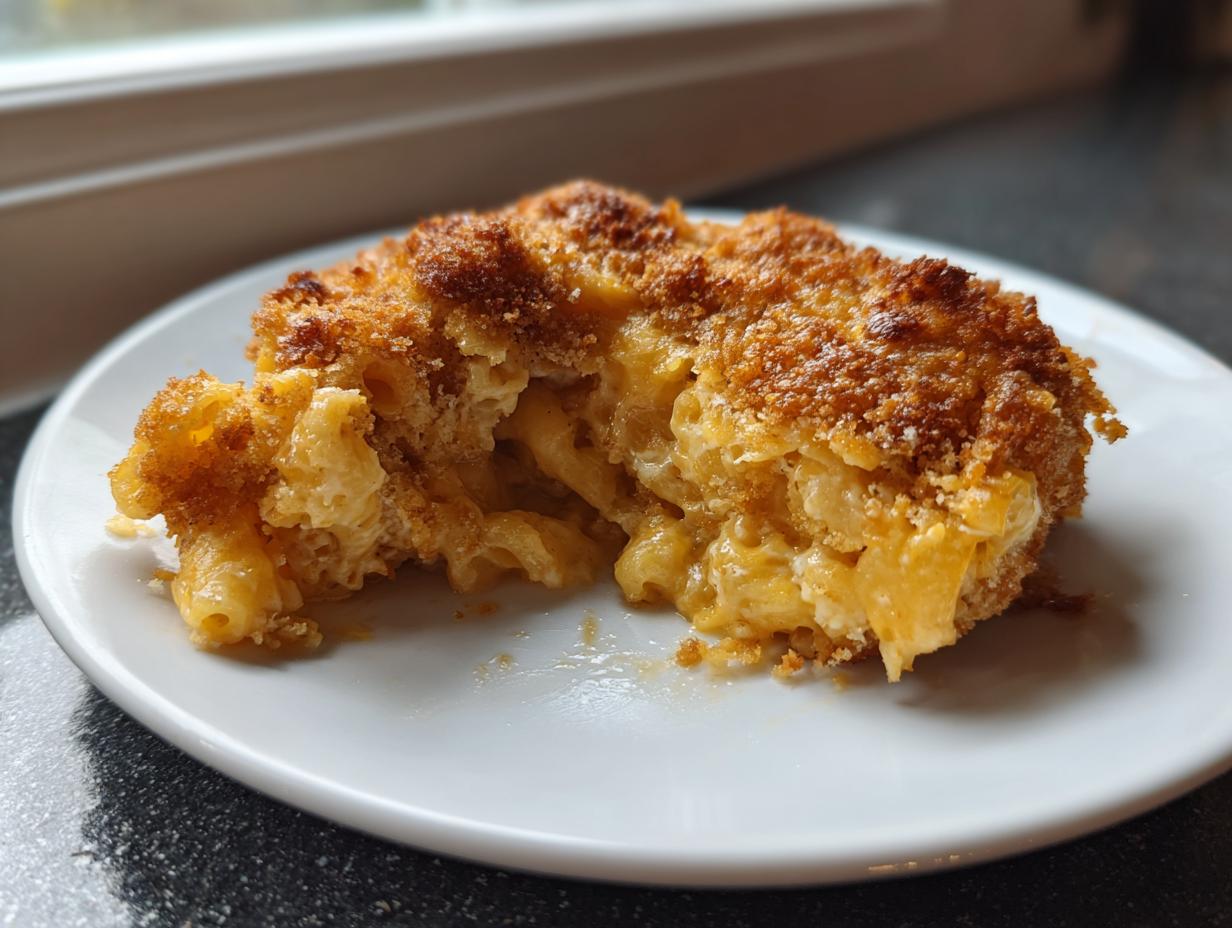
When the world feels a little bit hectic, you need that one dish that wraps you up in a warm hug, right? For me, that’s always been a ridiculously good bowl of baked mac and cheese. My grandmother, way back in the Midwest, didn’t use fancy names, but her casseroles were pure magic; they were the heart of every gathering. That’s the feeling I chased when developing this recipe—I wanted the absolute best. Forget those dry, sad skillet versions! This is truly The Ultimate Creamy Baked Mac and Cheese, designed to stay velvety soft underneath that perfect golden crust.
I spent years testing so you don’t have to worry about grainy sauce or stiff pasta. Coming from a nutrition background, I learned that ‘comforting’ doesn’t have to mean ‘heavy’ or ‘unbalanced,’ but for this dish? We are leaning into richness, my friends, just like in my easy stovetop creamy cheesy rice recipe. We’re using real butter, whole milk, and layers of sharp cheese to give you that gourmet comfort food pasta experience every single time you pull it out of the oven.
- Why This is the Ultimate Baked Mac and Cheese Recipe
- Ingredients for Your Creamy Baked Mac and Cheese
- Step-by-Step Instructions for Perfect Baked Mac and Cheese
- Tips for the Best Ever Baked Mac and Cheese
- Serving Suggestions for Your Indulgent Side Dish Recipe
- Storage and Reheating Instructions for Baked Mac and Cheese
- Frequently Asked Questions About Creamy Baked Macaroni and Cheese
- Nutritional Estimates for This Homemade Cheesy Casserole Recipe
- Share Your Ultimate Baked Mac and Cheese Success
Why This is the Ultimate Baked Mac and Cheese Recipe
Look, I know the struggle. You bake what should be the best ever baked mac and cheese, and when you serve it, it’s either stiff cardboard or, worse, that grainy sauce that makes you sigh dramatically. That’s why this recipe works—it’s built like a proper kitchen classic! We start with a real roux base, which is non-negotiable for a sauce that behaves itself. Plus, we’re using a trio of cheeses, not just one sad block. This combination prevents that dreaded dryness and gives you a sauce that actually coats every single noodle perfectly. Trust me, this is the blueprint for no dry baked mac and cheese.
This method delivers that decadent experience, making it the ultimate baked mac and cheese recipe you’ll keep coming back to. We layer richness upon richness, but we keep the technique simple so you spend less time worrying and more time eating! I even have a great creamy tortellini soup recipe for those nights when you think you don’t have time for rich food, but trust me, you *always* have time for this one.
Achieving Velvety Creamy Baked Mac and Cheese Texture
The secret to that velvety texture you dream about is all in the roux—fat plus flour cooked just right! You have to cook that paste for a full minute so it tastes nutty, not raw. Then, pour the warm milk in slowly while whisking like you mean it. This gentle incorporation stops lumps before they even start forming. If you’re rushing here, you’re going to get graininess later. We want luxurious, silky smooth blankets of cheese sauce, and that takes patience with the milk.
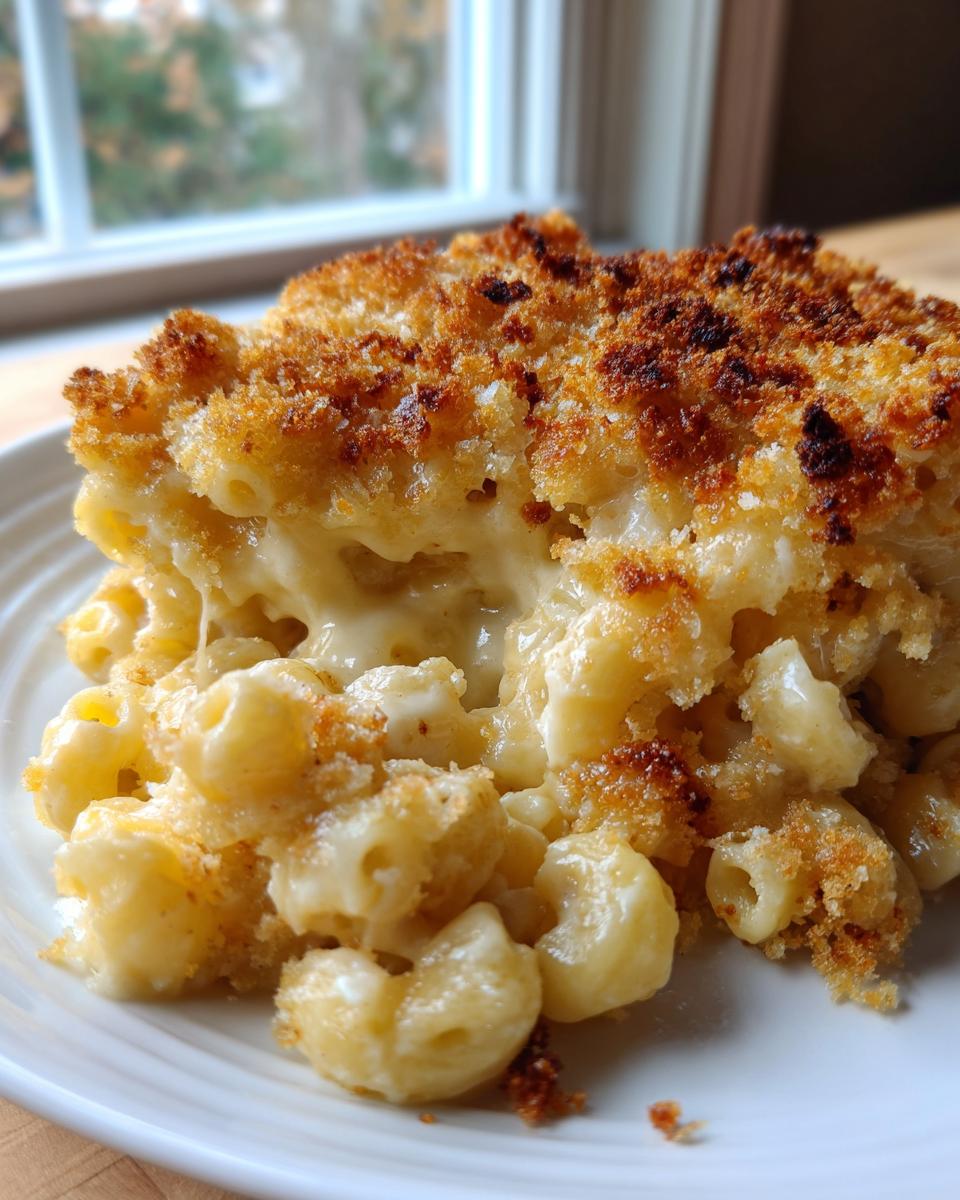
The Secret to a Golden Brown Mac and Cheese Crust
Now, for the best part that offers that amazing contrast: the crunch! We skip stale breadcrumbs and go straight for Panko. Why? Because Panko stays lighter and shatters beautifully when you cut into it. I toss mine with just a tiny bit of melted butter to help it toast up perfectly golden brown. That crisp baked mac and cheese crust cracking under your fork? That signals you nailed it. It’s the perfect textural counterpoint to the creamy interior. Have you ever tried adding a little sharp Parmesan to your topping? It’s next level!
Ingredients for Your Creamy Baked Mac and Cheese
Okay, let’s talk about what goes into this absolute masterpiece. Honestly, the ingredient list looks straightforward, but the quality really shines through here. Because this is designed to be an indulgent side dish recipe, we aren’t skimping on the good stuff, especially the cheese. Remember my note about avoiding the pre-shredded bags? Seriously, buy blocks. Pre-shredded cheese has powders to keep it from clumping, but those powders make your sauce gritty, and we want that velvety texture we talked about! Shredding your own cheese is part of why this works so well.
You’ll notice we use whole milk—don’t swap that out for skim if you want that ultimate richness! And yes, the pasta needs to be just shy of done. Don’t worry, I’ll walk you through that exact moment in the instructions. Speaking of rich flavor, if you’re looking for another fantastic cheesy bake, you have to check out my cheesy potato casserole—it hits the same comfort notes!
Here is everything you need for this decadent bake:
- 1 pound elbow macaroni (or whatever fun small shape you prefer!)
- 6 tablespoons unsalted butter (for the roux, plus more for greasing)
- 1/2 cup all-purpose flour
- 4 cups whole milk, warmed (This is important so it doesn’t shock the roux!)
- 1 teaspoon salt
- 1/2 teaspoon black pepper
- 1/4 teaspoon nutmeg (This is my secret whisper of flavor!)
- 1/4 teaspoon smoked paprika
- 8 ounces sharp cheddar cheese, freshly shredded
- 4 ounces Gruyère cheese, freshly shredded
- 4 ounces Fontina cheese, freshly shredded
- For the Topping:
- 1 cup panko breadcrumbs
- 2 tablespoons melted butter
Step-by-Step Instructions for Perfect Baked Mac and Cheese
This is where the magic happens, and I promise, if you follow these steps exactly, you’ll get that stunningly creamy result every single time. Don’t rush the sauce steps; that’s the key to this baked mac and cheese surviving the oven intact! I always put on some good music while making the sauce—it helps keep me steady. If you’re looking for other great oven meals, my easy chicken and rice casserole is another family winner.
Preparing the Pasta and Oven Setup
First things first: get that oven warm! Preheat it to 375°F (190°C) and make sure you have a 9×13 inch dish ready to go—just give it a light grease so nothing sticks later. Now, the pasta. This is absolutely critical for that ‘no dry’ finish. Cook your macaroni until it’s just shy of what the box tells you—I mean *just* shy. We call that underdone, and it’s essential because it’ll keep absorbing that glorious, thick sauce while it bakes. Drain it really well when it’s ready and set it aside while you tackle the sauce.
Making the Roux and Building the Creamy Cheese Sauce
Grab a big saucepan over medium heat and melt those 6 tablespoons of butter. Once it’s foamy, whisk in your flour and let it cook together for a full minute. That’s your roux, and we need to cook the raw flour taste out! Once that minute is up, start pouring in that warm milk slowly, whisking non-stop until it’s smooth. Keep stirring until it coats the back of a spoon nicely—it should look like thick gravy. Now, pull the pan OFF the heat! This is my #1 rule for creamy baked macaroni and cheese: Add the salt, pepper, nutmeg, and paprika, and then dump in your cheeses in handfuls. Stir until each batch is totally melted and smooth before adding the next. Heat encourages sharpness and graininess; off-heat keeps it silky!
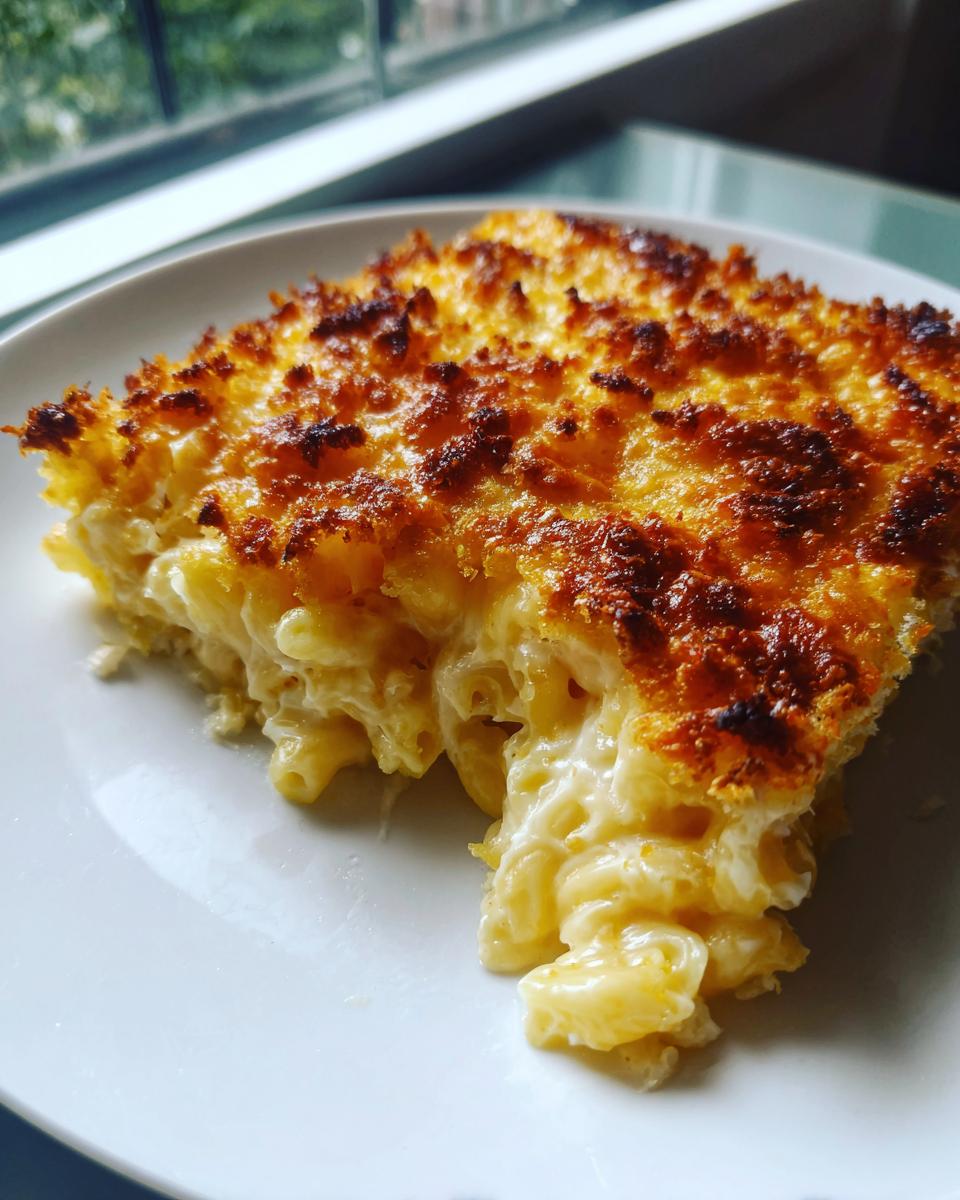
Assembling and Baking the Baked Mac and Cheese
Gently fold that macaroni into your stunning, smooth cheese sauce until every piece is draped in gooey goodness. Pour the whole thing into your prepared dish. For the topping—and don’t skip this!—toss the Panko with your 2 tablespoons of melted butter until it’s evenly coated. Sprinkle this evenly over the top. Pop it into the oven for about 20 to 25 minutes. You’re looking for the edges to be bubbling really happily and the top to be that perfect toasty golden brown. Once it comes out, you *must* let it sit for 10 minutes before scooping. I know it’s hard, but this lets that amazing sauce set up just enough so it doesn’t run everywhere!
Tips for the Best Ever Baked Mac and Cheese
When you’re making something as important as the best ever baked mac and cheese, you need to know the little tricks that elevate it from good to absolute showstopper status. I’ve learned through years of testing—both professionally and personally—that the difference between a standard casserole and true gourmet comfort food pasta lies in the details you think might not matter. For instance, I remember the first time I tried using pre-shredded Gruyère just because I was running late. Oh, Maya, what a mistake that was! The sauce was dull, and it seized up weirdly. Never again!
These tips come straight from my notebooks to ensure your bake is bubbly, perfectly seasoned, and incredibly creamy. If you want that restaurant-quality, deeply savory flavor, pay close attention to your cheese choice and how you handle texture. Sometimes I even make this right after my restaurant quality creamy pasta because the sauce-making skills overlap so perfectly!
Cheese Selection for Rich and Cheesy Baked Pasta
I cannot stress this enough: Please grate your own cheese. This is my big E-E-A-T moment from the kitchen! Pre-shredded cheese is dusted with starches (like potato starch or cellulose) so it pours easily, but those starches fight your roux and make your beautiful sauce grainy. For this rich and cheesy baked pasta, you need the blend:
- Sharp Cheddar gives you that classic, tangy backbone.
- Fontina melts like a dream—it’s incredibly smooth—which helps prevent separation when baked.
- Gruyère adds a nutty, earthy complexity you just can’t fake with cheddar alone. It gives it that undeniable gourmet feel.
When you shred them yourself, they melt into one harmonious, silky river of flavor. You can find links to some of my favorite cheese pairing guides over at Headlines Diner if you want to explore more complex blends!
Adjustments for Southern Style Baked Mac and Cheese
If you’re craving that specific, slightly denser, custard-like texture that defines true Southern style baked mac and cheese, there’s one very easy addition you can make. Right before you fold the pasta into the cheese sauce (after taking it off the heat!), whisk in one large egg. You heard me! That extra yolk and protein help bind the sauce as it bakes, creating a richer, almost soufflé-like quality instead of just a loose sauce on pasta.
I don’t use this method every time—I usually prefer the looser, gloopier sauce for my family—but when I want something truly decadent and sliceable, the egg is the way to go. Just make sure that cheese sauce isn’t actively simmering when you add the egg, or you might end up scrambling things! A little bit of that Southern magic goes a long way.
Serving Suggestions for Your Indulgent Side Dish Recipe
Okay, you’ve pulled this gorgeous, gooey masterpiece out of the oven. It is rich, it is cheesy, and it is definitely an indulgent side dish recipe—so what do you serve with something this spectacular? You definitely don’t want to weigh everyone down with more heavy carbs! I usually reach for something that offers a bright, acidic counterpoint to cut through all that cheddar and Gruyère goodness.
Think simple roasted chicken or maybe some slow-cooked pulled pork if you’re leaning into comfort week. But for a quick weeknight win, a vibrant, crisp salad is my go-to. Something with a sharp vinaigrette really cleanses the palate between bites of cheese! I find my zesty bean salad is honestly the perfect fresh side when you need a little green next to all that yellow.
Storage and Reheating Instructions for Baked Mac and Cheese
Even the most perfect batch of baked mac and cheese, sadly, never lasts forever! But good news—this recipe, because of that superior cheese sauce we worked so hard on, actually reheats beautifully, which is great for leftovers after you’ve made this homemade cheesy casserole recipe once.
When I have leftovers, I immediately cover the dish tightly with plastic wrap or transfer individual portions into airtight containers. You can definitely keep this in the fridge for about three to four days. If you plan on making a huge batch for a party, I even recommend assembling the whole thing but keeping it *unbaked* in the fridge overnight. Then, the next day, just toss the topping on and add about 10 extra minutes to your baking time. Easy peasy!
Now, about reheating. This is where people go wrong! Microwaving this creamy dish can sometimes cause the sauce to seize up or get greasy, especially if you’re reheating a large portion. My absolute favorite way is using the oven again for the best result. Cover the dish loosely with foil—you don’t want to steam and ruin that lovely crust we built—and heat it at about 325°F until it’s warmed through. If the topping looks a little less crunchy, just pop the foil off for the last five minutes of reheating.
If you’re just reheating a small scoop, the stovetop actually works wonders! Put your portion in a small saucepan over low heat. Stir constantly and add a tiny splash of milk or even a spoonful of heavy cream. That splash of liquid helps loosen the sauce right back up into its creamy state. If you struggle with reheating casseroles in general, my easy Mexican rice casserole has some great tips about adding moisture back during the reheat phase too. If you’re looking for another great leftover bake, check out the tips from Cupcake Recipes for their approach to reheating baked dishes!
Frequently Asked Questions About Creamy Baked Macaroni and Cheese
I get so many messages asking about turning this recipe into a prep-ahead dish or how to substitute ingredients, so I figured I’d tackle the top concerns right here! Knowing these little secrets really helps ensure you get that perfect, comforting dish—no guesswork involved. I really want everyone to experience the best version of this casserole!
Can I make this baked mac and cheese ahead of time?
Absolutely, yes! That’s one of the best things about this homemade cheesy casserole recipe—it loves being made ahead. I recommend you assemble the entire dish, pasta mixed into the sauce, topping spread on top, but stop before you bake it. Cover it tightly and pop it into the fridge for up to 24 hours. When you’re ready to bake, you just need to add about 10 to 15 extra minutes to the baking time since it’s starting cold. If you notice the cheese topping seems a little less crisp after sitting overnight, just uncover it for the last 10 minutes of baking!
What is the best cheese combination for baked pasta with crunchy topping?
When we’re talking about achieving that truly gourmet comfort food pasta flavor that stands up to a crisp crust, you can’t just rely on mild cheddar. The best combo is what we used here: High-quality sharp cheddar for that incredible flavor punch, Fontina because it melts like silk, and Gruyère for that wonderful nutty depth. The Gruyère is what really takes this above and beyond! If you change cheeses, make sure you’re using about 50% good melters (like Fontina or Monterey Jack) and 50% flavor drivers (like Sharp Cheddar or Pepper Jack). That balance is key for the baked pasta with crunchy topping to truly shine!
How do I prevent my baked mac and cheese from drying out?
This is the concern I hear most often! If you remember two things from this entire recipe, let it be these two methods, which are central to keeping your sauce luscious. First, you MUST undercook your pasta slightly—pull it out of the boiling water when it still has a firm bite, because it finishes cooking in that thick sauce in the oven. Second, your sauce must be built with care using that roux and warm whole milk. Don’t boil the sauce rapidly once the milk is in, and always melt the cheese gently off the heat. Follow those steps, and you’ll have the creamiest dish imaginable, just like my tuna pasta skillet which also relies on a smooth sauce base!
Nutritional Estimates for This Homemade Cheesy Casserole Recipe
I know some of you amazing cooks out there are watching nutrition as closely as you watch for that crust to brown—and I totally respect that! Because this recipe dials up the richness with three kinds of cheeses and whole milk, it’s definitely an indulgent moment. But hey, knowing what’s in your food is the first step toward balance, right? That’s why I always include a breakdown based on the specific amounts we used in the test kitchen.
Keep in mind these figures are just estimates for one serving of this homemade cheesy casserole recipe. Once you start adding extra Gruyère or maybe using low-fat milk (which I don’t recommend for the texture!), the numbers will shift a bit. If you want another recipe that hits that creamy note but with lighter ingredients, check out my creamy one-pot pesto pasta.
Here are the numbers based on 6 servings:
- Serving Size: 1 serving
- Calories: 650
- Fat: 38g (including 22g Saturated Fat)
- Cholesterol: 110mg
- Sodium: 580mg
- Carbohydrates: 55g (with 3g Fiber)
- Sugar: 6g
- Protein: 28g
See? It clocks in with a good amount of protein thanks to all that cheese and milk! It’s decadent, yes, but it packs a punch of satisfaction. Enjoy every cheesy, bubbly bite—you absolutely deserve it after making such a stellar dish!

Share Your Ultimate Baked Mac and Cheese Success
Whew! When you pull that pan of bubbling, golden-crusted goodness out of the oven, I really want to see it! Seriously, I live for hearing how this recipe turns into a staple at your house. Making a dish like this cheesy casserole is an accomplishment, and you should absolutely show it off!
If you made this recipe, please take a moment to leave a star rating right below this section. And if you have comments—maybe you swapped Gruyère for Gouda, or you found the perfect side pairing—tell me everything! I’m especially eager to hear if this technique finally solved the dreaded dry mac and cheese problem for you. Hearing that you achieved that perfect velvety texture is the best reward for all this recipe testing!
If you snap a picture of your gorgeous, unbelievably rich and cheesy baked pasta, tag MayaPlate on social media! I love seeing my recipes out in the world, making people happy at the dinner table. Looking for another easy thing to try after you’ve devoured this? You should jump over and check out my easy stuffed dates for a quick appetizer next time! And if you’re looking for more inspiration on making the absolute best baked dishes, I always check back on tips from Mom on Timeout for great foundational baking advice.
Thanks for cooking with me! I hope this becomes your new go-to comfort food.
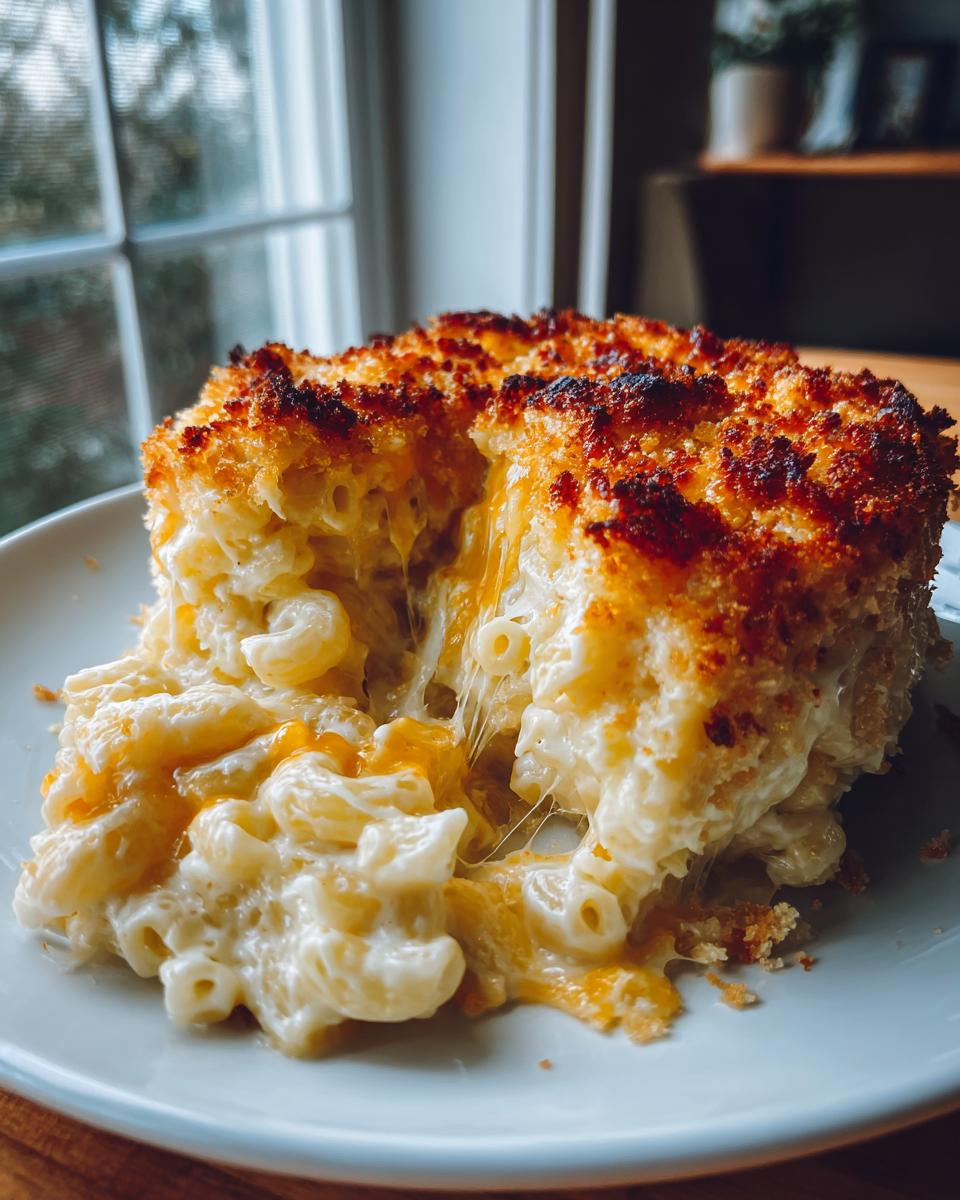
PrintThe Ultimate Creamy Baked Mac and Cheese with Crunchy Gruyère-Panko Topping
Make this rich and cheesy baked mac and cheese that stays creamy, never dry. It features a velvety sauce with sharp cheddar and Gruyère, topped with a satisfyingly crunchy panko crust.
- Prep Time: 15 min
- Cook Time: 30 min
- Total Time: 45 min
- Yield: 6 servings 1x
- Category: Dinner
- Method: Baking
- Cuisine: American
- Diet: Vegetarian
Ingredients
- 1 pound elbow macaroni
- 6 tablespoons unsalted butter
- 1/2 cup all-purpose flour
- 4 cups whole milk, warmed
- 1 teaspoon salt
- 1/2 teaspoon black pepper
- 1/4 teaspoon nutmeg
- 1/4 teaspoon smoked paprika
- 8 ounces sharp cheddar cheese, shredded
- 4 ounces Gruyère cheese, shredded
- 4 ounces Fontina cheese, shredded
- 1 cup panko breadcrumbs
- 2 tablespoons melted butter
Instructions
- Preheat your oven to 375°F (190°C). Lightly grease a 9×13 inch baking dish.
- Cook the macaroni according to package directions until just shy of al dente. Drain well and set aside. Do not overcook the pasta.
- In a large saucepan over medium heat, melt the 6 tablespoons of butter. Whisk in the flour and cook for 1 minute, stirring constantly to create a roux.
- Gradually whisk in the warm milk until the mixture is smooth. Continue cooking, stirring frequently, until the sauce thickens enough to coat the back of a spoon, about 5 to 7 minutes. Do not let it boil rapidly.
- Remove the saucepan from the heat. Whisk in the salt, pepper, nutmeg, and smoked paprika.
- Add the shredded cheddar, Gruyère, and Fontina cheeses to the sauce in handfuls, stirring until each addition is completely melted and smooth before adding the next. This technique prevents the sauce from becoming grainy.
- Gently fold the cooked macaroni into the cheese sauce until fully coated. Pour the mixture into the prepared baking dish.
- In a small bowl, toss the panko breadcrumbs with the 2 tablespoons of melted butter. Sprinkle the buttery panko evenly over the top of the macaroni and cheese.
- Bake for 20 to 25 minutes, or until the sauce is bubbly and the topping is golden brown and crisp.
- Let the baked mac and cheese rest for 10 minutes before serving to allow the sauce to set slightly.
Notes
- For the creamiest texture, shred your own cheese from blocks; pre-shredded cheese contains anti-caking agents that can affect sauce smoothness.
- To avoid dry pasta, slightly undercook the macaroni by about 1 minute less than the package directs, as it will continue to cook in the oven.
- If you prefer a Southern style baked mac and cheese, you can add one large egg, lightly beaten, to the cheese sauce mixture before combining with the pasta.
Nutrition
- Serving Size: 1 serving
- Calories: 650
- Sugar: 6
- Sodium: 580
- Fat: 38
- Saturated Fat: 22
- Unsaturated Fat: 16
- Trans Fat: 1
- Carbohydrates: 55
- Fiber: 3
- Protein: 28
- Cholesterol: 110