

Oh, I hear you! When that craving hits for that perfect, crunchy Tex-Mex flavor—that satisfying shatter when you bite into a chimichanga—it’s hard to settle for anything less. But let’s be real, deep-frying just doesn’t fit into my busy week, and I bet it doesn’t fit into yours either. That’s why I spent so much time perfecting this method, applying what I know about making food both delicious and smart. Trust me when I say you can absolutely get that amazing texture you miss from the restaurants, but right here in your own oven.
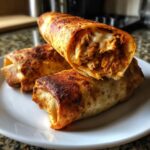
Welcome to my answer for one of the most requested quick meals: The Crispiest Guilt-Free Baked Chicken Chimichangas. We designed this recipe to be genuinely practical, delivering that incredible flavor payoff in under 45 minutes. It’s the kind of Easy Weeknight Tex Mex solution that nourishes your family without requiring you to spend hours in the kitchen. We’re talking juicy, seasoned chicken wrapped up and baked until golden brown. It’s comfort food that supports your lifestyle, not sabotages it!
If you’re looking for simple ways to bring flavor back to your weeknights, you’ll definitely want to check out my collection of simple weeknight dinners later!
- Why You Will Make These Baked Chicken Chimichangas Again and Again
- Ingredients for the Best Baked Chicken Chimichangas Filling
- Step-by-Step Instructions for Chi Chis Style Baked Chicken Chimichangas
- Assembling and Baking Your Baked Chicken Chimichangas Perfectly
- Tips for Success with Oven Baked Chicken Burritos
- Serving Suggestions for Your Healthy Mexican Dinner
- Storage and Reheating Instructions for Leftover Baked Chicken Chimichangas
- Frequently Asked Questions About Baked Chicken Chimichangas
- Nutritional Estimates for This Recipe
Why You Will Make These Baked Chicken Chimichangas Again and Again
I’m certain these Baked Chicken Chimichangas are headed straight to your rotation. Why? Because they give you everything you want from great Tex-Mex without adding unnecessary fuss or guilt. They seriously hit that weeknight dinner sweet spot.
- They are surprisingly fast—we’re talking ready to eat in about 35 minutes total, which is fantastic for a solid meal.
- The flavor is bold and restaurant-style, proving that less oil doesn’t mean less taste.
- They manage to stay structurally sound and incredibly flavorful.
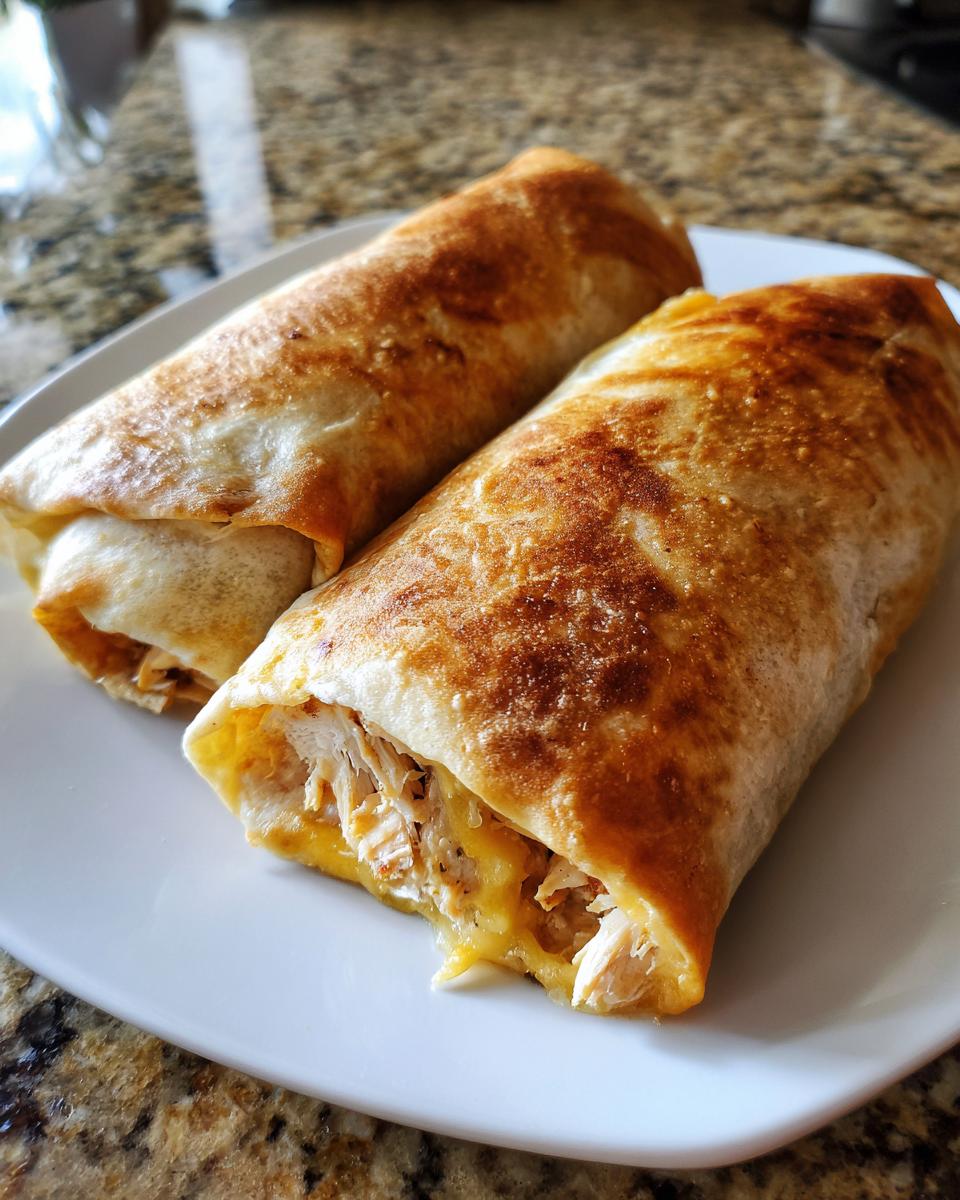
Achieving Maximum Crunch with Baked Chicken Chimichangas
The biggest hurdle when baking anything that should be crispy is often defeating sogginess. Nobody wants a floppy mess! My trick here is twofold, ensuring you get those fantastic Crispy Baked Chimichangas. First, you must cook that filling down until almost all the broth is gone. Second, and this is crucial: don’t skimp on the cooking spray right before they go into the oven. You need a generous spritz—or even a light brush of melted butter if you’re feeling fancy—on the outside of every roll. That fat catches the heat and turns everything golden brown and rigid, just like you want!
Ingredients for the Best Baked Chicken Chimichangas Filling
Getting the filling right is truly the foundation of making great Baked Chicken Chimichangas. Remember, since we aren’t deep-frying, we need to build maximum flavor into the interior, but we absolutely have to keep it dry. Soggy tortillas are the enemy of the crunch we’re chasing! I’ve listed everything you need below. Notice how we cook down the liquid right in the pan? That step is non-negotiable for success.
- 1 tablespoon olive oil
- 1 medium yellow onion, chopped
- 2 cloves garlic, minced
- 1 teaspoon ground cumin
- 1 teaspoon chili powder
- 1/2 teaspoon dried oregano
- 1/4 teaspoon salt
- 1/4 teaspoon black pepper
- 2 cups cooked, shredded chicken breast
- 1/2 cup chicken broth
- 1 cup shredded Monterey Jack cheese
- 8 (8-inch) flour tortillas
Ingredient Notes and Substitutions for Your Shredded Chicken Chimichanga Recipe
To keep this recipe speedy—because I know you’re looking for that Low Guilt Comfort Food on a busy night—I often cheat and use a store-bought rotisserie chicken. Just shred about two cups worth; it saves loads of time! When it comes to the cheese, Monterey Jack melts beautifully, but if you don’t have it on hand, a sharp yellow cheddar or even a Colby Jack blend works just as well. The important thing is using good quality spices so that blend of cumin and chili powder really pops when you bite into the filling.
Step-by-Step Instructions for Chi Chis Style Baked Chicken Chimichangas
This is where the magic happens! We’re moving quickly here, but don’t rush the flavoring steps. Getting that authentic, slightly smoky taste that reminds you of your favorite Mexican restaurant is all about layering those spices correctly. Follow these steps exactly, and your Chi Chis Style Baked Chimichangas will turn out perfectly seasoned every single time. The whole process, from chopping to baking, flies by!
- First things first, get your oven preheated to a nice hot 400°F (200°C). While that heats up, grab your baking sheet and give it a light grease, just a thin layer, to stop anything from sticking right away.
- We start building flavor on the stovetop. Heat that tablespoon of olive oil over medium heat. Toss in your chopped onion and cook until they get soft, about 5 minutes. You want them translucent, not browned.
- Next, stir in your minced garlic along with all those dry spices: cumin, chili powder, oregano, salt, and pepper. You only need about one minute here until you can really smell how good they are going to be! This toasting wakes up all the flavor profiles.
- Now, add the 2 cups of shredded chicken and the 1/2 cup of chicken broth. This is the key phase! Stir everything really well and let it simmer until that broth basically evaporates. We are cooking the moisture out so it doesn’t end up steaming your tortillas later.
- Once the liquid is gone, pull that skillet off the heat immediately. Stir in your Monterey Jack cheese until it’s just melted and creamy.
- To keep those tortillas nice and flexible for rolling, warm them briefly—I pop mine in the microwave for about 15 seconds max. This prevents tearing when you start rolling.
- Time to assemble! For each tortilla, put about 1/3 cup of that cheesy chicken mix right near the edge. You need to learn the right technique here: fold the sides inward first, and then roll it up tightly, just like you would a standard burrito. Place them seam-side down on that prepared baking sheet.
You’ll find more tips for making this your go-to Easy Weeknight Tex Mex solution soon, but for now, click over and see how others are having success with this easy baked recipe!
Expert Tip: Keeping the Filling Dry for Crunchy Tortilla Rolls
Listen up, because this is the secret weapon for making Crunchy Tortilla Rolls instead of soggy pockets! That broth you add in step 4? It’s there purely to help the spices bloom and coat the chicken nicely. You absolutely MUST cook it down until the bottom of the skillet is mostly dry again. If you skip this, that steam gets trapped under the tortilla while baking, and boom—soggy bottom. By focusing on making this a Less Oil Mexican Food option that’s already flavorful on its own, you naturally reduce the moisture that causes problems later!
Assembling and Baking Your Baked Chicken Chimichangas Perfectly
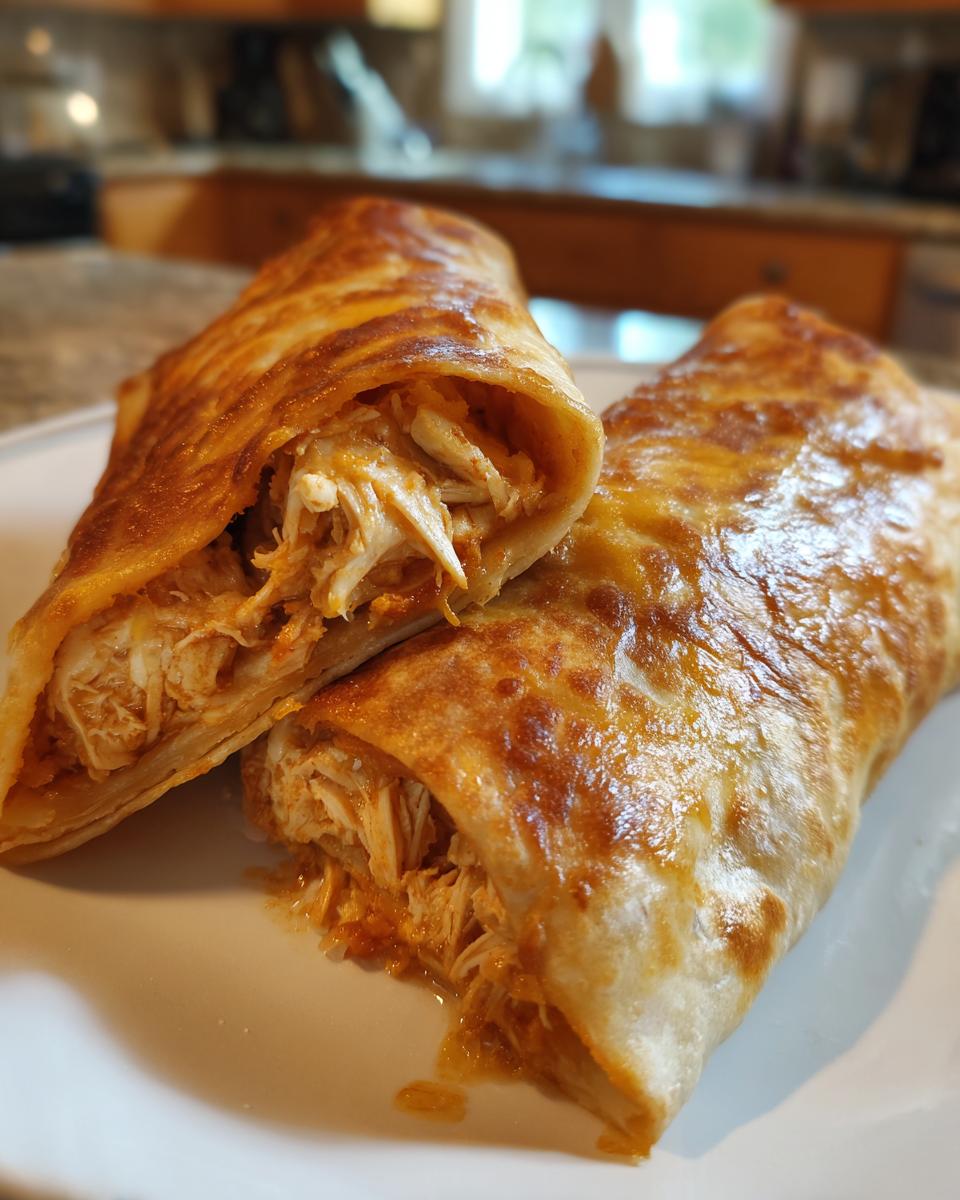
Now that you have that gloriously dry, cheesy, flavorful filling, it’s time to roll them up so they stay closed and crisp! Rolling technique matters a ton when you are aiming for restaurant-style quality without frying. Remember to fold those sides in toward the center like an envelope before you roll it up tight from the bottom edge. This keeps the filling contained when it heats up in the oven.
Once they are all nestled seam-side down on your baking sheet—and I mean really nestled—you must commit to the final crisping step. Grab your cooking spray. Seriously, coat the entire top surface generously! That light coating of fat is what creates that golden brown, amazing crust we want in our Baked Chicken Chimichangas. Slide them into that preheated 400°F oven and let science do the work for about 15 to 20 minutes. Flipping them halfway ensures both sides get equally crunchy!
Tips for Success with Oven Baked Chicken Burritos
Even with a great recipe, a few extra tweaks can take your Oven Baked Chicken Burritos from “good” to “I can’t believe I didn’t fry these!” I’ve learned that the little things truly make the difference when you’re skipping the deep fryer. Don’t skip these notes; they are the difference between a great crunch and just an okay one!
First, let’s talk tortillas. We used 8-inch flour tortillas because they are the perfect size to fold neatly and still give you a substantial, satisfying roll. If you try to use tiny taco-sized shells, you’ll end up with overflow, and that extra exposed filling tends to dry out. If you only have the bigger burrito-sized ones, you can cut them in half after baking, but for rolling, stick to that medium size for neatness.
Another thing I always remind people about is the resting time after they come out of the oven. I know, I know, the smell is intoxicating and you want to dive right in. But give them 5 minutes on the baking sheet before you transfer them to the plate. This short rest allows the exterior crust to fully set up, locking in that crunch we worked so hard to create. It also means the molten cheese inside doesn’t ooze out immediately when you slice into it or take the first bite.
For even better results next time, I highly recommend checking out how to save time during the week with my guide on simple weeknight dinners planning. And if you’re looking for more inspiration on achieving that perfectly crisp texture in the oven, this article on restaurant-style Mexican food has some great reinforcement of our techniques!
Serving Suggestions for Your Healthy Mexican Dinner
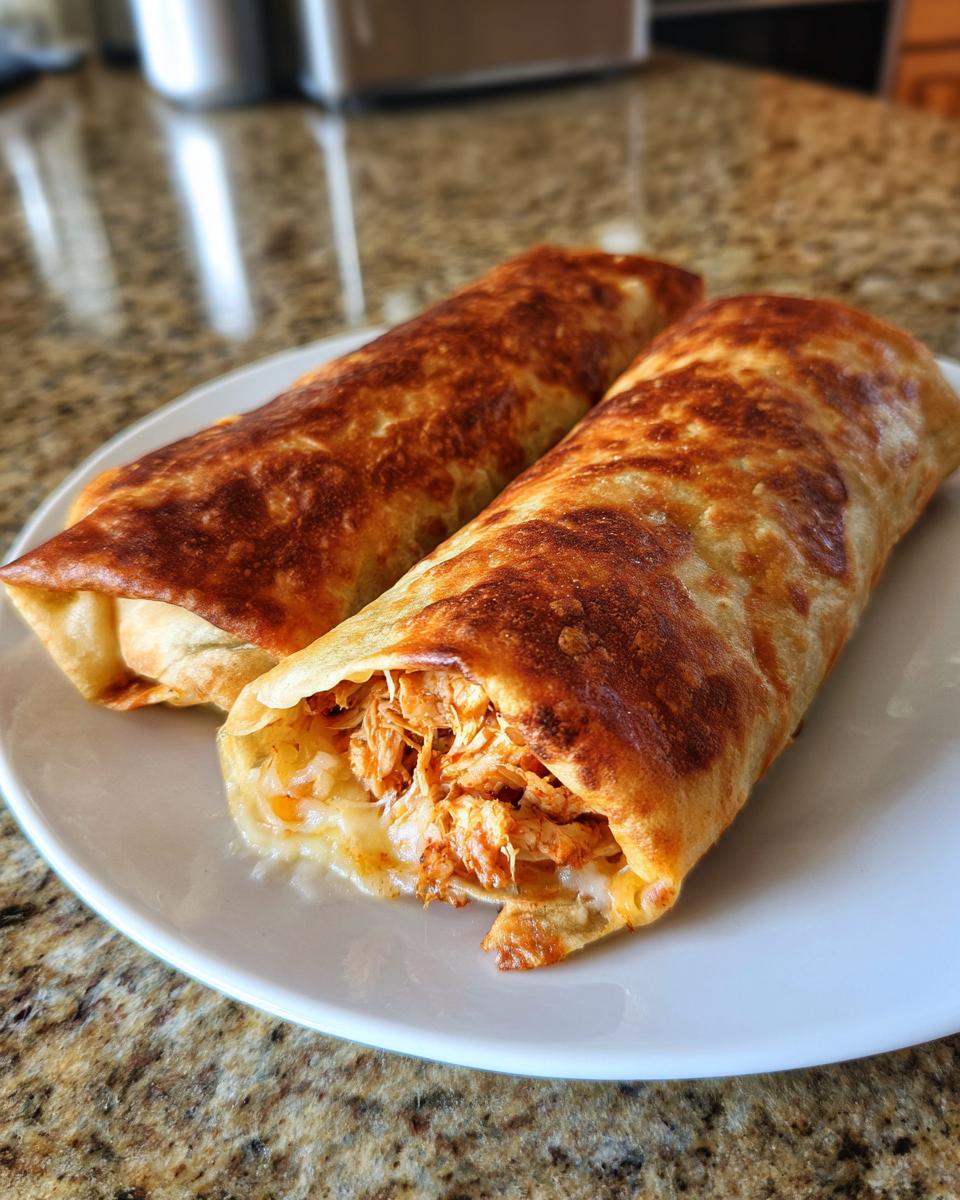
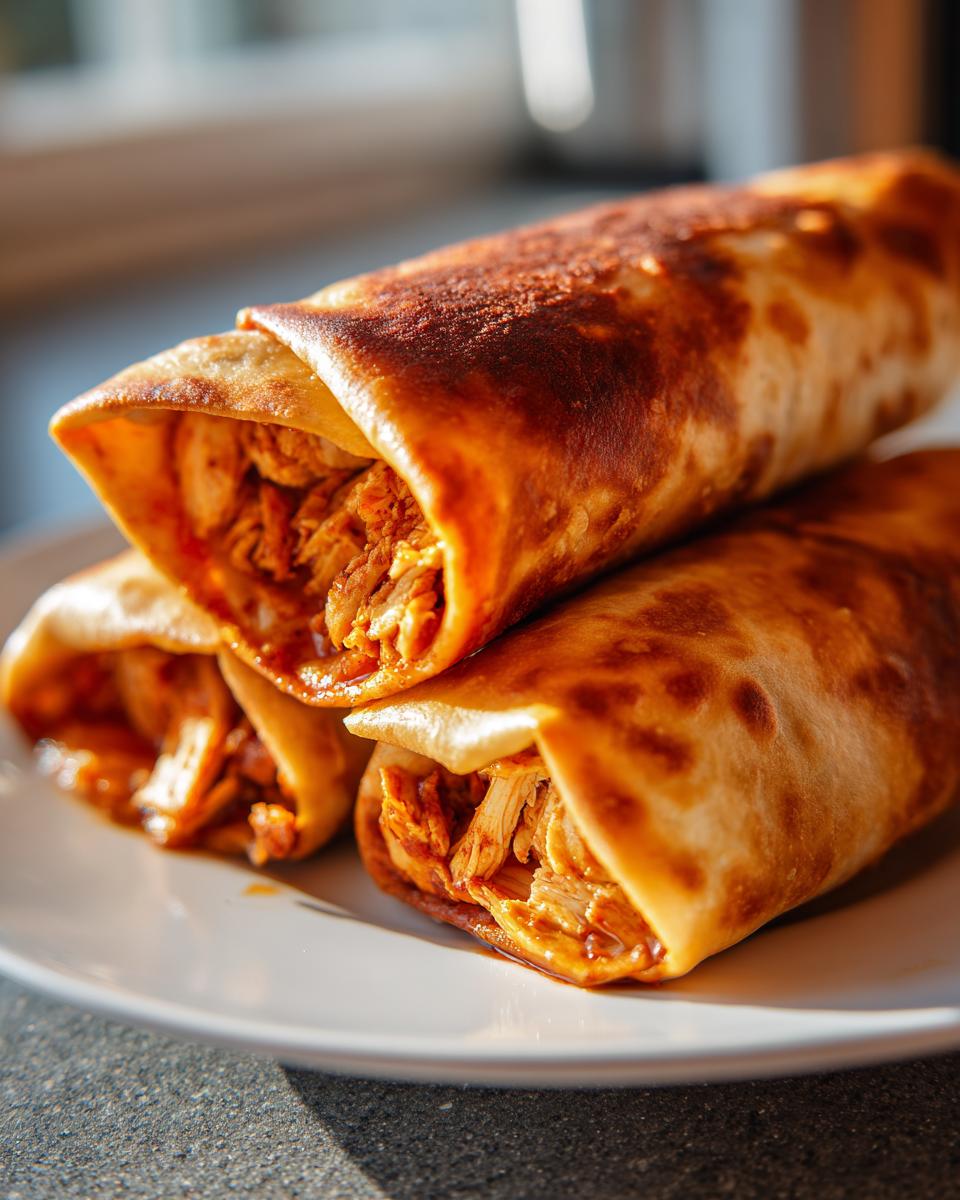
So, your Baked Chicken Chimichangas are golden, crispy, and smell absolutely incredible coming out of the oven. Now what? You need the perfect supporting cast! Since we worked hard to keep these light and delicious—truly a Healthy Mexican Dinner option compared to the deep-fried versions—we should stick to toppings that add freshness and excitement, not just heavy sauces.
Forget drenching them! The best way to serve these is with small bowls of bright, fresh toppings on the side. This allows everyone at the table to customize their plate without instantly softening that beautiful crust we worked so hard to create.
Here are my must-haves to complete that perfect Tex-Mex spread:
- Salsa Fresca: A bright, chunky tomato salsa is always a winner. The acidity cuts right through the richness of the cheese in the filling.
- Guacamole or Sliced Avocado: Healthy fats are always welcome here! A dollop of creamy guac adds richness without the heaviness of sour cream.
- Shredded Lettuce and Pico de Gallo: These add fantastic crunch and fresh texture contrast.
- Plain Greek Yogurt: Instead of full-fat sour cream, I use plain Greek yogurt. It gives you the same cool tanginess but dials up the protein content for a genuinely nourishing meal.
If you’re looking for an absolutely show-stopping side dish that pairs perfectly with these chimichangas, you have to try my recipe for Mexican Street Corn Salad (Elote). It’s bright, zesty, and brings a complete authentic flavor profile to your table without adding much time to your cooking.
Storage and Reheating Instructions for Leftover Baked Chicken Chimichangas
Because these Baked Chicken Chimichangas come together so fast, sometimes you end up with a few extra—which is perfect, because they reheat surprisingly well! That’s part of the joy of making truly practical meals, right? Knowing that you have an almost-instant, delicious lunch or second dinner waiting for you tomorrow.
If you happen to have any leftovers, here’s my advice. Make sure they are completely cooled down before you try to store them. You don’t want any trapped condensation turning your crispy shells into mush in the fridge! Once cool, place them in an airtight container. They’ll keep beautifully in the refrigerator for about three days. I wouldn’t push it past that, just to keep things fresh.
The biggest complaint I hear about leftovers is reheating—nobody wants a chewy chimichanga! So, please, for the love of crunch, skip the microwave. The microwave might heat it up fast, but it will steam the tortilla and you’ll lose all that precious crispiness we worked for.
Instead, you have two golden options. If you only have one or two to reheat, the toaster oven or a conventional oven set to about 350°F is perfect. Just lay them on a baking sheet and heat them until they are nice and hot all the way through, maybe 8 to 10 minutes. If you happen to have an air fryer, that’s my absolute favorite tool for leftovers! Just pop them in the air fryer basket for about 4 minutes around 375°F. They come out nearly as good as fresh! This is kitchen homework that pays off later, keeping your Low Guilt Comfort Food accessible all week long.
Frequently Asked Questions About Baked Chicken Chimichangas
I know you might still have a few lingering questions! Anyone who wants genuinely crispy food without the deep fry usually has a couple of sticking points, especially around texture and timing. I’ve rounded up the most common ones I get asked about these Baked Chicken Chimichangas so we can make sure your first batch is a total success. We want you cooking smart and eating well!
Can I make these Baked Chicken Chimichangas ahead of time?
Yes, absolutely! This is where this recipe shines for meal prepping, fitting right into that Easy Chicken Freezer Meal Prep goal. You can assemble the entire chimichanga—filling, folding, and rolling—and place them seam-side down on the baking sheet. You can refrigerate them like this for up to a day. If you’re freezing them for later: wrap each one tightly in plastic wrap, then foil, and freeze flat. When you’re ready to bake from frozen, just add about 10 extra minutes to the baking time. But here’s the rule: You MUST not spray them with oil until right before they go into the oven. You bake them straight from the fridge or freezer!
How do I ensure my Baked Chicken Chimichangas are truly crispy?
This is my favorite question because the answer is the key to this whole recipe! If you want that glorious shatter, you need to focus on two things that relate directly to fat and heat. First, your filling absolutely must be as dry as possible before you roll them up—we cooked out all that broth for a reason! Second, when you line them up on the pan, coat the entire exterior surface of the tortillas heavily with cooking spray or brush them with melted butter. You need that fat barrier against the 400°F heat. Don’t be shy with the spray; that’s what mimics the effect of the deep fryer and guarantees you get golden brown, crunchy perfection!
If you’re looking for other ways to save time during the week, check out my tips for putting together quick, healthy lunch options!
Nutritional Estimates for This Recipe
As someone who believes strongly in nourishing our bodies while still enjoying incredible food, I know you’re curious about what’s in these delicious crunch-bombs. Since we are focusing on making this a Low Guilt Comfort Food option, these numbers are fantastic compared to the fried alternative. Remember, because we are relying on cooking spray instead of deep-frying oil, we keep the fat content way down!
Please keep in mind that these values are just estimates. The exact numbers can shift a bit based on the brand of tortillas you use, how much cheese melts out, or precisely how much salsa you pile on top! But this gives you a great general idea of what you are eating when you make these Baked Chicken Chimichangas.
- Serving Size: 2 chimichangas
- Calories: 450
- Protein: 30g
- Fat: 18g (with only 8g being saturated fat)
- Carbohydrates: 45g
- Sugar: 3g
- Sodium: 580mg
It really is a balanced meal when you consider the high protein from the chicken and cheese! That’s smart eating that tastes like a treat.
PrintThe Crispiest Guilt-Free Baked Chicken Chimichangas (Chi-Chi’s Style at Home)
Achieve the satisfying crunch of deep-fried chimichangas using only your oven. This easy recipe delivers restaurant-quality flavor with seasoned shredded chicken filling, making it a perfect, healthier Tex-Mex dinner for busy weeknights.
- Prep Time: 15 min
- Cook Time: 20 min
- Total Time: 35 min
- Yield: 4 servings 1x
- Category: Dinner
- Method: Baking
- Cuisine: Tex-Mex
- Diet: Vegetarian
Ingredients
- 1 tablespoon olive oil
- 1 medium yellow onion, chopped
- 2 cloves garlic, minced
- 1 teaspoon ground cumin
- 1 teaspoon chili powder
- 1/2 teaspoon dried oregano
- 1/4 teaspoon salt
- 1/4 teaspoon black pepper
- 2 cups cooked, shredded chicken breast
- 1/2 cup chicken broth
- 1 cup shredded Monterey Jack cheese
- 8 (8-inch) flour tortillas
- Cooking spray (for crisping)
- Optional toppings: Salsa, sour cream, guacamole
Instructions
- Preheat your oven to 400°F (200°C). Lightly grease a baking sheet.
- Heat the olive oil in a skillet over medium heat. Add the onion and cook until soft, about 5 minutes.
- Add the garlic, cumin, chili powder, oregano, salt, and pepper. Cook for 1 minute until fragrant.
- Add the shredded chicken and chicken broth to the skillet. Stir well and cook until the liquid has mostly evaporated, about 5-7 minutes. This keeps the filling from making the tortillas soggy.
- Remove the chicken mixture from the heat and stir in the shredded cheese until just melted.
- Warm the tortillas briefly in the microwave (about 15 seconds) to make them pliable.
- Place about 1/3 cup of the chicken filling near one edge of a tortilla. Fold in the sides, then tightly roll the tortilla up like a burrito. Place seam-side down on the prepared baking sheet. Repeat with the remaining filling and tortillas.
- Spray the tops of the rolled chimichangas generously with cooking spray. This step is key for achieving a golden brown, crispy texture.
- Bake for 15 to 20 minutes, flipping halfway through, until the tortillas are golden brown and crunchy.
- Serve immediately with your favorite toppings for a truly satisfying, low-guilt comfort food experience.
Notes
- For the crispiest result, ensure your chicken filling is not overly wet before rolling the tortillas.
- If you prefer an even crunchier exterior, lightly brush the tops with melted butter instead of using cooking spray.
- You can prepare the filling ahead of time and store it in the refrigerator for up to 3 days.
Nutrition
- Serving Size: 2 chimichangas
- Calories: 450
- Sugar: 3
- Sodium: 580
- Fat: 18
- Saturated Fat: 8
- Unsaturated Fat: 10
- Trans Fat: 0
- Carbohydrates: 45
- Fiber: 3
- Protein: 30
- Cholesterol: 95