
I don’t know about you, but sometimes my day just demands a snack that actually sticks with me without requiring me to turn on the oven. We get so tired of those chalky, weirdly sweet store-bought protein bars, right? I spent years feeling hungry an hour later, wasting money on bars that tasted like flavored chalk. When my schedule as a nutritional consultant got crazy, I needed a fix, fast. That’s why I went back to the basics—the simplest, most satisfying combination I could think of. These Easy No-Bake 5-Ingredient Peanut Butter Protein Bars are my sanity saver. They deliver that dense, chewy satisfaction without any fuss, and they’re ready before you can even decide what takeout to order. For more on how I built my philosophy around making good food accessible, you can always check out my story here.
- Why These Easy No-Bake 5-Ingredient Protein Bars Are a Game Changer
- Gathering What You Need for Perfect Peanut Butter Protein Bars
- Ingredients for These Easy No-Bake Protein Bars
- Step-by-Step Guide to Making Your No Bake Protein Bars
- Tips for Perfecting Your Homemade Protein Bars
- Storage and Make Ahead Protein Snacks
- Frequently Asked Questions About These Protein Bars
- Estimated Nutritional Value for These Protein Bars
- Share Your Experience Making These Quick Protein Treats
Why These Easy No-Bake 5-Ingredient Protein Bars Are a Game Changer
Honestly, ditching the baking sheet makes life so much easier, and that’s the biggest draw here. We’re talking about genuinely healthy snack bars that come together in about ten minutes of active work—seriously, I timed it! When you need quick protein treats, this recipe is your hero. It requires zero specialized equipment, which makes these the absolute best protein bars for beginners. No worries about overbaking or dry edges here.
The real magic is how these five basic components create something that tastes like dessert. We aren’t messing around with binders and stabilizers you need a science degree to pronounce. The creamy peanut butter acts as the fat and the glue, while the oats give structure and fiber. Combine that with the right protein powder, and you get some of the best tasting protein bars around, all thanks to that perfect flavor partnership!
Quick Prep for Busy Schedules
You read that right—prep is ten minutes, hands on! Since there is zero baking, you’re just mixing and pressing. This means you can whip up a batch right after your evening workout or tackle them while the coffee is brewing in the morning. It’s the definition of efficient meal prep bars. You just need about an hour of chill time, and boom! You have grab-and-go fuel for the entire week.
The Power of Simple Ingredients in Homemade Protein Bars
I limit myself to just five core ingredients here, and I want you to see why. Each one pulls its weight. Quality matters immensely when you cut back this much. This simple structure ensures that you know exactly what you are eating, which is the entire point of making your own protein bars at home instead of grabbing something questionable off the shelf. It’s satisfying fuel, pure and simple.
Gathering What You Need for Perfect Peanut Butter Protein Bars
When you’re working with just five components, you really don’t want one ingredient letting the side down, do you? Trust me, the creamy peanut butter is the foundation here, so make sure yours is fresh and easy to stir. We also need wholesome rolled oats for that satisfying chew, along with your go-to protein powder. Don’t forget the touch of sweetness and that final flourish of chocolate right on top! For a little inspiration on other simple ingredient plays, check out some ideas here.
Ingredients for These Easy No-Bake Protein Bars
These are the essentials, folks. There’s no room for fancy extras here; just the five things that make these protein bars work so beautifully together. I’ve listed them out exactly as I use them because when the ingredient list is this short, every measurement has to count. Make sure your peanut butter is creamy—none of that natural, separated stuff unless you really know what you are doing!
- 1 cup creamy peanut butter
- 1/2 cup vanilla or unflavored protein powder
- 1/2 cup rolled oats
- 1/4 cup honey or maple syrup
- 1/4 cup dark chocolate chips (for topping)
Step-by-Step Guide to Making Your No Bake Protein Bars
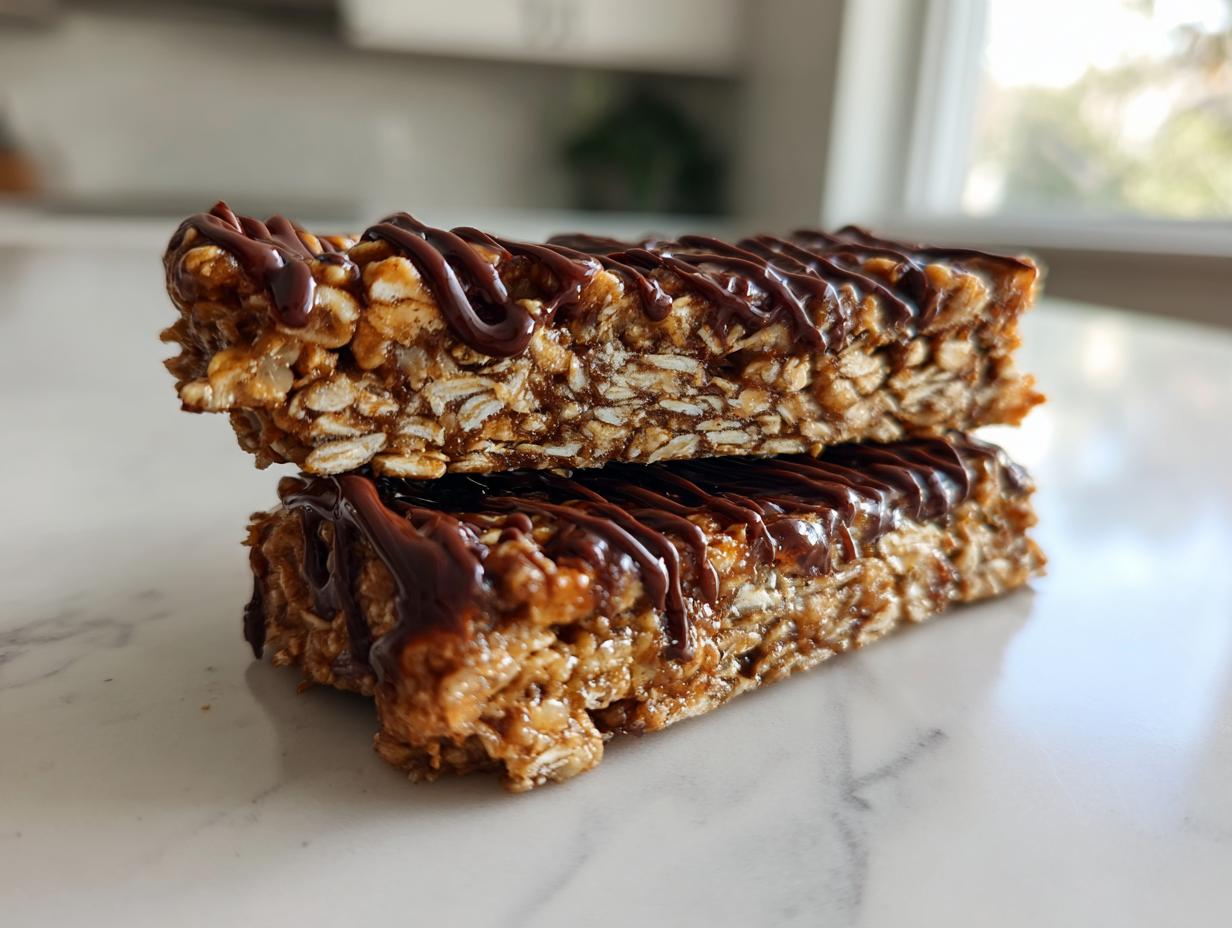
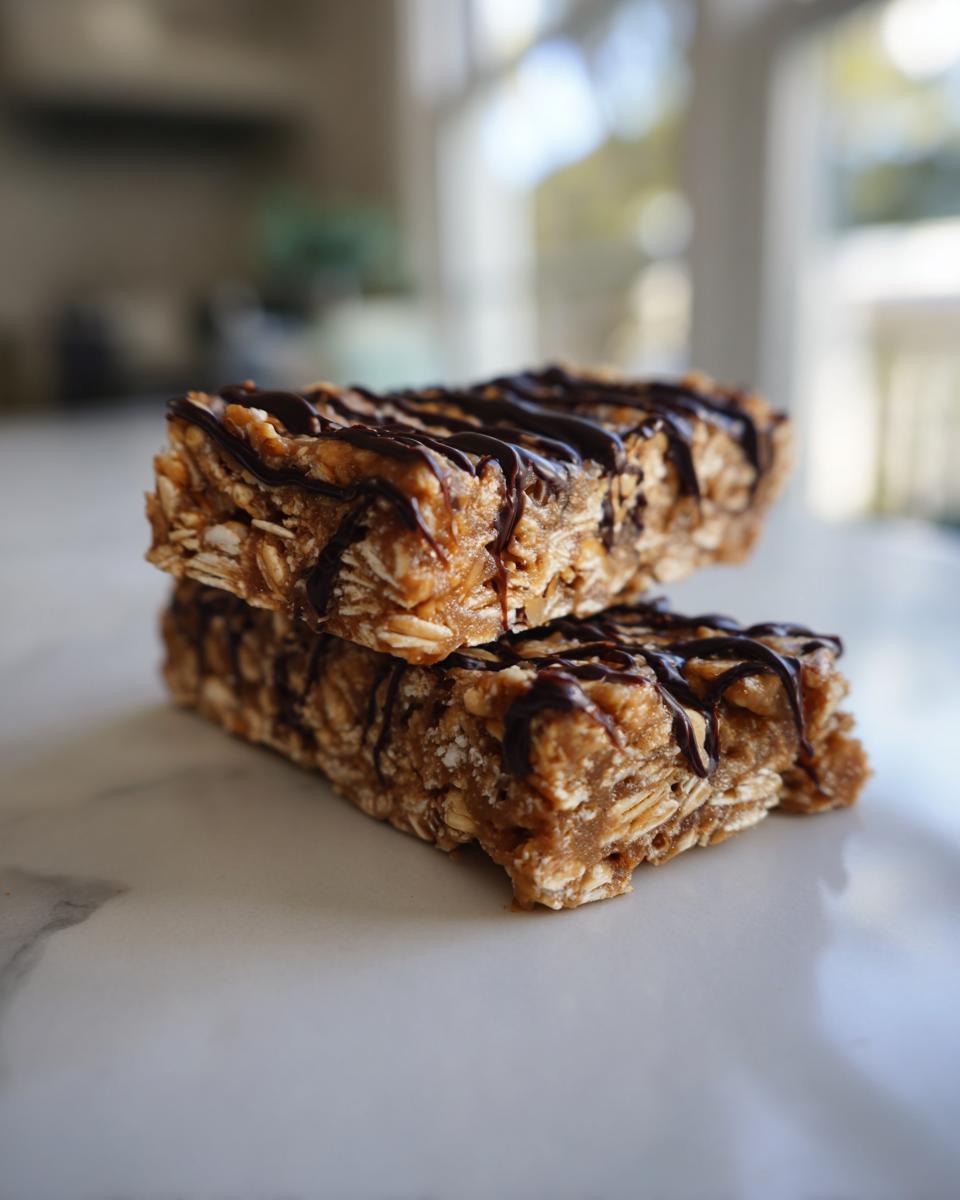
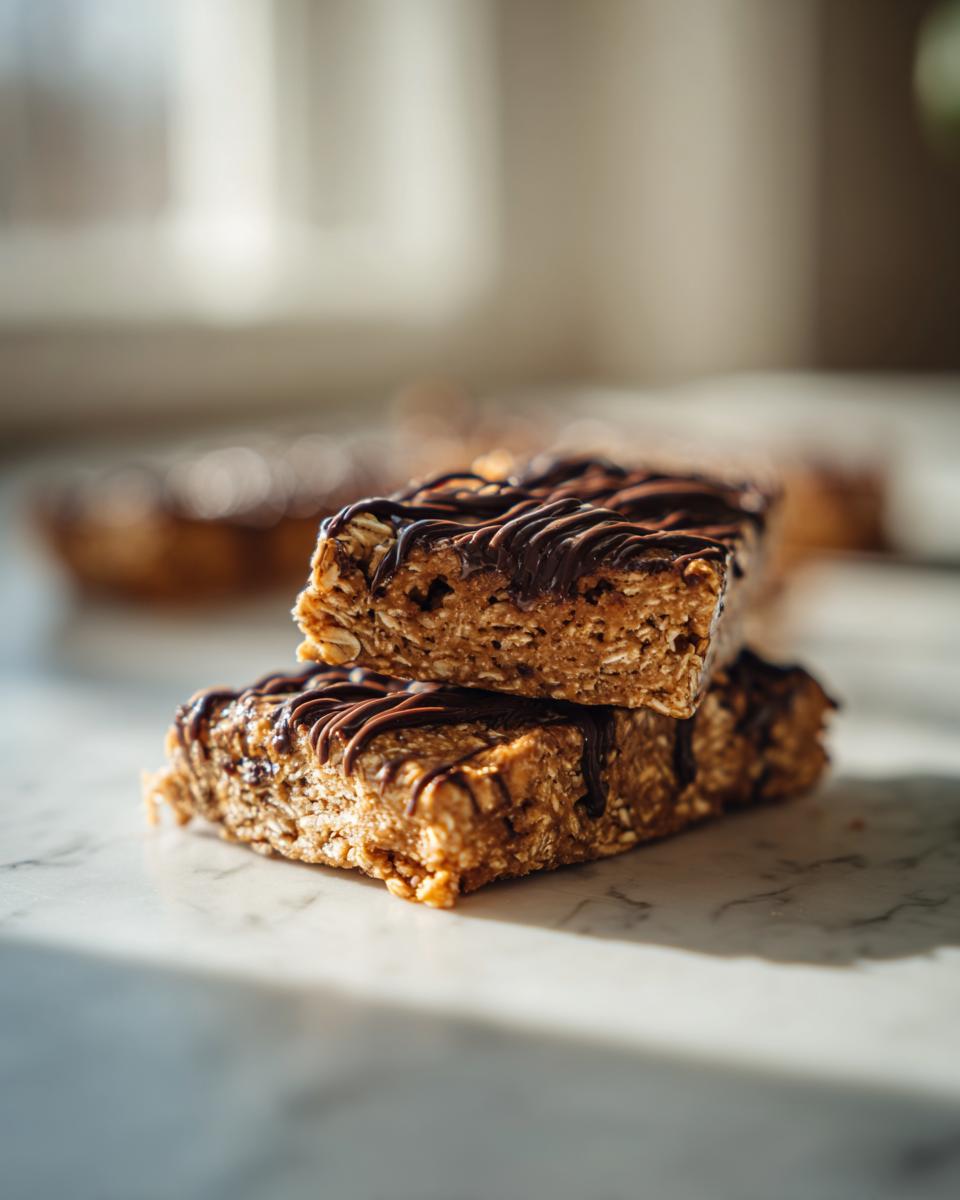
Okay, now for the fun part! This is where we turn five simple things into something amazing. You won’t believe how easy this process is; frankly, it’s shocking how good these protein bars turn out considering we don’t even turn on the stove. This whole active mixing process takes about ten minutes, max. I always like to have my 8×8 pan ready with parchment paper completely lined up first—make sure you leave that overhang on the sides, that’s your secret helper for getting these out later, trust me!
You’ll combine everything except the chocolate chips right in a mixing bowl. Stir it up until it starts looking like thick cookie dough. Sometimes, depending on your protein powder, it can look crumbly—if yours is just refusing to marry together, go ahead and add a teaspoon of water or milk, really just one at a time, until it holds its shape when you squeeze it. Then, move it into that prepared pan. This next part is critical for getting those dense, chewy protein bars: press that mixture down HARD. Use the bottom of a glass or even just your clean hands to compact it into an even layer. If you don’t press firmly, they’ll just crumble apart later, and we certainly don’t want sad, crumbly homemade protein bars!
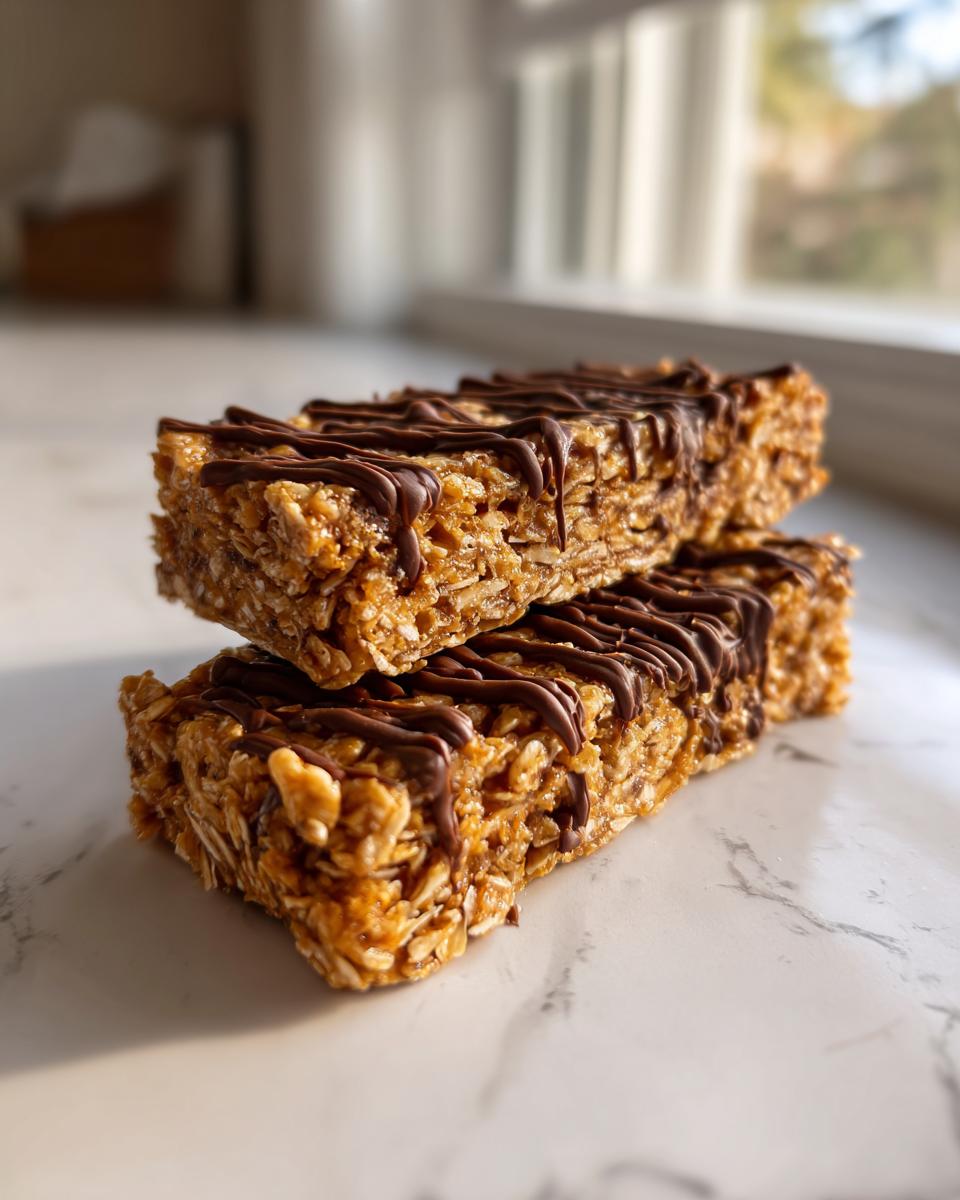
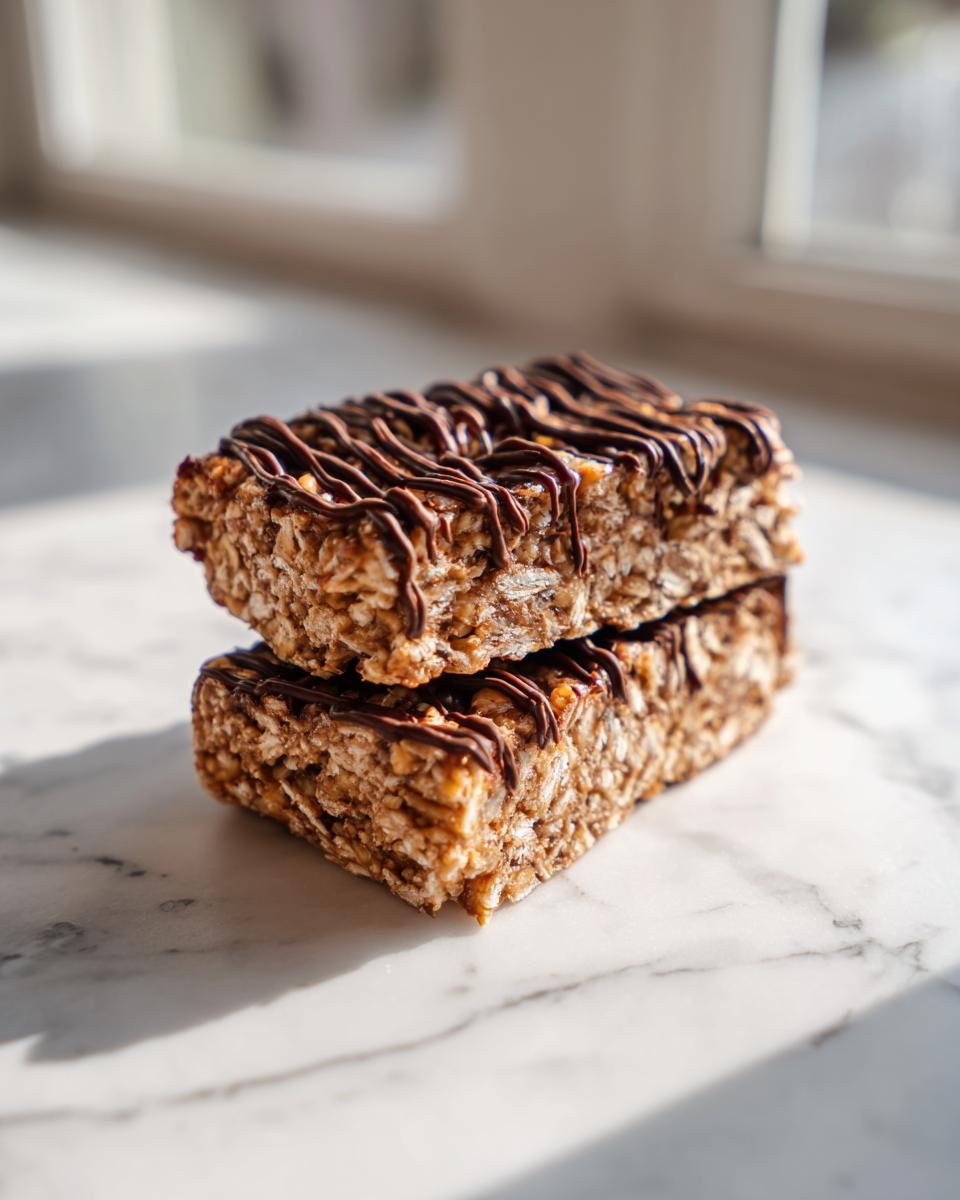
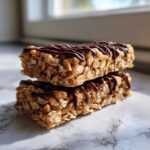
For the topping, grab your dark chocolate chips. Microwave them in short bursts—like 30 seconds, stir, 30 seconds, stir—until they are smooth. Don’t walk away, or you’ll burn them! Then, drizzle that glorious melted chocolate right over the top of the pressed base. Once the chocolate is drizzled, pop the whole thing into the fridge. You need at least an hour for them to set up properly. If you rush this, those clean cuts turn into a total mess. You can find more great tips for quick, no-bake treats like these here.
Mixing and Pressing the Protein Bars Base
When you’re mixing the peanut butter, oats, honey, and powder, really work it until you get that uniform dough. Don’t stop stirring just because it looks mostly combined! You need that thick, stiff consistency. Then, when you press it into the pan, press, press, press! We’re aiming for one solid block. That firmness is what prevents them from being dusty, crumbly messes when you try to cut them later. Remember, we want firm protein bars, not a pile of sweet crumbs.
Melting and Drizzling the Chocolate Topping
Microwaving chocolate is tricky, I know! The key is gentle heat. If you blast it for a full minute, you’ll scorch it, and then it’ll seize up on you. Stirring after short intervals helps it melt evenly from the inside out. Once it’s perfectly smooth, use a fork or a spoon to just lightly drizzle it across the top. A little goes a long way here, providing that necessary bitter contrast to the sweet peanut butter base!
Chilling and Cutting Your Homemade Protein Bars
Patience is essential for successful homemade protein bars. Resist the urge to check them after 30 minutes! You need that full hour (or maybe a bit more if your fridge isn’t super cold) so that the chocolate sets hard and the binding ingredients firm up nicely. Once they’re chilled right through, use those handy parchment paper overhangs to gently lift the whole block out onto a cutting board. Then, use a sharp knife to cut them into 10 neat pieces. That chill time ensures those clean edges you see in the final pictures!
Tips for Perfecting Your Homemade Protein Bars
Even though this recipe is wonderfully simple, there are a few kitchen secrets to making sure these homemade protein bars are perfectly chewy every single time. I always test for texture flexibility before chilling—if it feels too stiff when warm, it’s usually just right after chilling! Remember, these are designed to be simple homemade snacks, so customization is where the fun really starts.
If you want to check out some other creative takes on this style of snack, I love seeing what others post online at places like the one I linked here.
Ingredient Substitutions for Custom Protein Bars
If peanut butter isn’t your favorite, or if you need to adapt for allergies, you can absolutely swap it out! Almond butter or sunflower seed butter work great too, but be warned: natural nut butters that have oil separated runnier than creamy peanut butter. If you need to adjust sweetness, swap the honey for maple syrup to achieve a great vegan protein bars recipe outcome. Just try not to change the ratio of the dry ingredients to the wet ones too much, or you’ll end up needing extra liquid to bring it all together!
Storage and Make Ahead Protein Snacks
This is where these bars completely beat those expensive grocery store boxes! Since these are no bake protein bars, storage is super easy, but temperature matters for texture. They really shine when kept cold. I always store mine in an airtight container right in the refrigerator. Trust me on this: keep them chilled! They will stay perfectly firm, chewy, and tasting fresh for a solid week—making them the ultimate meal prep bars solution.
If you’re someone like me who likes to bake a huge batch to last even longer, you can absolutely freeze them! Just make sure you separate the layers with a little square of parchment paper before you stack them in a freezer-safe bag or container. They freeze beautifully, and honestly, I think they taste even better slightly cold. Pull one out about 15 minutes before you want to eat it, and you’ve got a fantastic, ready-to-go snack. These truly are the definition of excellent make ahead protein snacks! It’s great knowing I have these reliable protein bars waiting for me.
Frequently Asked Questions About These Protein Bars
It’s natural to have questions when you’re trying a new, super-simple recipe! I get asked the same things all the time when I share these amazing protein bars with friends. Since we stripped this recipe down to the bare essentials, sometimes people wonder about swaps or adjustments. Don’t worry, I’ve got the answers to help make your batch of homemade protein bars absolutely perfect!
How can I make these low sugar protein bars?
That’s a smart question, especially if you are watching your sugar intake closely. Since we rely on honey or maple syrup for binding *and* sweetening, cutting it down too much can make the dough crumble instead of stick. If your protein powder is already quite sweet, you can slowly reduce the honey amount by about a tablespoon and see how the mix comes together. If you need an even bigger reduction, look for a zero-calorie liquid sweetener that binds well—though I can’t guarantee the texture will be quite as chewy. For the chocolate topping, opt for 100% cacao baking chocolate instead of standard chips if you need to keep the sugar count low.
Can I use a different nut butter in this easy protein bar recipe?
Yes, you absolutely can! This easy protein bar recipe is quite forgiving in that regard. Almond butter or cashew butter are great substitutions, but here’s the catch: commercial nut butters that have oil separated runnier than creamy peanut butter. If you use a very runny natural butter, your dough might get too soft. If that happens, just add an extra tablespoon of protein powder or a tablespoon of rolled oats until it firms up enough to handle. The flavor profile changes slightly, but they still turn out delicious!
What is the best protein powder to use for these homemade protein bars?
This is where things get personal! For texture, I find standard whey protein powder works perfectly because it absorbs moisture nicely and keeps the bars firm. If you are looking for vegan protein bars recipe adaptations, plant-based powders work fine, but be aware that they often absorb moisture differently. Sometimes pea protein can make the dough a bit stiffer or drier than whey. If your dough seems very crumbly when using a plant-based blend, just follow the tip I mentioned earlier: add liquid, one teaspoon at a time, until you can confidently press it into a solid block. That’s the key!
Estimated Nutritional Value for These Protein Bars
Now, I have to give you my standard disclaimer here because I know so many of you are counting macros or watching your sugar intake closely. Since we are using simple, whole-food ingredients, the exact numbers can shift a tiny bit depending on the specific brand of peanut butter or protein powder you choose. What I give you here is a solid, educated estimate based on the five standard ingredients listed in the recipe when cut into 10 bars. Think of this as a great baseline for your high protein recipes tracking!
For one bar, you’re looking at fantastic staying power. These are genuinely designed to be energy-sustaining, not just a speedy sugar rush. The protein content is really the star here, making these fantastic for that post-workout recovery or anytime you need a serious energy lift. It’s all about balance so you can enjoy these satisfying protein bars guilt-free!
Here is the breakdown per serving:
- Calories: 220
- Protein: 12g
- Total Fat: 14g (including 3g saturated fat)
- Total Carbohydrates: 18g (including 2g Fiber)
- Sugar: 8g
See? Solid fuel that keeps you going! They are a great way to keep your high protein recipes goal on track without resorting to something highly processed.
Share Your Experience Making These Quick Protein Treats
I truly hope these Easy No-Bake 5-Ingredient Peanut Butter Protein Bars become as much of a staple in your kitchen as they are in mine! Knowing that I’ve helped someone ditch the expensive, questionable store-bought clutter for these simple, reliable homemade protein bars just fills me up. Seriously, when you see how easy it is to make something so satisfying, you’ll never go back to the checkout aisle struggle again!
I absolutely love hearing about your tweaks and successes. Did you use almond butter instead? Did you skip the chocolate drizzle because the kiddos ate the bars too fast? Drop me a comment down below! A rating helps other busy folks looking for the best tasting protein bars to find this recipe, too. It’s how we build this community together!
If you snap a picture of your perfectly chilled, chewy bars, please tag me over on social media! It means the world to me when I get to see my recipes making an appearance in your real, busy, amazing lives. If you ever have questions or need some custom advice for a substitution, don’t hesitate to reach out via my contact page. Happy snacking!
PrintEasy No-Bake 5-Ingredient Peanut Butter Protein Bars
Make these easy, no-bake protein bars using only five simple ingredients. They are chewy, satisfying, and perfect for quick meal prep or a healthy snack when you need sustained energy.
- Prep Time: 10 min
- Cook Time: 0 min
- Total Time: 1 hour 10 min
- Yield: 10 servings 1x
- Category: Snack
- Method: No-Bake
- Cuisine: American
- Diet: Vegetarian
Ingredients
- 1 cup creamy peanut butter
- 1/2 cup vanilla or unflavored protein powder
- 1/2 cup rolled oats
- 1/4 cup honey or maple syrup
- 1/4 cup dark chocolate chips (for topping)
Instructions
- Line an 8×8 inch baking pan with parchment paper, leaving an overhang on the sides for easy removal.
- In a medium bowl, combine the peanut butter, protein powder, rolled oats, and honey or maple syrup.
- Mix all ingredients thoroughly until a thick, uniform dough forms. You may need to use your hands to fully incorporate everything.
- Press the mixture evenly into the prepared pan. Press down firmly to compact the bars.
- Melt the chocolate chips in a microwave-safe bowl in 30-second intervals, stirring until smooth.
- Drizzle the melted chocolate over the top of the bar mixture.
- Place the pan in the refrigerator and chill for at least 1 hour, or until firm.
- Use the parchment overhang to lift the block out of the pan. Cut into 10 even bars.
- Store the bars in an airtight container in the refrigerator for up to one week.
Notes
- For a vegan option, use maple syrup instead of honey and ensure your protein powder is plant-based.
- If the mixture seems too dry, add one teaspoon of water or milk at a time until it comes together.
- These homemade protein bars taste best when kept chilled.
Nutrition
- Serving Size: 1 bar
- Calories: 220
- Sugar: 8
- Sodium: 110
- Fat: 14
- Saturated Fat: 3
- Unsaturated Fat: 11
- Trans Fat: 0
- Carbohydrates: 18
- Fiber: 2
- Protein: 12
- Cholesterol: 0