
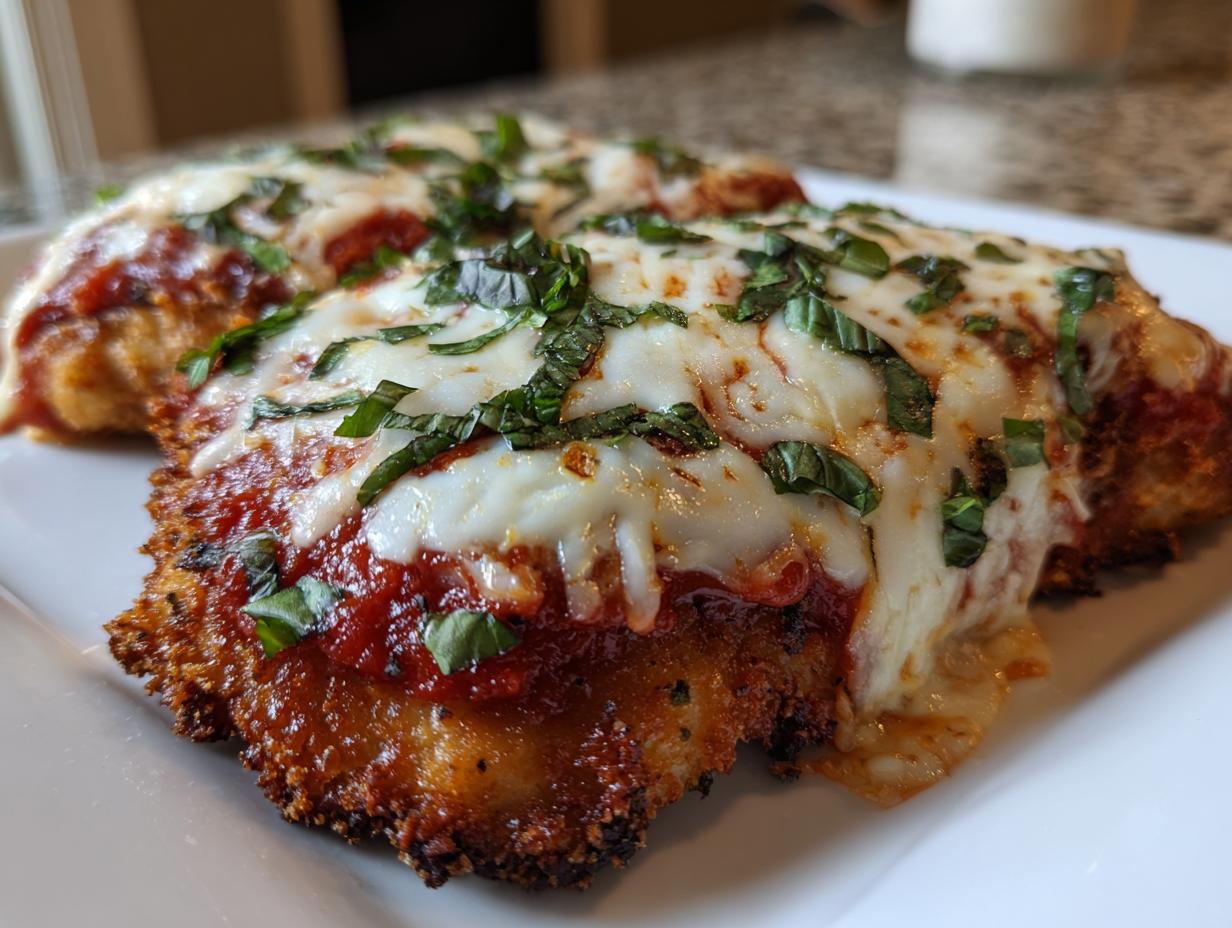
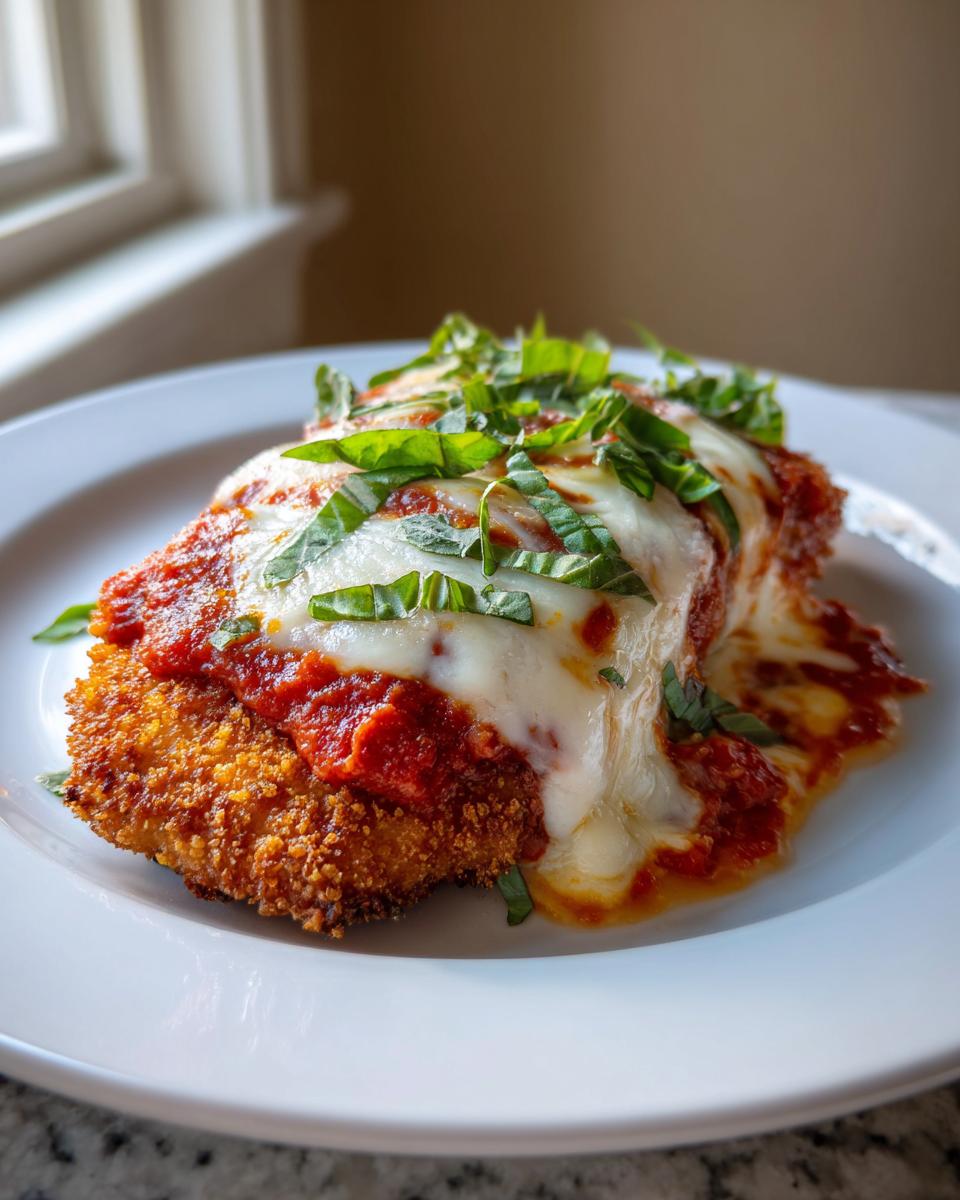
You know those nights where you just crave that perfect Italian experience—the one where the chicken is shatteringly crisp, swimming with rich sauce, and topped with enough gooey cheese to require a fork and knife? I totally get it! So many takeout versions end up soggy by the time they hit your table. That’s exactly why I spent ages perfecting this chicken parmesan recipe.
My goal here at MayaPlate has always been to deliver maximum flavor without maxing out your evening schedule. I really think food should be a moment of pause, just like I talk about over on the About Page. This version is my answer to making Restaurant Style Chicken Parm happen on a Tuesday night. Trust me, once you master the simple trick for that crust and keep the chicken breast juicy inside, you’ll never look back. It’s pure, satisfying comfort food, made right here.
- Why This Is The Best Chicken Parmesan Recipe You Will Make
- Essential Ingredients for Your Chicken Parmesan Recipe
- How to Prepare Your Easy Chicken Parmesan Recipe
- Tips for Success with Your Homemade Chicken Parm
- Serving Suggestions for Your Chicken Parmesan Dinner Ideas
- Storage and Reheating Instructions for Chicken Parmesan Recipe Leftovers
- Frequently Asked Questions About This Chicken Parmesan Recipe
- Estimated Nutritional Data for This Chicken Parmesan Recipe
- Share Your Homemade Chicken Parm Experience
Why This Is The Best Chicken Parmesan Recipe You Will Make
Look, there are a million chicken parmesan recipes out there, I know. But this one is different because we nail the texture you actually want. Forget dry, pale chicken! This method guarantees that amazing crunch you get at the best Italian spots. It tastes like you spent hours, but it’s totally weeknight friendly.
- Guaranteed Juicy Chicken Parmesan: We pound it thin, so it cooks evenly all the way through, locking in all those nice flavors.
- Next-Level Crispiness: We use Panko breadcrumbs because regulars crumbs just don’t cut it here. The *Crispy Chicken Parmesan* is real!
- Maximum Cheesiness: We layer on the mozzarella and parmesan so you get that perfect, golden cheesy top layer every single time.
Achieving Restaurant Style Chicken Parm Texture
The secret sauce (literally!) to keeping things crispy is our two-step process. We pan-fry the breaded cutlets just long enough to set that crunchy coating—we are not trying to cook them all the way through in the oil! That initial fry acts like a seal. Then, we finish them in the oven under the cheese. That brief period lets the sauce warm up and the mozzarella melt into a gorgeous, golden blanket without ever steaming the delicious crust underneath. That’s how you get that perfect *Restaurant Style Chicken Parm* finish!
Essential Ingredients for Your Chicken Parmesan Recipe
You don’t need a pantry full of weird items to make an incredible homemade chicken parm. I’ve kept this list simple so it fits perfectly into our goal of being a quick quick chicken recipes for dinner, but the quality of these few things really makes the difference!
For the chicken, we need four nice, boneless, skinless breasts. Then, for our dredging station, grab one cup of flour, two eggs beaten with half a cup of milk—that’s our simple egg wash! The real star for that crunch is going to be 1 1/2 cups of Panko breadcrumbs. Seriously, do not substitute standard breadcrumbs for this, or you’ll lose that signature snap!
We’ll mix half a cup of grated Parmesan right into those Panko crumbs along with garlic powder, oregano, salt, and pepper. For the finish, you need about a cup and a half of quality marinara sauce, 8 ounces of fresh mozzarella (trust me on fresh!), and a final dusting of Parmesan for the top. That’s it!
Ingredient Notes and Substitutions
If you want to take this *chicken parmesan recipe* from good to gourmet, pay attention to the cheese and the sauce. Fresh mozzarella, the soft kind packed in water, melts way better and tastes cleaner than the pre-shredded stuff that comes pre-bagged. It’s worth the extra step to slice or shred it yourself!
When it comes to the marinara, use the best jarred sauce you can find, or if you have 20 extra minutes, use my simple homemade marinara sauce. If you’re really pressed for time and have to use something already in your pantry, just make sure you choose one that isn’t overly sweet. We want rich tomato flavor to balance that salty cheese crust.
How to Prepare Your Easy Chicken Parmesan Recipe
Okay, this is where the magic happens, and honestly, it’s faster than you think. If you’re looking for truly Quick Chicken Recipes, this streamlined process gets you maximum reward for minimum time. We’re not making complicated cuts here; we’re aiming for evenness so everything cooks through nicely at the end.
Step 1: Preparing the Chicken Cutlets for the Chicken Parmesan Recipe
First things first: you absolutely have to pound those chicken breasts. Grab a piece of plastic wrap, lay a chicken breast down, cover it with another sheet, and then just gently pound the thickest parts with a meat mallet. Think about making a patty—you want everything to be about a half-inch thick, nice and uniform. This step is non-negotiable for juicy results! If they are too thick on one end, that part will dry out while the rest cooks.
Step 2: The Perfect Dredging Station for Crispy Chicken Parmesan
Set up three shallow dishes side-by-side. Dish one is just your flour. Dish two is your egg and milk mixture—give that a quick whisk! Dish three holds your amazing Panko and Parmesan crumb mix. Now, take your pounded chicken. Dip it completely in the flour, shaking off the loose bits. Then, dip it in the egg wash, letting the excess drip back. The most important part? Press that cutlet *firmly* into the Panko mix on both sides. You want a really secure, thick coating for the best Crispy Chicken Parmesan.
Step 3: Pan-Frying and Assembling the Cheesy Chicken Bake
Get about a quarter-inch of olive oil hot in a skillet over medium-high heat. We are only frying these cutlets for about 2 to 3 minutes per side, just until they look beautifully golden brown. They won’t be cooked through, and that’s okay! This step sets that crust so it doesn’t get soggy later. Once they’re browned, lay them in your baking dish. Spoon a layer of marinara over the top of each piece. Then pile on that fresh mozzarella, followed by a sprinkle of your topping Parmesan. Pop it into the preheated 400°F oven, and get ready for the best Cheesy Chicken Bake you’ve ever made!
Tips for Success with Your Homemade Chicken Parm
I’ve learned a few things over the years trying to replicate that perfect Italian place flavor right on my own counter. If you follow the main steps, you’ll be great, but these little tricks transform this *chicken parmesan recipe* from good to legendary.
First up: moisture control! To stop that bottom layer from getting soggy in the baking dish, try this: after you pan-fry the cutlets to set the crust, let them sit on a wire cooling rack for about five minutes before you add them to the sauce in the baking dish. That tiny bit of air time lets any residual oil drip off and helps that crust breathe before the sauce hits it.
Secondly, watch your dairy! When you add the mozzarella on top, make sure it’s sliced relatively thin or coarsely shredded. If you use big, thick chunks of fresh mozzarella, the cheese on top might melt beautifully and burn before the chicken in the middle heats up to a safe temperature. We want melted and bubbly, not scorched and hard!
Finally, don’t ignore the oven temperature management I mentioned earlier. If your cheese looks perfect—golden brown, slightly bubbling—but you know the chicken could use another minute or two to hit that safe 165°F internal temperature, switch that oven setting to broil *only* for the last 60 seconds. Keep your eye glued to it though! Broiling goes from perfect to black in seconds, and we don’t want that delicious crust to char.
Do these things, and I promise you’ll have the Best Chicken Parmesan on the block—crispy, juicy, and oh-so-cheesy!
Serving Suggestions for Your Chicken Parmesan Dinner Ideas
So, you’ve got this incredible, flavor-packed main course staring at you—what do you serve it with? Choosing the right side dish can really complete your Chicken Parmesan Dinner Ideas without stealing the spotlight from that gorgeous, cheesy cutlet. Since this dish is so rich, I like to keep the accompaniments straightforward but satisfying!
For a truly classic Italian-American night, you absolutely need something underneath to soak up the extra marinara. A generous bed of spaghetti is always my go-to choice. I use a thin spaghetti or linguine because they coat so nicely in the sauce. If you’re keeping it quick, toss your cooked pasta with a little olive oil and garlic while you wait for the chicken to bake. Simple, effective, and totally delicious!
But if you’re trying to keep things a little lighter, or maybe you’re not feeling the carb-heavy approach, you can’t go wrong with some vibrant greenery. A crisp Caesar salad or even just some simple mixed greens dressed with a sharp lemon vinaigrette cuts through the richness of the cheese beautifully. And hey, if you’ve got 10 minutes to spare, whip up some cheesy garlic bread—it’s almost mandatory for scooping up those last bits of sauce and crispy breading!
Storage and Reheating Instructions for Chicken Parmesan Recipe Leftovers
I always hope for leftovers because, let’s be honest, this is still fantastic the next day, even if the crispiness takes a little vacation. If you end up with any amazing *chicken parmesan recipe* leftovers, you need to store them properly so they taste amazing later. Don’t just toss them in a container! Separation is key for the best results.
First, let the chicken cool down completely after it comes out of the oven. Once it’s room temperature, you need to carefully separate the components. If you’re just storing the chicken, place it in an airtight container. If you’re storing the pasta too, keep it in a separate container entirely. The golden rule here is this: The residual heat and steam trapped between the sauce, cheese, and breading are what turn that beautiful crust soft. Keep it refrigerated, and it should hold up well for about 3 days, max.
How to Reheat Your Chicken Parmesan for Maximum Crispness
Now for the crucial part: reheating! Listen to me, do NOT microwave this if you care about texture. Microwaving your Homemade Chicken Parm turns that crispy Panko into sad, soggy mush. We need dry heat to bring that crispness back.
If you have an air fryer, that’s your best bet. Set it to 375°F (190°C) and cook for about 6 to 8 minutes. It works wonders for crisping up the edges again! If you don’t have an air fryer, use your regular oven. Set it to 375°F (190°C) and place the leftover cutlet (sauce and cheese still on!) on a baking sheet. Bake it for about 10 to 12 minutes. You might want to give the cheese a quick blast under the broiler for 30 seconds at the very end, mimicking the original bake. This dries out the breading just enough to give you that satisfying crunch back. Enjoy those second-day flavors!
Frequently Asked Questions About This Chicken Parmesan Recipe
I know you might have a few last-minute questions swirling around before you dive into making this recipe. It’s that important, right? We want this Easy Chicken Parmesan to be flawless for your next Weeknight Italian Dinner, so let’s clear up the biggest sticking points!
Can I skip the pan-frying step entirely in this Easy Chicken Parmesan Recipe?
That’s a fantastic question, especially if you’re trying to keep the oil down! You absolutely *can* skip the pan-frying step and go straight to a fully baked approach like I mentioned in the notes. Preheat to 400°F, spray the breaded cutlets with a little cooking spray, and bake them! However, I have to be honest with you: you sacrifice that authentic, shatteringly crispy crust we worked so hard for. The pan-fry is what sets the Panko so it doesn’t just absorb sauce in the oven. If you bake only, you’ll get a softer, more casserole-style result, which is still tasty, but it’s not quite the same texture.
How do I ensure my chicken stays juicy when making this Chicken Parmesan Recipe?
Juiciness is the holy grail of great chicken parm! If you follow the pounding step—and please, please don’t skip it!
- Make sure the chicken breasts are pounded evenly to about 1/2-inch thickness. If one end is thick, it won’t cook at the same rate as the thinner part, and you end up with dry edges and a raw middle.
- Don’t overcook in the initial pan-fry! We only want 2-3 minutes per side just to get that beautiful golden color on the crust. We finish the cooking in the oven *with* the sauce, which keeps the moisture trapped in.
- When it goes into the oven, check that internal temperature. As soon as it hits 165°F, pull it out! Any longer, and you start losing moisture, even under a blanket of cheese.
It all comes down to even thickness and paying attention to the clock once it hits the oven!
Estimated Nutritional Data for This Chicken Parmesan Recipe
I always get asked about the details, and hey, while MayaPlate focuses on flavor and simplicity, being mindful of what we’re eating is important too! Here is the estimated breakdown for one serving of this fantastic *chicken parmesan recipe*.
Please remember, these numbers are just estimates based on the standard ingredients listed above—things like the exact brand of marinara you use or how much oil you use when frying can shift these numbers slightly. But this gives you a great idea of what you’re enjoying!
- Serving Size: 1 cutlet
- Calories: 580
- Fat: 30g (with 14g Saturated Fat)
- Carbohydrates: 35g
- Protein: 45g
- Sodium: 750mg
See? That’s honestly pretty impressive for a meal that tastes this rich and satisfying! It proves that you can absolutely enjoy classic comfort food, like this *Easy Cheesy Chicken Bake*, without completely derailing your healthy eating goals. If you want to see more ideas for lighter, satisfying weeknight meals, check out the tips I gathered from other great cooks over here: Chicken Parmesan with Marinara and Mozzarella Recipe.
Share Your Homemade Chicken Parm Experience
Now that you’ve got the secrets to achieving that restaurant-quality crunch and keeping your chicken so incredibly juicy, I’m dying to hear how it went! Seriously, making this *chicken parmesan recipe* should feel like a triumph.
When you try this out for your next weeknight dinner, please drop a rating down below. Did the Panko crust hold up like magic? Were you thrilled with how quickly you pulled this off? Little details like that help everyone else who is nervous about tackling homemade Italian food!
If you snapped a picture of your perfectly golden, cheesy bake, I would absolutely love to see it! You can always tag me on social media or send a photo through the contact form. Seeing your success stories is what keeps me inspired to share these practical, delicious recipes. Get cooking, friends, and let me know what you think!
PrintThe Ultimate Crispy Chicken Parmesan Recipe (Restaurant Quality, Weeknight Friendly)
Make restaurant-style Chicken Parmesan at home that stays perfectly crispy, juicy, and cheesy. This easy recipe delivers maximum flavor for your weeknight Italian dinner.
- Prep Time: 15 min
- Cook Time: 25 min
- Total Time: 40 min
- Yield: 4 servings 1x
- Category: Dinner
- Method: Pan-Frying and Baking
- Cuisine: Italian-American
- Diet: Vegetarian
Ingredients
- 4 boneless, skinless chicken breasts (about 6 oz each)
- 1 cup all-purpose flour
- 2 large eggs, beaten
- 1/2 cup milk
- 1 1/2 cups Panko breadcrumbs (for extra crispiness)
- 1/2 cup grated Parmesan cheese (for breading)
- 1 teaspoon garlic powder
- 1/2 teaspoon dried oregano
- 1/2 teaspoon salt
- 1/4 teaspoon black pepper
- 1/4 cup olive oil (for pan-frying)
- 1 1/2 cups quality marinara sauce
- 8 ounces fresh mozzarella cheese, sliced or shredded
- 1/4 cup grated Parmesan cheese (for topping)
- Fresh basil, chopped (for garnish)
Instructions
- Preheat your oven to 400°F (200°C). Lightly grease a baking dish large enough to hold the cutlets.
- Prepare the chicken: Place each chicken breast between two sheets of plastic wrap. Pound them to an even 1/2-inch thickness using a meat mallet. This ensures even cooking and juiciness.
- Set up the dredging station: In the first shallow dish, place the flour. In the second dish, whisk together the eggs and milk. In the third dish, combine the Panko breadcrumbs, 1/2 cup grated Parmesan, garlic powder, oregano, salt, and pepper.
- Coat the chicken: Dredge each cutlet first in the flour, shaking off excess. Dip into the egg mixture, letting excess drip off. Finally, press firmly into the Panko mixture to create a thick, even coating.
- Achieve crispiness: Heat the olive oil in a large skillet over medium-high heat. Pan-fry the breaded cutlets for 2-3 minutes per side until golden brown. They do not need to be cooked through; this step sets the crust. Work in batches if necessary to avoid overcrowding the pan.
- Assemble the dish: Place the browned cutlets in the prepared baking dish. Spoon about 2-3 tablespoons of marinara sauce over each cutlet. Top generously with the mozzarella cheese, followed by the remaining 1/4 cup of Parmesan cheese.
- Bake: Bake for 12-15 minutes, or until the chicken is cooked through (internal temperature reaches 165°F) and the cheese is melted and bubbly. For extra browning on the cheese, switch the oven to broil for the last 1-2 minutes, watching carefully to prevent burning.
- Serve immediately over your favorite pasta or with a side salad. Garnish with fresh basil.
Notes
- For the juiciest chicken, ensure all cutlets are pounded to an even thickness before breading.
- Panko breadcrumbs are key for achieving that restaurant-style crispy chicken parmesan crust without over-frying.
- If you prefer a baked-only method, spray the breaded cutlets lightly with cooking spray before baking at 400°F for 15 minutes, flipping halfway, before adding sauce and cheese.
Nutrition
- Serving Size: 1 cutlet
- Calories: 580
- Sugar: 8
- Sodium: 750
- Fat: 30
- Saturated Fat: 14
- Unsaturated Fat: 16
- Trans Fat: 0.5
- Carbohydrates: 35
- Fiber: 3
- Protein: 45
- Cholesterol: 150