
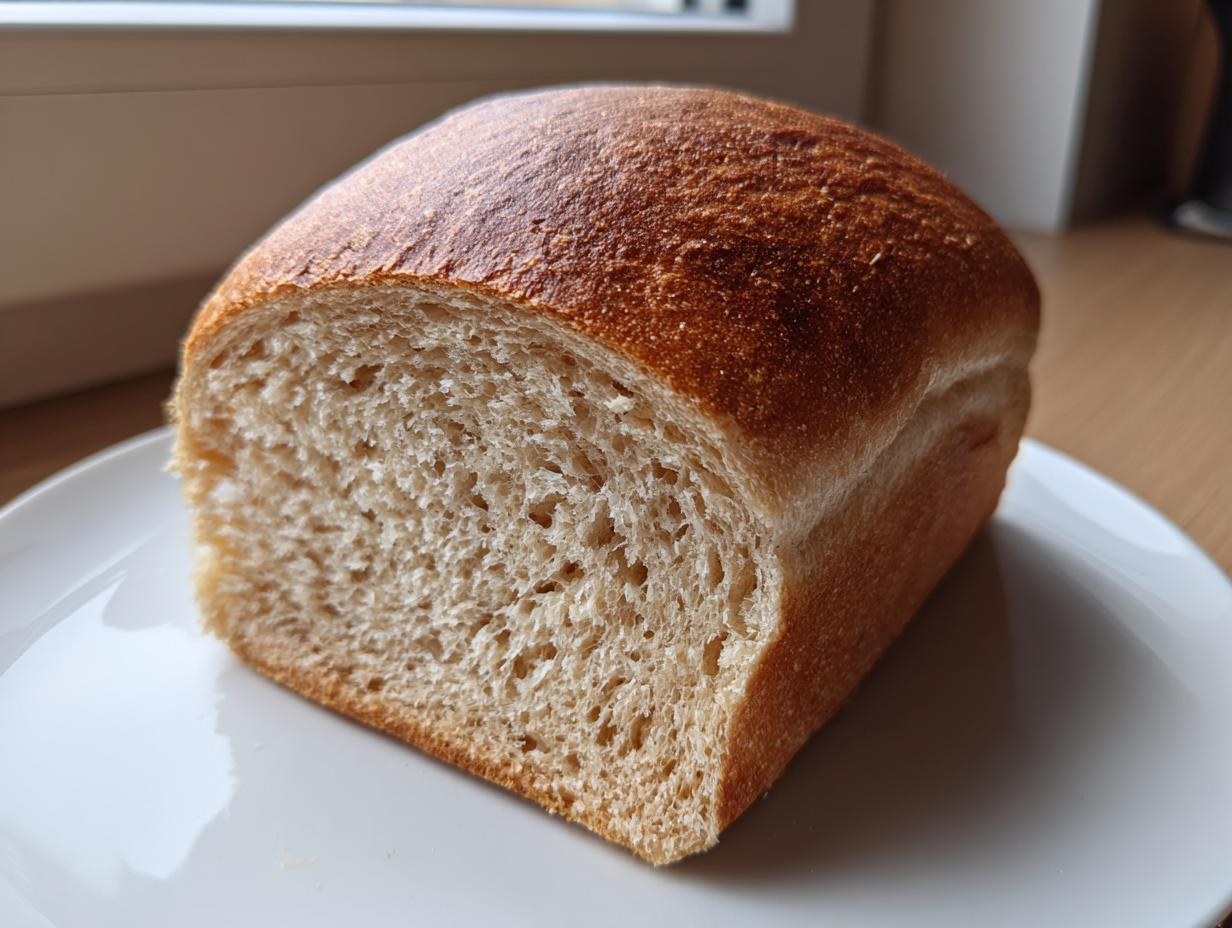
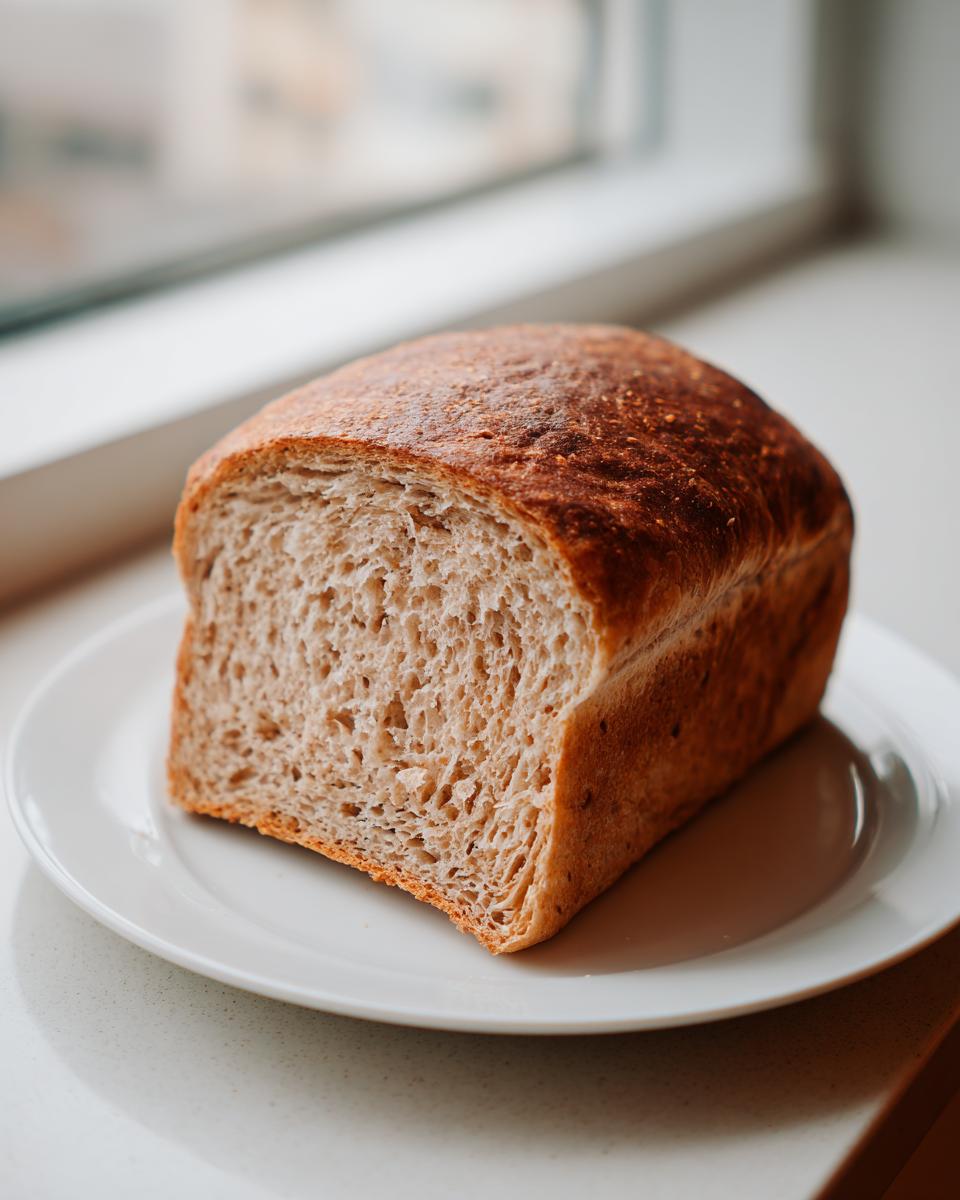
It’s such a struggle, isn’t it? You want that hearty, genuinely wholesome bread, but every time you try making it at home, you end up with a brick that could double as a doorstop. Store-bought healthy options are usually packed with weird fillers, so I get why you’re here! I promise this whole wheat bread recipe is different. I developed this Soft & Fluffy Honey Whole Wheat Sandwich Bread because, as a nutritional consultant, I needed real food that worked with my busy life. At MayaPlate, we always focus on delivering deliciously simple, intelligently nourishing results, and this loaf proves you don’t need fancy techniques to get that perfect, soft sandwich texture. You can read more about how we approach practical nutrition over on our About Page.
- Why This Soft & Fluffy Honey Whole Wheat Bread is a Kitchen Staple
- Gathering Ingredients for Your Whole Wheat Bread
- Step-by-Step Instructions for Easy Whole Wheat Loaf Recipe
- Tips for Perfect Whole Wheat Bread Baking Success
- Variations on Your Honey Whole Wheat Bread Recipe
- Storage & Reheating Instructions for Fresh Baked Bread at Home
- Frequently Asked Questions About Whole Wheat Bread
- Estimated Nutritional Information for this Whole Wheat Bread
- Share Your Homemade Whole Wheat Bread Creations
Why This Soft & Fluffy Honey Whole Wheat Bread is a Kitchen Staple
When you’re trying to eat healthier, sometimes you sacrifice texture, but not today! This is the whole wheat bread recipe I trust when I need something quick, healthy, and totally satisfying. Forget that heavy, crumbly stuff you’re used to. This loaf is foolproof, even if you’ve never touched yeast before! It hits all the right notes for nourishing eating without sacrificing pure comfort food.
Achieving Fluffy Whole Wheat Baking Results
The secret to avoiding that dreaded dense finish is simple: we use a tiny bit of all-purpose flour alongside the whole wheat. This small adjustment gives the gluten structure it needs while keeping that hearty fiber you want. It’s the key to genuine fluffy whole wheat baking. A quick 5-to-7-minute knead is usually all it takes!
Perfect for Beginner Bread Making
Seriously, if you can mix wet and dry ingredients, you can nail this recipe. We keep the steps straightforward—activate the yeast, mix, knead lightly, and let time do the heavy lifting. It’s truly a no-fail recipe perfect for anyone new to beginner bread making. No fancy stand mixers required here, promise!
Gathering Ingredients for Your Whole Wheat Bread
Okay, let’s get our ingredients ready! The short ingredient list is part of what makes this an easy whole wheat loaf recipe. Remember, since we are using 100% whole wheat flour for that hearty homemade bread flavor, the quality matters. I always recommend using a good brand of whole wheat flour because the bran cuts the gluten, and a higher quality flour handles that better.
- 1 cup warm water (aim for 105–115°F—too hot kills the yeast, too cool makes it lazy!)
- 2 teaspoons active dry yeast
- 1/4 cup honey (this is crucial for flavor!)
- 2 tablespoons unsalted butter, melted
- 1 1/2 teaspoons salt
- 3 cups whole wheat flour
- 1/2 cup all-purpose flour (don’t skip this, it helps make it soft!) plus more for dusting
Grab everything and set it next to your mixing bowl. We are ready to start!
Step-by-Step Instructions for Easy Whole Wheat Loaf Recipe
Now for the fun part! Don’t let the word “yeast” scare you off. Making whole wheat bread is totally hands-on but genuinely simple once you follow the timing. We’re going for that perfect, light structure you want in a great sandwich loaf, so pay attention to the rise times.
Activating Yeast and Mixing Wet Ingredients
First things first: wake up that yeast! Gently mix your warm water and yeast together in a big bowl. It needs to sit there for about five minutes until it looks foamy and bubbly on top. That foam is your signal that the yeast is happy and ready to work its magic. Once it’s foamy, stir in your honey, the melted butter, and salt. That honey adds such a necessary warmth to the flavor profile.
Kneading for a Soft Sandwich Bread Recipe Texture
Time to introduce the flour! Add your whole wheat flour in gradually while mixing, then start tossing in that half-cup of all-purpose flour bit by bit. Stop adding flour when the dough starts looking shaggy but should still feel a little tacky—not sticky wet, but not stiff dry either. Turn it out onto a lightly floured counter and knead with purpose for about 5 to 7 minutes. Honestly, don’t over-knead! If you add too much extra flour here, you’ll end up with that dense result we are trying so hard to avoid for a soft sandwich bread recipe.
The Two Rises: Proofing Your Whole Wheat Bread
Once the dough is smooth and elastic, tuck it into an oiled bowl, cover it up, and let it chill out in a warm spot for about an hour to an hour and a half, or until it’s doubled. That’s the first rise done! Gently deflate it (“punch it down” jokingly!) and shape it into a nice tight log before placing it snugly into your prepared 9×5 pan. Cover it again and let it have its second rise for 30 to 45 minutes. You know it’s ready for the oven when the dough crests just about an inch over the top of the pan. Preheat that oven to 375°F during the last 15 minutes of this second proofing, so it’s hot when the bread goes in!
Tips for Perfect Whole Wheat Bread Baking Success
We have done the hard work mixing and rising, so let’s make sure the final result is a smash hit! Even great recipes can trip us up at the last minute, especially when baking homemade bread. My background in nutrition taught me that adjustments are sometimes necessary when working with whole grains. Follow these simple expert tips, and you’ll get beautiful, soft whole wheat bread every time you pull a loaf out of the oven. Check out this simple recipe if you want to see how they achieve great results at another trusted source, too!
Troubleshooting Common Issues with Whole Wheat Loaf
The number one fear is density, right? Remember why we use that half-cup of all-purpose flour? That’s your structure insurance policy! Whole wheat bran actually cuts the gluten strands, which is why adding too much flour just results in concrete. If your dough feels shockingly dry during the kneading stage, add just one teaspoon of warm water at a time until it feels tacky again. Don’t rush the rises either; slow and steady really does build the best flavor and rise for your whole wheat loaf.
Cooling: The Final Step for Wholesome Sandwich Bread
This is crucial, so listen up! When the loaf comes out of the oven—and trust me, it smells amazing—you absolutely cannot leave it sitting in that hot metal pan. It will continue to steam itself, creating a mushy, gummy bottom crust, and we don’t want that after all our effort making wholesome sandwich bread. Immediately turn that bread out onto a wire cooling rack. Let it cool completely—and I mean completely—before you even think about slicing it. That cooling process finishes setting the structure inside the crumb!
Variations on Your Honey Whole Wheat Bread Recipe
I love that this basic honey wheat bread recipe is so versatile! Once you master the main loaf, you can start playing around a bit—and trust me, adding things turns this into a real showstopper. You can easily toss in about a quarter cup of flax seeds or sunflower seeds right before the final shaping if you want more texture and crunch. For a sweeter treat, I sometimes swap out the water for milk, which gives you an ever-so-slightly richer texture, though it might need a touch more liquid overall.
If you’re looking for even more inspiration on using honey in your baking, check out some ideas over at Bramble Wine Cottage. But honestly, this basic recipe is perfect for everyday sandwiches, so don’t feel like you need to change a thing!
Storage & Reheating Instructions for Fresh Baked Bread at Home
The smell of this bread when it’s fresh is unbeatable, but you’ll want to save some for tomorrow’s toast! Since this is a truly wholesome sandwich bread made without preservatives, storage is key. Once completely cooled—and I mean totally cool—wrap that loaf tightly in plastic wrap first, then slide it into an airtight bag or container. This traps the moisture in without making the crust soggy.
It stays great on the counter for about three days. If you made a double batch (and trust me, you should have!), slicing the remaining loaf and freezing it works wonders. Just pop the slices straight from the freezer into a toaster when you need them. Easy peasy!
Frequently Asked Questions About Whole Wheat Bread
I know when you first look at a new recipe, questions pop up immediately, especially with baking! People often worry about texture when making whole wheat bread at home, but don’t stress. I’ve gathered the most common things I hear from folks trying this recipe for the first time. Most issues boil down to the very structure of the whole grain itself, but we fixed most of that by blending flours!
Can I make this a 100 percent whole wheat bread recipe?
Yes, you absolutely can turn this into a 100 percent whole wheat bread recipe! But here’s my crucial tip for success: whole wheat flour is thirsty. If you swap out all that half-cup of all-purpose flour for whole wheat, you will need to add extra liquid. Start by adding just one or two extra tablespoons of warm water during the mixing stage. If the dough still seems too dry or stiff, just keep adding liquid one teaspoon at a time until it feels right. If you skip the extra liquid, your loaf will definitely be denser.
What is the best way to get a baker style whole wheat loaf?
To get that beautiful rise and that slightly rounded, professional-looking top, you need to nail that second proof! This is when the shaped loaf is sitting in the pan waiting to bake. Make sure your kitchen is warm—not hot, but draft-free and cozy. When the dough rises almost an inch over the rim of the pan, that dough is perfectly gassy, full of potential! When it hits the hot oven, all that trapped gas expands super fast, which we call oven spring. That’s your secret to that lovely, airy interior structure. You can see a great example of a beautifully risen loaf by checking out Kristine’s Kitchen Blog.
Estimated Nutritional Information for this Whole Wheat Bread
Since we are always focused on nourishing food here at MayaPlate, I wanted to give you a heads-up on what you’ll be enjoying in every slice of this whole wheat bread. Now, remember, because we are using specific honey amounts, melted butter, and flour ratios, these numbers are exactly what the recipe yields based on standard nutritional data serving calculations. They are fantastic estimates, but keep in mind that if you add seeds or swap honey for maple syrup, things might shift slightly!
We’re using quality ingredients to make a healthy bread recipe, and the stats reflect that wholesome approach. This data is based on 16 slices per loaf:
- Serving Size: 1 slice (about 1/16th of the loaf)
- Calories: Approximately 145 calories
- Fat: Just 2.5g total, keeping things wonderfully light!
- Carbohydrates: 28g, which is mostly complex carbs from the whole grain!
- Fiber: A solid 4g per slice supporting digestive health.
- Protein: About 5g to keep you feeling full and satisfied.
- Sugar: Only 4g, mostly coming naturally from the honey we used.
It just goes to show you—you can bake a truly fresh baked bread at home that tastes amazing and still fits beautifully into a balanced eating plan. No compromises necessary!
Share Your Homemade Whole Wheat Bread Creations
I truly hope this easy recipe helps you bring some homemade goodness back to your week! If you bake this yummy whole wheat bread, please come back and drop a rating below—I love seeing those stars! And if you snap a picture, tag us, or just want to ask a burning question, you can always reach out via our Contact Page. Happy baking, friends!
PrintSoft & Fluffy Honey Whole Wheat Sandwich Bread (Beginner Friendly)
Bake a soft, fluffy loaf of 100 percent whole wheat bread at home. This easy recipe uses honey for a touch of sweetness and is perfect for beginners making wholesome sandwich bread.
- Prep Time: 20 min
- Cook Time: 35 min
- Total Time: 2 hours 10 min
- Yield: 1 loaf 1x
- Category: Baking
- Method: Baking
- Cuisine: American
- Diet: Vegetarian
Ingredients
- 1 cup warm water (105-115°F)
- 2 teaspoons active dry yeast
- 1/4 cup honey
- 2 tablespoons unsalted butter, melted
- 1 1/2 teaspoons salt
- 3 cups whole wheat flour
- 1/2 cup all-purpose flour (plus more for dusting)
Instructions
- Combine the warm water and yeast in a large bowl. Let it sit for 5 minutes until foamy. This confirms your yeast is active.
- Stir in the honey, melted butter, and salt into the yeast mixture.
- Add the whole wheat flour gradually, mixing until a shaggy dough forms.
- Add the all-purpose flour one tablespoon at a time until the dough comes together and is slightly tacky but not sticky. You may not need all the flour.
- Turn the dough out onto a lightly floured surface. Knead for 5 to 7 minutes until the dough is smooth and elastic. For soft bread, avoid adding too much extra flour during kneading.
- Place the dough in a lightly oiled bowl, turning once to coat. Cover the bowl with plastic wrap or a clean kitchen towel.
- Let the dough rise in a warm place for 1 to 1.5 hours, or until it has doubled in size. This slow rise builds flavor.
- Gently punch down the risen dough. Shape it into a uniform loaf and place it into a greased 9×5 inch loaf pan.
- Cover the pan loosely and let the dough rise again (the second proof) for 30 to 45 minutes, or until the dough crests about 1 inch above the rim of the pan.
- Preheat your oven to 375°F (190°C) during the last 15 minutes of the second rise.
- Bake for 30 to 35 minutes, or until the crust is golden brown and the internal temperature reaches 190°F (88°C).
- Remove the bread from the pan immediately and cool completely on a wire rack before slicing. This prevents a gummy texture.
Notes
- For a richer flavor, substitute 1/4 cup of the whole wheat flour with bread flour.
- If you want a seeded loaf, gently press 1/4 cup of sunflower or flax seeds onto the top of the dough just before the second rise.
- To check if the bread is done without a thermometer, tap the bottom; it should sound hollow.
Nutrition
- Serving Size: 1 slice
- Calories: 145
- Sugar: 4g
- Sodium: 180mg
- Fat: 2.5g
- Saturated Fat: 1.5g
- Unsaturated Fat: 1g
- Trans Fat: 0g
- Carbohydrates: 28g
- Fiber: 4g
- Protein: 5g
- Cholesterol: 5mg